Teacher Portal:
Work and Simple Machines
Investigation 4 – Lab
 BE PREPARED
| Class materials: |
|
| Group materials: |
|
| Pair Materials |
|
| Individual materials: |
|
Teacher Preparation
1. Cut the lengths of masking tape required for the pairs and groups. The lengths listed in the materials list can be approximated. For example, 6 cm is approximately the length of your index finger, 10 cm is approximately the length from the base of your thumb to the tip, and 15 cm is approximately the length from the bottom of the palm of your hand to the tip of your index finger.
2. Organize the required materials at a central distribution point.
3. Separate the class into pairs.
Instruction
Direct each student pair to obtain the following necessary materials from the distribution point: one (1) calculator, two (2) white plastic buckets, one (1) meter stick, one (1) woodblock, one (1) prism, ten (10) large (12 g) bears, six (6) medium (8 g) bears, seven (7) small (4 g) bears, one (1) 10 cm piece of tape, ten (10) gram cubes, and four (4) 15 cm pieces of masking tape.
Procedure:
 1. Explain that, in this Investigation, students will explore another simple machine, the lever. Students will use a woodblock, prism, and a meter stick to construct a lever to explore how this simple machine affects work. The passages that follow are provided to assist your direction of the students through this part of the investigation.
a. Place the woodblock on one of its wide surfaces.
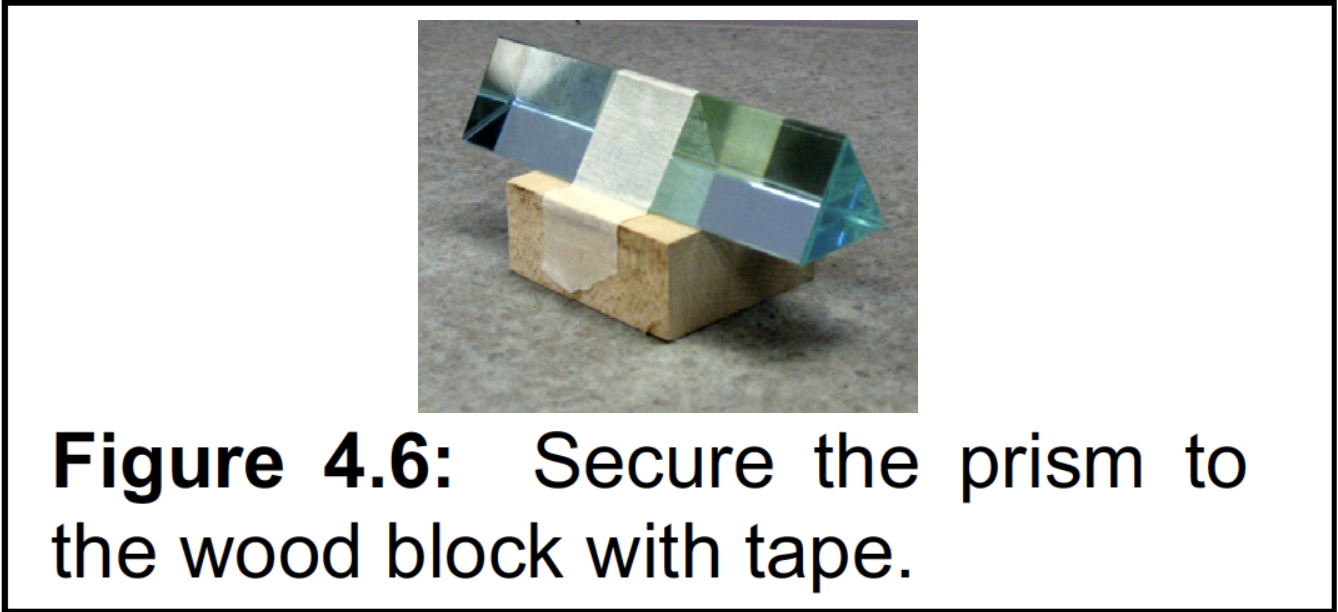
b. Create the fulcrum by placing the prism on top of the woodblock and securing it to the woodblock with a length of tape (Figure 4.6).
c. Place the meter stick on top of the fulcrum so that it’s balanced. The fulcrum should be at approximately the 50 cm mark (Figure 4.7).

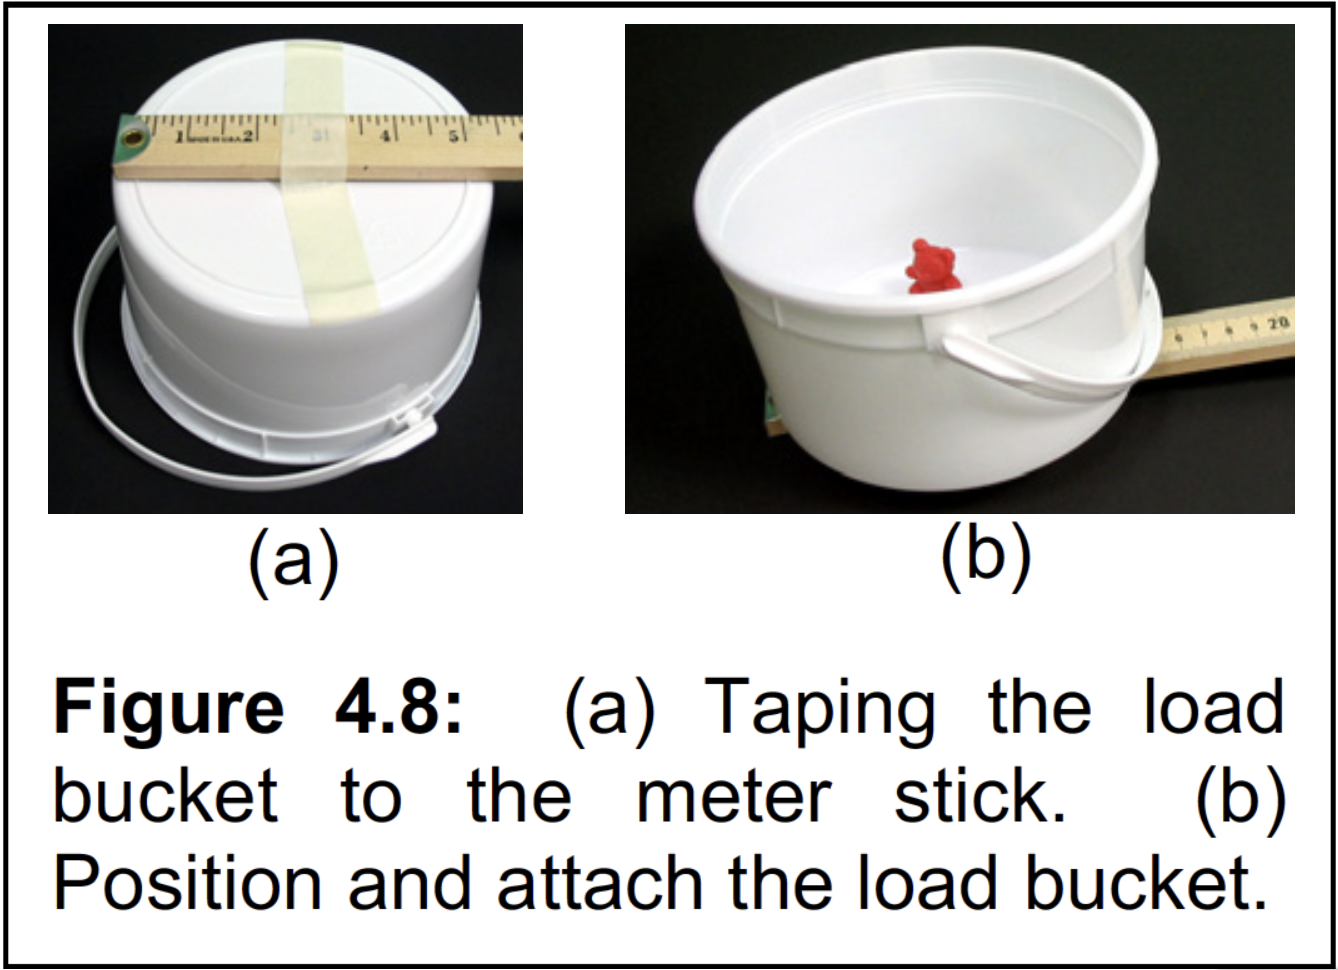
d. Attach one white bucket at the 0 cm end of the meter stick using two 15 cm lengths of tape (Figure 4.8a). The edge of the bucket should be even with the end of the meter stick (Figure 4.8b).
 e. Place one small (4 g) bear into the bucket. This is the load bucket.
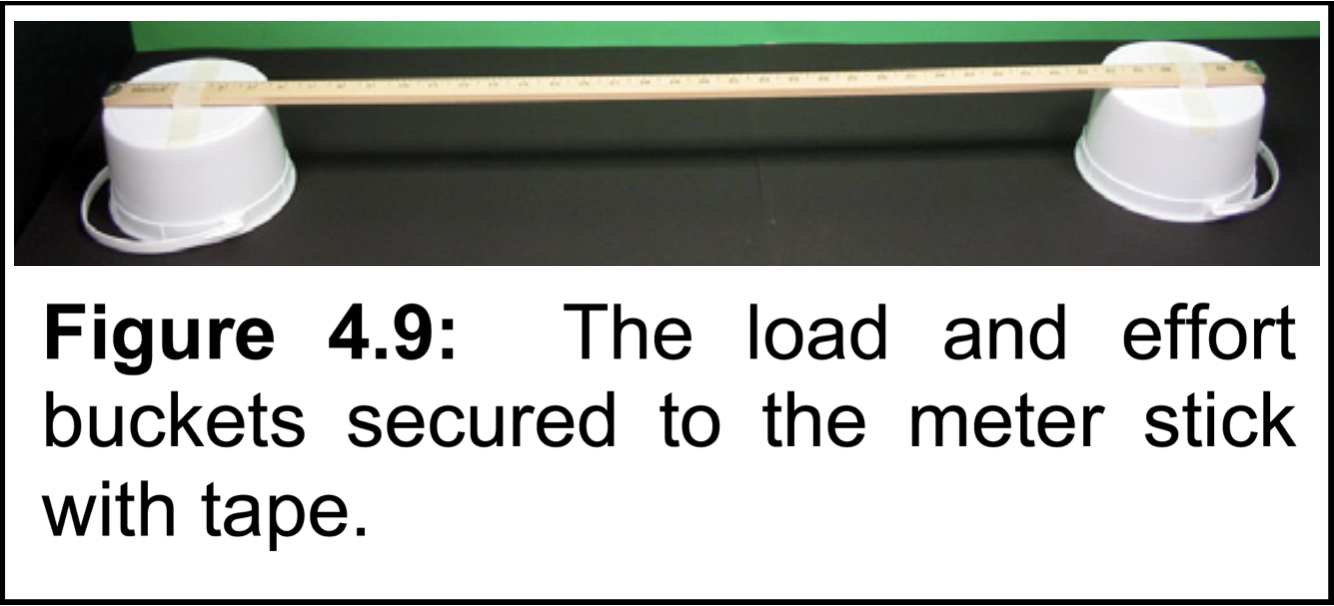
f. Place the second white bucket on top of the meter stick at the 100 cm end. The edge of the bucket should be even with the end of the meter stick. Secure the bucket to the meter stick with two more 15 cm lengths of tape (Figure 4.9). This is the effort bucket.
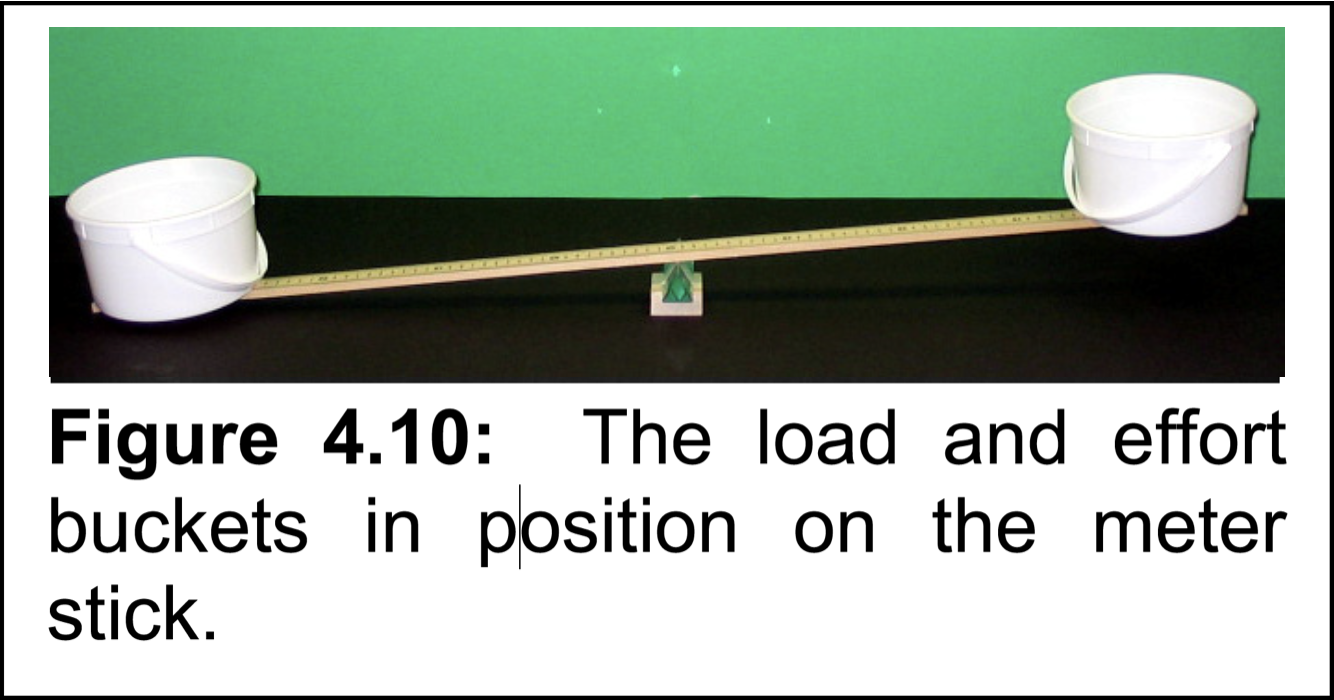
g. The construction of the lever for the experiments is now complete (Figure 4.10).
2. After students construct their levers, they will sketch and identify its major components. They will then be asked a question that is the main focus of this part of the Investigation.
Where are the load, fulcrum, effort arm, and load arm on the lever?
GET FOCUSED
During this part of the Investigation, students will investigate the results of varying the position of applied force on a lever when lifting a load.
They will also investigate the differences in the force required to lift a load as the length of the effort arm is changed by varying the position of the fulcrum along the lever.
INVESTIGATE
Trial 1 – 4
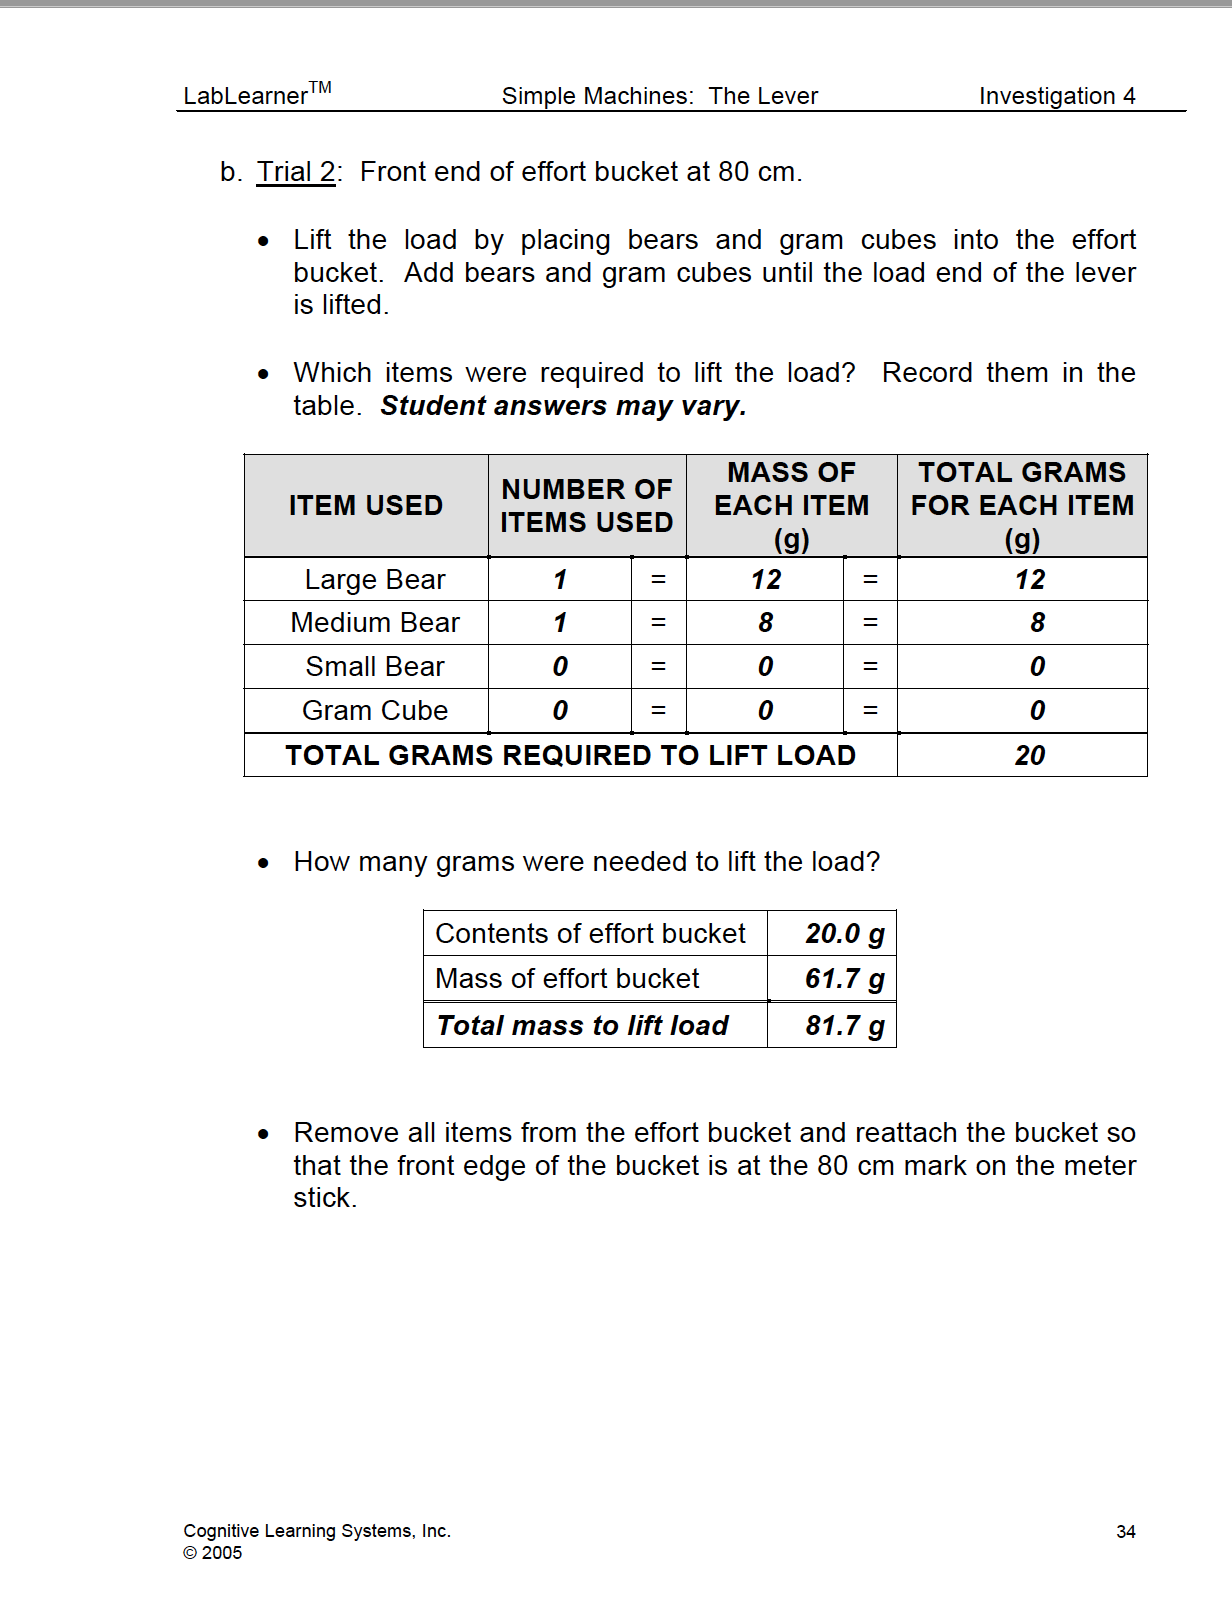
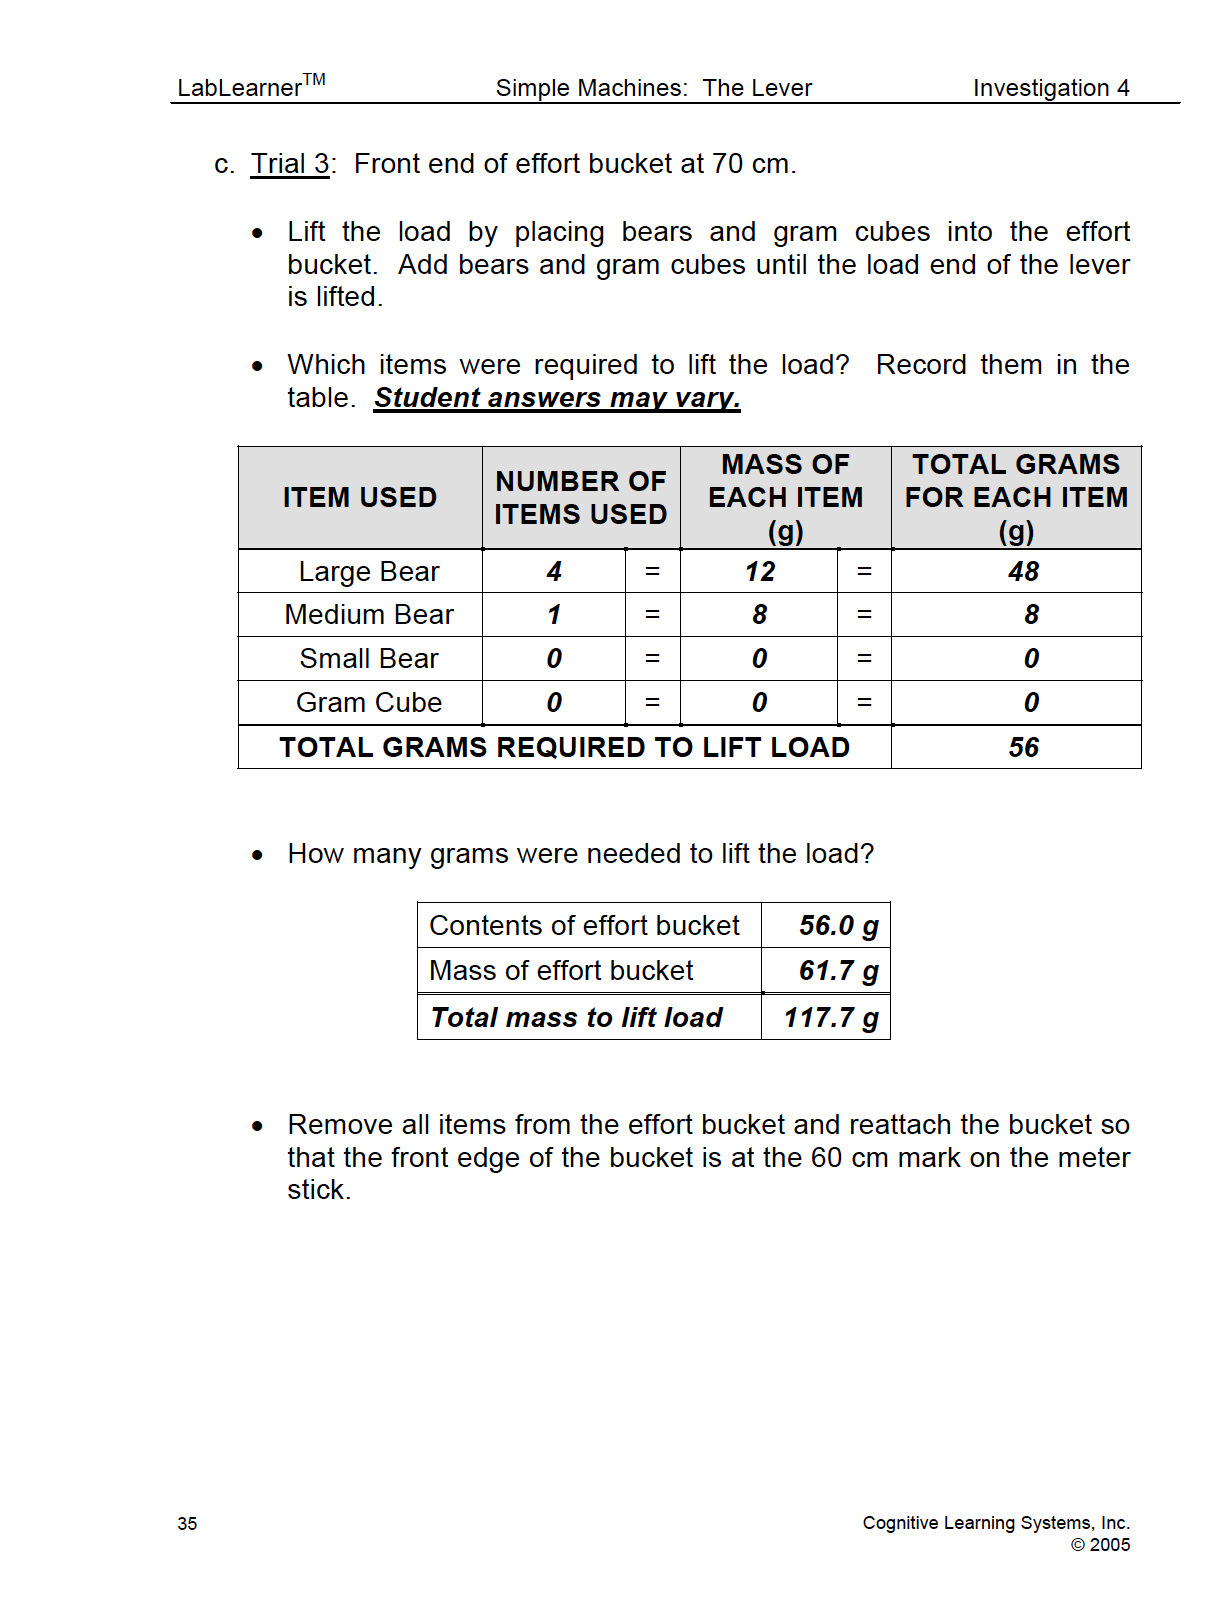
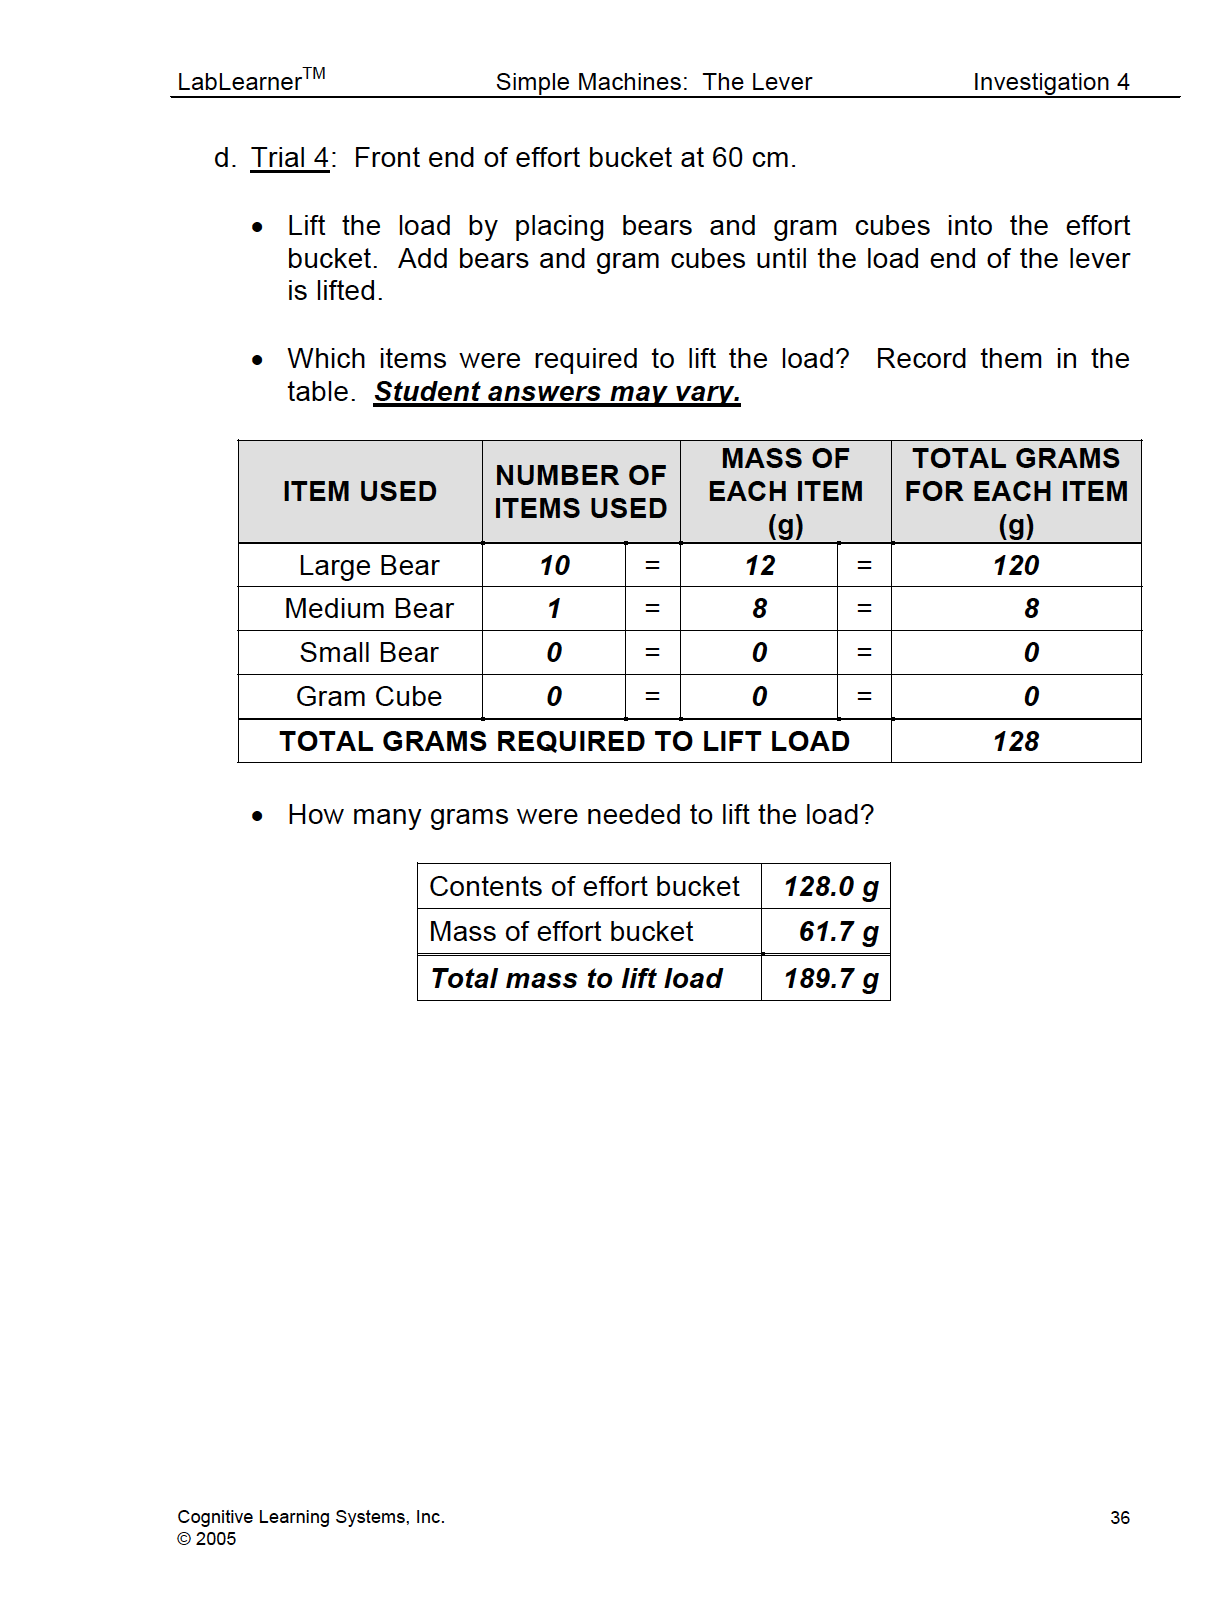
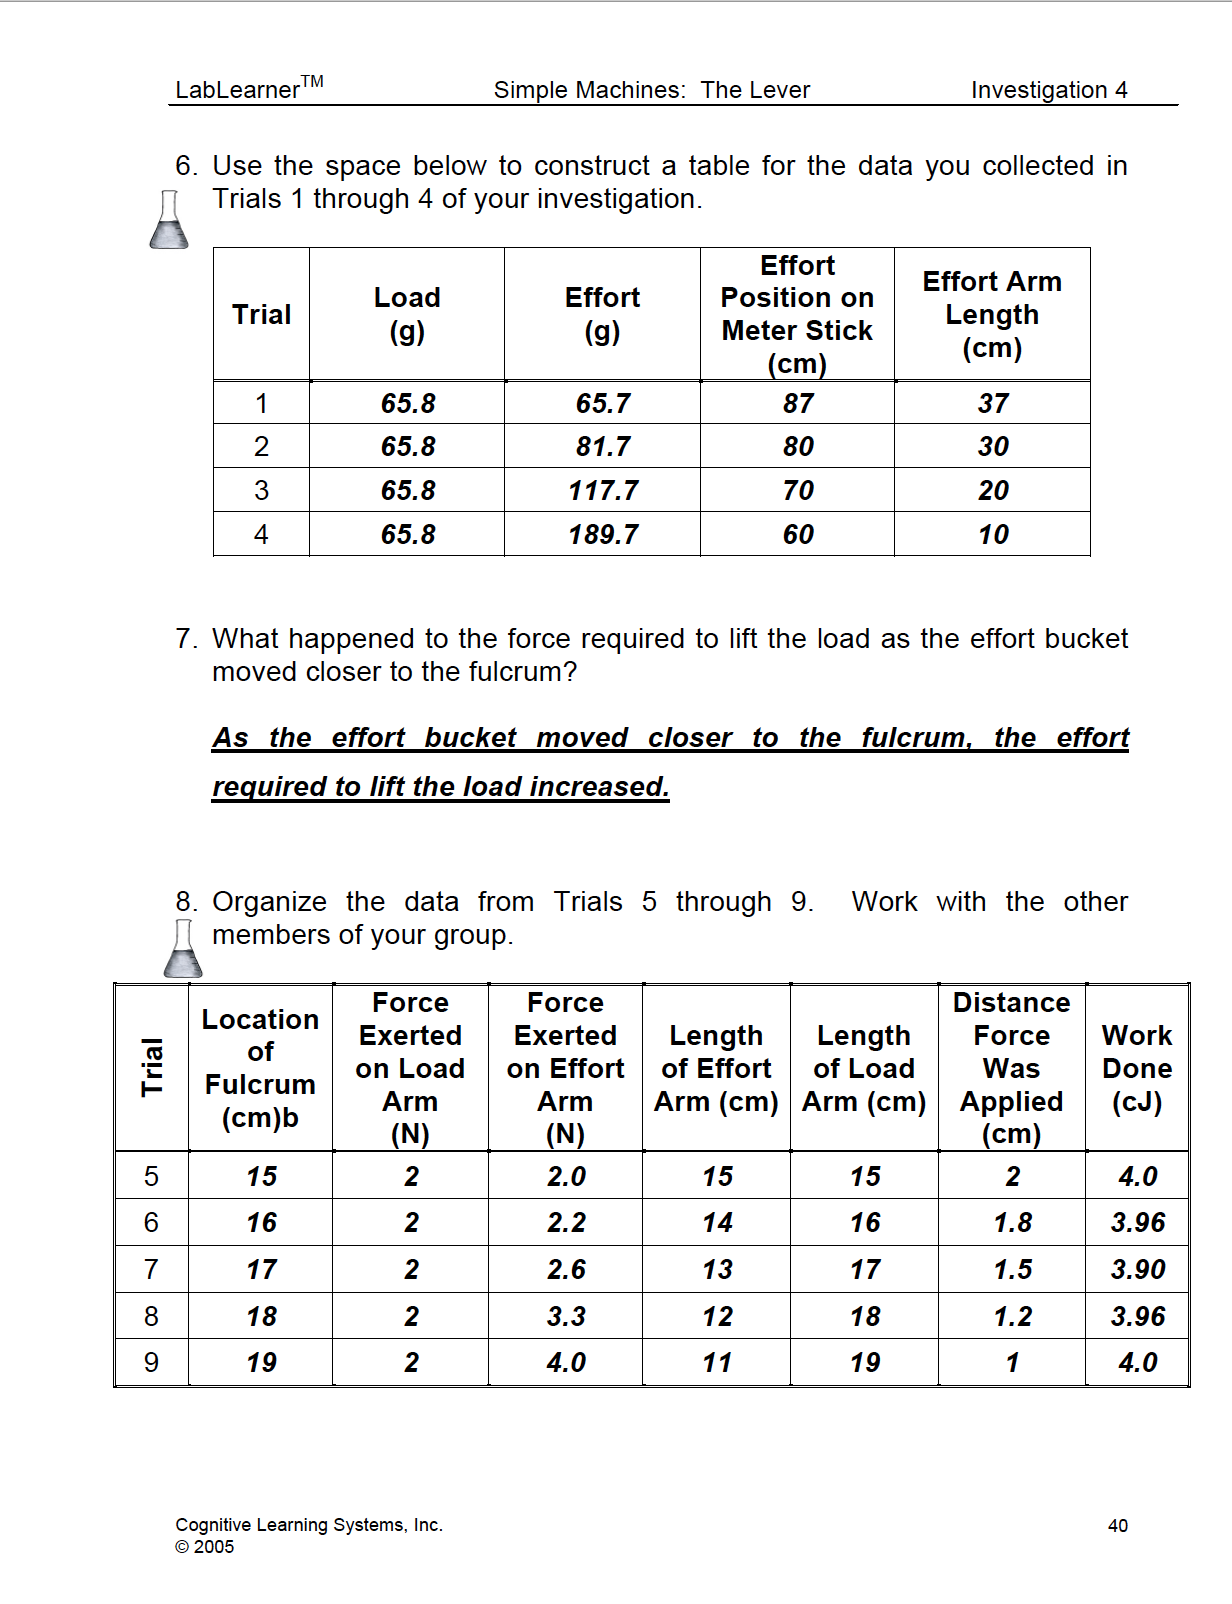
During this part of the investigation, students will investigate the results of varying the position of applied force on a lever when lifting a load. Students will apply effort at different positions on the effort arm by moving the effort bucket from the 87 cm position to the 60 cm position. As a result, they will change the length of the effort arm.
At each position of the effort bucket, students will compare the force needed to lift the load. They will do this by determining the mass of the load bucket and its contents in Trial 1. As the contents of the load will not change, the mass of the load will remain constant for Trials 2 through 4. Students will then determine the mass of the effort bucket. The mass of the effort bucket will remain constant for Trials 2 through 4.
Finally, during each trial students will calculate the mass of the contents they add to the effort bucket. Students will discover that as the length of the effort arm decreases (the force is applied closer to the fulcrum) the force required to lift the load increases. Before beginning this part of the Investigation, students will be asked to consider the following question and make a prediction:
Do you think the force required to lift the load will change when the effort is applied at different positions on the lever?
 Student pairs should join with another pair to form a group. They should return the meter sticks, bears, and gram cubes to the distribution center and obtain the following materials for the second part of their investigation: three (3) metric rulers, one (1) spring scale, one (1) 200 g mass, one (1) 6 cm length of masking tape, two (2) 10 cm lengths of masking tape, and two (2) 15 cm lengths of masking tape. Students will use the wood block, prism and metric ruler to construct a new lever. The passages that follow are provided to assist your direction of the students through this part of the Investigation.
a. Locate the wood block and prism used as a fulcrum in Trials 1 through 4. They will serve as a fulcrum for this set of experiments.
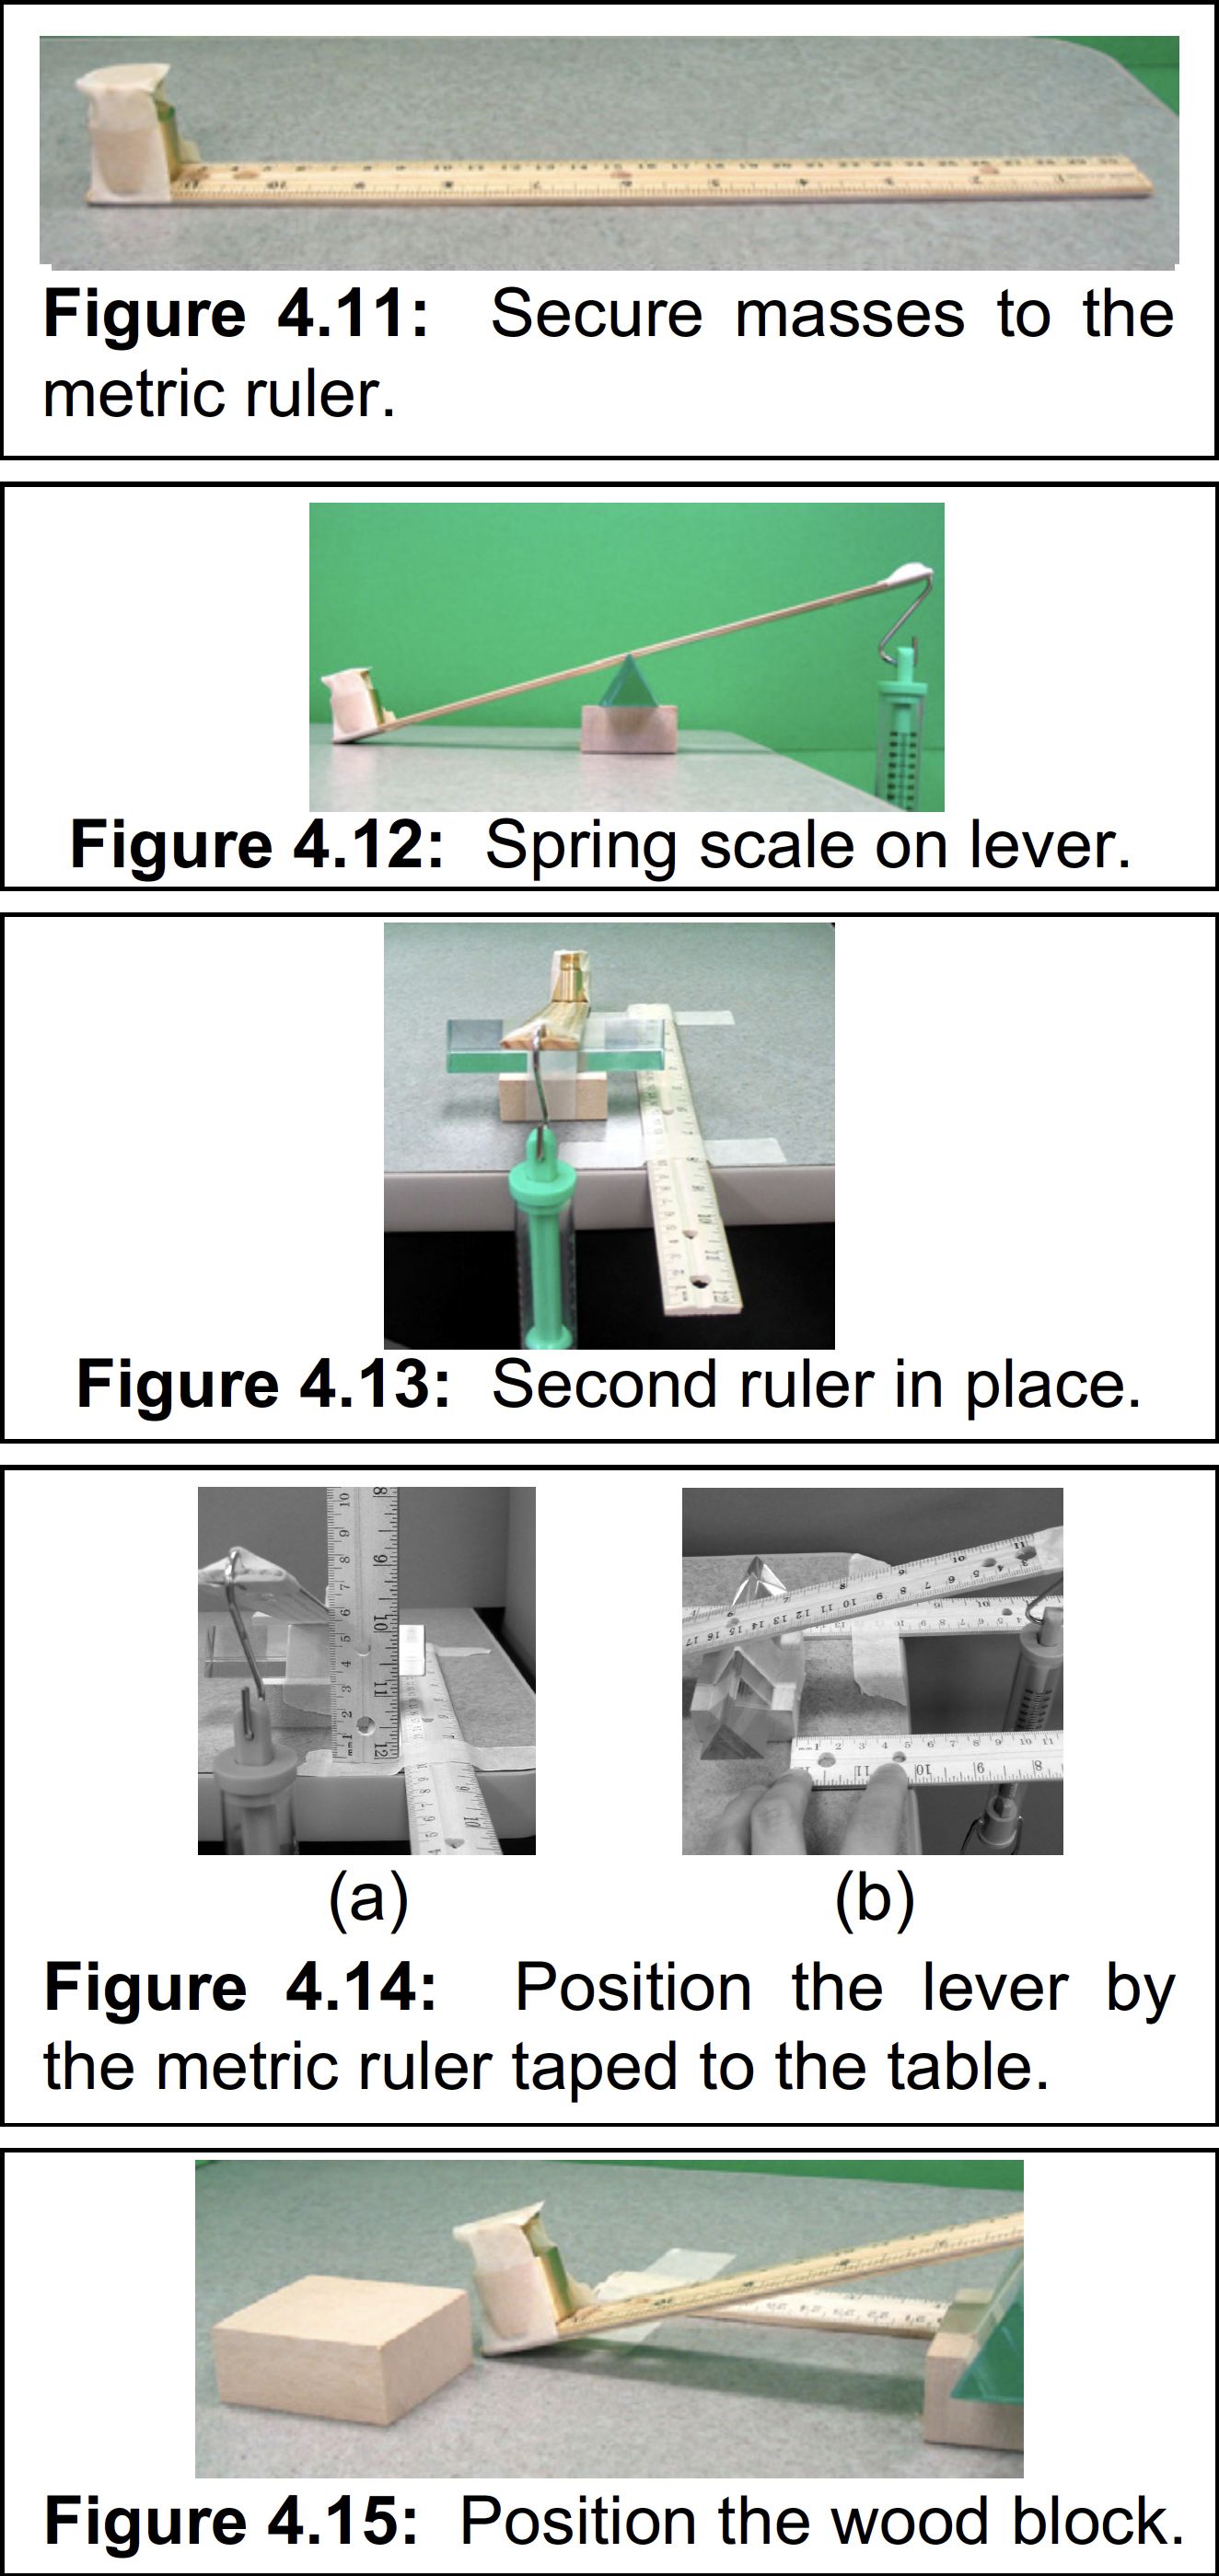
b. Secure the 200 g mass to the 0 cm end of a metric ruler with the two 15 cm lengths of masking tape (Figure 4.11).
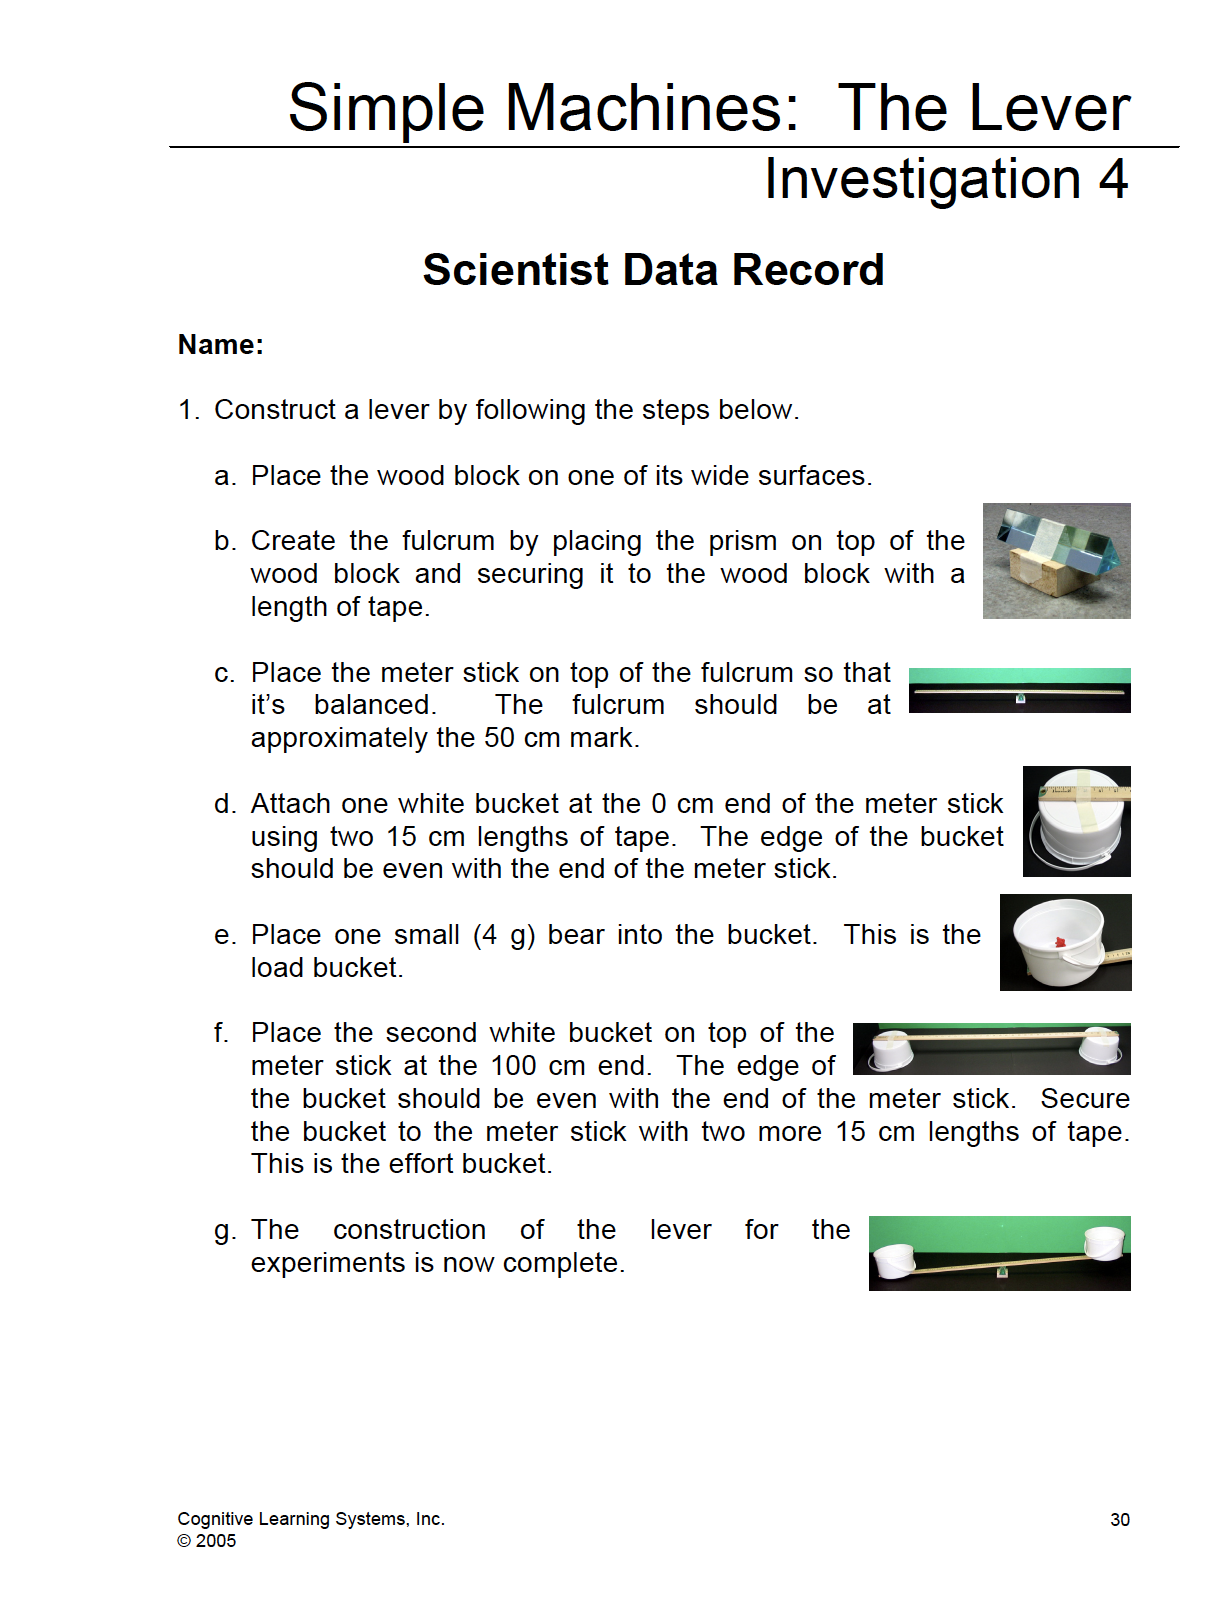
c. Place the metric ruler onto the fulcrum. Attach the hook end of the spring scale to the 30 cm end of the ruler with a 6 cm length of masking tape (Figure 4.12).
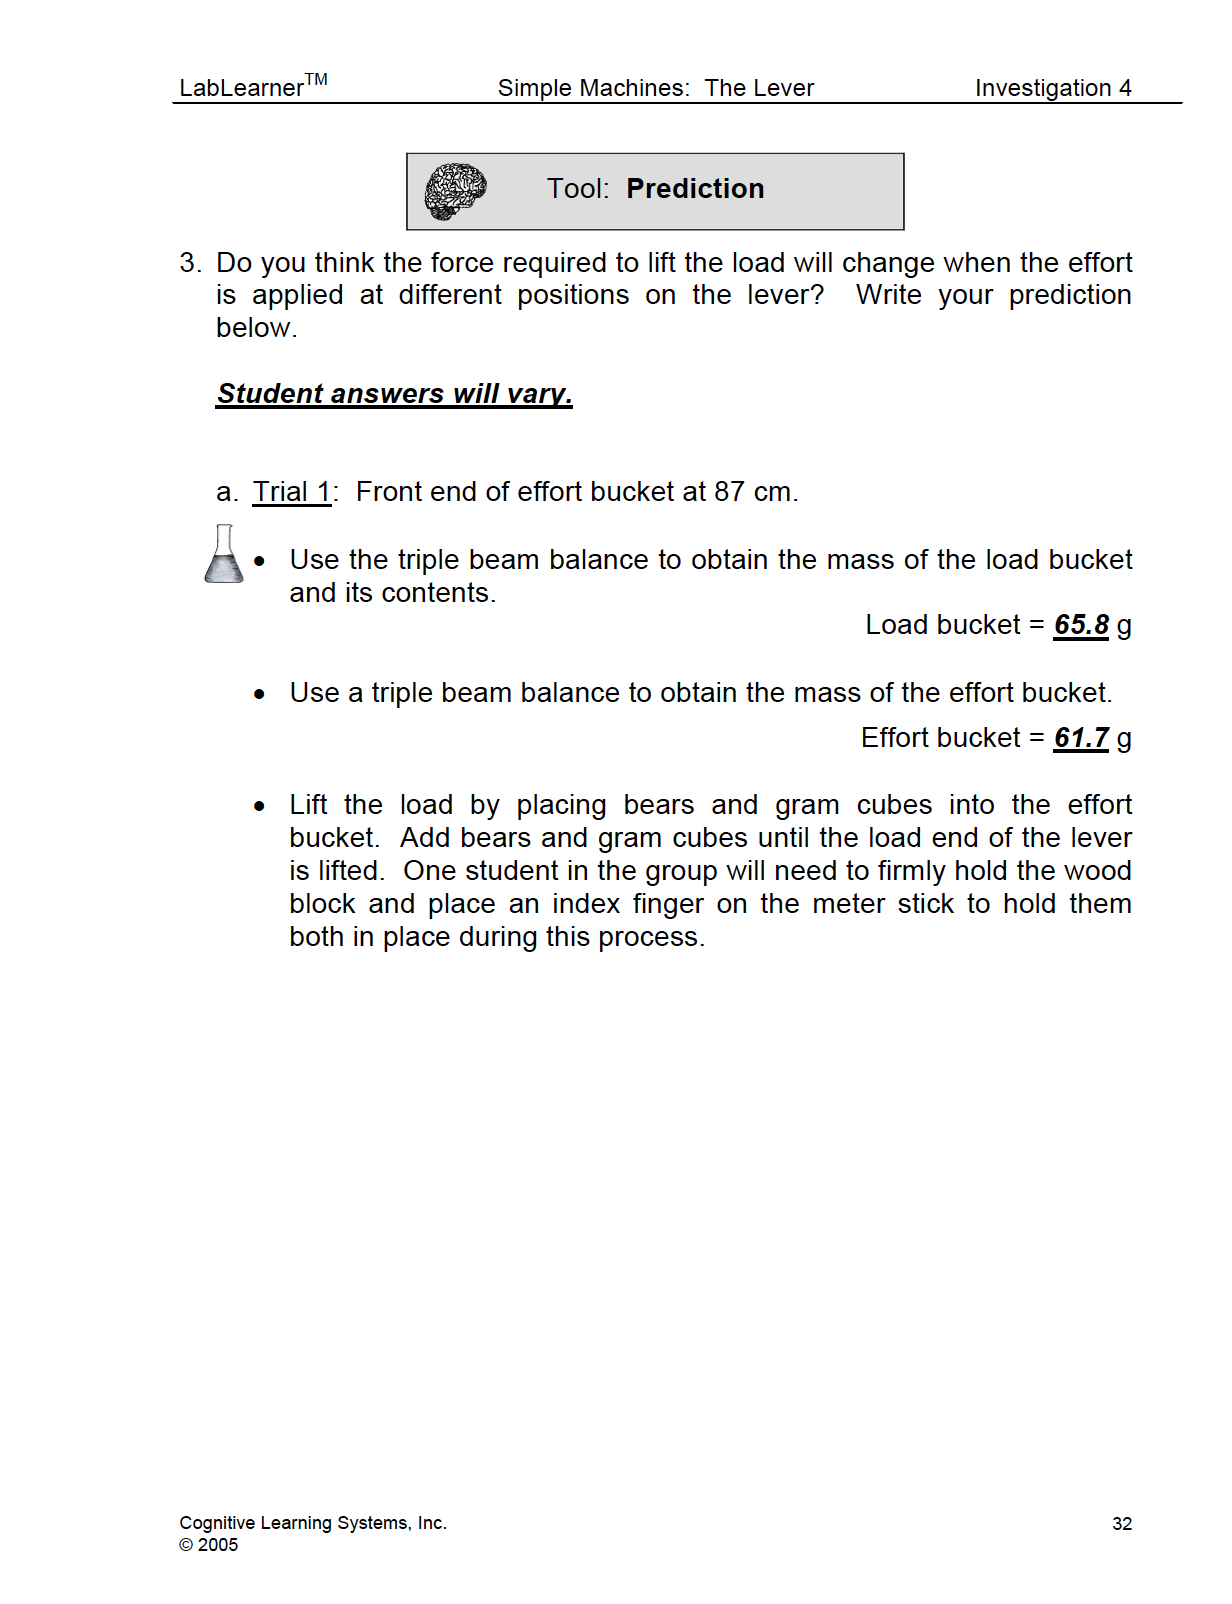
d. Place the second metric ruler beside the lever so that about 10 cm extends beyond the table. Tape the ruler in place with two 10 cm lengths of masking tape, one at the edge of the table and one at the opposite end of the ruler (Figure 4.13).
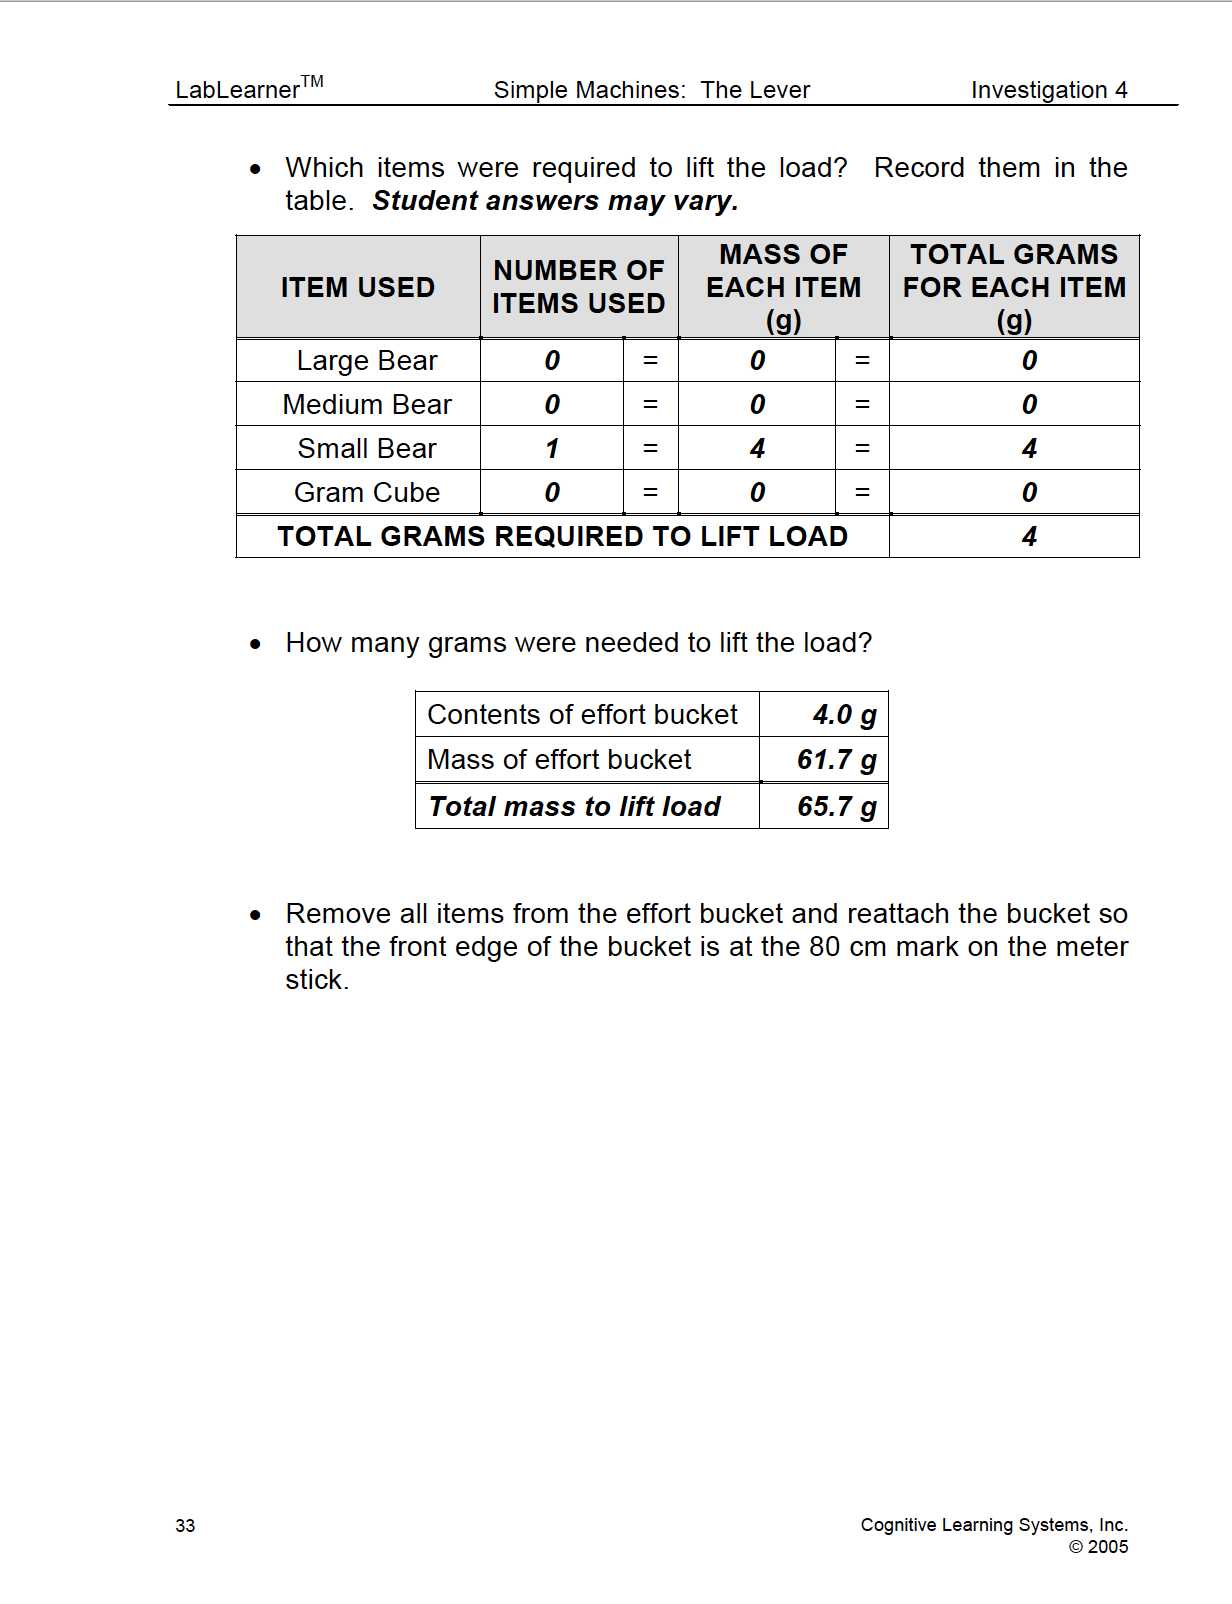
e. Place the third metric ruler on its end beside the metric ruler taped to the table. Move the lever so the lever’s beam (metric ruler) is positioned on the opposite side of the metric ruler. Position the fulcrum of the lever 5 cm from the edge of the table (Figure 4.14).
f. Place a wood block beside the end of the load arm of the lever. The end of the lever’s load arm will be lifted so that it is only as high as the woodblock (Figure 4.15).
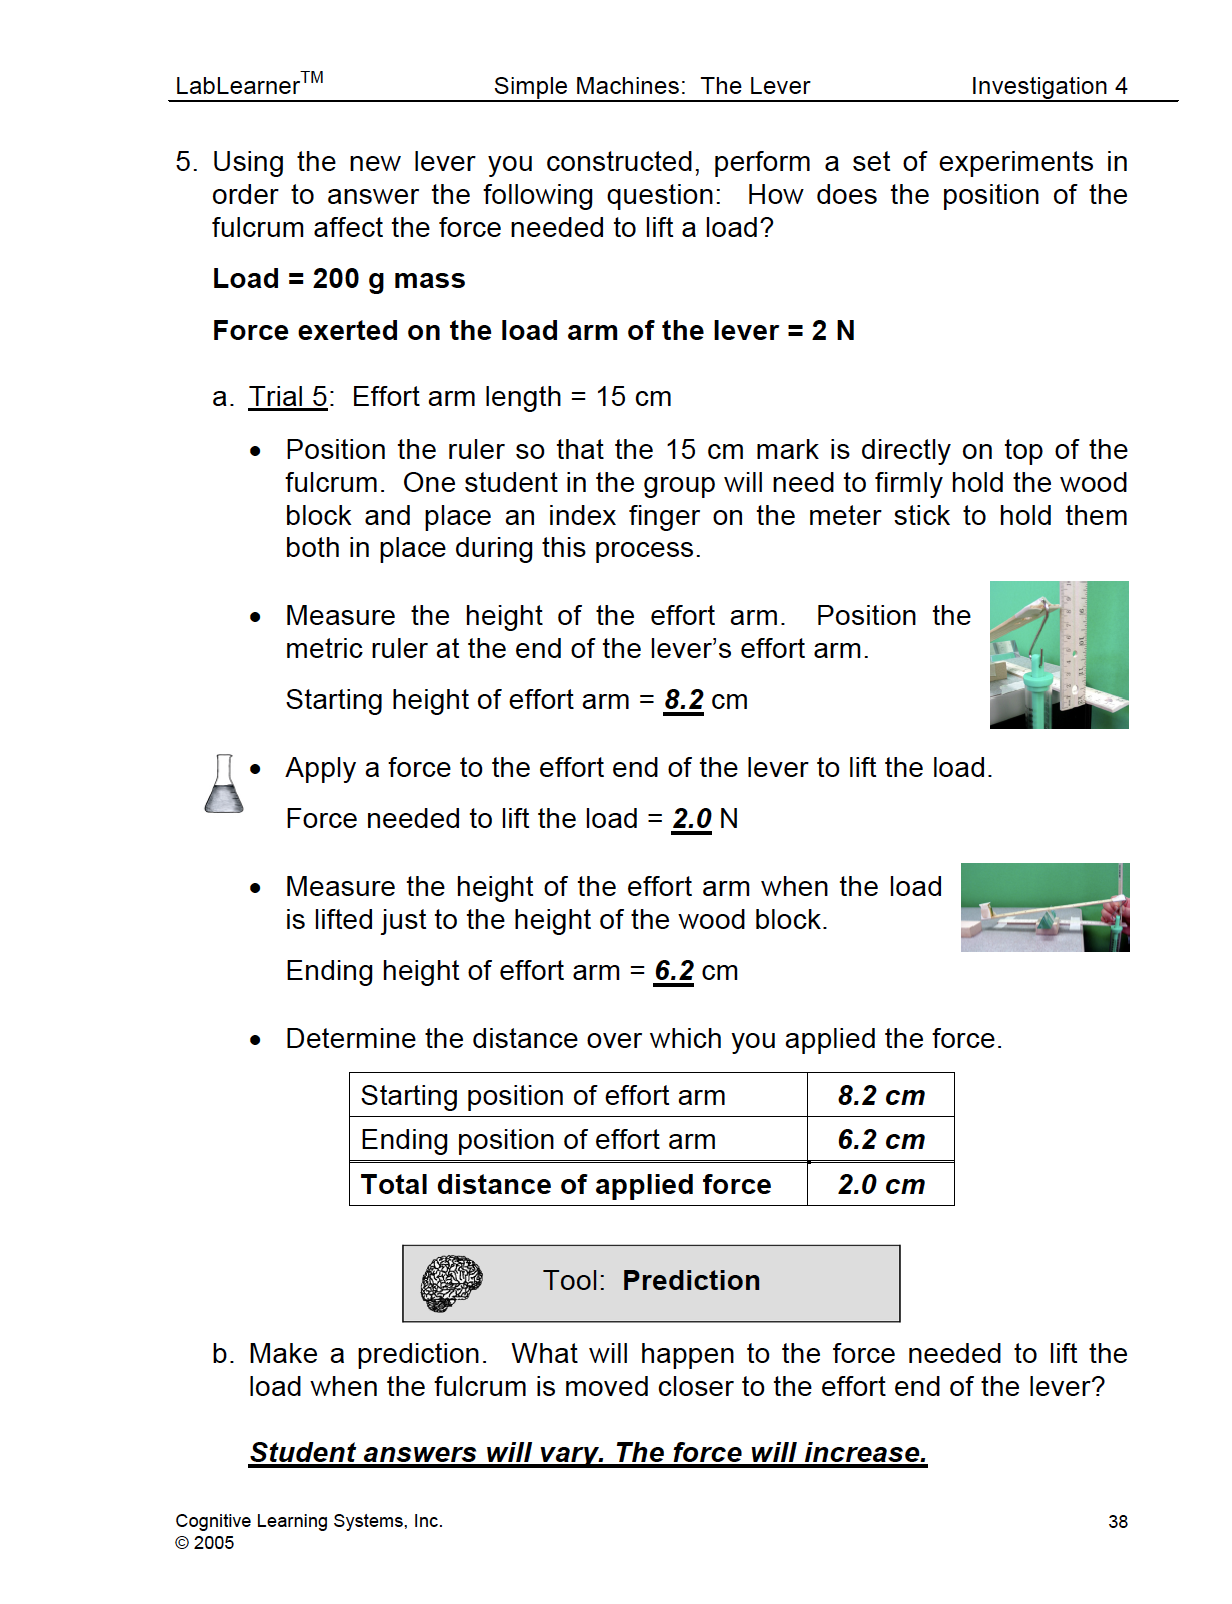
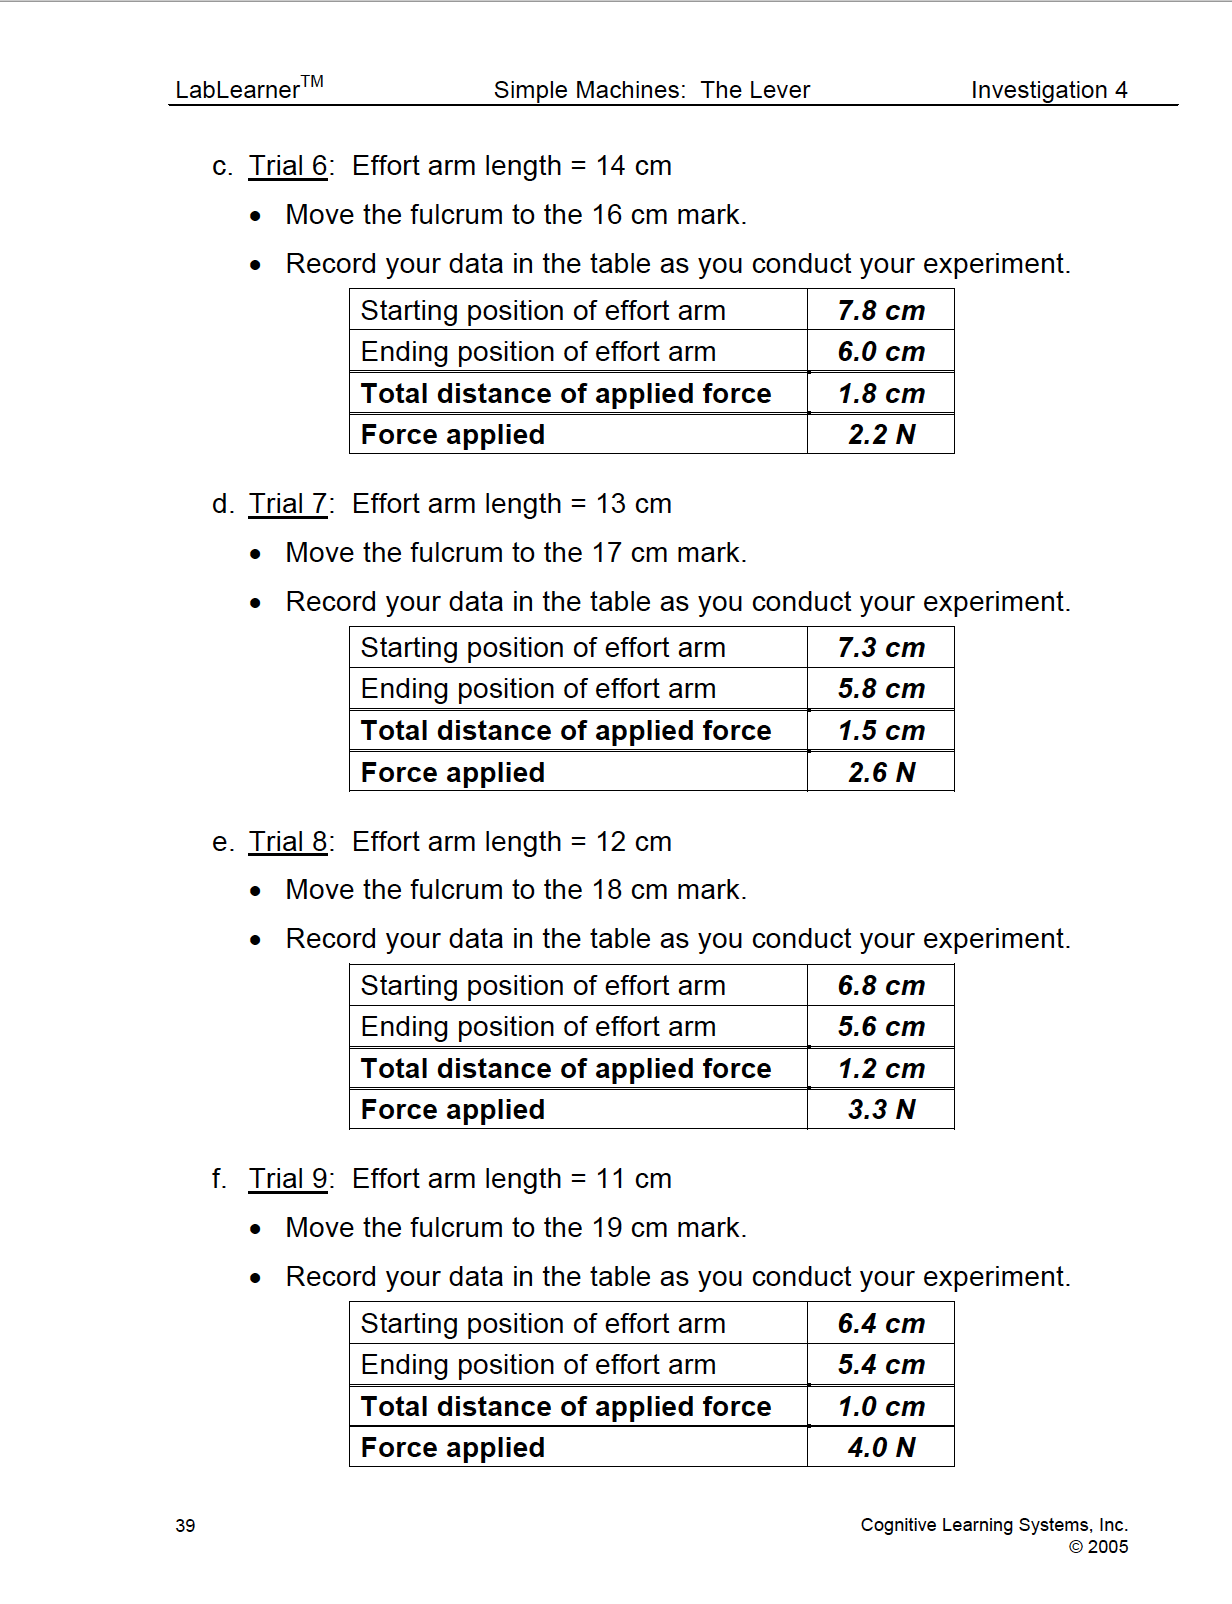
Trials 5 – 9
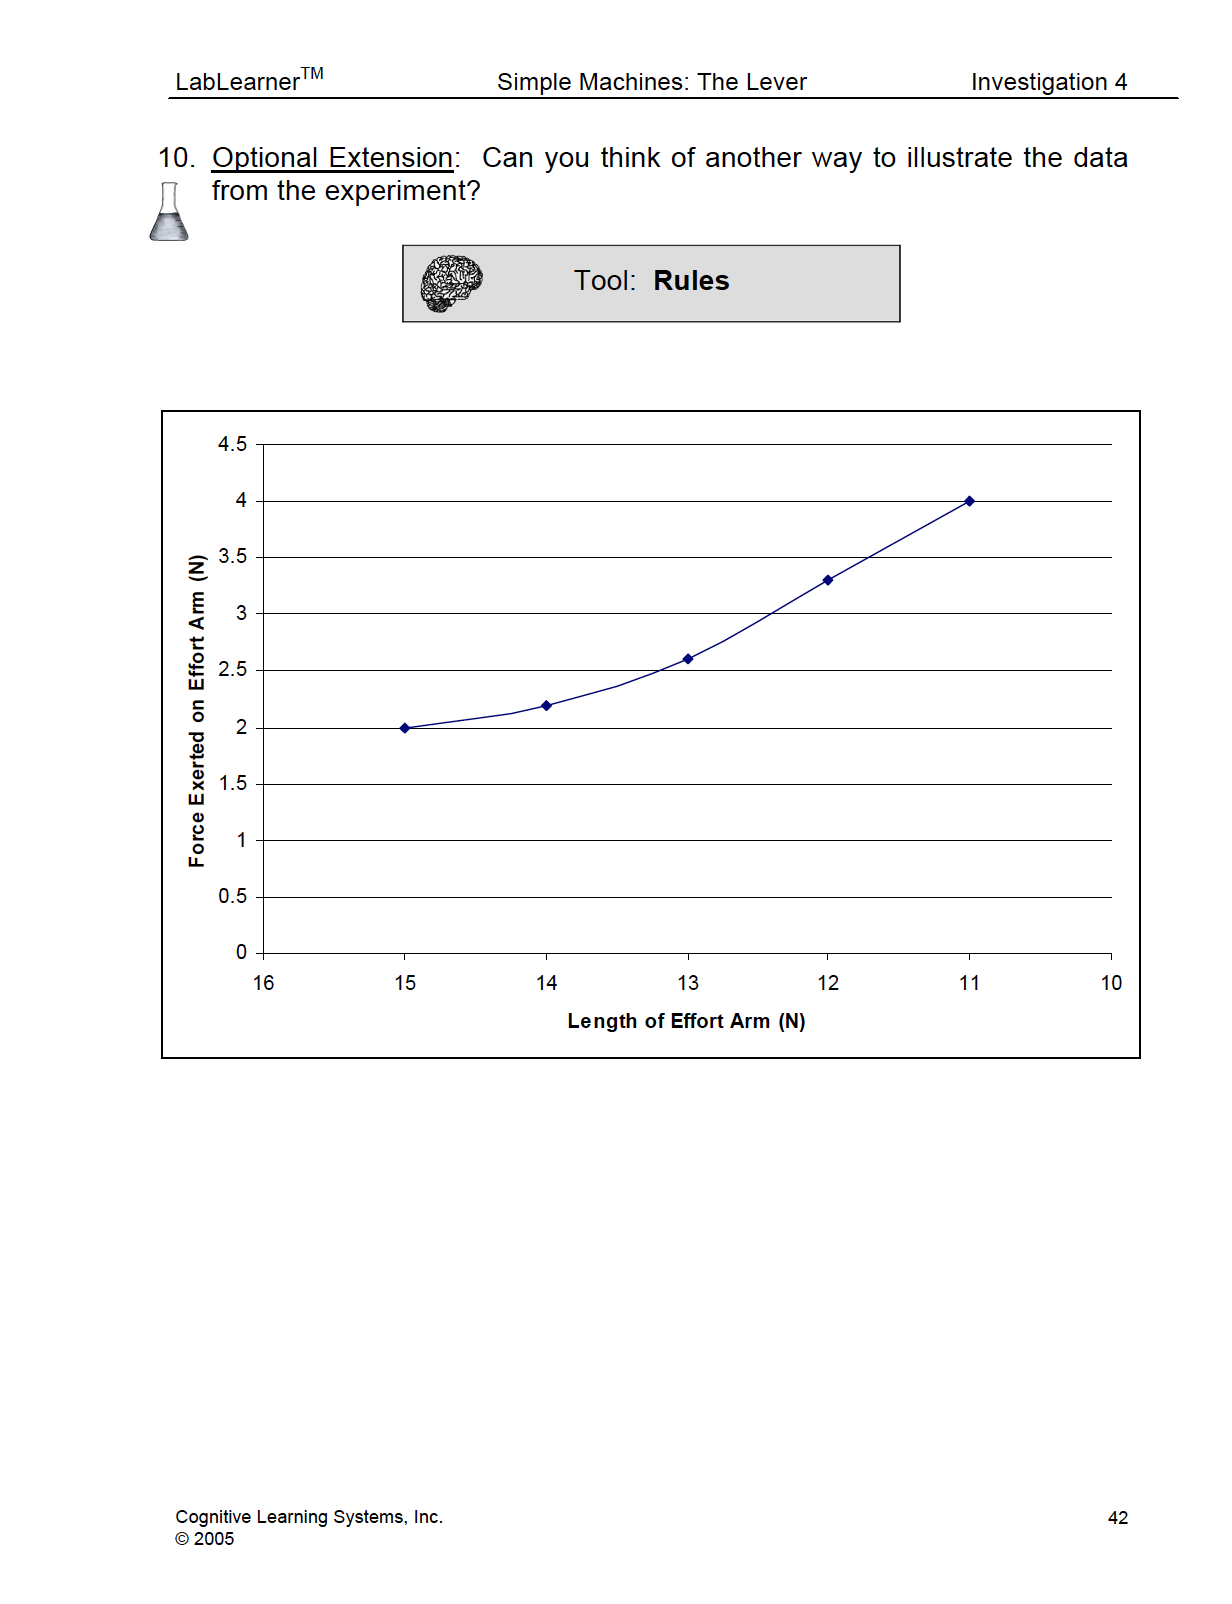
During this part of the Investigation, students will conduct experiments similar to those in Trials 1 through 4. However, in these experiments, students will investigate the differences in the force required to lift a load as the length of the effort arm is changed by varying the position of the fulcrum along the lever.
Students will use the spring scale to obtain quantitative measurements of force for each position of the fulcrum. Students will be asked a question that is the focus of this part of the investigation and make a prediction based on that question.
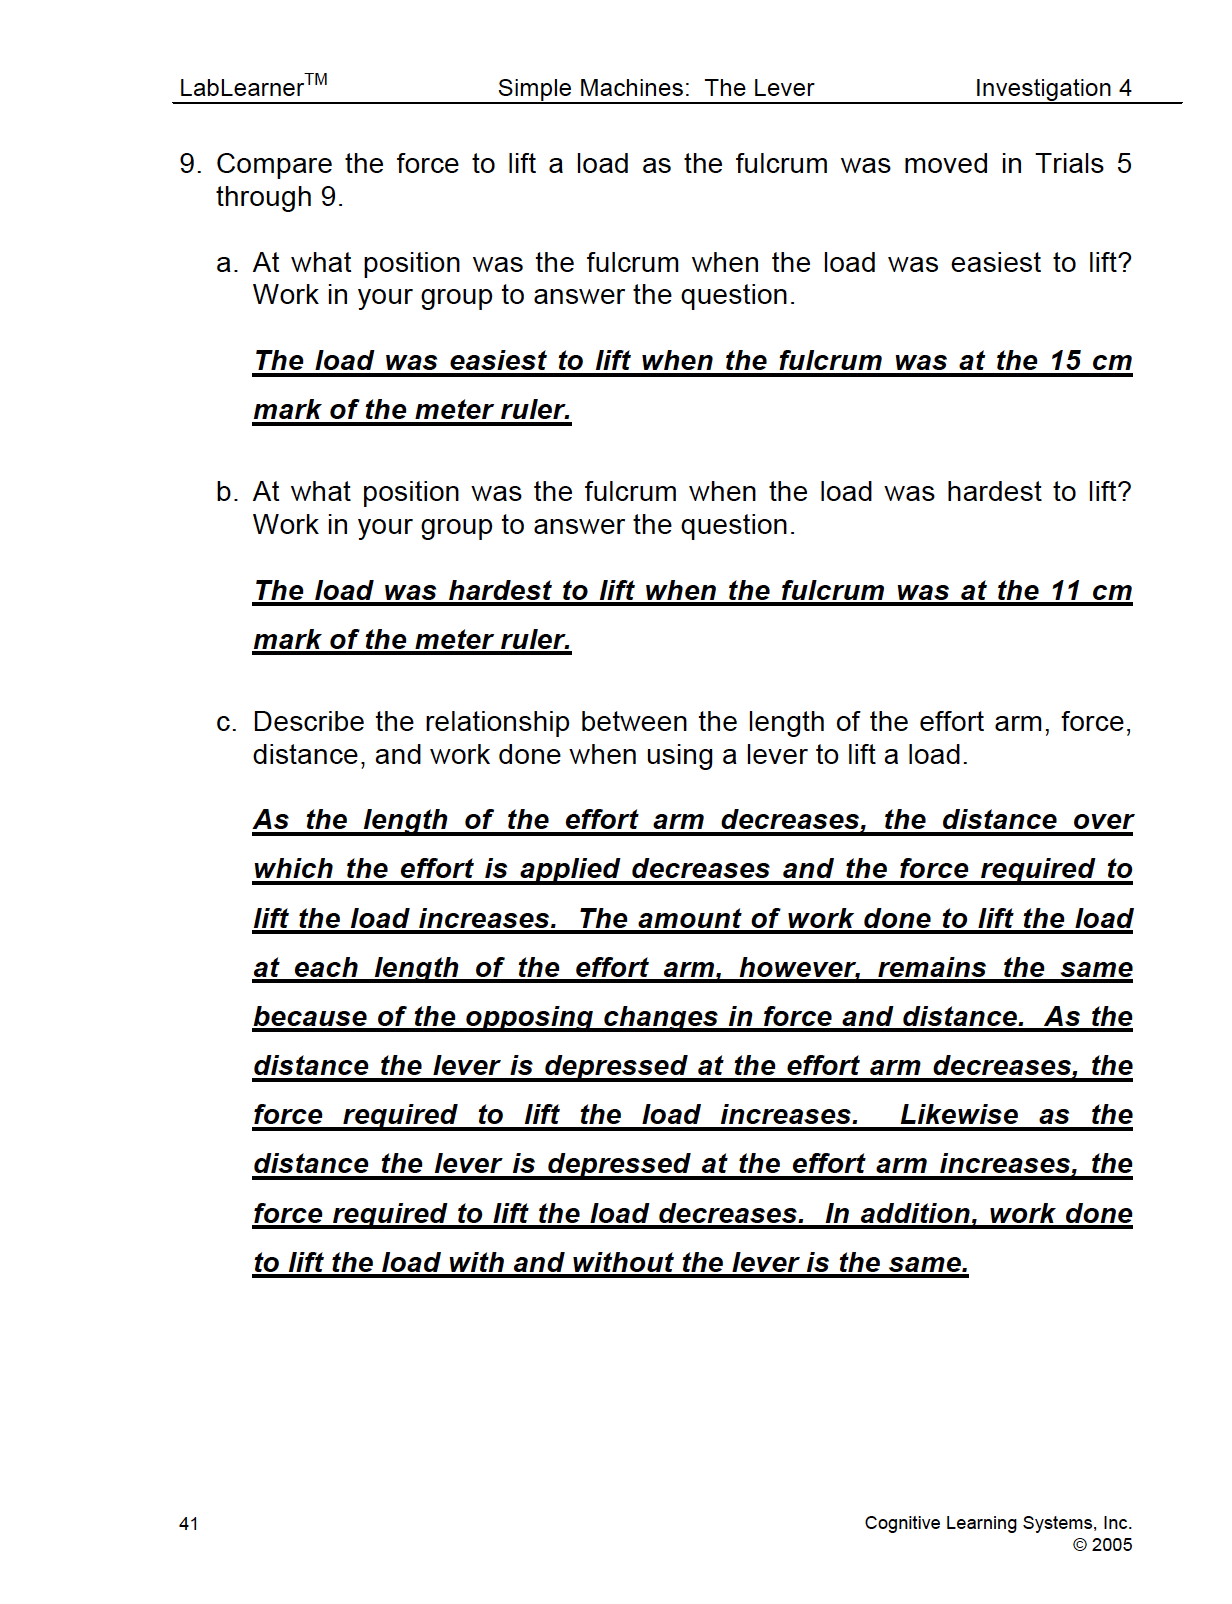
When using a lever, how does the position of the fulcrum affect the force needed to lift the load?
KEYS


CLEAN UP
Let students know your expectations for clean-up. Ask them to clean up.