Teacher Portal:
Our Solar System
Investigation 4 – PreLab
 PRINT IT
Use your browser to download a printable PDF as help during the slide presentation and to make additional notes. In your browser, go to File > Print and then choose to save as PDF.
MINDSET
This Investigation is designed to:
- demonstrate to students that the Moon revolves around the Earth.
- help student relate the rotation of the Earth with the revolution of the Moon around the Earth, concluding that the Earth rotates approximately seven times for each quarter revolution of the Moon.
- model to students that only one side of the Moon is visible from the Earth.
- model to students that during New Moon, the Sun is opposite the Moon and shining on the far side of the Moon to Earth.
- demonstrate to students that during First Quarter, the Sun shines on the right side of the Moon when viewed from the Earth.
- model to students during Full Moon, the Sun is opposite the Earth and shining on the near side of the Moon to Earth.
- demonstrate to students that during Third Quarter, the Sun shines on the left side of the Moon when viewed from the Earth.
- help students relate the calendar year to the phases of the Moon.
- reinforce that the Earth revolves around the Sun, the Moon revolves around the Earth and therefore moves around the Sun with the Earth
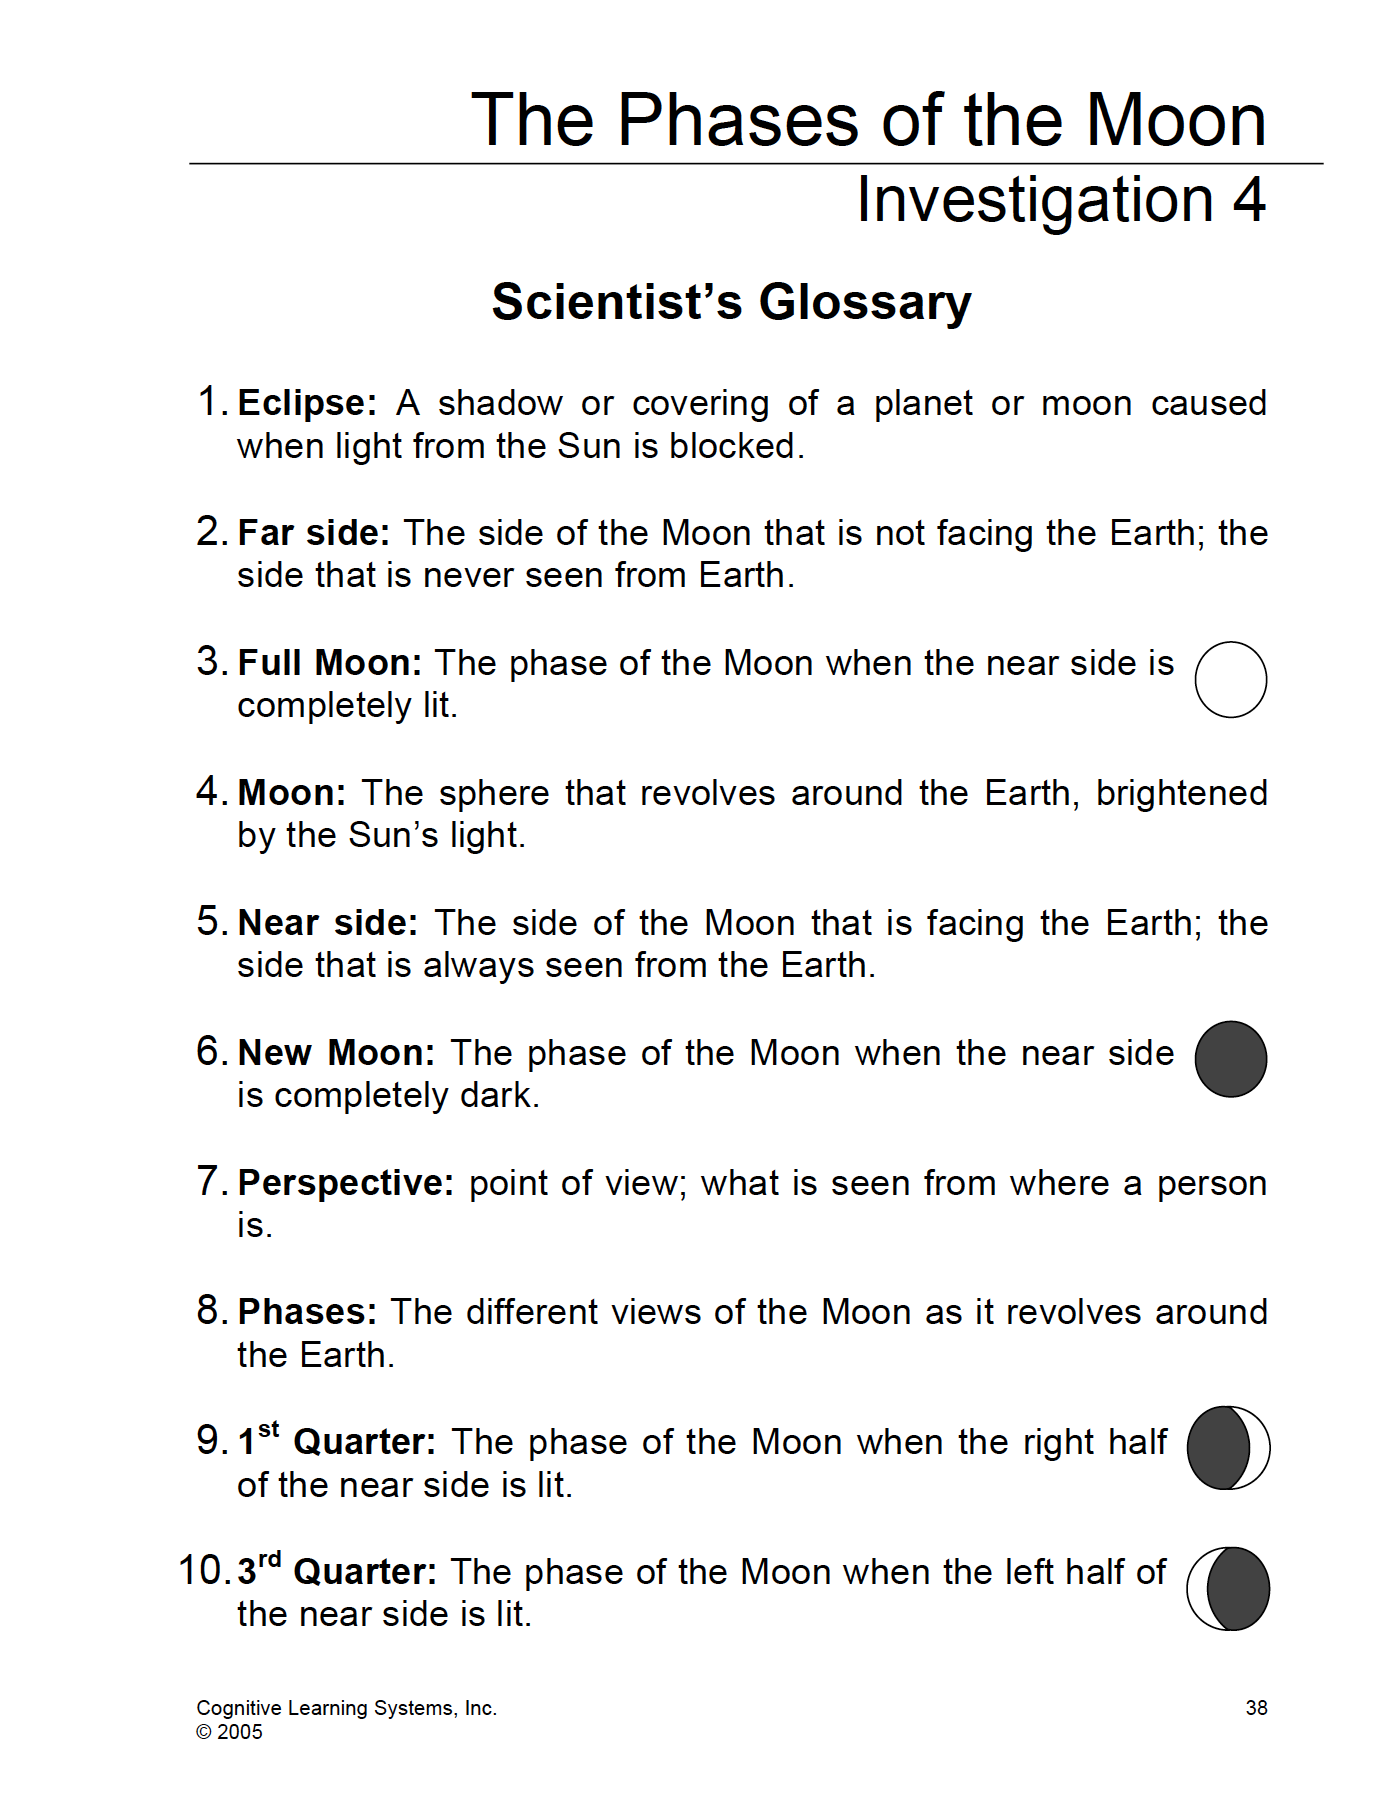
SCIENTIST’S GLOSSARY
1. Eclipse: A shadow or covering of a planet or moon caused when light from the Sun is blocked.
2. Far side: The side of the Moon that is not facing the Earth; the side that is never seen from Earth.
3. Full Moon: The phase of the Moon when the near side visible from Earth is completely lit.
4. Moon: The sphere that revolves around the Earth, brightened by the Sun’s light.
5. Near side: The side of the Moon that is facing the Earth; the side that is always seen from the Earth.
6. New Moon: The phase of the Moon when the near side is completely dark.
7. Perspective: Point of view; that what is seen depends on the location of the viewer.
8. Phases: The different views of the Moon as it revolves around the Earth.
9. 1st Quarter: The phase of the Moon when the right half of the near side is lit.
10. 3rd Quarter: The phase of the Moon when the left half of the near side is lit.
BE PREPARED
Watch the Investigation 4 Teacher Video and Student Video below to prepare for the PreLab.
SET FOR SUCCESS
- Tell students that they are continuing the Our Solar System CELL.
- Ask students to share the kinds of things they might learn in these Investigations.
Begin the PreLab Concept Slides to start students on their learning journey. Then watch the Pre-Lab Student Video afterward as a class.
NAVIGATE IT
Once the slide presentation is launched
- use your left and right arrows to advance or go back in the slide presentation, and
- hover your mouse over the left edge of the presentation to get a view of the thumbnails for all the slides so that you can quickly move anywhere in the presentation.
- Click HERE to launch the slide presentation for the CELL.
SHARE IT
SLIDE VSOLAR4pre-1
This is the third Investigation of the LabLearner CELL Our Solar System. In it, students will explore the Earth, Sun, and seasons.
______________________________________________
SLIDE VSOLAR4pre-2
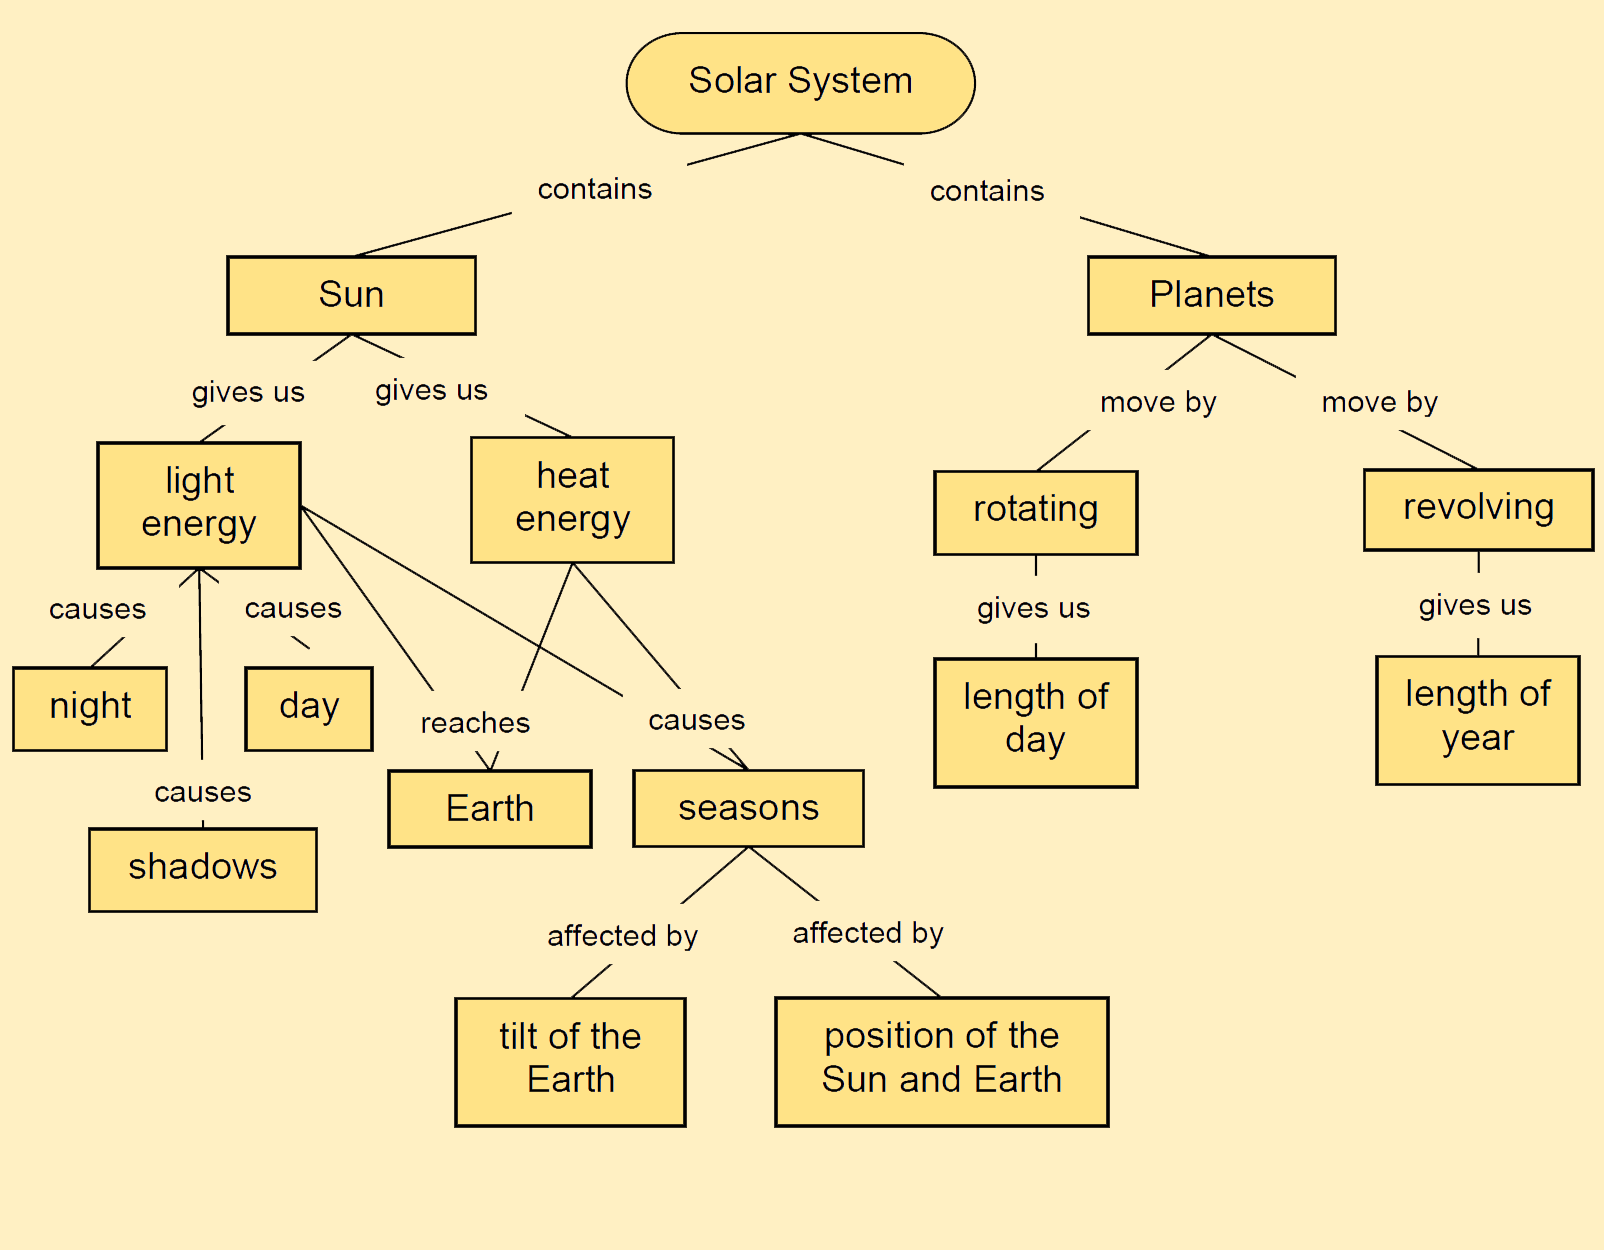
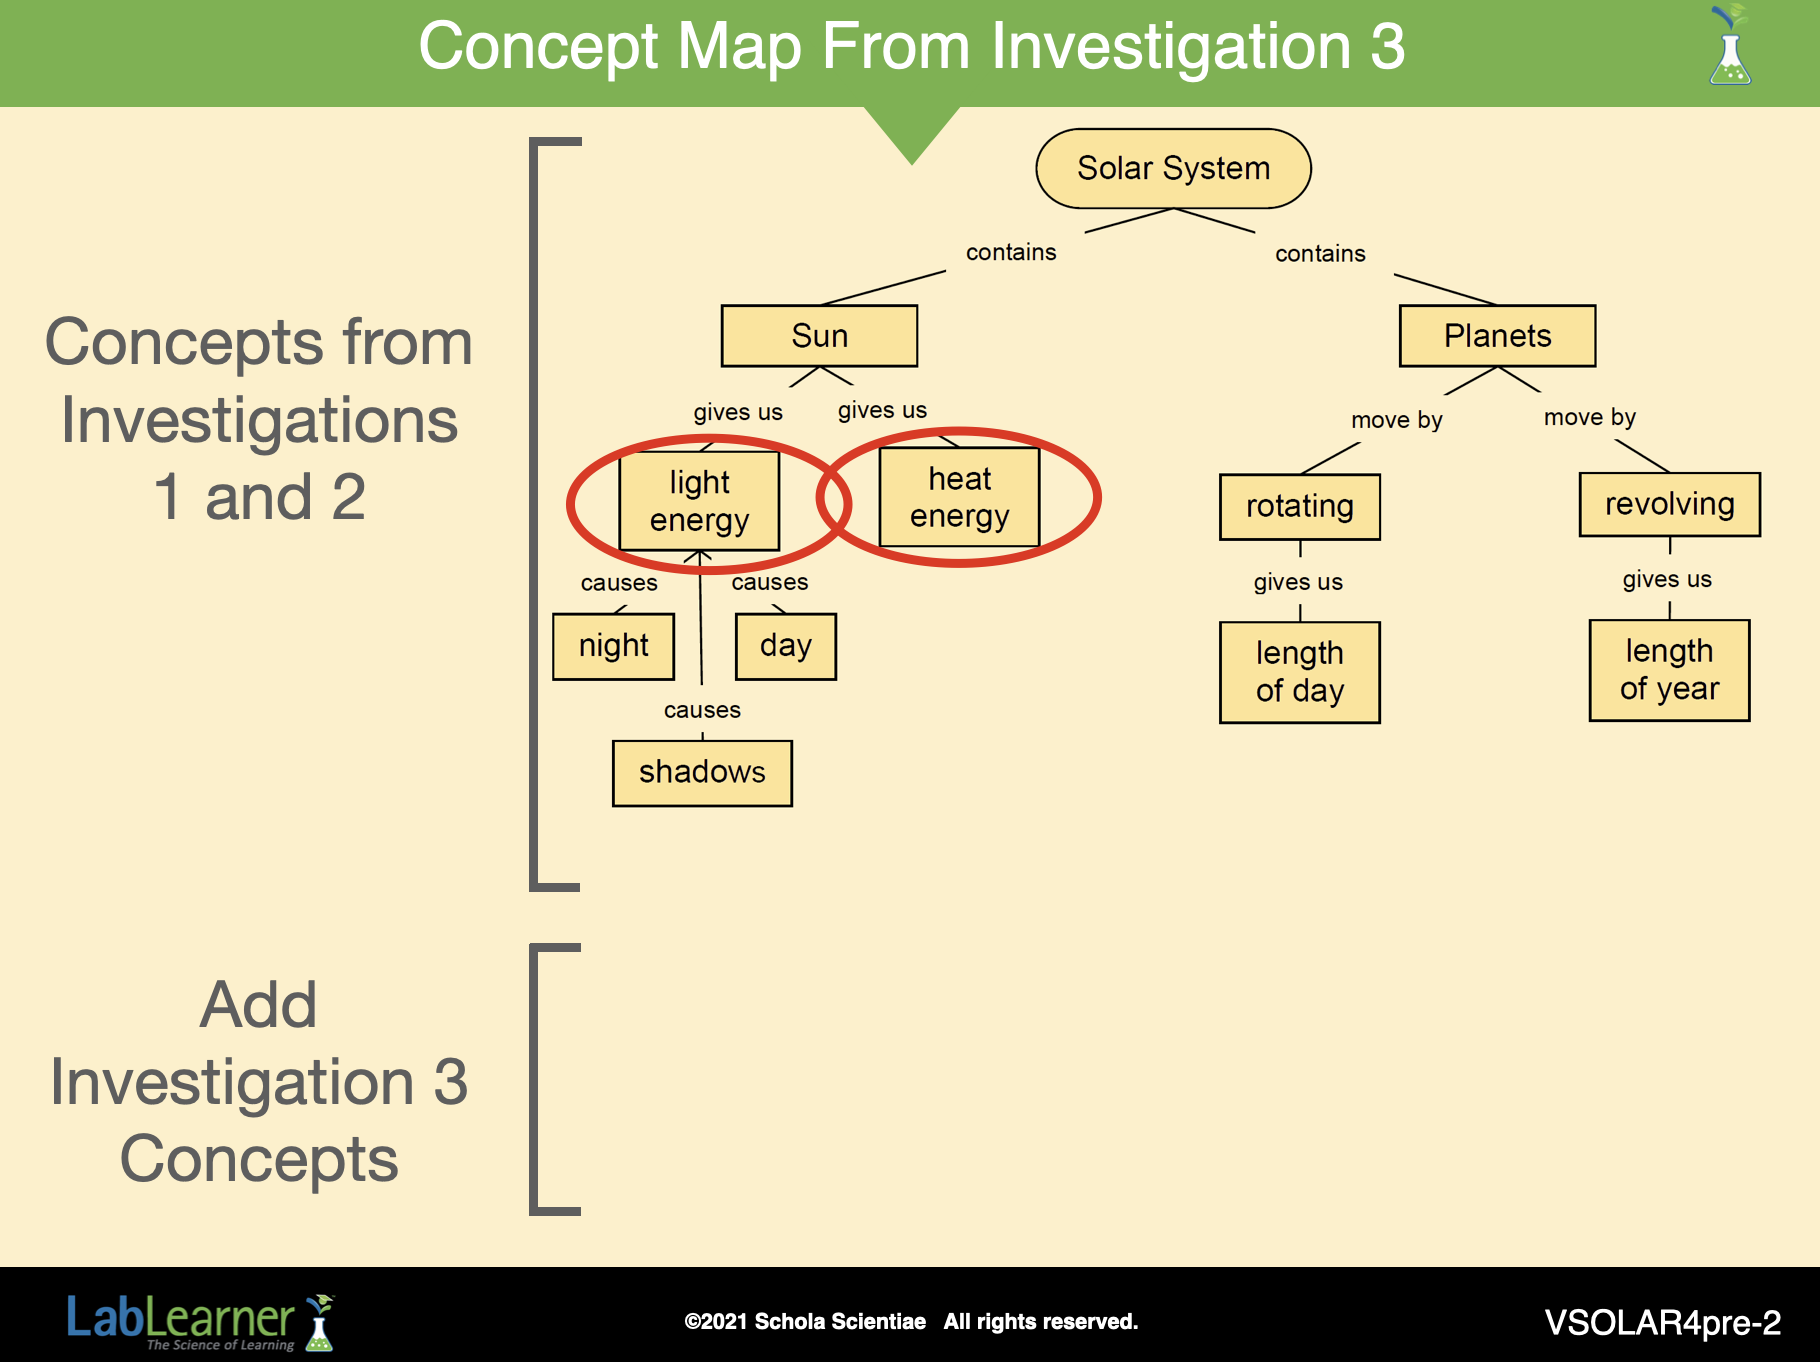
A. Begin the lesson by reviewing what students learned in Investigation Three. To do this, add to the concept map created in Investigation Three. Teacher facilitation using the following questions will guide students to develop the complexity of the concept map.
1. Begin by focusing students on what they learned about the Sun and the Earth in Investigation Three.
a. Ask students: What are some of the most important things you have learned about the Sun and the Earth? Student answers may vary. Record answers as students brainstorm. Student answers may include: Seasons, temperature, the tilt of the Earth, and the position of the Sun and the Earth.
b. After a list has been compiled, ask students to find the terms light energy and heat energy on the concept map.
c. Ask students: In Investigation Three, you explored the effect of light and heat energy on a specific planet. Which planet did you investigate? Students investigated light and heat energy as it affected the Earth.
d. Write the term Earth below light energy and heat energy. Draw a line from light energy to Earth. Draw another line between heat energy and Earth.

e. Tell students that light and heat energy reaches the Earth. Write the word reaches on the lines connecting Earth to light energy and heat energy.
f. Ask students: In Investigation Three, you explored how light and heat energy affect the Earth. What do light and heat energy cause on Earth? Light and heat energy cause seasons.
g. Write seasons beside Earth. Connect seasons to light energy and heat energy as you did Earth.
h. Ask students: What word should we put on the connecting lines to explain the connection between light and heat energy and the seasons? Student answers may vary. Students may suggest the following words: causes, makes, results in, and so forth.
______________________________________________
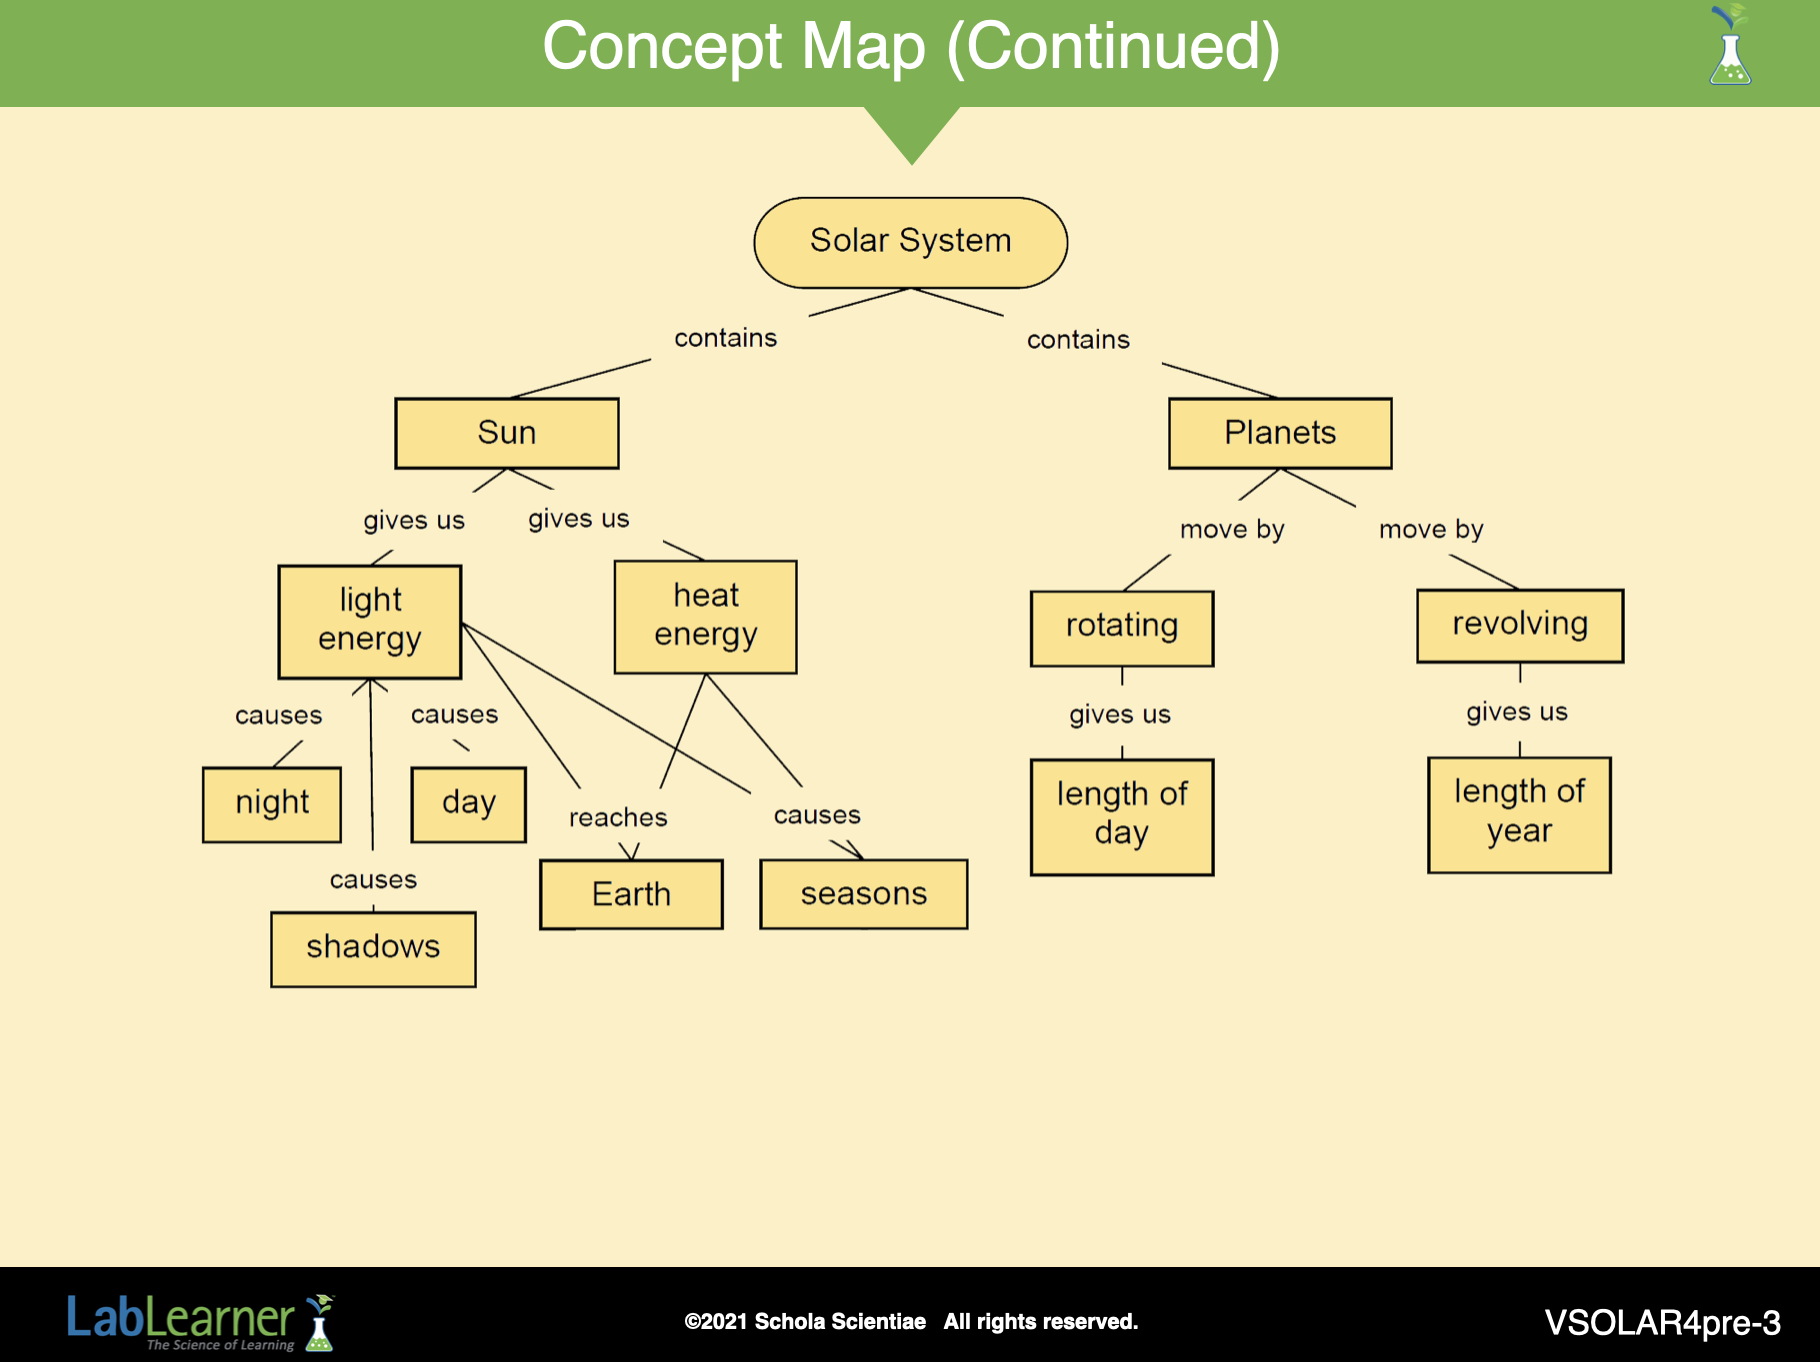
SLIDE VSOLAR4pre-3
2. Direct students’ attention to the seasons.
a. Ask students: What did you learn about the Earth and the Sun that causes the seasons? The tilt of the Earth and the position of the Earth and Sun affect the seasons.
b. Under seasons, write the words tilt of the Earth and position of the Earth and Sun. Draw a line connecting each phrase to seasons.
c. Ask students: What words can we write on the connecting lines to explain how these ideas are connected to the seasons? Student answers may vary. Students may suggest the following terms: affected by, caused by, or change because of.
d. Label the connecting lines with an appropriate phrase or word.
e. Ask students to study the concept map.
Ask students: What does the concept map tell us? The concept map shows students what they have learned.
f. Ask students: Why was it helpful to map a concept map? Student answers may vary. Creating concept maps help students to think about what they know about a topic, They also help to organize new information.
g. Tell students that they may find it helpful to create a concept map on their own if they ever need to organize or better understand things they have just learned.
______________________________________________
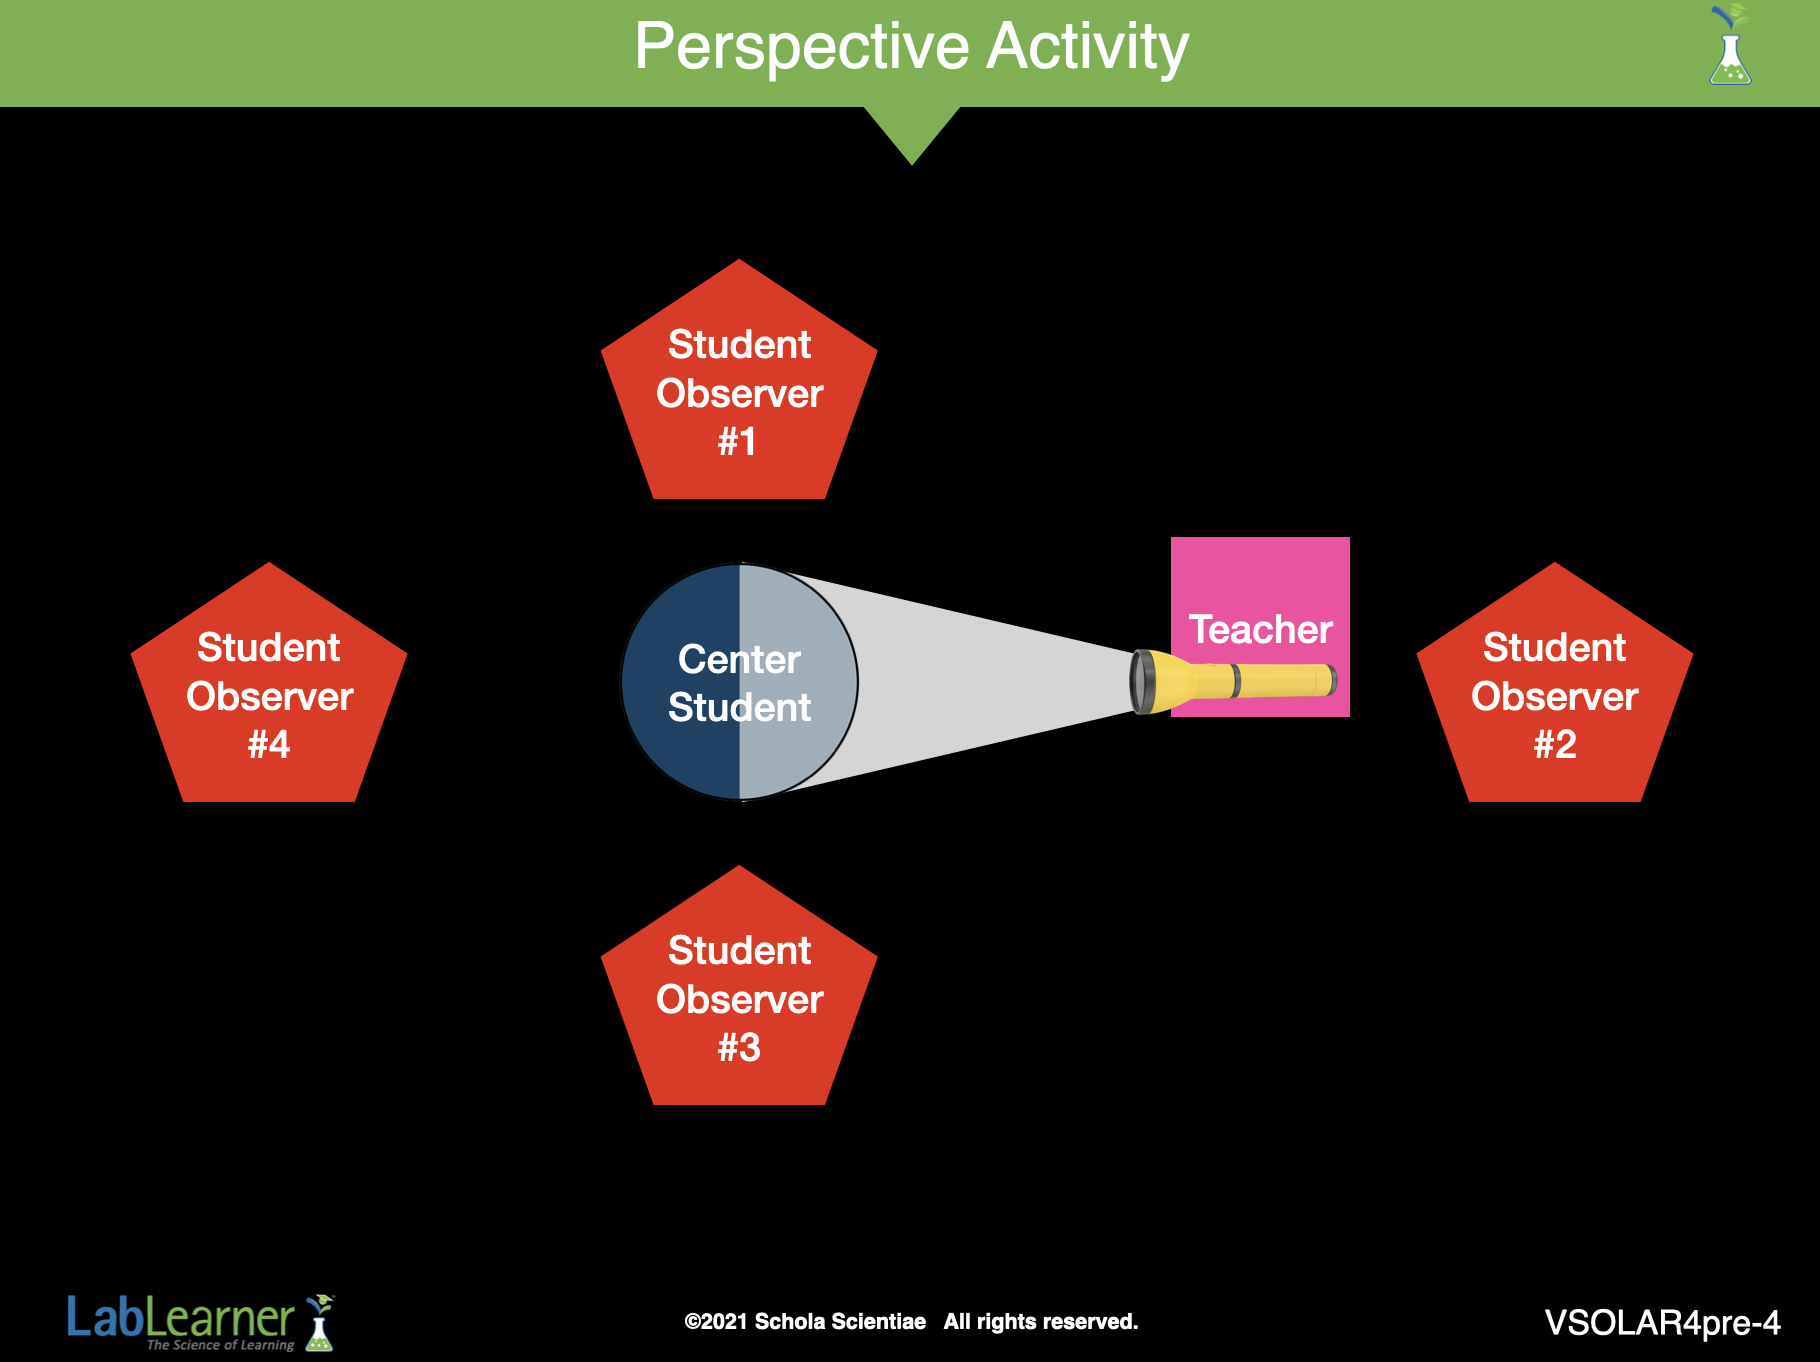
SLIDE VSOLAR4pre-4
B. During the Lab, students will conduct a model that relies on student perspective and interpretation of what they observe. To prepare students for this experiment, conduct an activity focused on perspective.
1. Tell students that they are going to perform an activity that focuses on how things appear based on their position.
2. To begin the activity, stand near the center of the room with a flashlight.
a. Explain to students that you will direct the light at a student volunteer. Ask for a student volunteer to stand in front of you with his or her back facing you.
b. Ask for four other student volunteers. Place the volunteers around the student as illustrated in the slide.
3. Turn off the lights in the classroom. Turn on the flashlight and direct the light so that the student’s back is lit.
4. Tell all of the students in the classroom to observe the student who is lit from behind. Remind students that everyone in the room is looking at the same student. The light from the flashlight is shining on the student.
5. Ask the following questions of the student observers:
a. Ask Observer 1: how does the student appear to you? The student’s back is lit by the flashlight. The front of the student is dark.
b. Ask Observer 2: how does the student appear to you? The student’s back is lit.
c. Ask Observer 2: does any part of the student seem dark? Student answers may vary based on the strength of the light from the flashlight and any additional light that may enter the classroom. Observer 2 should see that most of the student’s back is lit.
d. Ask Observer 3: how does the student appear to you? The student’s back is lit by the projector. The front of the student is dark.
e. Ask Observer 4: how does the student appear to you? None of the student is lit.
f. Ask Observer 4: does all of the student’s body seem dark? Student answers may vary based on the strength of the light from the flashlight and any additional light that may enter the classroom. However, the student should respond that all or most of the student is dark.
6. Ask the class the following questions to show the importance of perspective when making observations:
a. Ask students: Did all of the observers look at the same person? Yes.
b. Ask students: Did the light on the person change? Was the flashlight moved or changed? No.
c. Ask students: Did all of the observers see the same thing? No.
d. Ask students: Did any of the observers see the same thing? Student answers may vary. Students may suggest that Observers 1 and 3 saw the same thing. Both saw the student’s backlit and front dark.
e. Instruct Observers 1 and 3 to again look at the student in the middle. Then, instruct the two students to switch places.
Ask the two students: Did the student look the same from both positions? No. In one position, the student’s back that was lit was on the left and the dark front was on the right. In the other position, the sides that were illuminated were opposite.
f. Ask the class again: Did any of the students see the exact same thing? No.
g. Ask students: If each person was looking at the same student, why did they see different things? Student answers may vary. Students may suggest that the student looked different based on the position of the observer.
______________________________________________
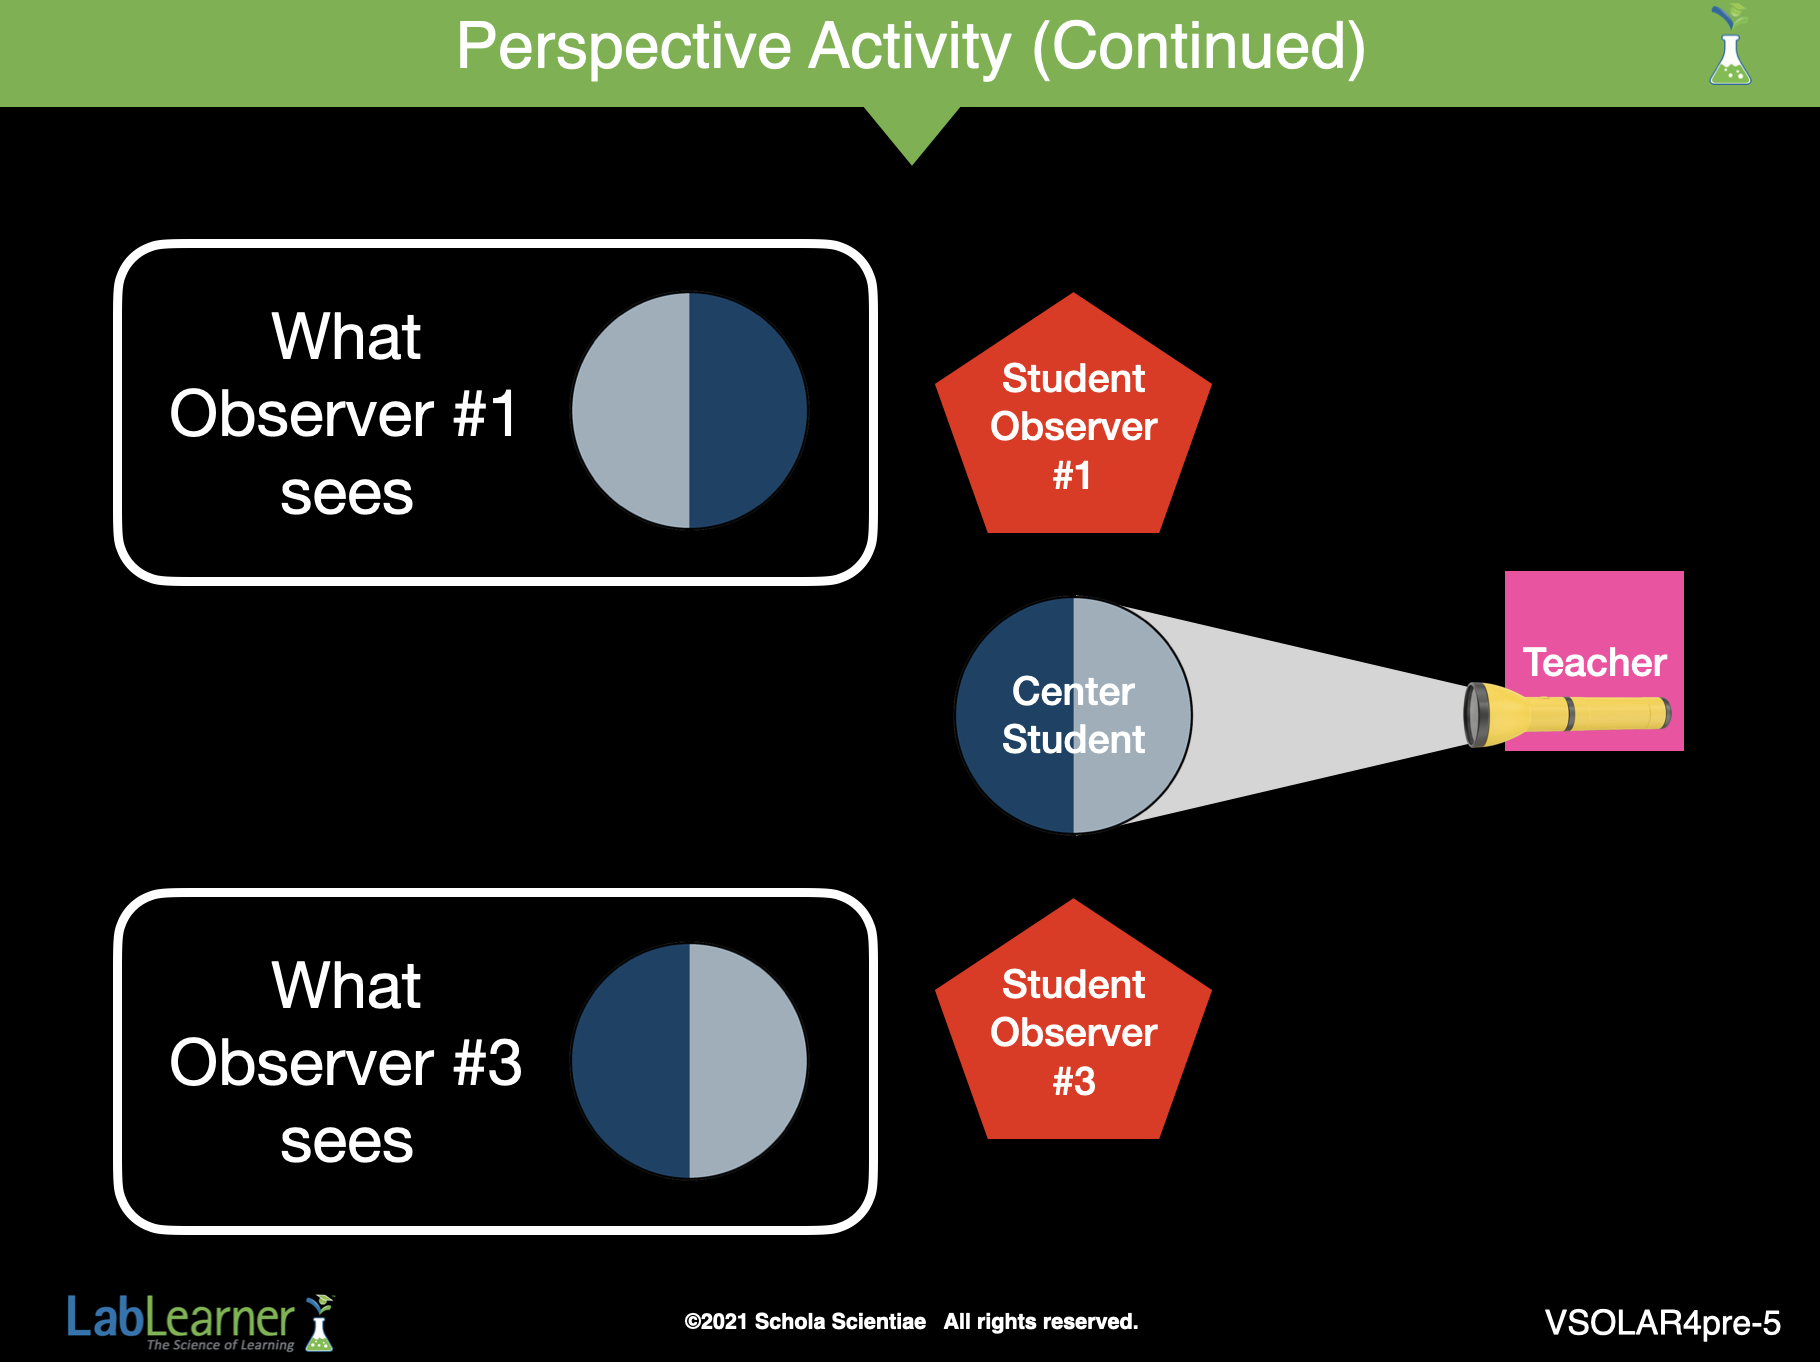
SLIDE VSOLAR4pre-5
e. Instruct Observers 1 and 3 to again look at the student in the middle. Then, instruct the two students to switch places.
Ask the two students: Did the student look the same from both positions? No. In one position, the student’s back that was lit was on the left and the dark front was on the right. In the other position, the sides that were illuminated were opposite.
f. Ask the class again: Did any of the students see the exact same thing? No.
g. Ask students: If each person was looking at the same student, why did they see different things? Student answers may vary. Students may suggest that the student looked different based on the position of the observer.
______________________________________________
SLIDE VSOLAR4pre-6
7. Turn on the lights and allow students to sit down again.
a. Ask students: What did you learn from this activity? Students learned that what is observed may differ based on the position of the observer, even though the light and the student being lit didn’t change.
b. Direct students to locate a term on their Scientist’s Glossary that describes the reason that observers reported seeing different things.
Students should locate the term “Perspective: point of view; what is seen from where a person is.”
8. Check that students have transferred the idea of perspective to life on Earth.
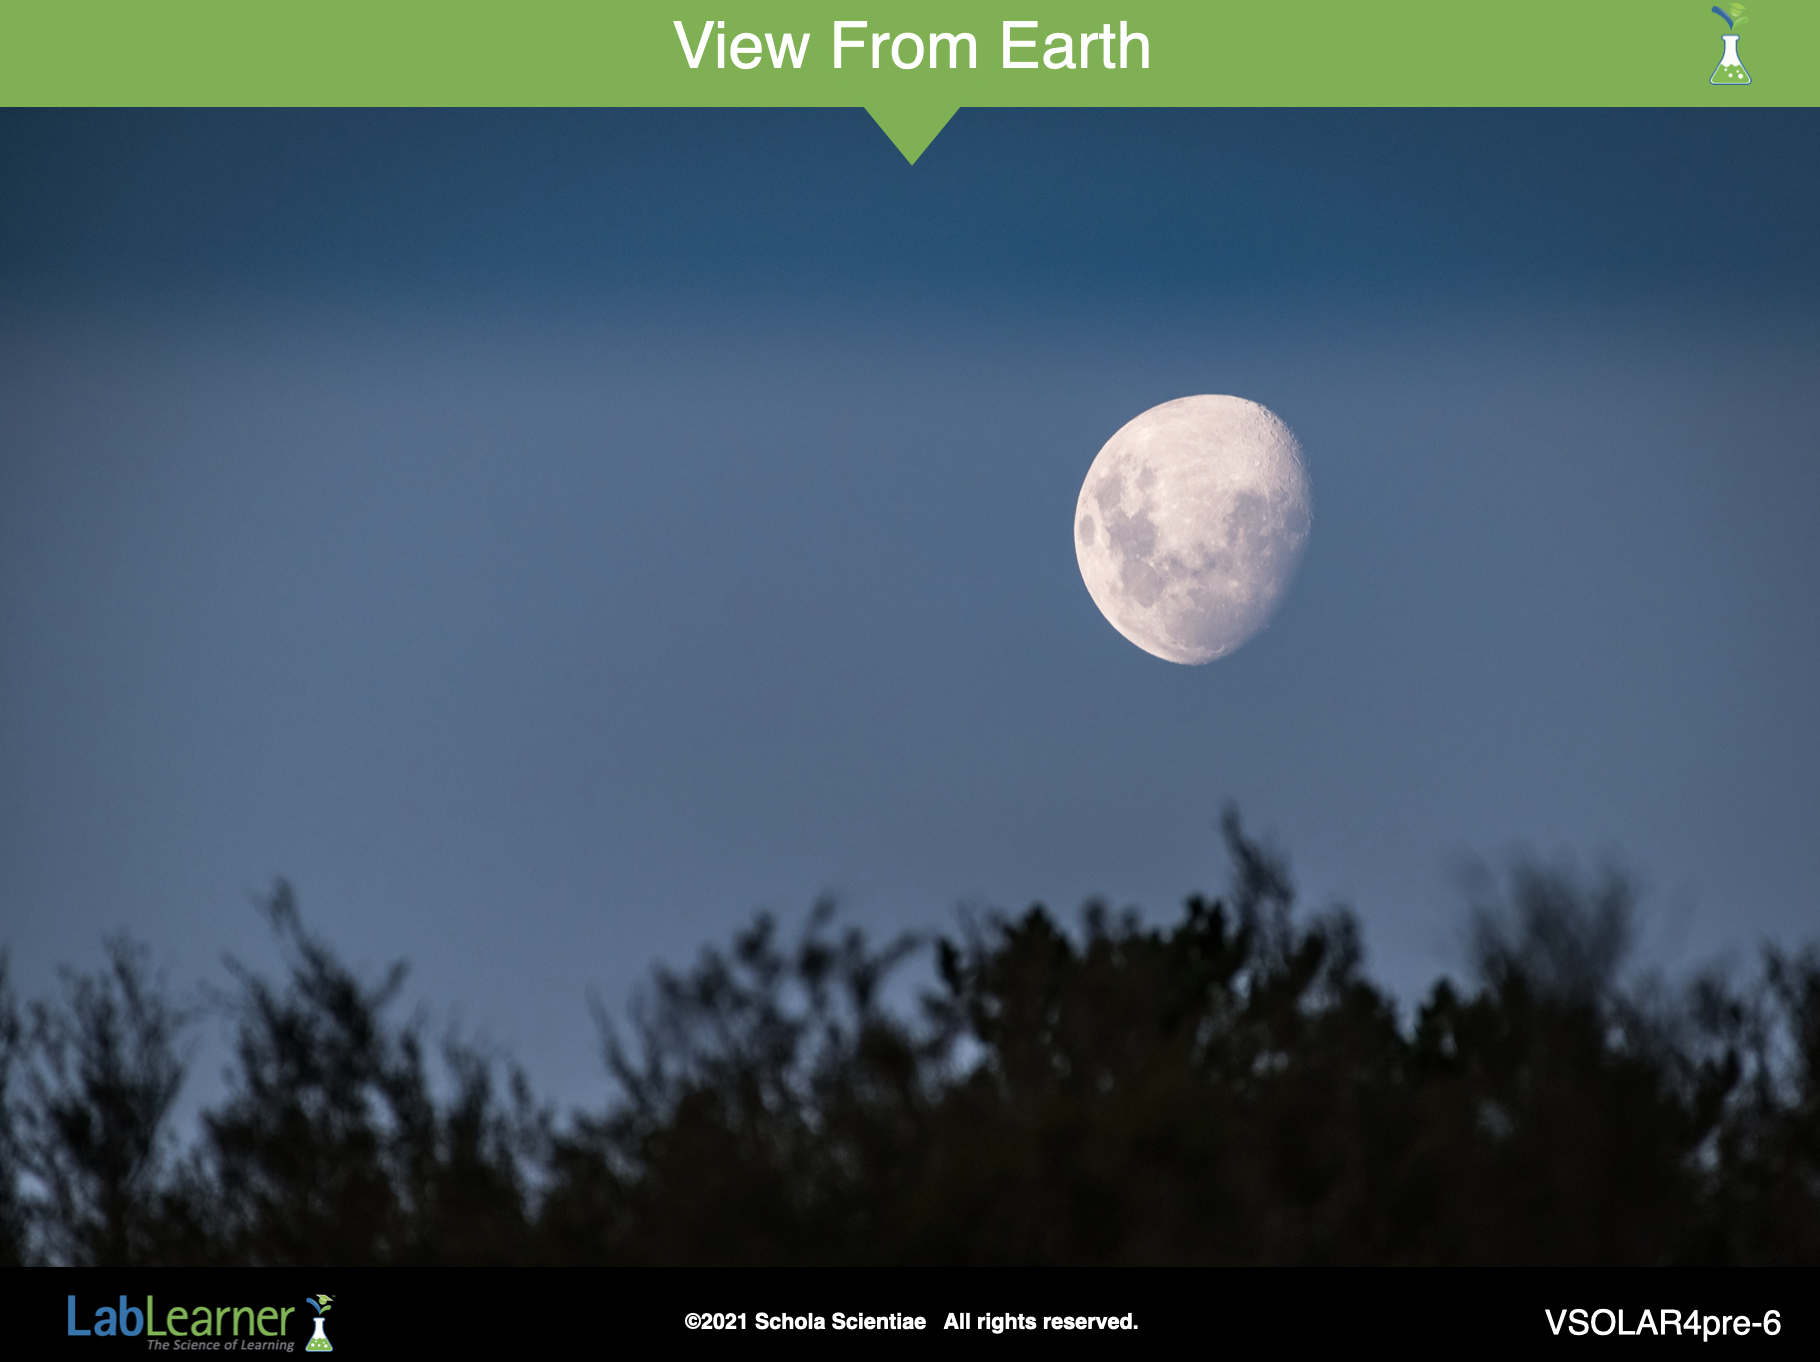
a. Ask students: What is the perspective from which we view the sky? We view the sky from where we live on Earth.
b. Ask students: Do you think that there could be other perspectives for viewing the Moon or the Earth? Guide students to the realization that other perspectives are possible, depending on the location of the viewer. As an example, astronauts in spaces view the Earth and the Moon differently than we do because they are traveling in orbit around the Earth.
______________________________________________
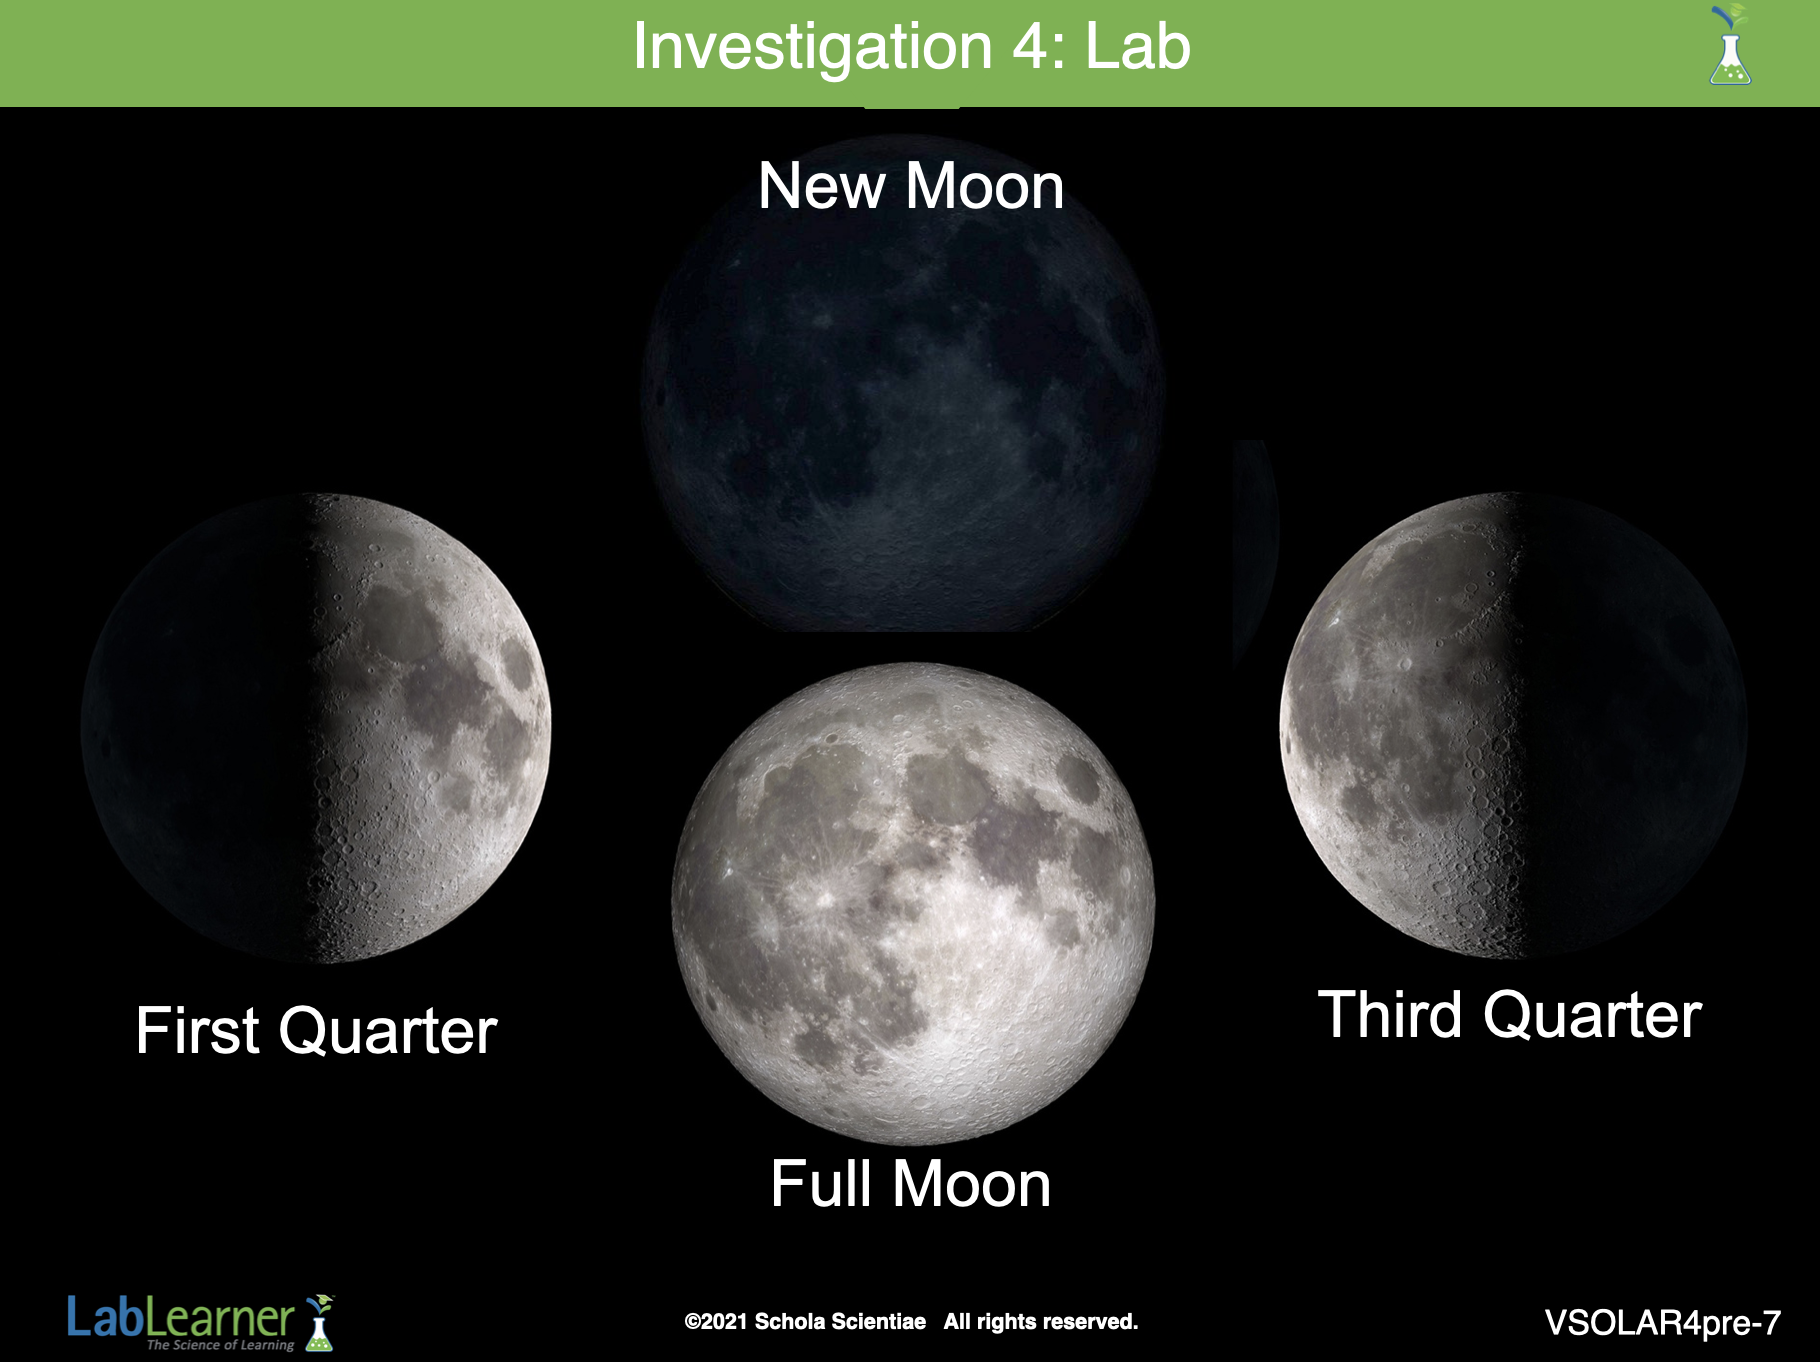
SLIDE VSOLAR4pre-7
C. Tell students that during the Lab, they will learn about the Moon and the Earth. Lead the following discussion to assess students’ understanding of the Moon:
1. Ask students: Can you ever see the Moon? If so, when? Student answers will vary. Students may recall seeing the Moon most easily at night. Some students may also recall seeing the Moon during the day.
2. Ask students: Where does the Moon go during the day? Student answers will vary. Note any misconceptions about the Moon such as students claiming that the Moon “rises” and “sets” like the Sun, as this may indicate that students believe that the Moon revolves around the Earth once every 24 hours instead of the Earth’s rotation allowing the Moon to be seen during the nighttime hours.
3. Ask students: How big is the Moon? Student answers will vary. The Moon may at times appear very large. However, the Moon is in reality much smaller than the Sun and even smaller than the Earth.
4. Ask students: What shape is the Moon? Student answers may vary. The Moon looks like a circle. Some students may have prior knowledge of the Moon’s spherical shape.
5. Ask students: Is the Moon bright? Does the brightness ever change? Student answers may vary. The Moon often appears bright. Sometimes, the Moon is a bright circle. Other times it looks more like a bright sliver or crescent shape.
D. Tell students that they will explore the Moon, in particular the phases of the Moon, more fully in the Lab.
Student Video
Watch the Investigation 4 Student Videos after the Share It presentation to prepare for the Lab.
KEYS