Teacher Portal:
Our Solar System
Investigation 4 – PostLab
 PRINT IT
Use your browser to download a printable PDF as help during the slide presentation and to make additional notes. In your browser, go to File > Print and then choose to save as PDF.
NAVIGATE IT
Once the slide presentation is launched
- use your left and right arrows to advance or go back in the slide presentation, and
- hover your mouse over the left edge of the presentation to get a view of the thumbnails for all the slides so that you can quickly move anywhere in the presentation.
- Click HERE to launch the slide presentation for the CELL.
SHARE IT

SLIDE VSOLAR4post-1
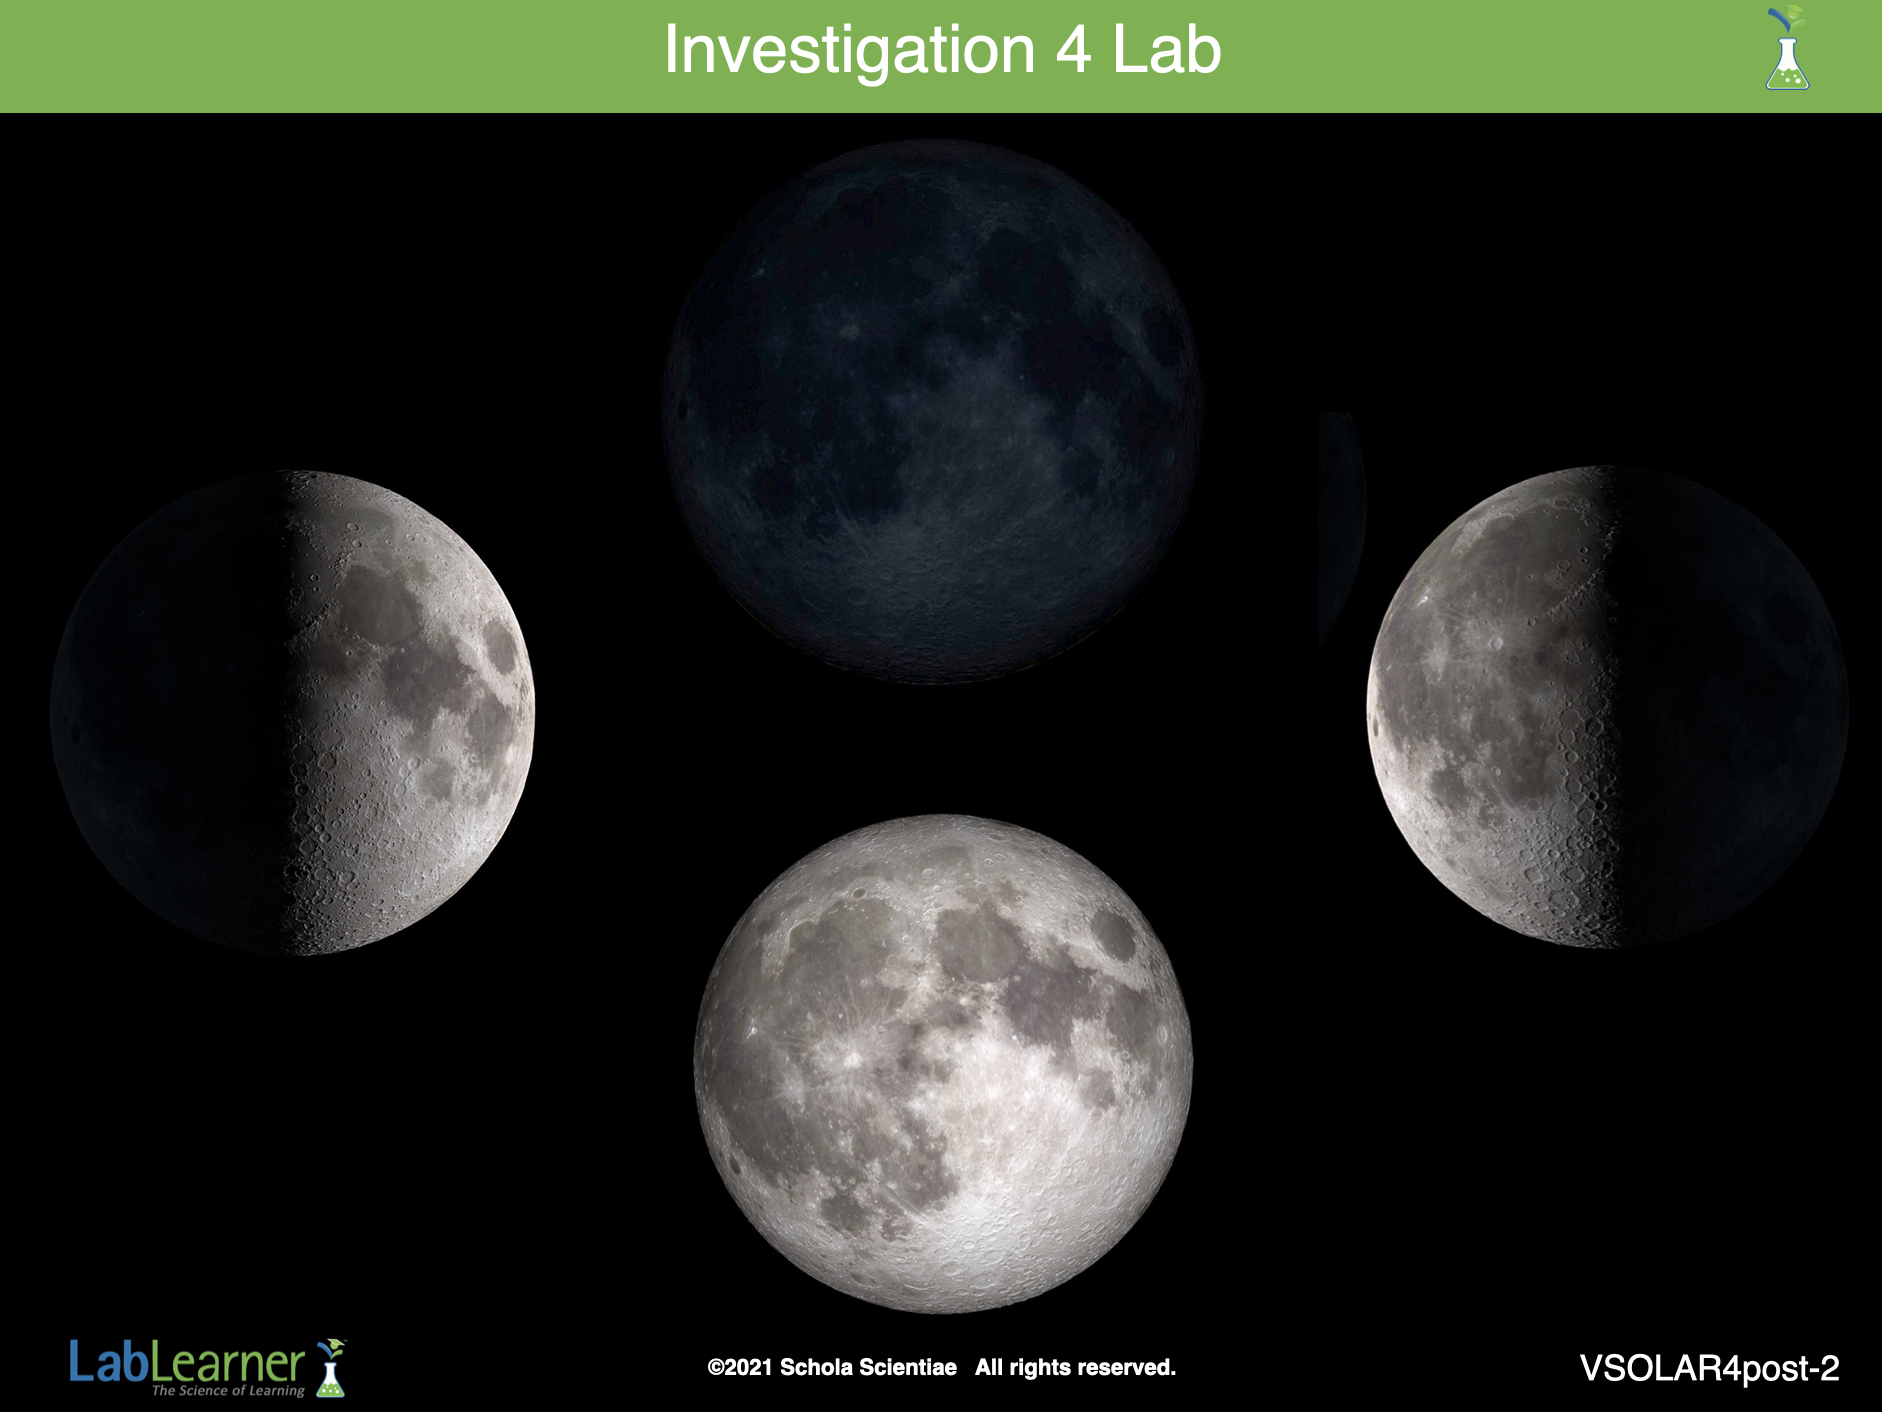
This was the fourth Investigation of the LabLearner CELL Our Solar System. In it, students explored the phases of the Moon.
______________________________________________
SLIDE VSOLAR4post-2
A. Briefly guide students to recall the experiments performed in the Lab.
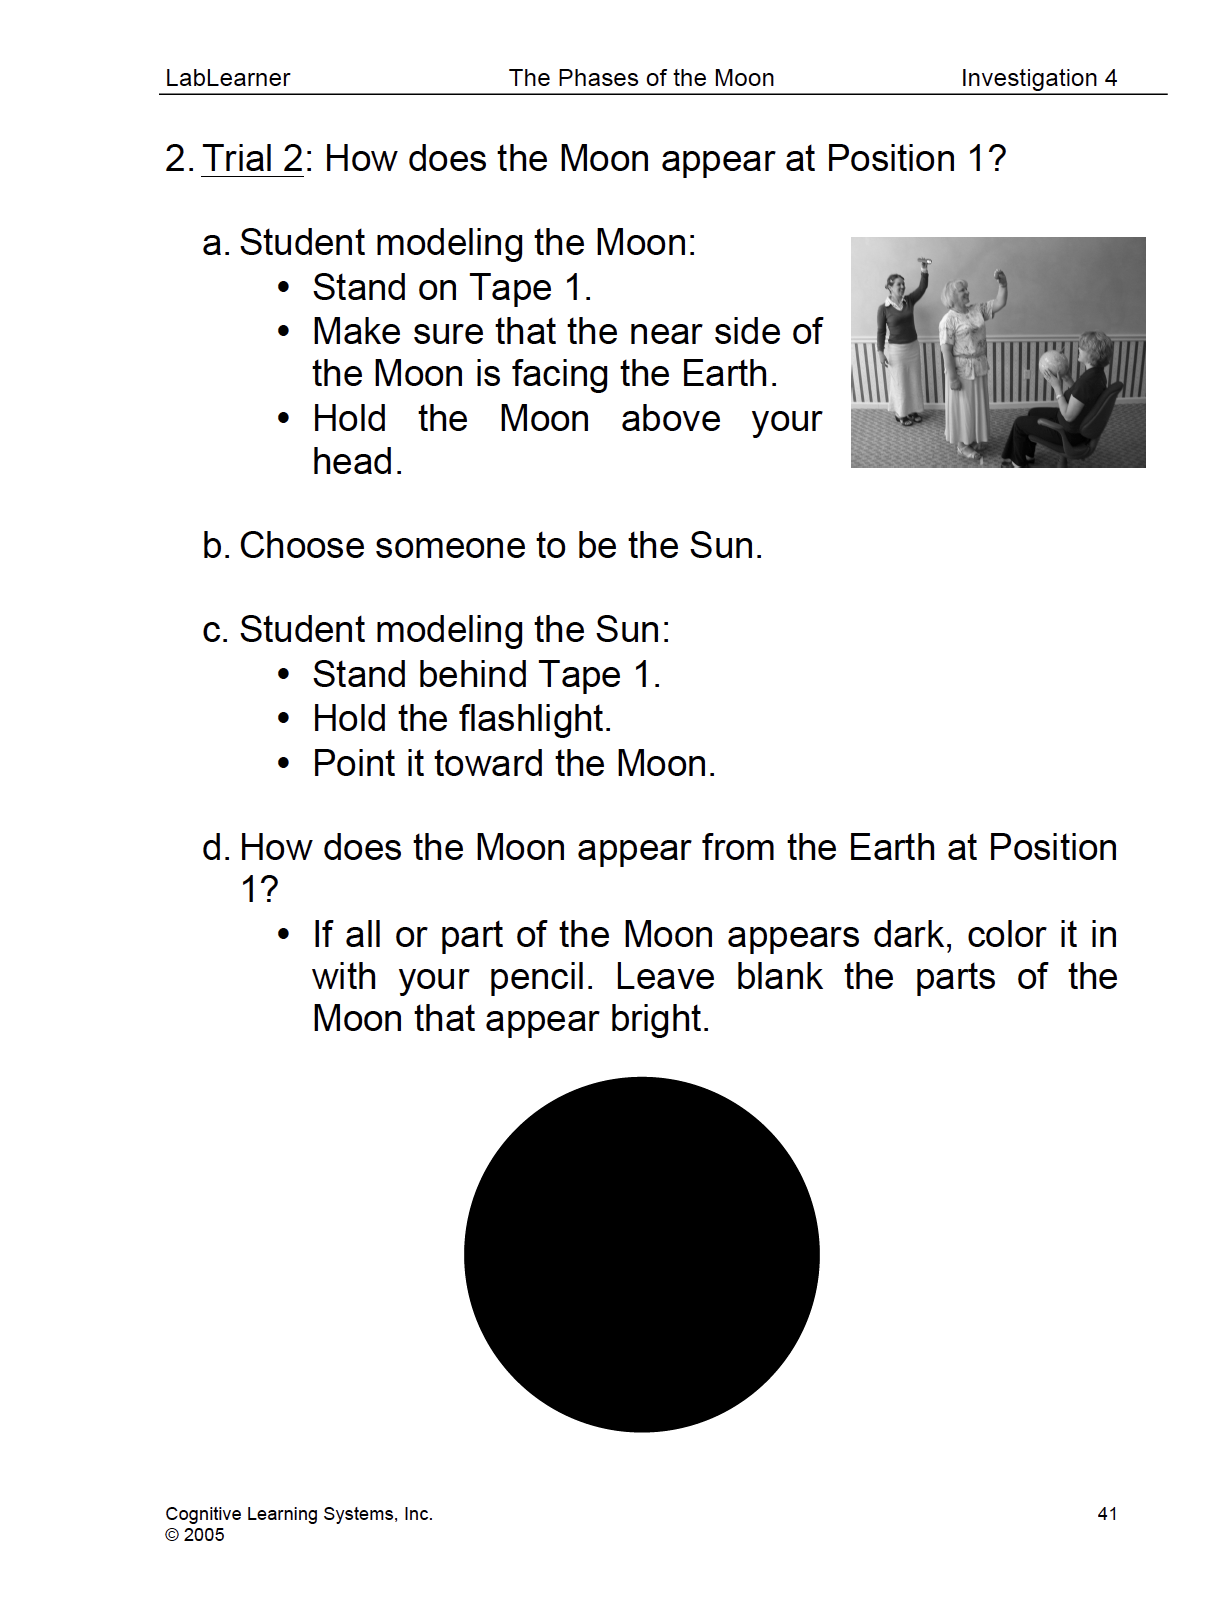
1. Ask students: What did you investigate in the Lab? Students investigated the appearance of the Moon as it revolved around the Earth.
2. Ask students: What caused the Moon to appear bright? The Sun shone on the Moon, making it bright.
3. Ask students: At how many different positions did you observe the position of the Moon? Students observed the Moon at four positions.
______________________________________________
SLIDE VSOLAR4post-3
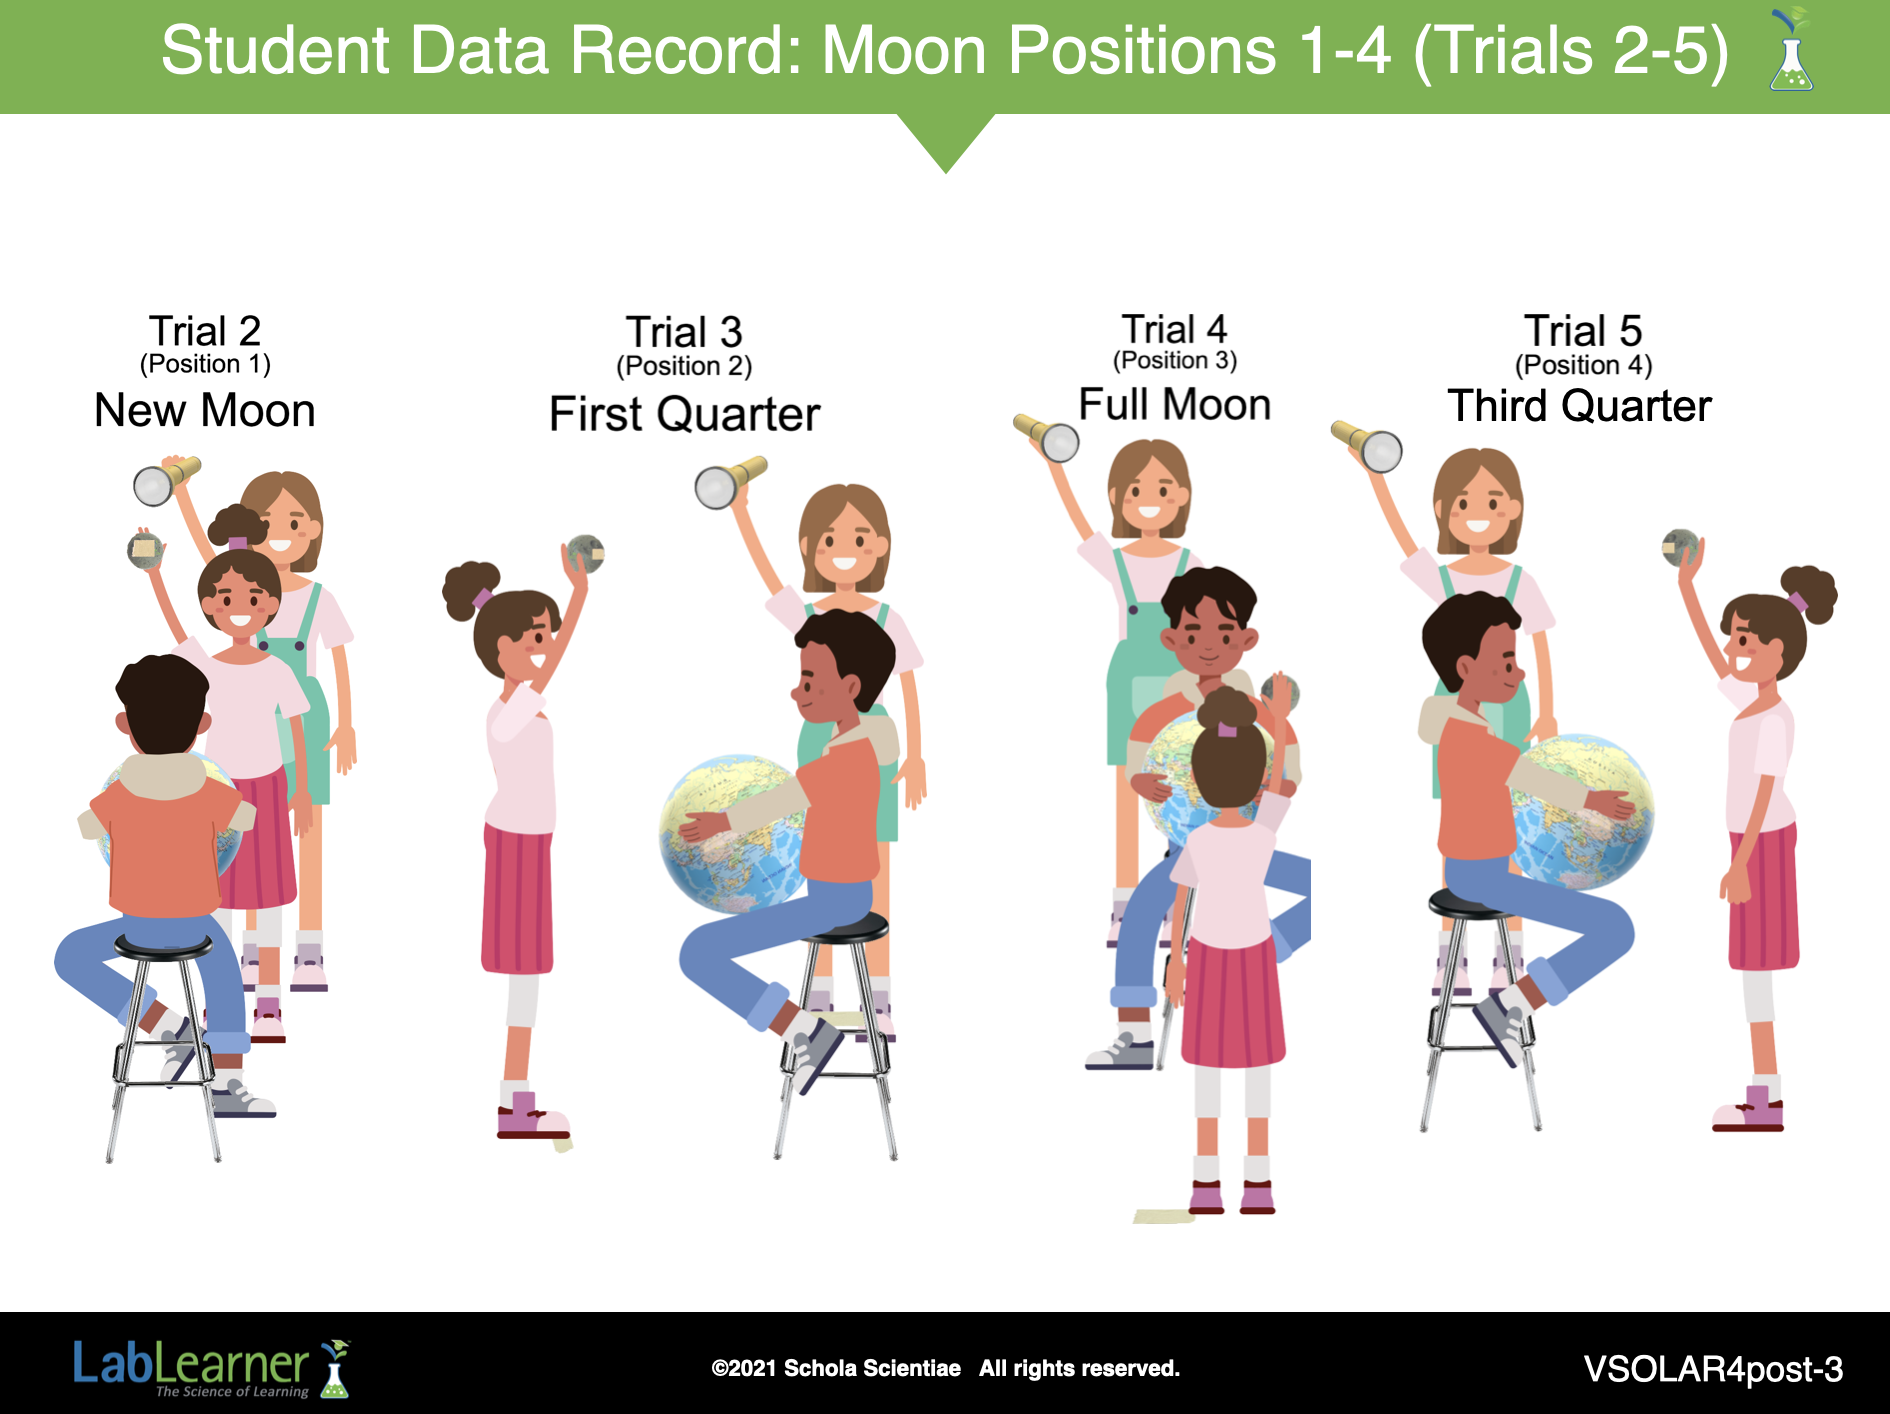
B. Instruct students to look at the four diagrams of the Moon they drew in Problems 2 – 5 in the Student Data Record.
1. Explain to students that they only drew the Moon in the diagram. However, it is important to remember where the Sun was in each position.
2. Ask students to look at Problem 2.
Ask students: Where was the Sun when the Moon was in Position 1? The Sun was behind the Moon when the Moon was standing on Tape 1.
3. Instruct students to use the space below the diagram of the Moon in Problem 2 to write that the Sun was behind the Moon.
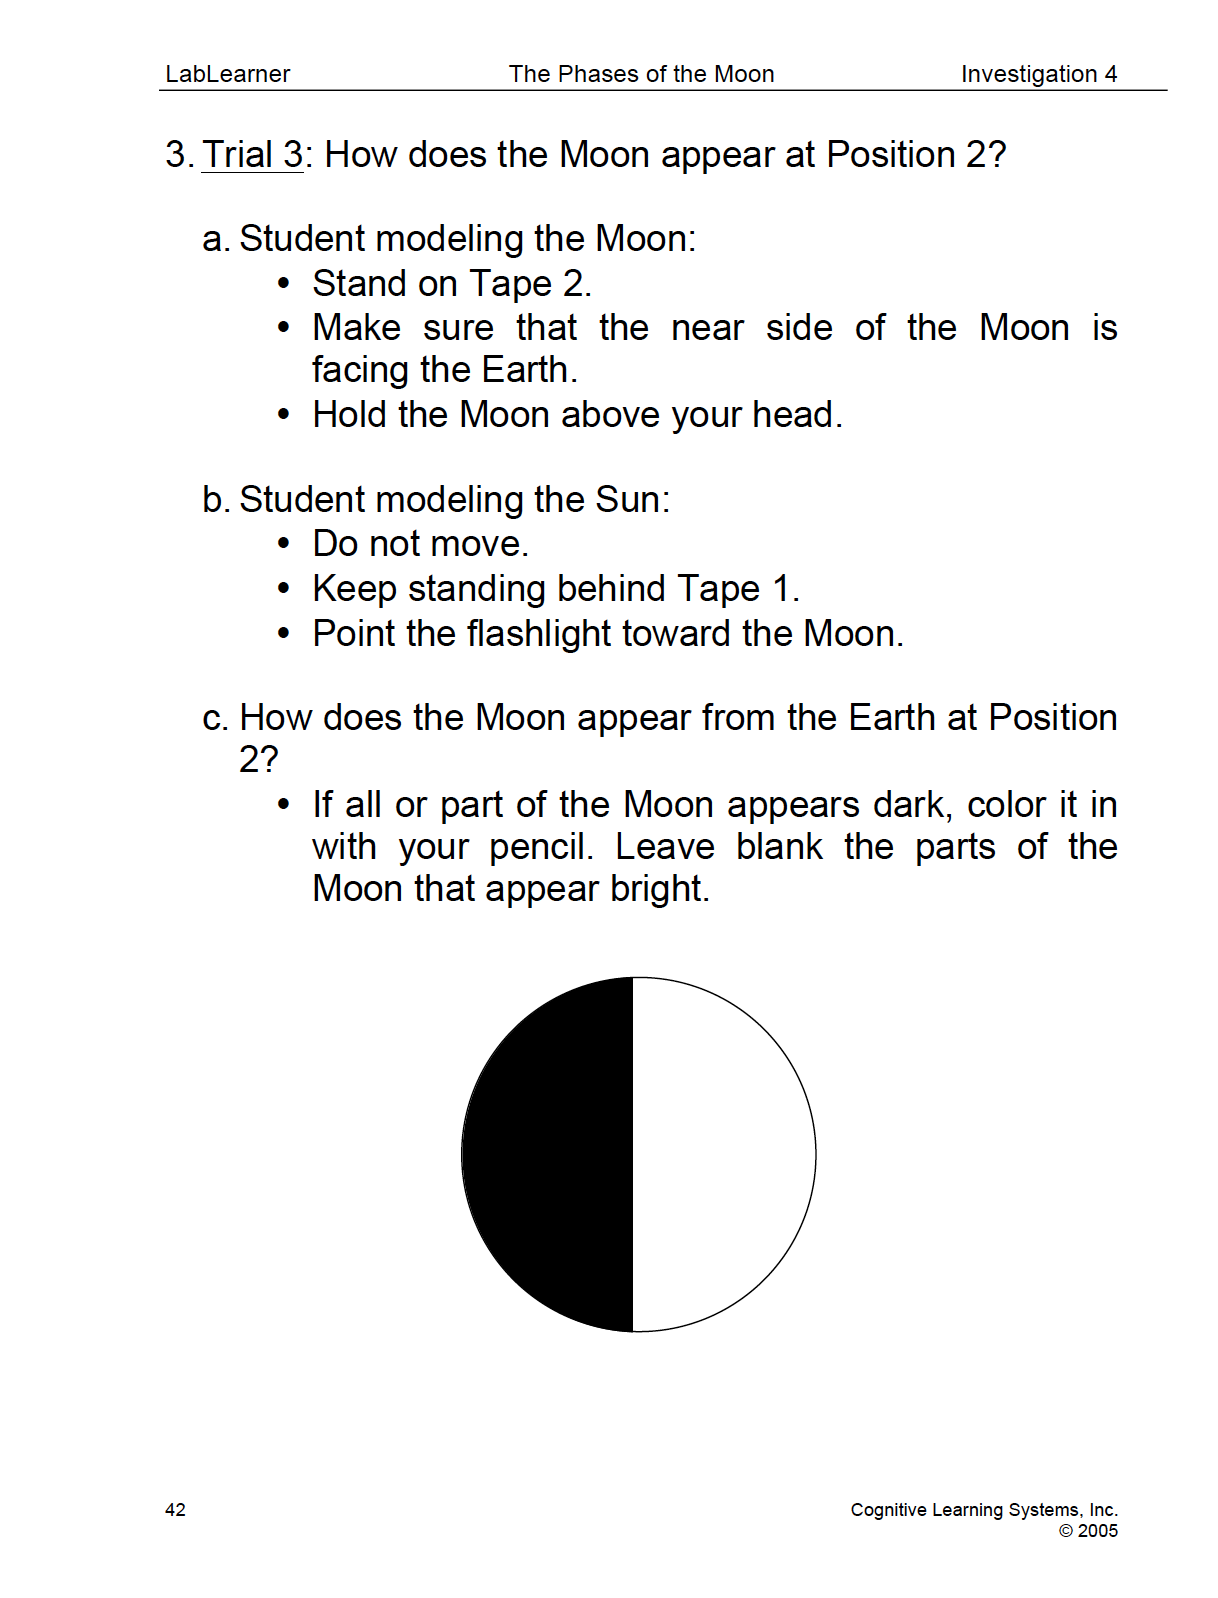
4. Ask students to look at Problem 3.
Ask students: Where was the Sun when the Moon was in Position 2? (If needed, instruct students to look at their drawing and find the part of the Moon that was lit). The Sun was shining on the part that was lit. This may help students realize that at Position 2, the Sun was to the right of the Moon as viewed from the Earth.
5. Instruct students to use the space beside the diagram of the Moon in Problem 3 to write the word Sun or draw a picture of the Sun to indicate its location.
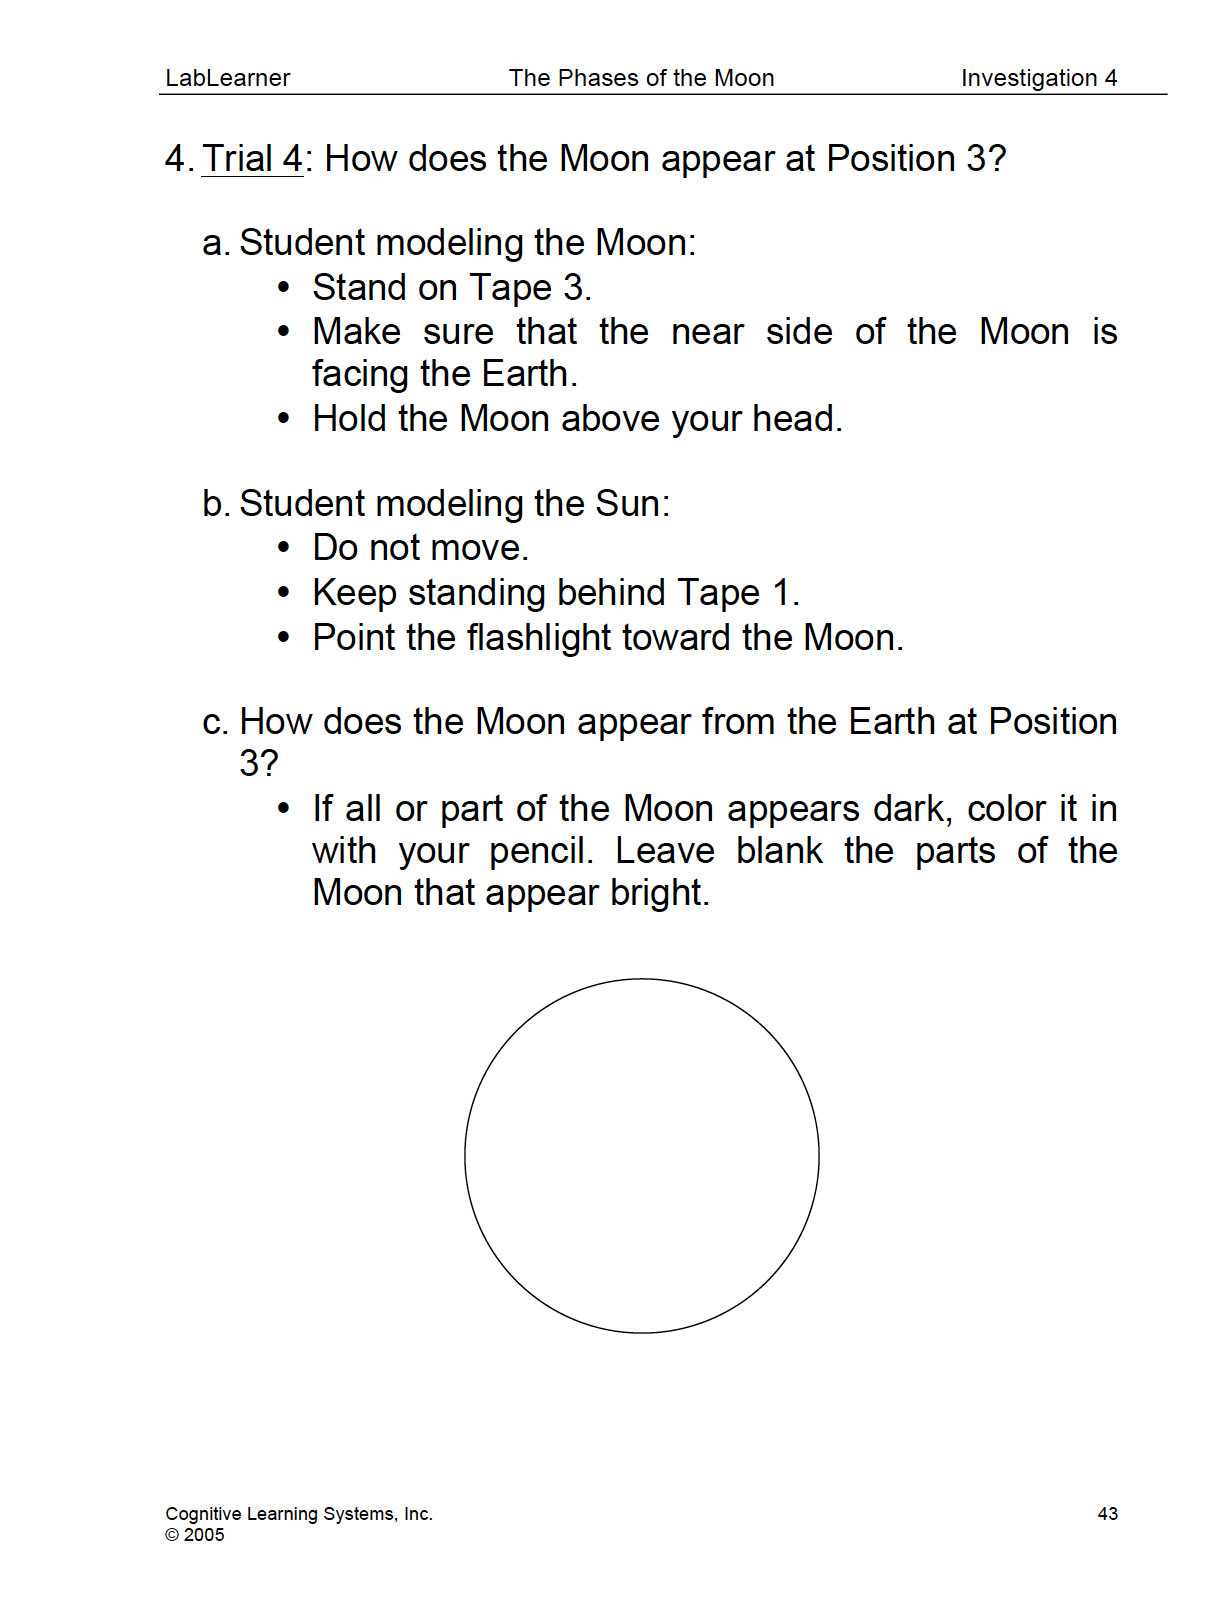
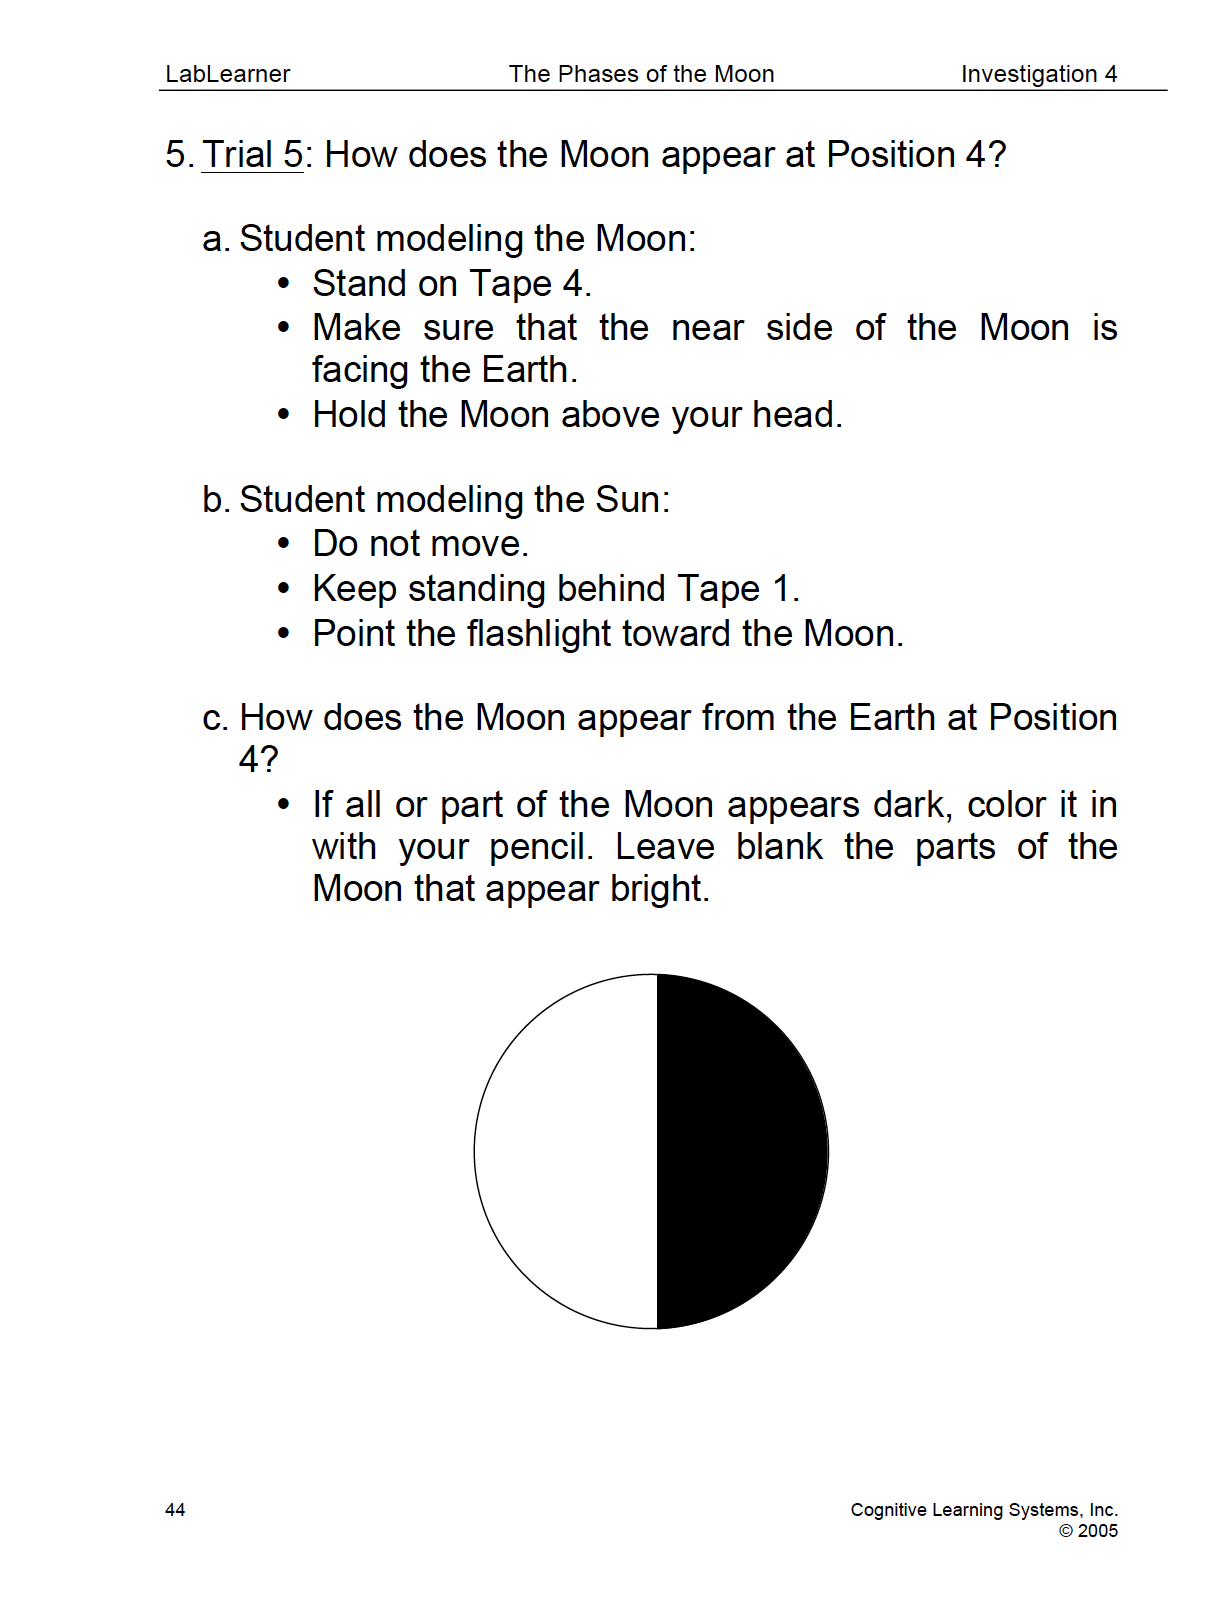
6. Continue in this process with Positions 3 and 4. At Position 3, students should write below the diagram of the Moon that the Sun was facing the Moon. At Position 4, students should write the word Sun or draw the Sun to the left of the Moon, indicating that the Sun was to the left of the Moon as viewed from the Earth at this Position.
______________________________________________
SLIDE VSOLAR4post-4
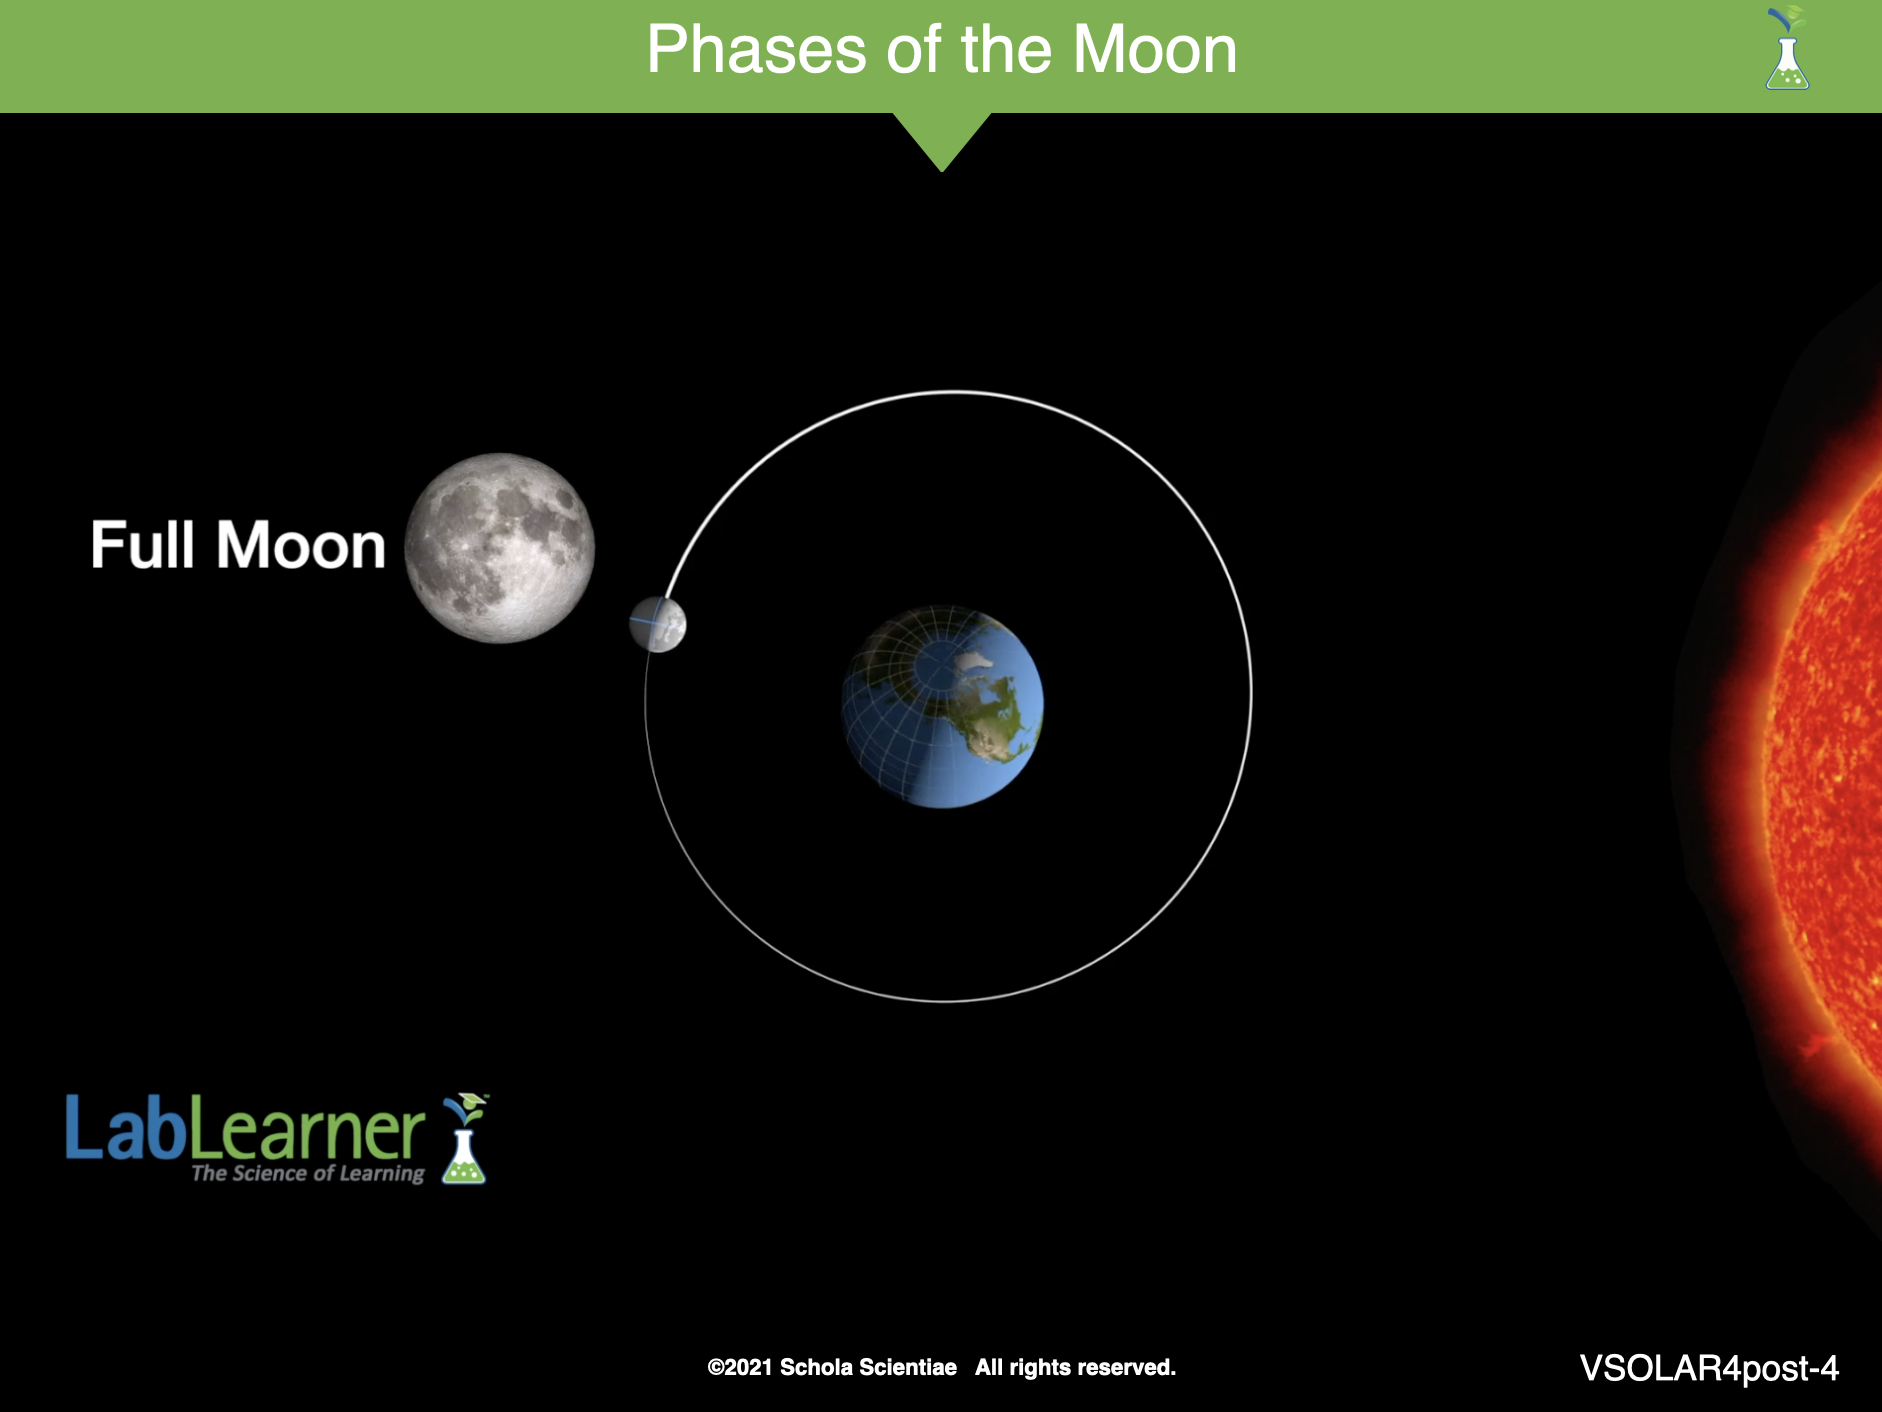
C. Introduce the phases of the Moon to the class.
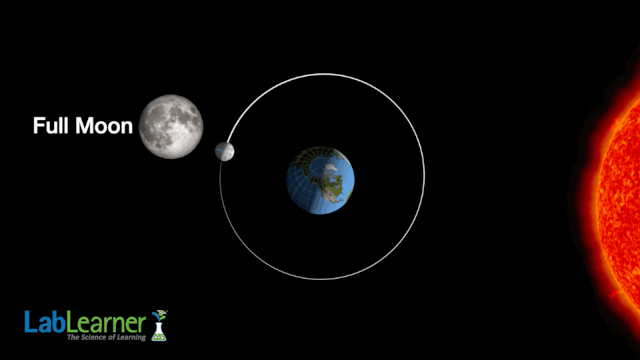
1. Ask students: Have you ever heard the term, Full Moon? Student answers will vary.
2. Ask a student volunteer to read the definition of the term Full Moon aloud from the Scientist’s Glossary:
“A full moon describes the phase of the Moon when the near side is
completely lit.”
3. Ask students: Have you ever heard the term, New Moon? Student answers will vary.
4. Ask a student volunteer to read the definition of the term New Moon aloud from the Scientist’s Glossary:
“A new moon describes the phase of the Moon when the
near side is completely dark.”
5. Explain to students that the four positions they investigated in the Lab describe four of the phases of the Moon. Tell students that a phase is a period of time or a stage. Phases of the moon describe the view of the Moon at different places during its revolution around the Earth.
Ask student volunteers to read the definitions of 1st Quarter and 3rd Quarter from the Scientist’s Glossary:
“1st Quarter: The phase of the Moon when the right half of the near side is lit.”
“3rd Quarter: The phase of the Moon when the left half of the near side is lit.”
6. Divide students into groups. Instruct students to work together to label each of the Moon drawn in Problems 2 – 5 as either New Moon, Full Moon, 1st Quarter, or 3rd Quarter. Students should label the Moon above each drawing.
Note: Students’ attention may need to be drawn to the fact that although half the Moon is lit during the 1st and 3rd Quarters, these phases are still referred to as quarters rather than halves. Students may think of this in one of two ways. First, remind them that something that is divided into four parts is divided into quarters. Point out that the side of the Moon that is viewed from the Earth is only half of the Moon. Therefore, if half of that side is lit, only one quarter of the total Moon is lit. Another way to think of this is by identifying one revolution of the Earth as a whole. Students modeled four positions around this whole revolution. In other words, students modeled each quarter of the revolution. These two ways of thinking may help students understand the naming of the 1st Quarter and the 3rd Quarter.
______________________________________________
SLIDE VSOLAR4post-5
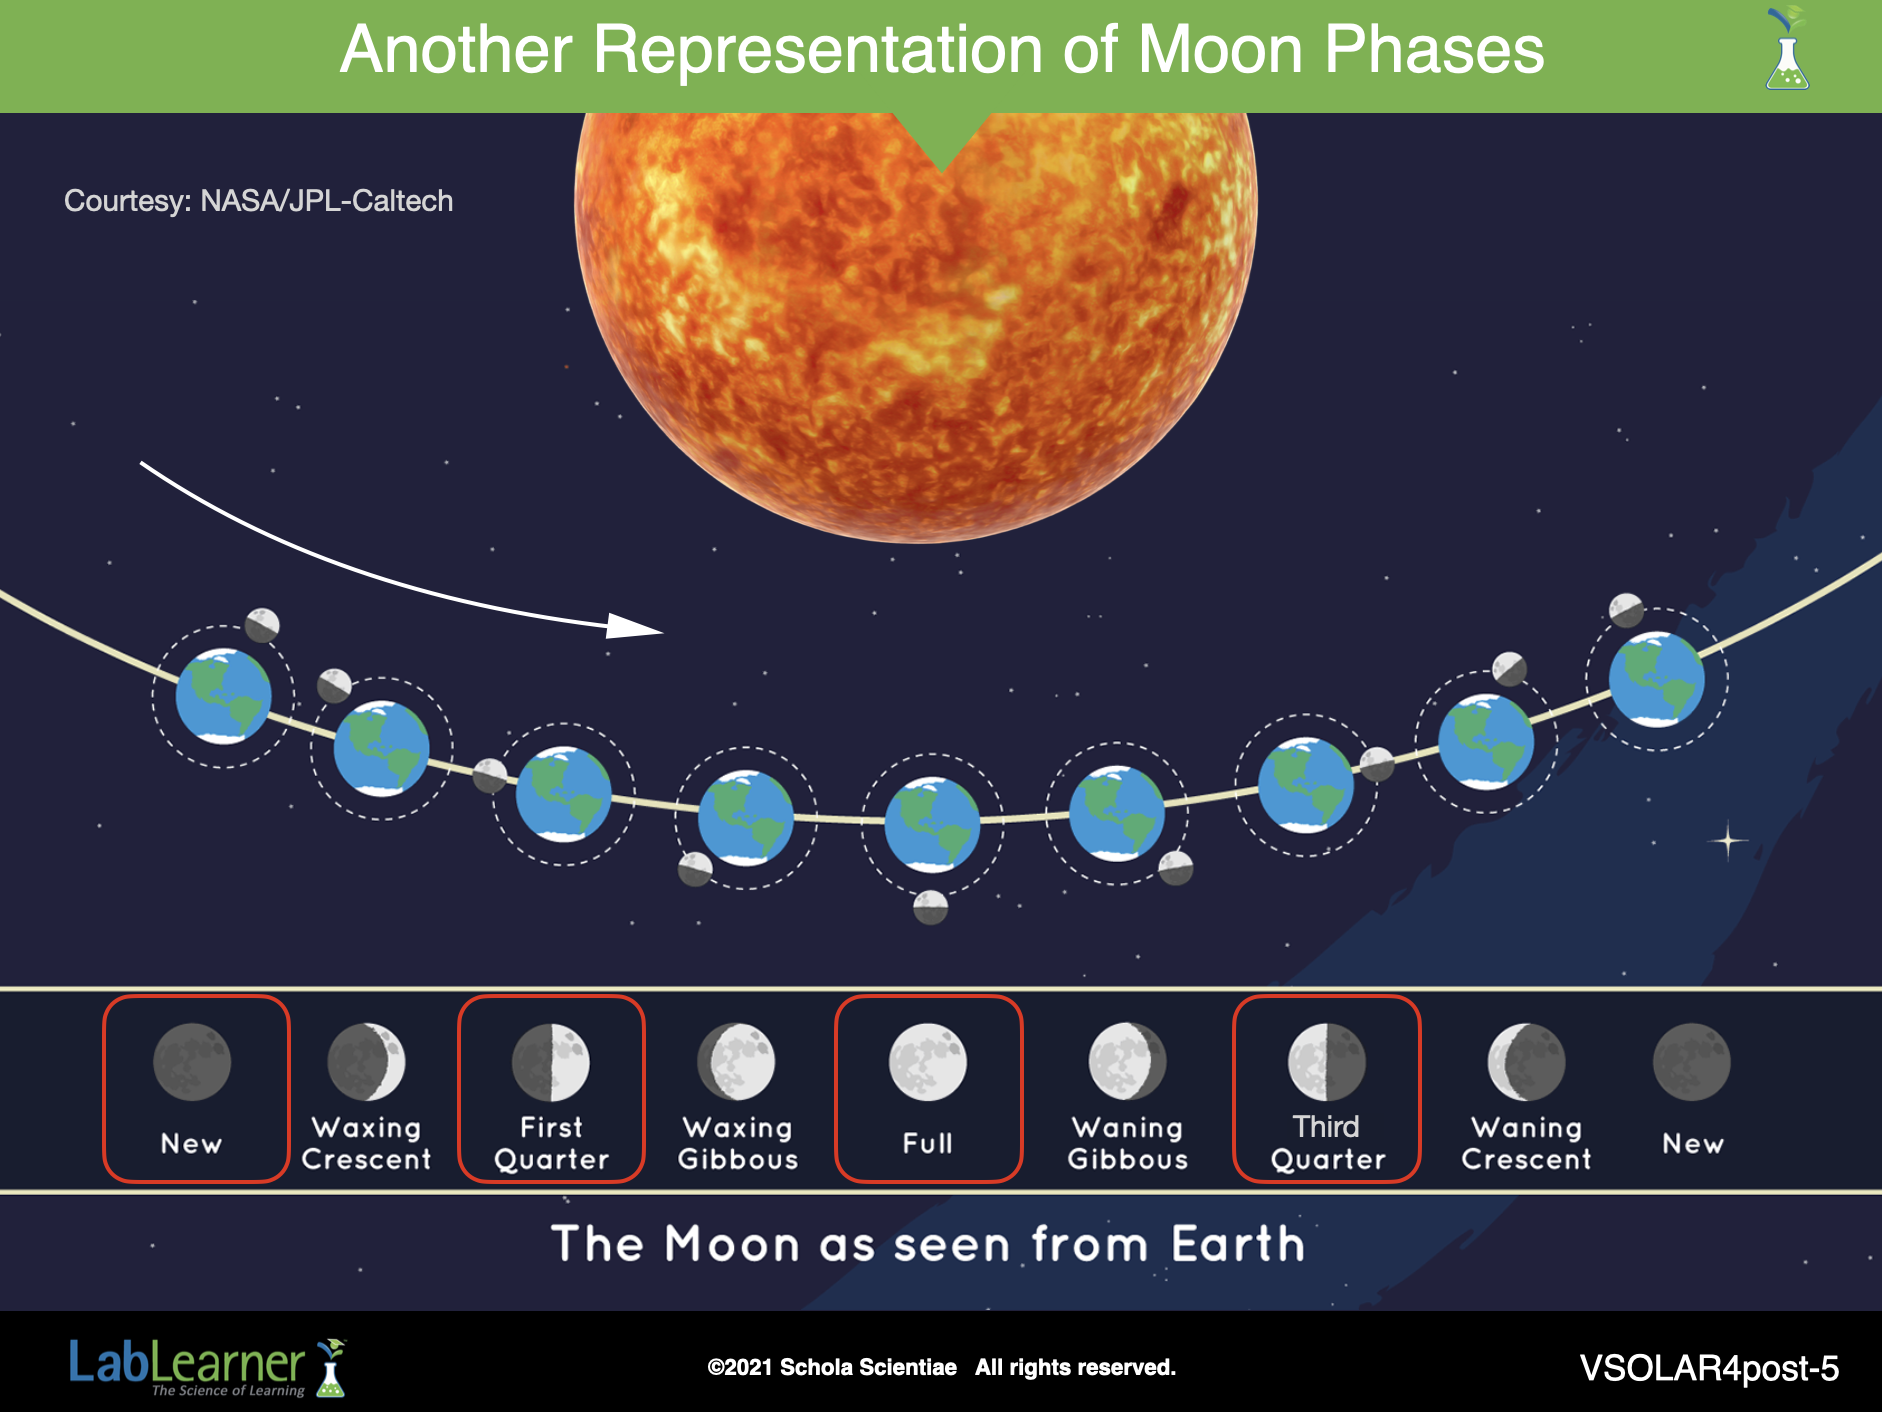
This slide presents yet another representation of the phases of the Moon. Some students may find it useful for conceptualizing the Moon phases. It is from the NASA Jet Propulsion Laboratory at the California Institute of Technology. Notice that intermediate Moon phases are included in this cartoon. Students need not memorize these  intermediate phases at this time and will come across them again in the LabLearner middle school CELL Space.
These additional Moon phases may be of interest to students as the waxing and waning crescent figures are characteristic depictions of the Moon in children’s literature (see image). Such early depictions of the Moon frequently lead to the misconception that the Moon is actually the shape of a crescent rather than the dark part being in shadow (notice how you see stars behind the Moon as if the shaded part wasn’t there!).
The essential issue here is that the Moon revolves around the Earth as the Earth revolves around the Sun. Although we see the different phases of the Moon from our position on Earth, you can see that the Moon is always half-lit by the Sun, and of course, this is the part of the Moon facing the Sun.
______________________________________________
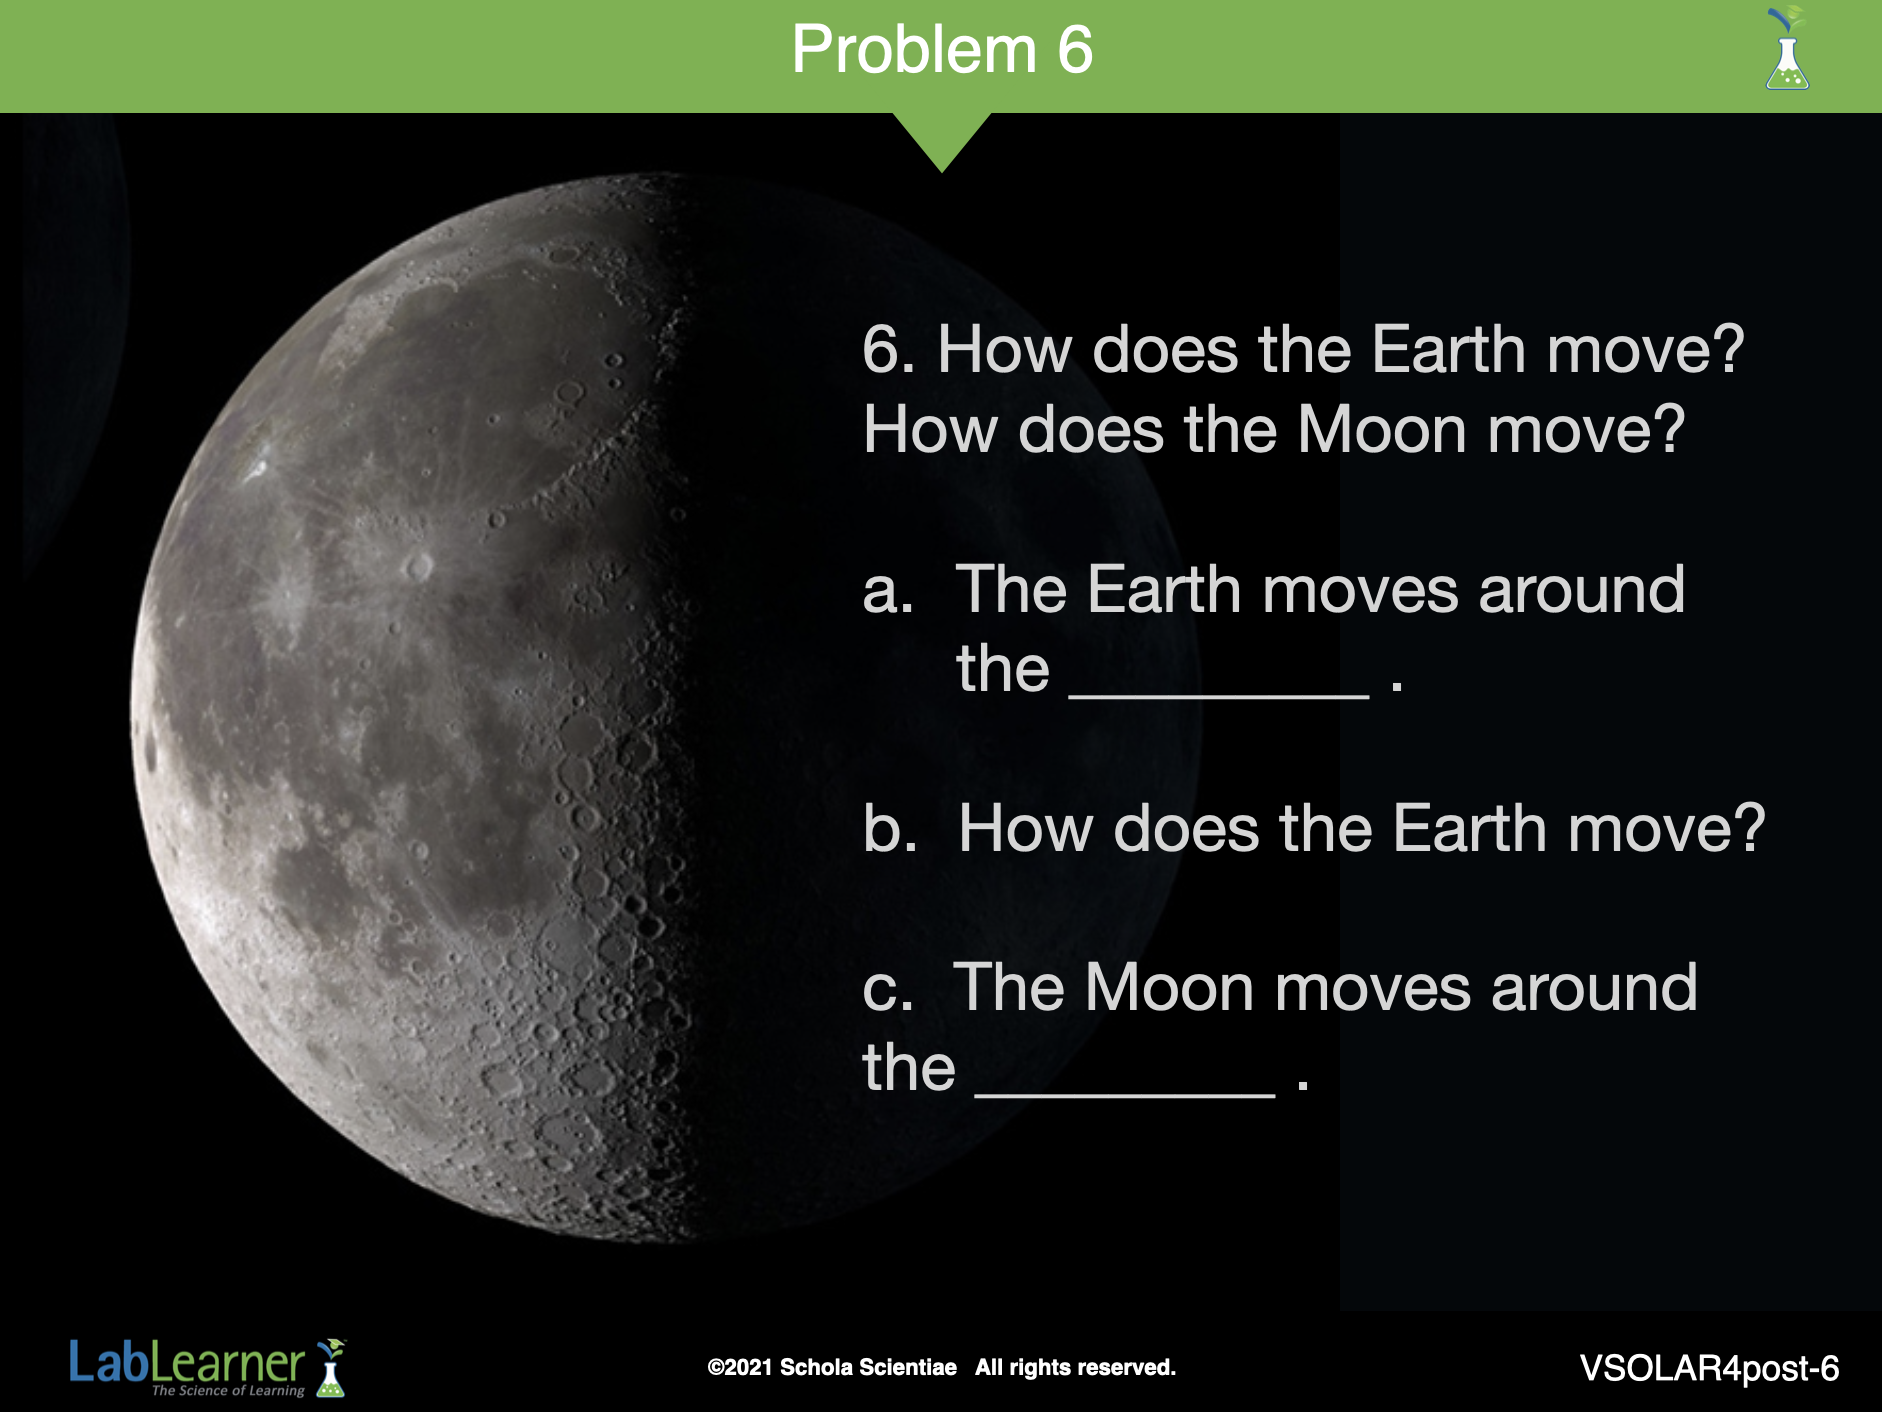
SLIDE VSOLAR4post-6
D. Remind students that throughout this CELL, they have investigated how the position of the planets, Sun and Moon, and the movement of each affects the Solar System.
1. Tell students it is important to remember how the Earth moves and how the Moon moves.
2. Instruct students to take a few minutes to answer Problems 6a – c in the Student Data Record.
3. After students have completed the questions, review the answers as a class.
4. Students may have been confused by the idea that the Moon moves around the Earth and the Sun. If so, reiterate that the Moon revolves around the Earth.
Ask students: Around what does the Earth move? The Earth moves around the Sun.
5. The Moon revolves around the Earth. At the same time, the Earth revolves around the Sun. Therefore, the Moon moves around the Sun with the Earth.
Note: For the purpose of these lessons, students will not be asked whether or not the Moon rotates. However, the Moon does perform one rotation as it completes one revolution around the Earth. Because the near side of the moon always faces the Earth, the Moon must complete one rotation as it revolves once around the Earth.
______________________________________________
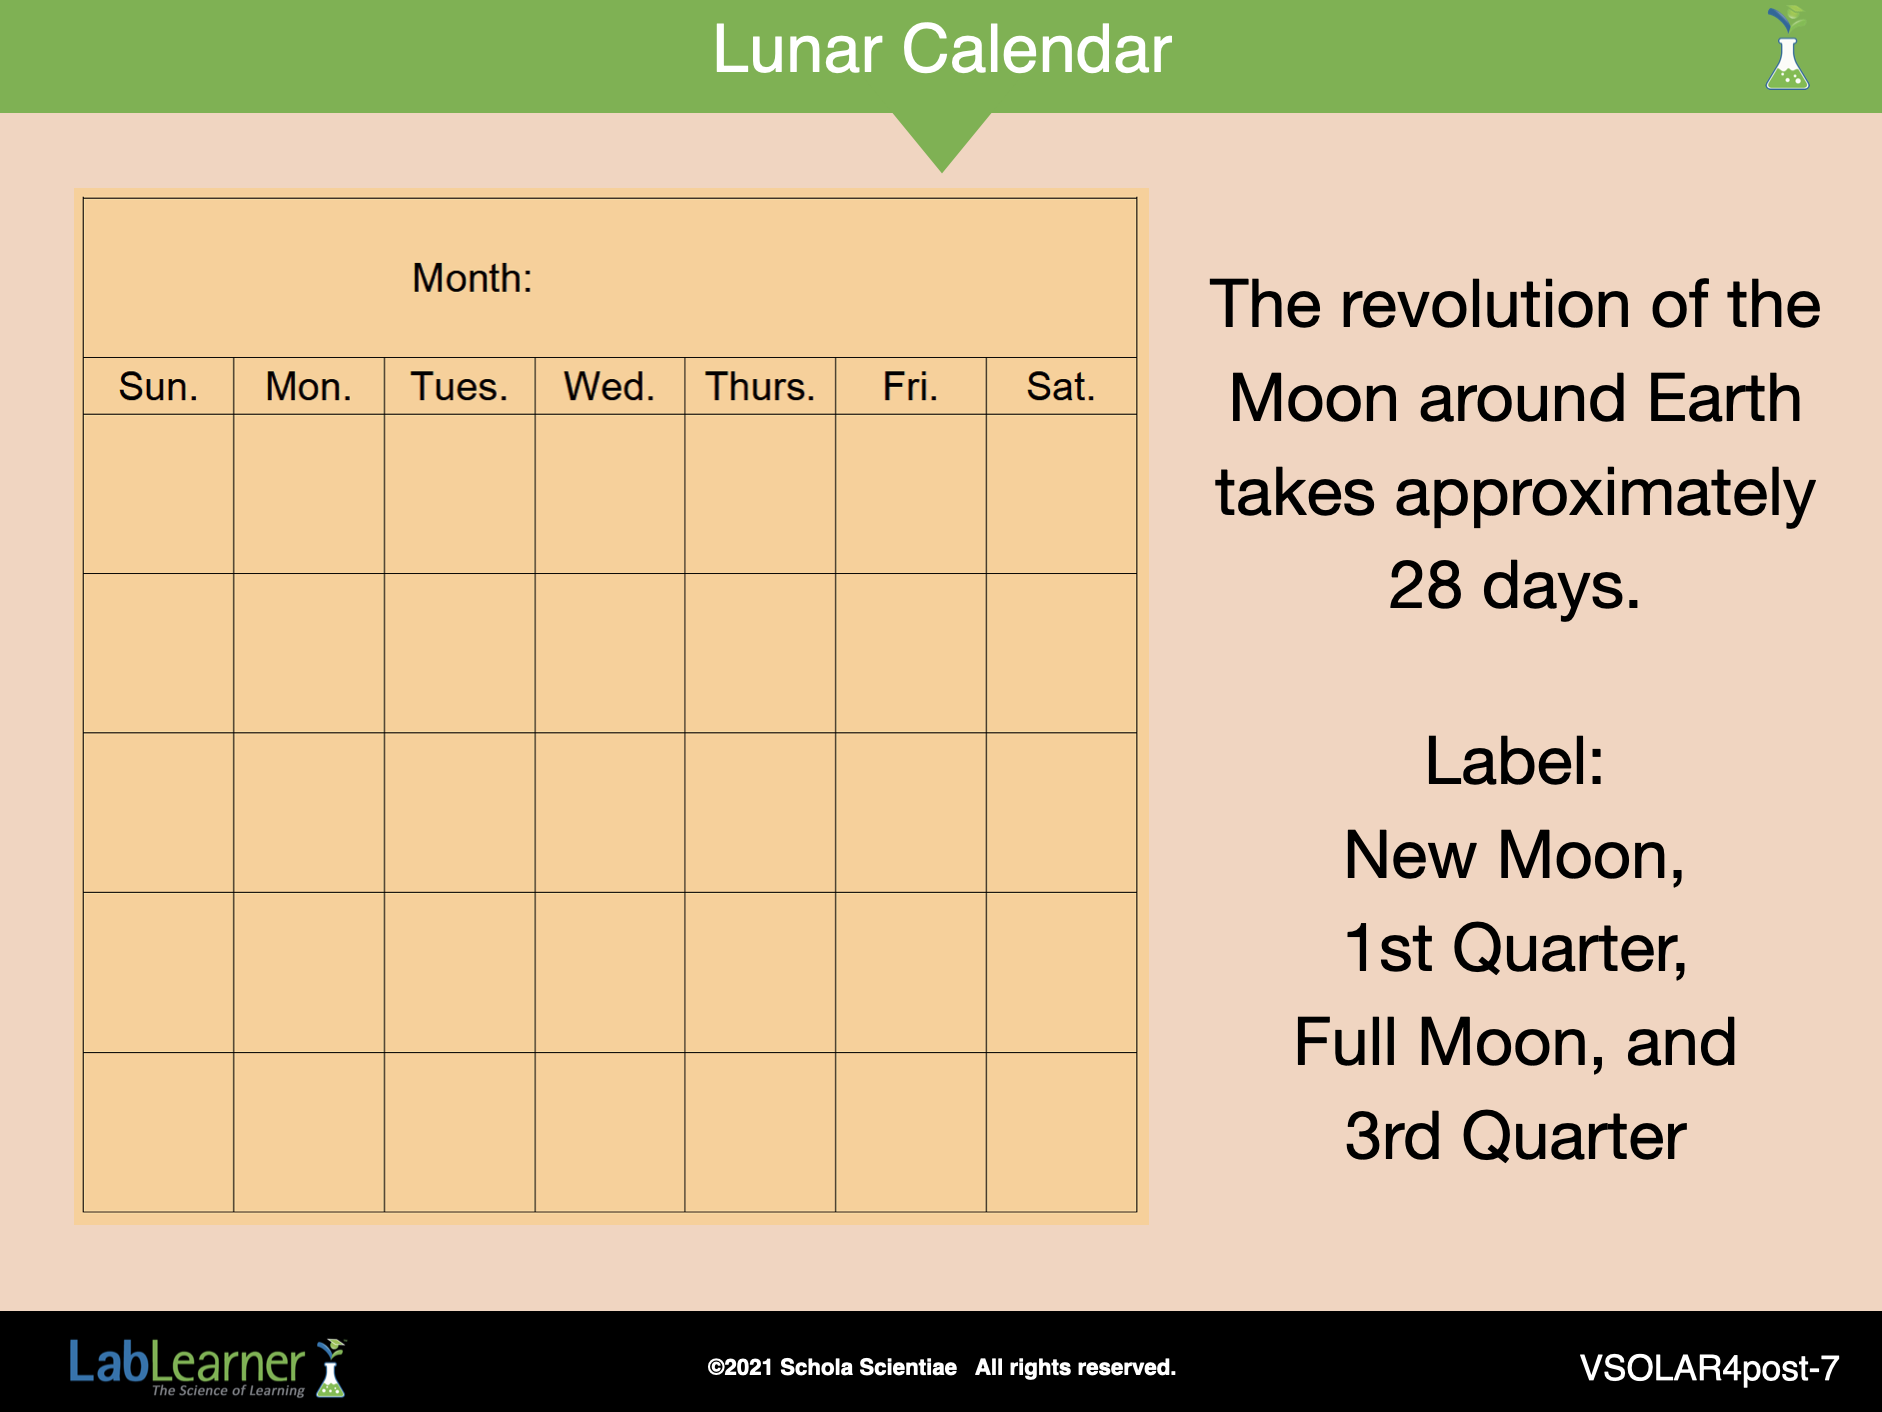
SLIDE VSOLAR4post-7
E. Begin to draw a connection between the calendar year and the phases of the Moon.
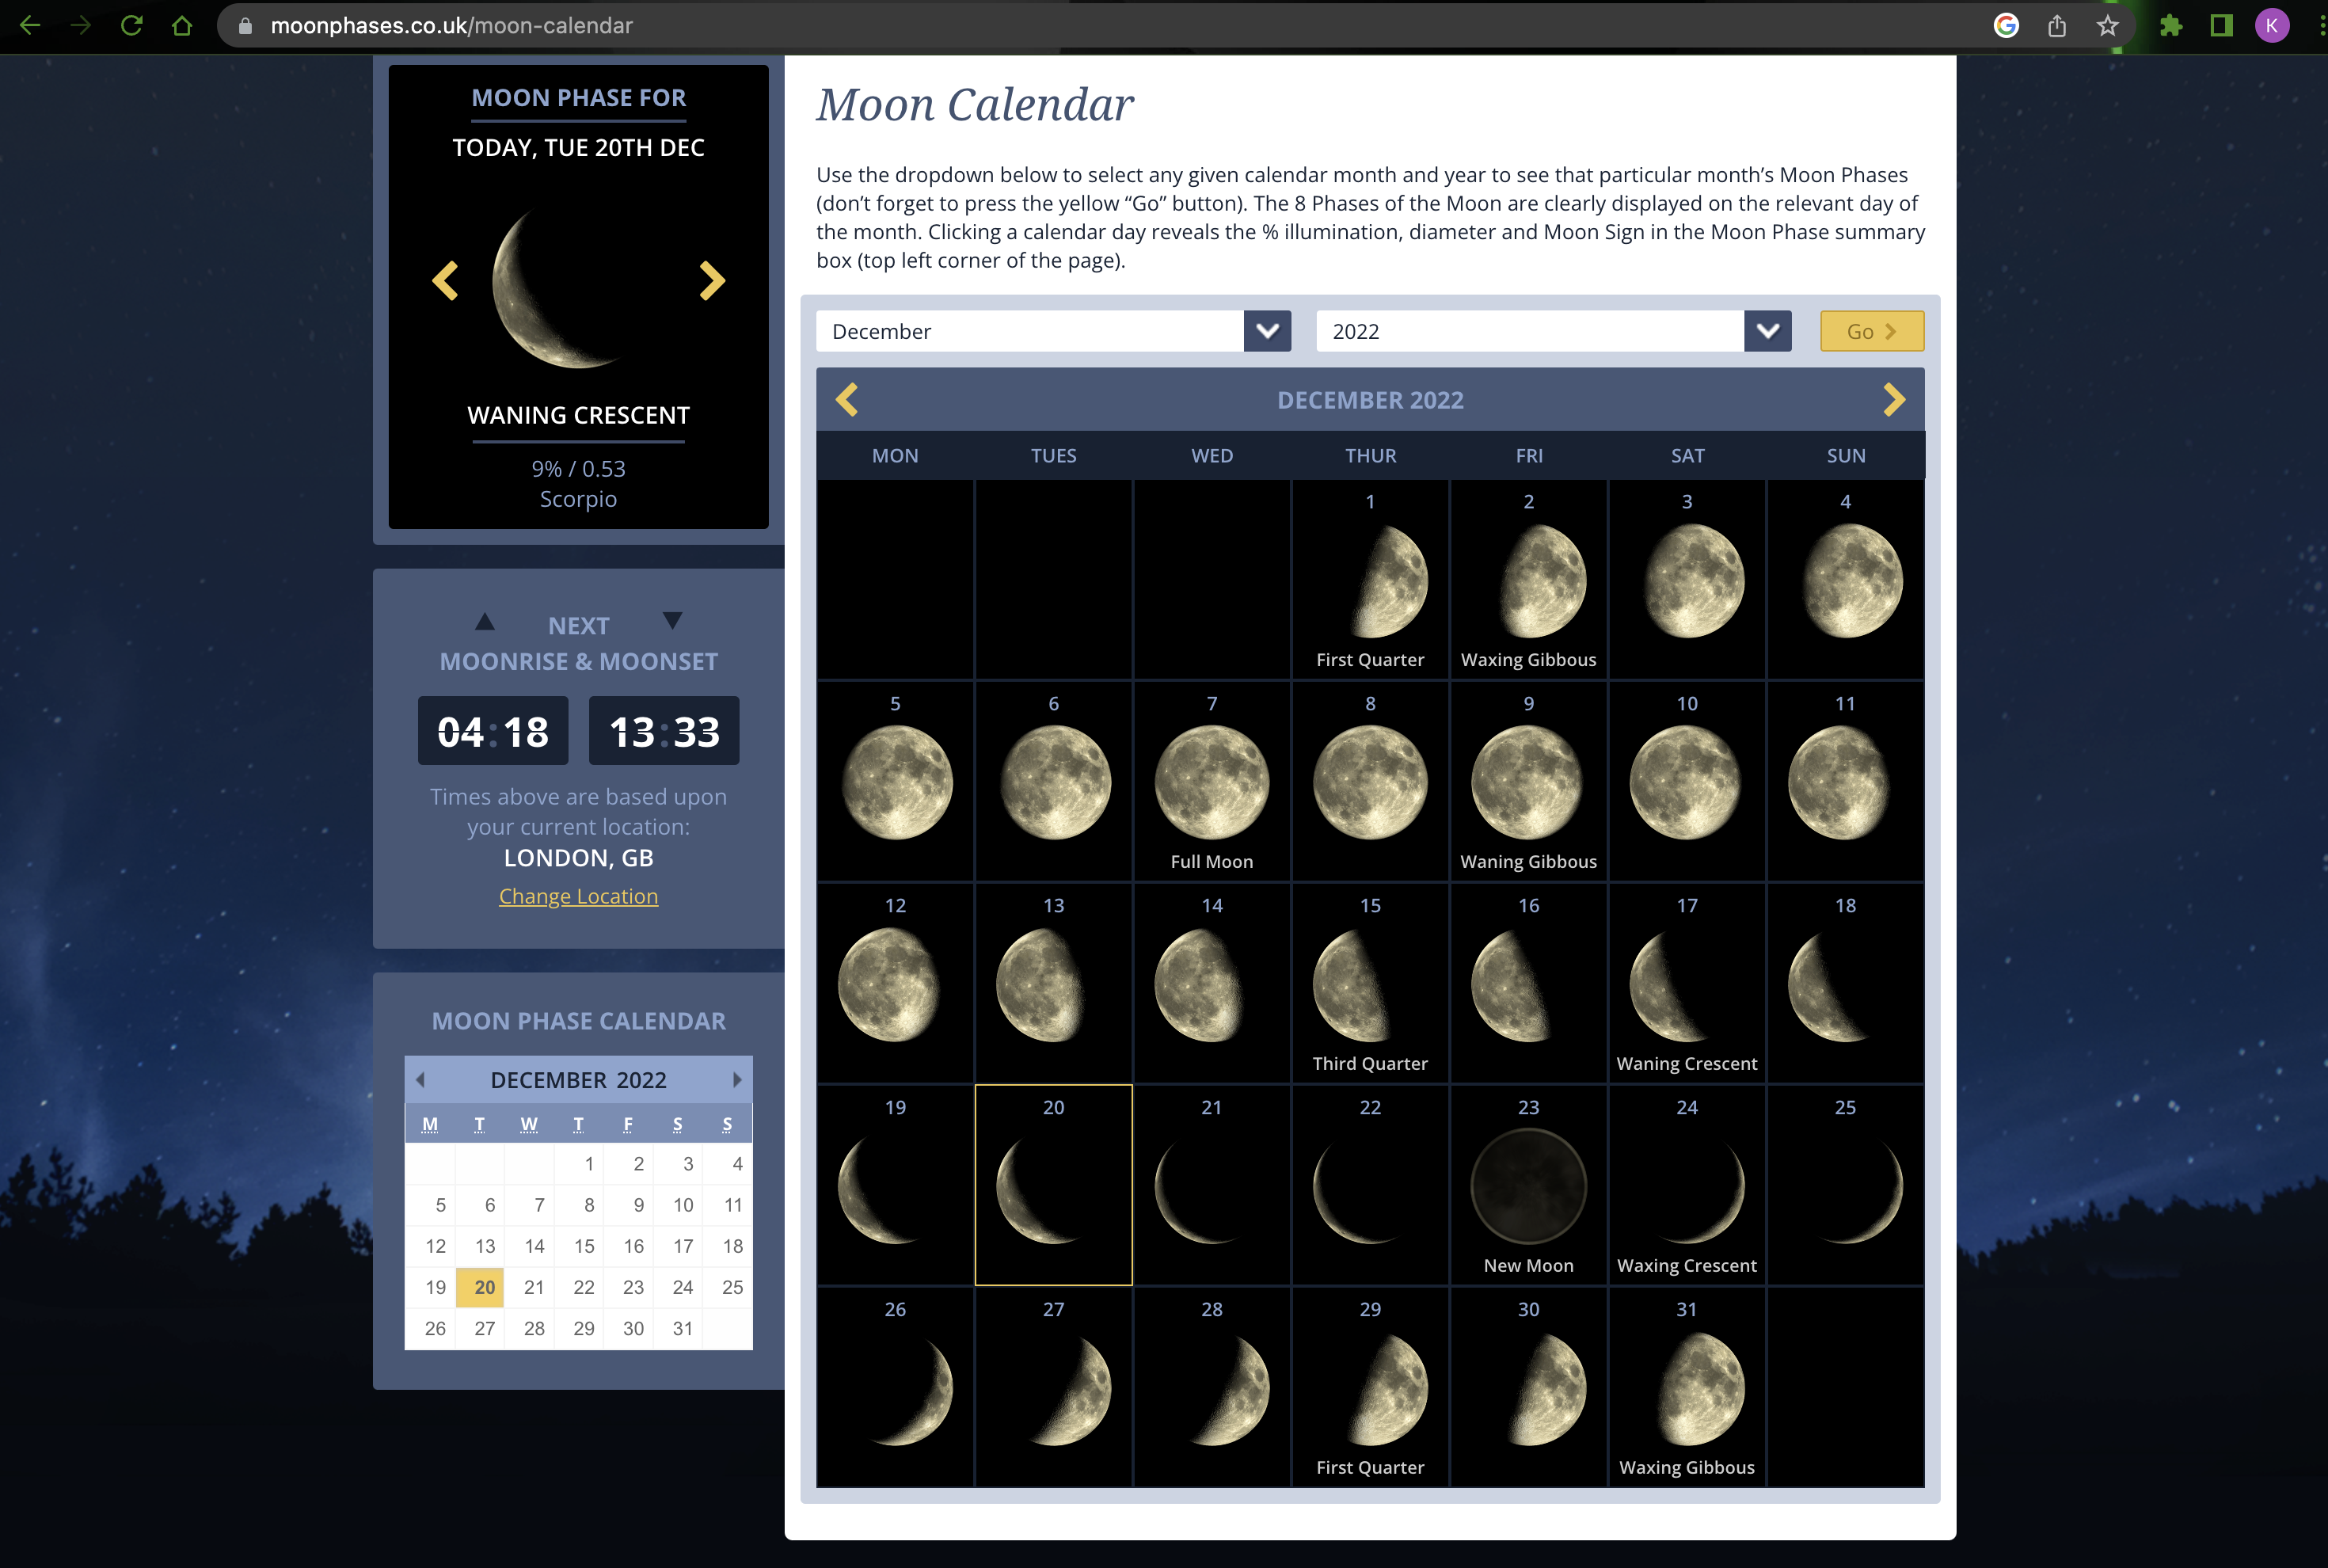
1. Show students the classroom calendar with the four studied phases of the Moon labeled. Explain that the revolution of the Moon takes approximately 28 days. More precisely, one revolution is completed in 29.5 days.
2. Tell students to look at the calendar drawn in Problem 7 of the Student Data Record. Instruct students to fill in the month and the dates so that it shows the current month.
3. Instruct students to label New Moon, 1st Quarter, Full Moon, and 3rd Quarter on the calendar. List the dates so that students can label them. The image below is from an excellent resource from the United Kingdom that permits one to look at the Moon phases for any month from 1950 to 2050 (https://moonphases.co.uk/moon-calendar). Students can even look at the Moon on the day they were born!
4. Divide the class into groups. Instruct students to think about how the Moon appears at each phase.
5. Conduct an activity to help students create a dynamic mental model of the Phases of the Moon. This will assist them in their drawings.
6. After student groups have had time to complete their drawings, review them as a class.
______________________________________________
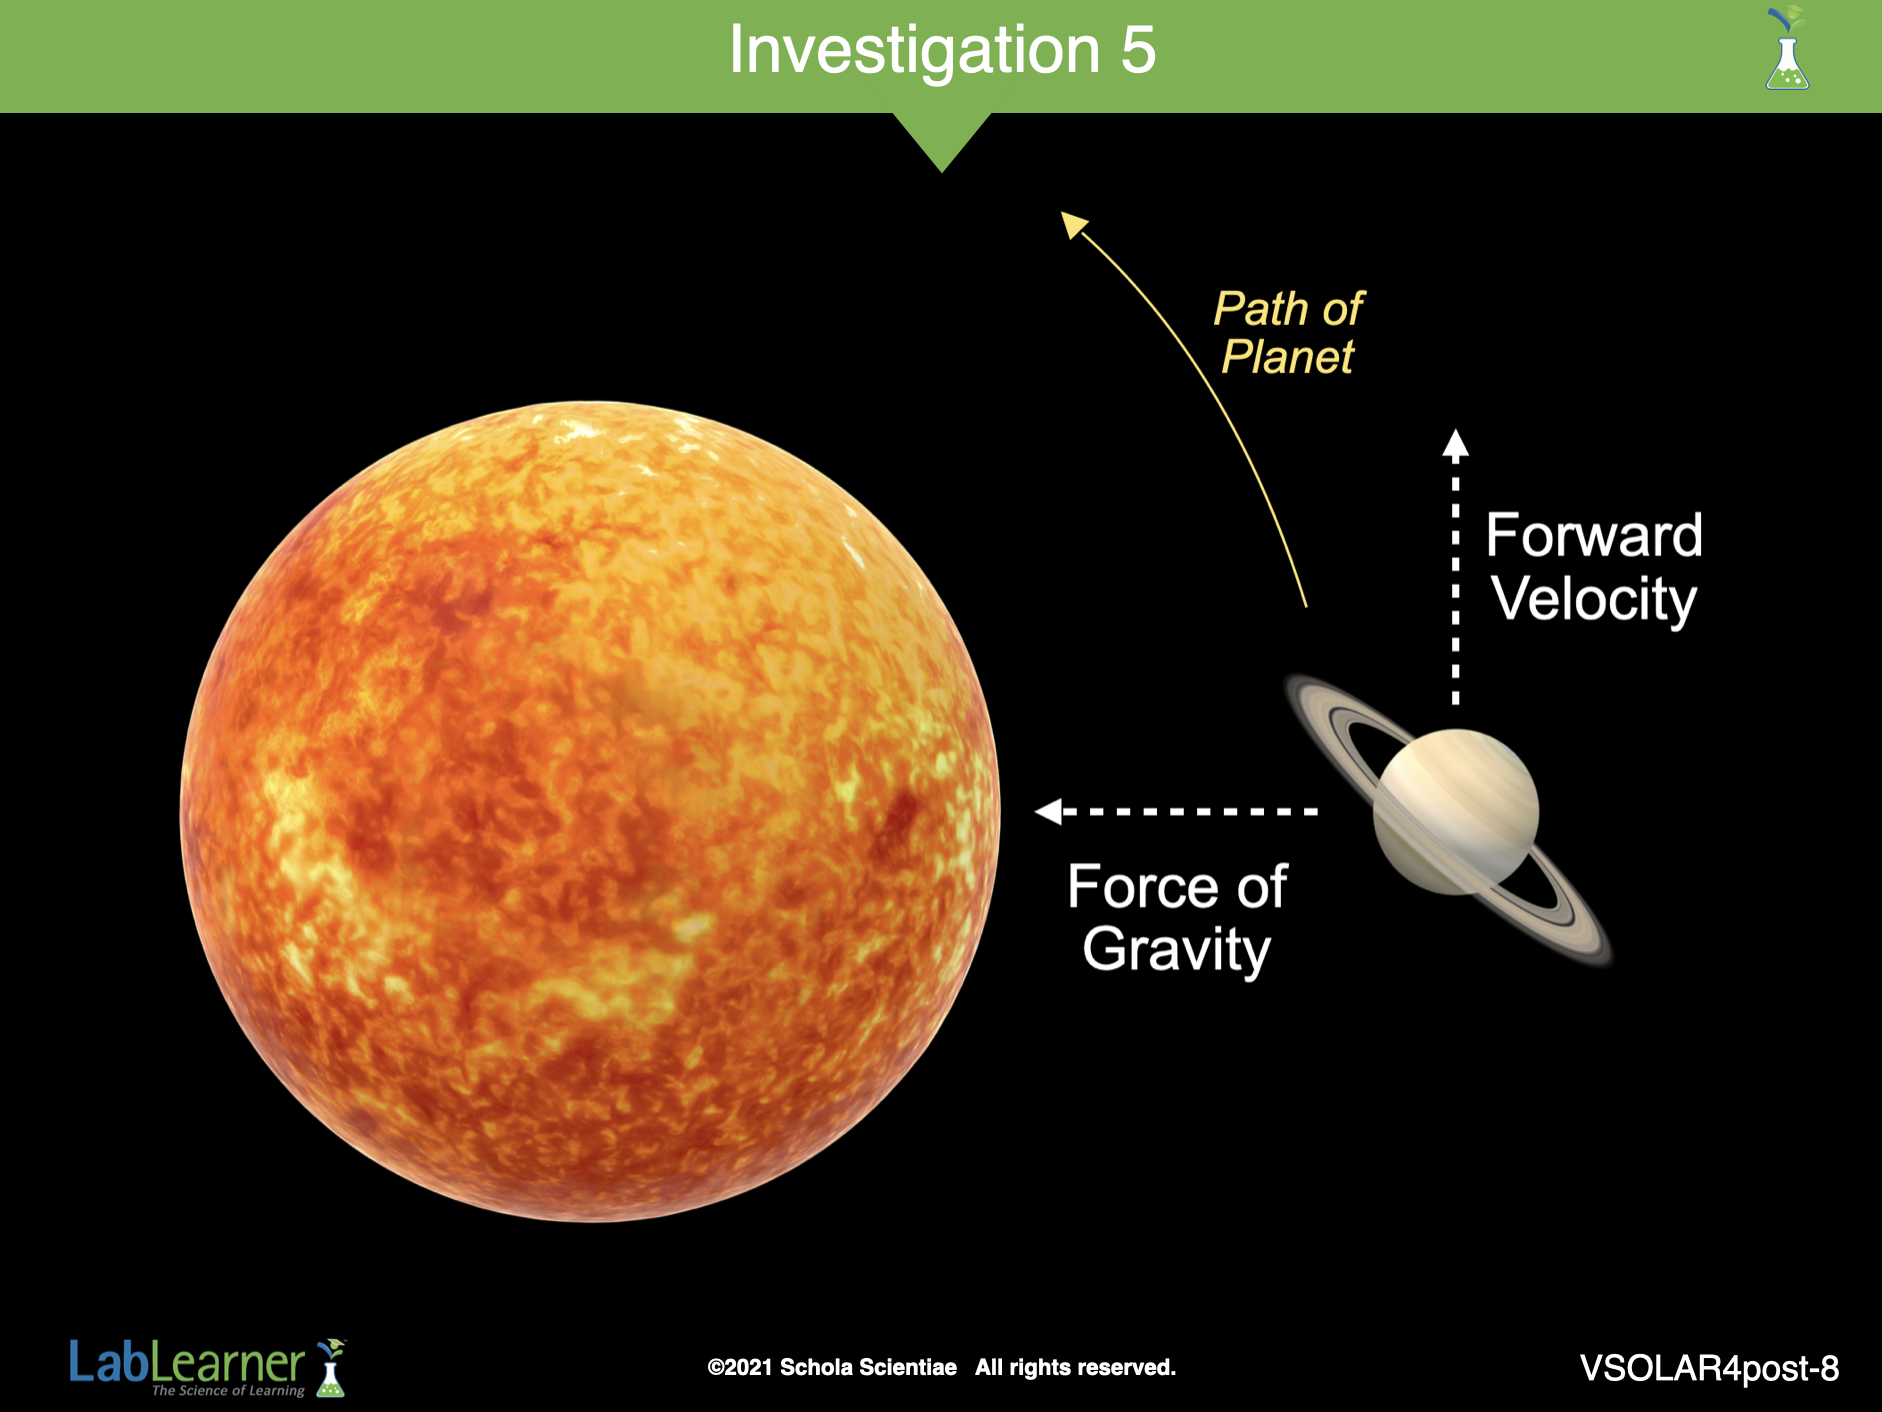
SLIDE VSOLAR4post-8
F. To prepare students for Investigation 5, guide them in the following brief activity.
1. Ask students to listen as you begin a sentence. Students should together complete the sentence by saying aloud the one word that correctly completes it.
a. The planets revolve around the ________. (Sun)
b. The Earth revolves around the ________. (Sun)
c. The Moon revolves around the ________. (Earth)
2. Tell students that in Investigation Five, they will explore what makes the revolution of a planet take place.
KEYS: POSTLAB