Teacher Portal:
Microscopic Explorations
Investigation 2 – PostLab
ASK WHY
Microscopes are one of the most important scientific instruments developed. In fact, in the medical field, microscopes are largely responsible for making modern medicine “modern”!
BRANCH OUT
While we often think of microscopes in terms of research with cells, however, microscopes are used in many other fields where significant magnification is required. Professions that rely on microscopes include jewelers, gemologists (study gems), geologists (study rocks), and forensic scientists (study crimes).
PRINT IT
Use your browser to download a printable PDF as help during the slide presentation and to make additional notes. In your browser, go to File > Print and then choose to save as PDF.
NAVIGATE IT
Once the slide presentation is launched
- use your left and right arrows to advance or go back in the slide presentation, and
- hover your mouse over the left edge of the presentation to get a view of the thumbnails for all the slides so that you can quickly move anywhere in the presentation.
- Click HERE to launch the slide presentation for the CELL.
SHARE IT
SLIDE MICRO2-post-1
Let’s begin the PostLab by reviewing the experiments students performed in the lab. Ask the following questions to promote discussion of the experiments.
What was the theme or focus of the investigation? The focus of the investigation was to observe differences in resolution and field of view when viewing specimens at different powers of magnification, including the unassisted eye and the compound microscope. Students investigated the appearance of three specimens: cork, pieces of thread, and their fingerprints. During their investigation, students viewed each of the specimens using the 4X, 10X, and 40X objectives of the compound microscope. In addition, students made a slide of their fingerprint for viewing with the microscope. In doing so, they learned a procedure for the preparation of a specimen for microscopic analysis.
Think about Trial 1. What question did you answer when performing Trial 1? How did you answer this question?
Students investigated the question: What are the relationships between the resolution of an image, the field of view of an image, and the magnification of the lens used to view an object? To answer this question, students viewed a piece of cork and pieces of thread with the low (4X), medium (10X), and high (40X) objectives of the microscope. Students sketched and described the appearance of the cork and crossed fibers when viewed with each objective. In addition, students calculated the total power of magnification observed when the specimens were viewed under each objective.
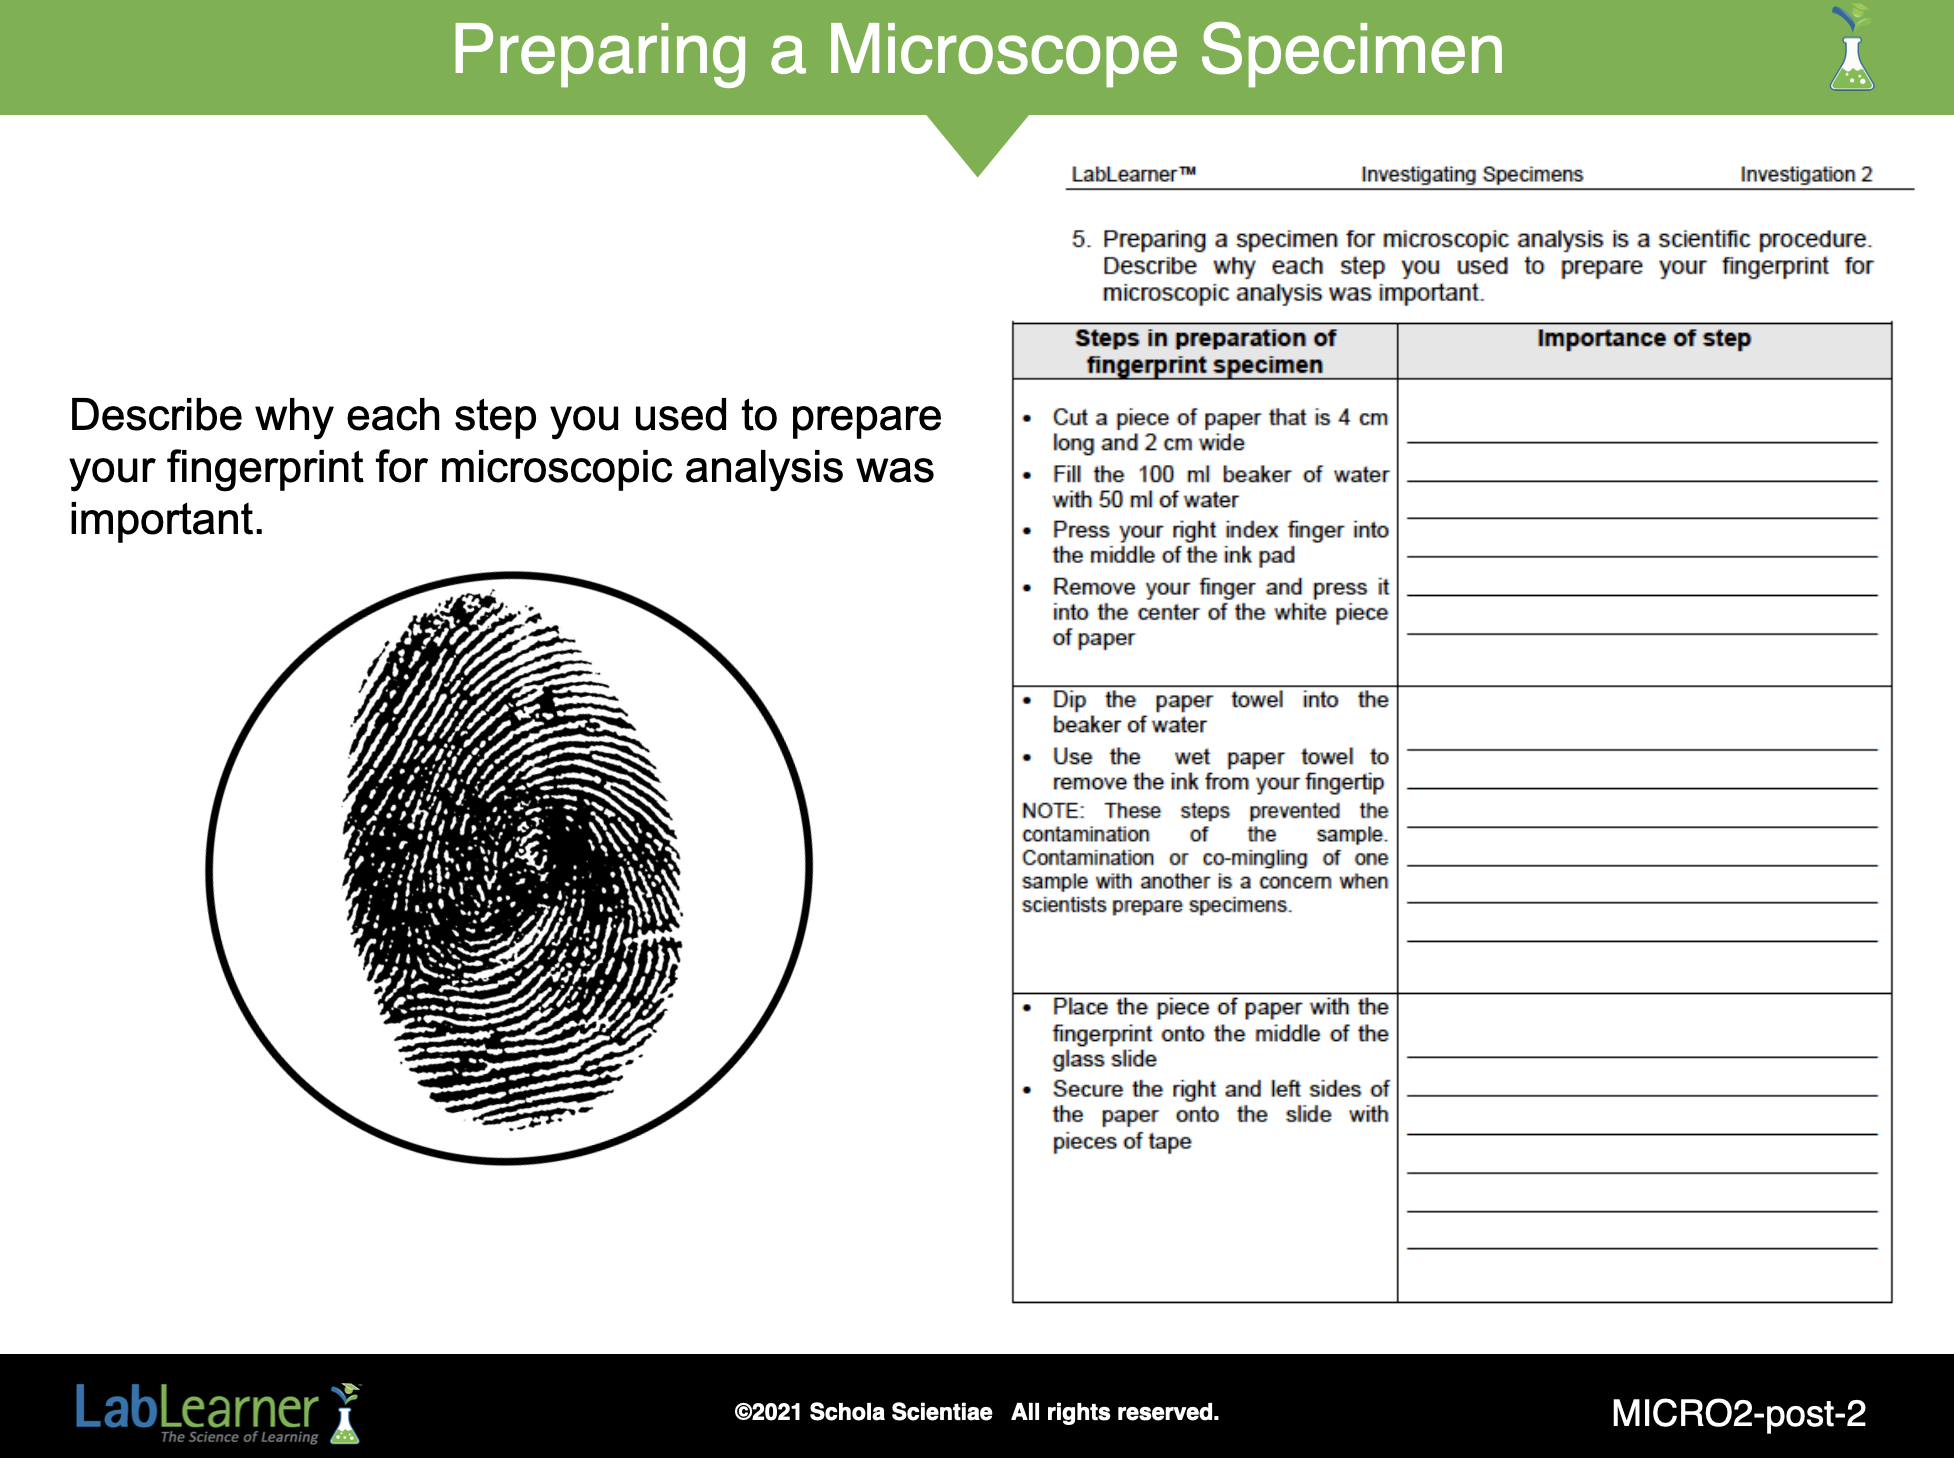
During Investigations Three and Four, students will need to prepare plant and animal specimens for analysis under the microscope. Therefore, it is important to understand why each of the steps they used to make the slide of their fingerprint was necessary.
- Review the steps students performed and the importance of each step. Encourage students to locate the procedure from problem 5 of their Scientist Data Record and suggest the reason that step was necessary. Students should record the importance of each step in the appropriate column of problem 5.
______________________________________________
SLIDE MICRO2-post-2
Ask students: Can you think of one other property of the specimen preparation that was necessary for you to view the specimen? Hint: Think about the thickness of the piece of paper and the light source of the microscope.
Student answers may vary. Encourage students to understand that in order for a specimen to be analyzed under the microscope, light must be able to travel through the specimen and any substance it is mounted on. In the case of their fingerprints, the paper was thin enough that light could pass through it and travel up into the objectives and the eyepiece of the microscope.
______________________________________________
SLIDE MICRO2-post-3
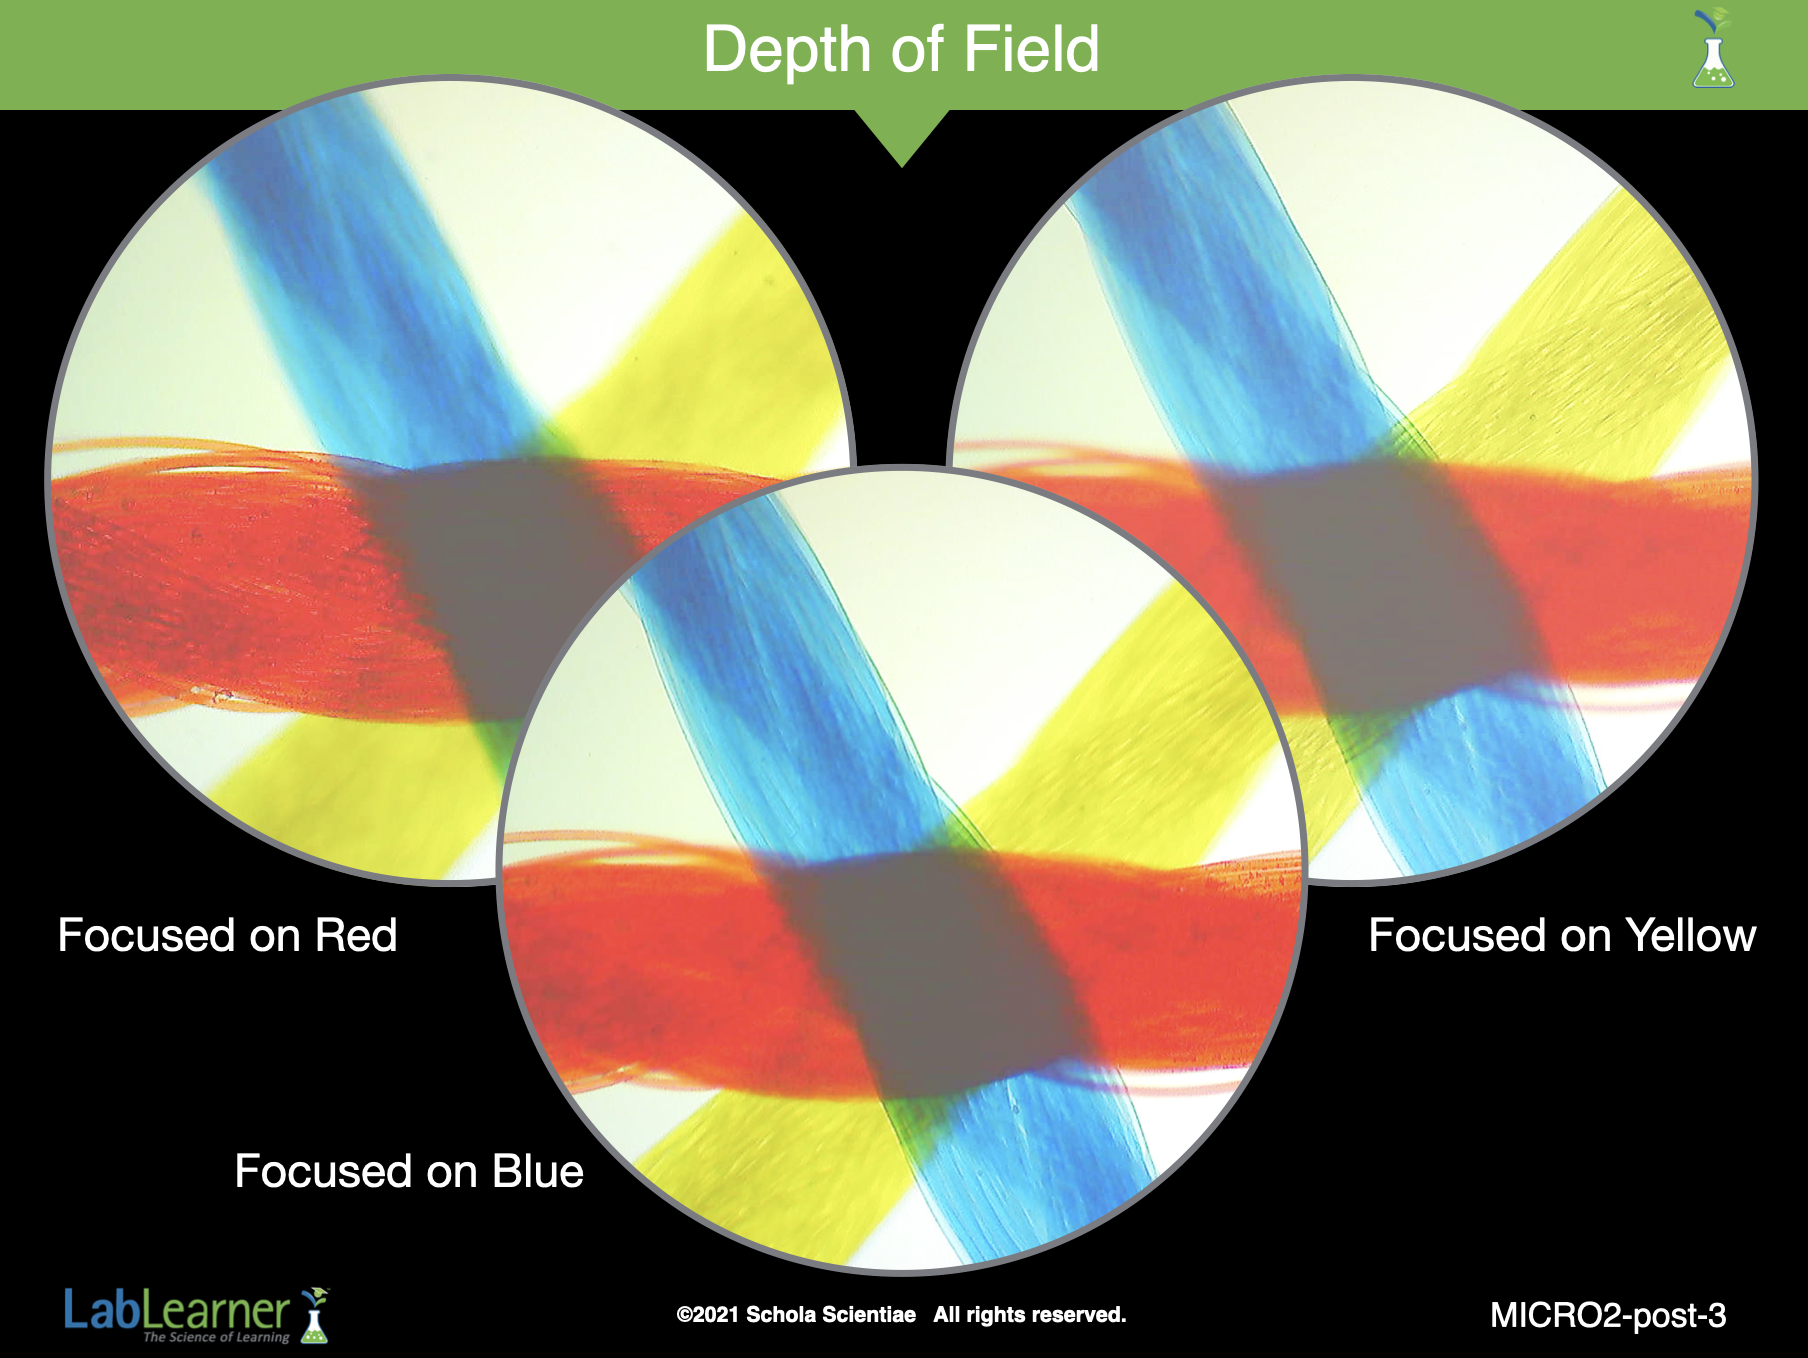
In this slide, we take a brief look at a property you may have noted already in your microscopic observation. That is, it is not possible to focus on the entire specimen at the same time. When you adjust the focus knob of the microscope and look carefully, you can see that not all parts of the specimen are in focus at the same time. Different areas of the specimen come into and out of focus as you turn the focus knob. For example, in this slide, photographs were taken (from left to right) when focused on the red thread, then the blue thread, and finally the yellow thread. Can you think of any reason why this happens? Student answers may vary but should include the concept that the specimen itself is 3-dimensional, that is, it is not flat.
Therefore, as the objective lens is moved up or down, it focuses on different levels of the specimen. Notice on the slide that when we focus on the red thread, the blue and yellow threads are slightly out of focus. You still see them, but they are not as clear as the red thread. The same thing occurs when focused on the blue or yellow threads. This effect is called depth of field. You are focusing on different depths of the specimen.
____________________________
Look at the pictures below. They demonstrate how depth of field can be used with the lens of a camera. If you click on the image, it will open in a new window and be easier to see the details.

Every lens, including those in our eyes, can only focus on one distance at a time. Try focusing on your outstretched hand in front of you. Notice how the objects in the background are not focused. On the other hand, when you focus your eyes on the background, your hand is no longer in focus. This is the result of depth of field and it occurs with all lenses.
______________________________________________
SLIDE MICRO2-post-4
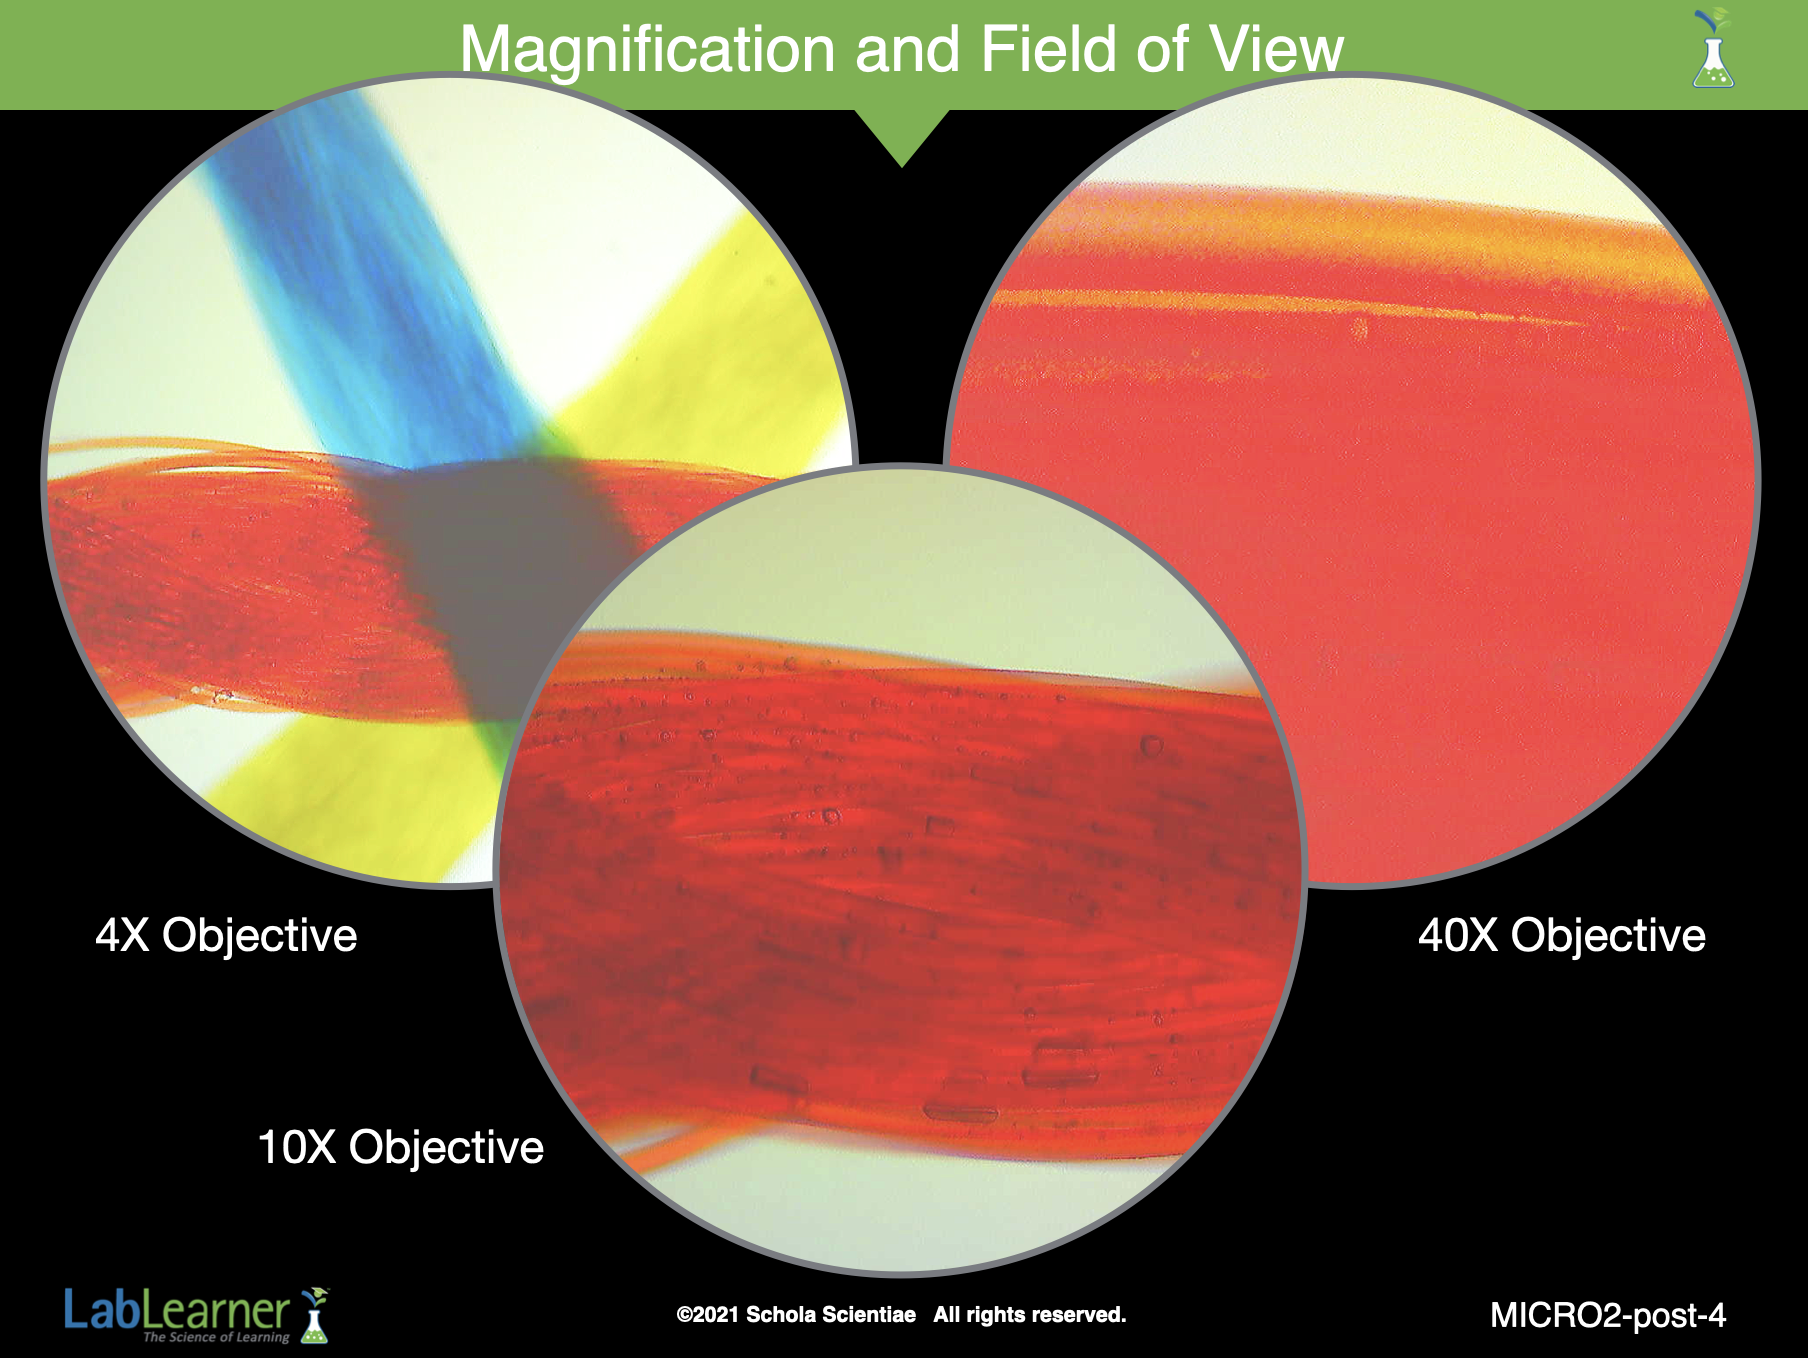
Let’s begin analysis of Trials 1 and 2 by discussing the appearance of the pieces of cork and thread and the fingerprints when viewed with the three microscope objectives.
Ask students: What was the power of magnification when the specimens were viewed with the three different objectives? How did you calculate the power of magnification? Students should answer that the power of magnification was calculated by multiplying the magnification power of the objective by the magnification power of the eyepiece. Both the power of magnification of the objective and the eyepiece were included in the equation because there is a lens in both the eyepiece and the objective of the microscope. Each lens has refractive power. Therefore the total magnification is the product of the magnification of both lenses.
-
- Total power of magnification of the low power (4X) objective
- Objective power X eyepiece power
- 4 X 10 = 40X
-
- Total power of magnification of the medium power (10X) objective
- Objective power X eyepiece power
- 10 X 10 = 100X
-
- Total power of magnification of the high power (40X) objective
- Objective power X eyepiece power
- 40 X 10 = 400X
Describe some of your observations of the crossed fibers specimen you made when viewing it through the three objectives. Explain any differences in the appearance of the pieces of thread when the different objectives were used. Use the sketches you drew in your Scientist Data Record to help you. Student answers will vary. However, students’ answers should include a description of the thread specimen under each viewing condition. In addition, students should indicate that as the magnification power of the objectives increased from 4X to 40X, more details of the crossed fibers specimen were visible and the structure of the fibers was magnified. For example, when viewed with the low power objective, almost all of the fibers were visible. When viewed with the medium power objective, a portion of the pieces of thread was visible and it was easier to see that the different color fibers were themselves composed of smaller fibers. At the high level of magnification, the 40X objective, much less of the total specimen was visible. In addition, the higher magnification showed that the width along each of the smaller fibers was different at different places along the fibers and that there were some individual fibers that had broken off of the small fibers and extended in different directions. In addition, it was easier to determine which of the colored fibers was on top or below the other fibers.
______________________________________________
SLIDE MICRO2-post-5
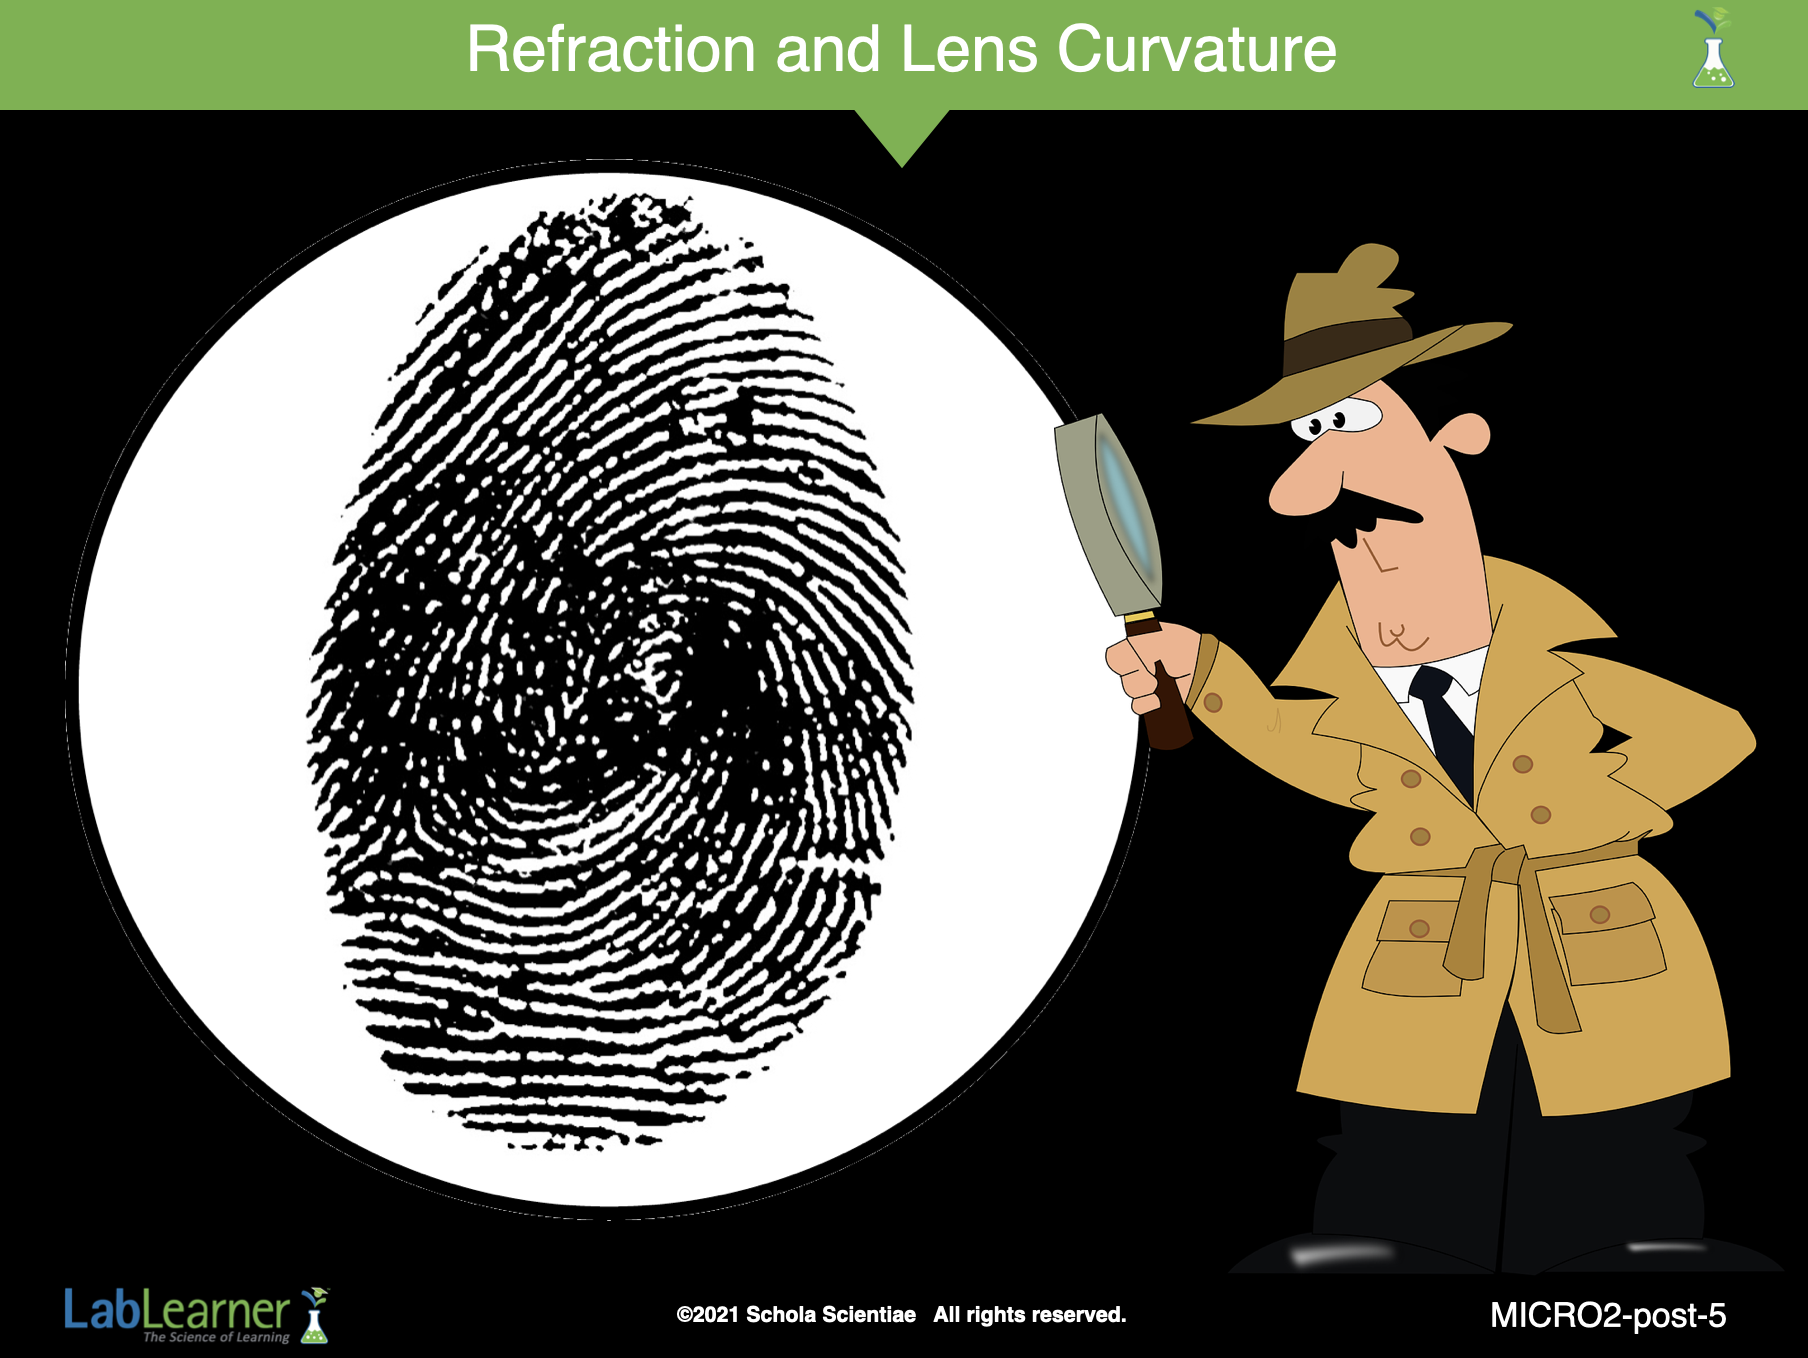
Describe some of your observations of your fingerprint you made when viewing it through the three objectives. Explain any differences in the appearance of the specimen when the different objectives were used. Use the sketches you drew in your Scientist Data Record to help you. Student answers will vary. However, students’ answers should include a description of their fingerprints under each viewing condition. In addition, students should indicate that as the magnification power of the objectives increased from 4X to 40X, more details of the specimen were visible. For example, when viewed with the low power objective, several curved, bumpy dark lines were visible. The decrease in the size of the field of view when going from 4x to 10x meant that fewer lines were visible. However, details such as breaks or irregularities in the texture of the lines were more visible at 10x than at 4x. At 40x, one single line or spot of dark ink filled the viewing area. Paper fibers were able to be seen.
______________________________________________
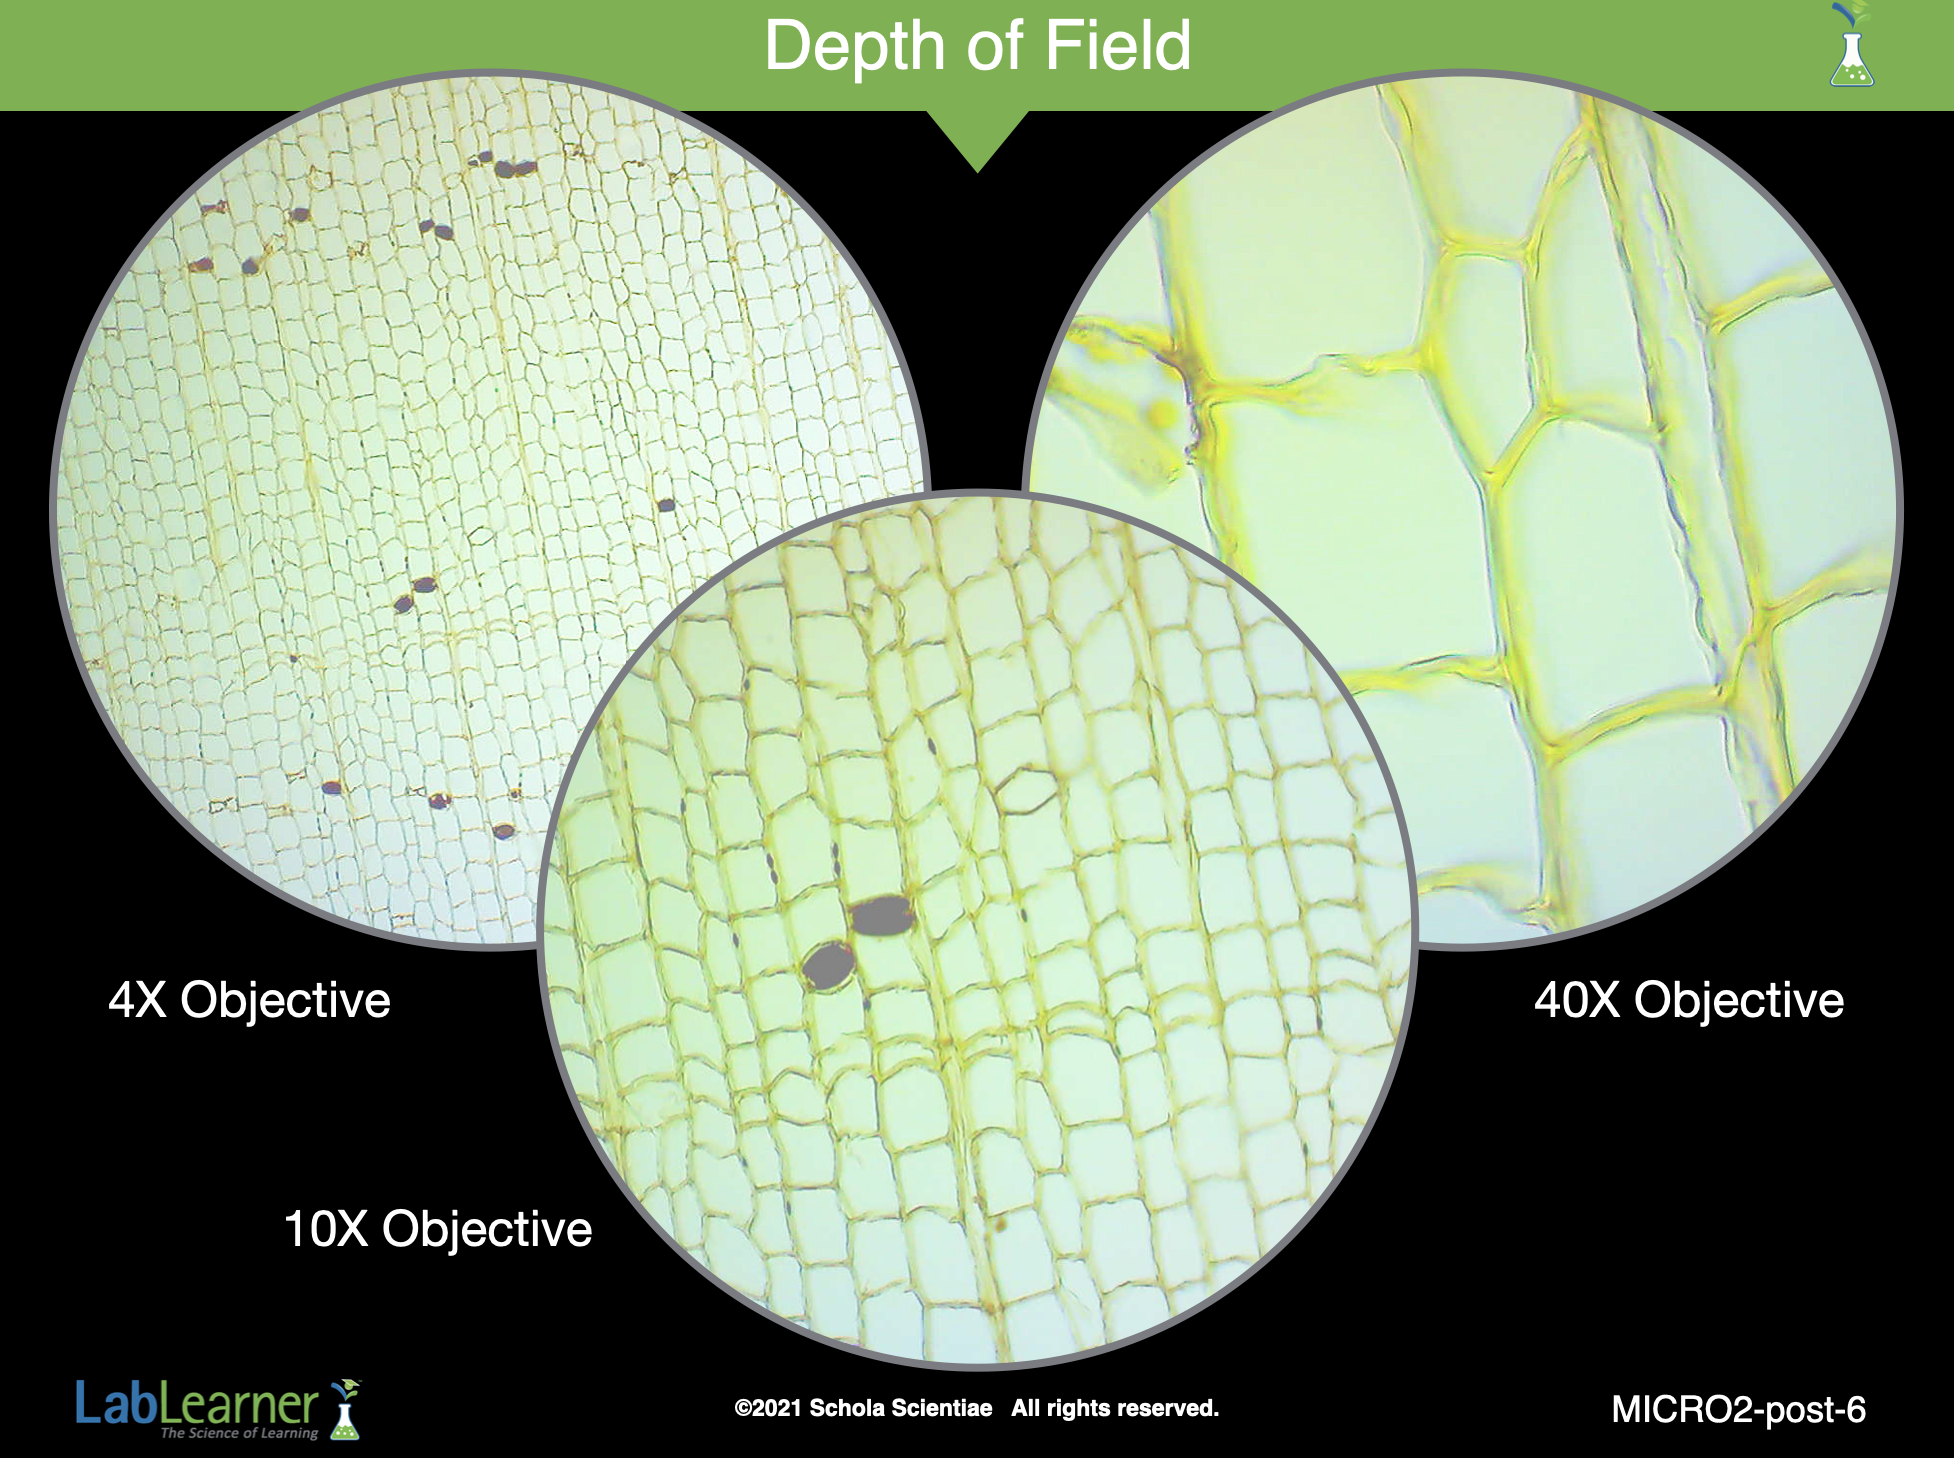
SLIDE MICRO2-post-6
Describe some of your observations of the cork specimen you made when viewing it through the three objectives. Explain any differences in the appearance of the cork when the different objectives were used. Use the sketches you drew in your Scientist Data Record to help you. Student answers will vary. However, students’ answers should include a description of the cork specimen under each viewing condition. In addition, students should indicate that as the magnification power of the objectives increased from 4X to 40X, more details of the cork specimen were visible and the structure of the cork was magnified.
For example, when viewed with the low power objective, almost the entire piece of cork was visible. When viewed with the medium power objective, a portion of the cork piece was visible. At this level of magnification, the cork piece appeared to be composed of small circular and rectangular shapes that were hollow inside. At the high level of magnification, the 40X objective, much less of the total specimen was visible, but it was evident the small rectangular and circular shapes had jagged edges and some of the shapes overlapped onto one another. In addition, it now appeared as if some of the shapes were hollow inside while others were not.
You described the differences in the specimens when viewed with the three objectives. Did you observe any similarities in the images of each specimen when they were viewed with the three objectives? Can you describe the similarities? Student answers may vary. However, student answers should discuss the following similarities: the color and proportions of the specimens were similar when viewed with all three objectives. In other words, the different lenses did not produce a change in color or a change in the proportions of the images. The specimens did not turn a different color or change from a circular to triangular shape when the objectives changed.
______________________________________________
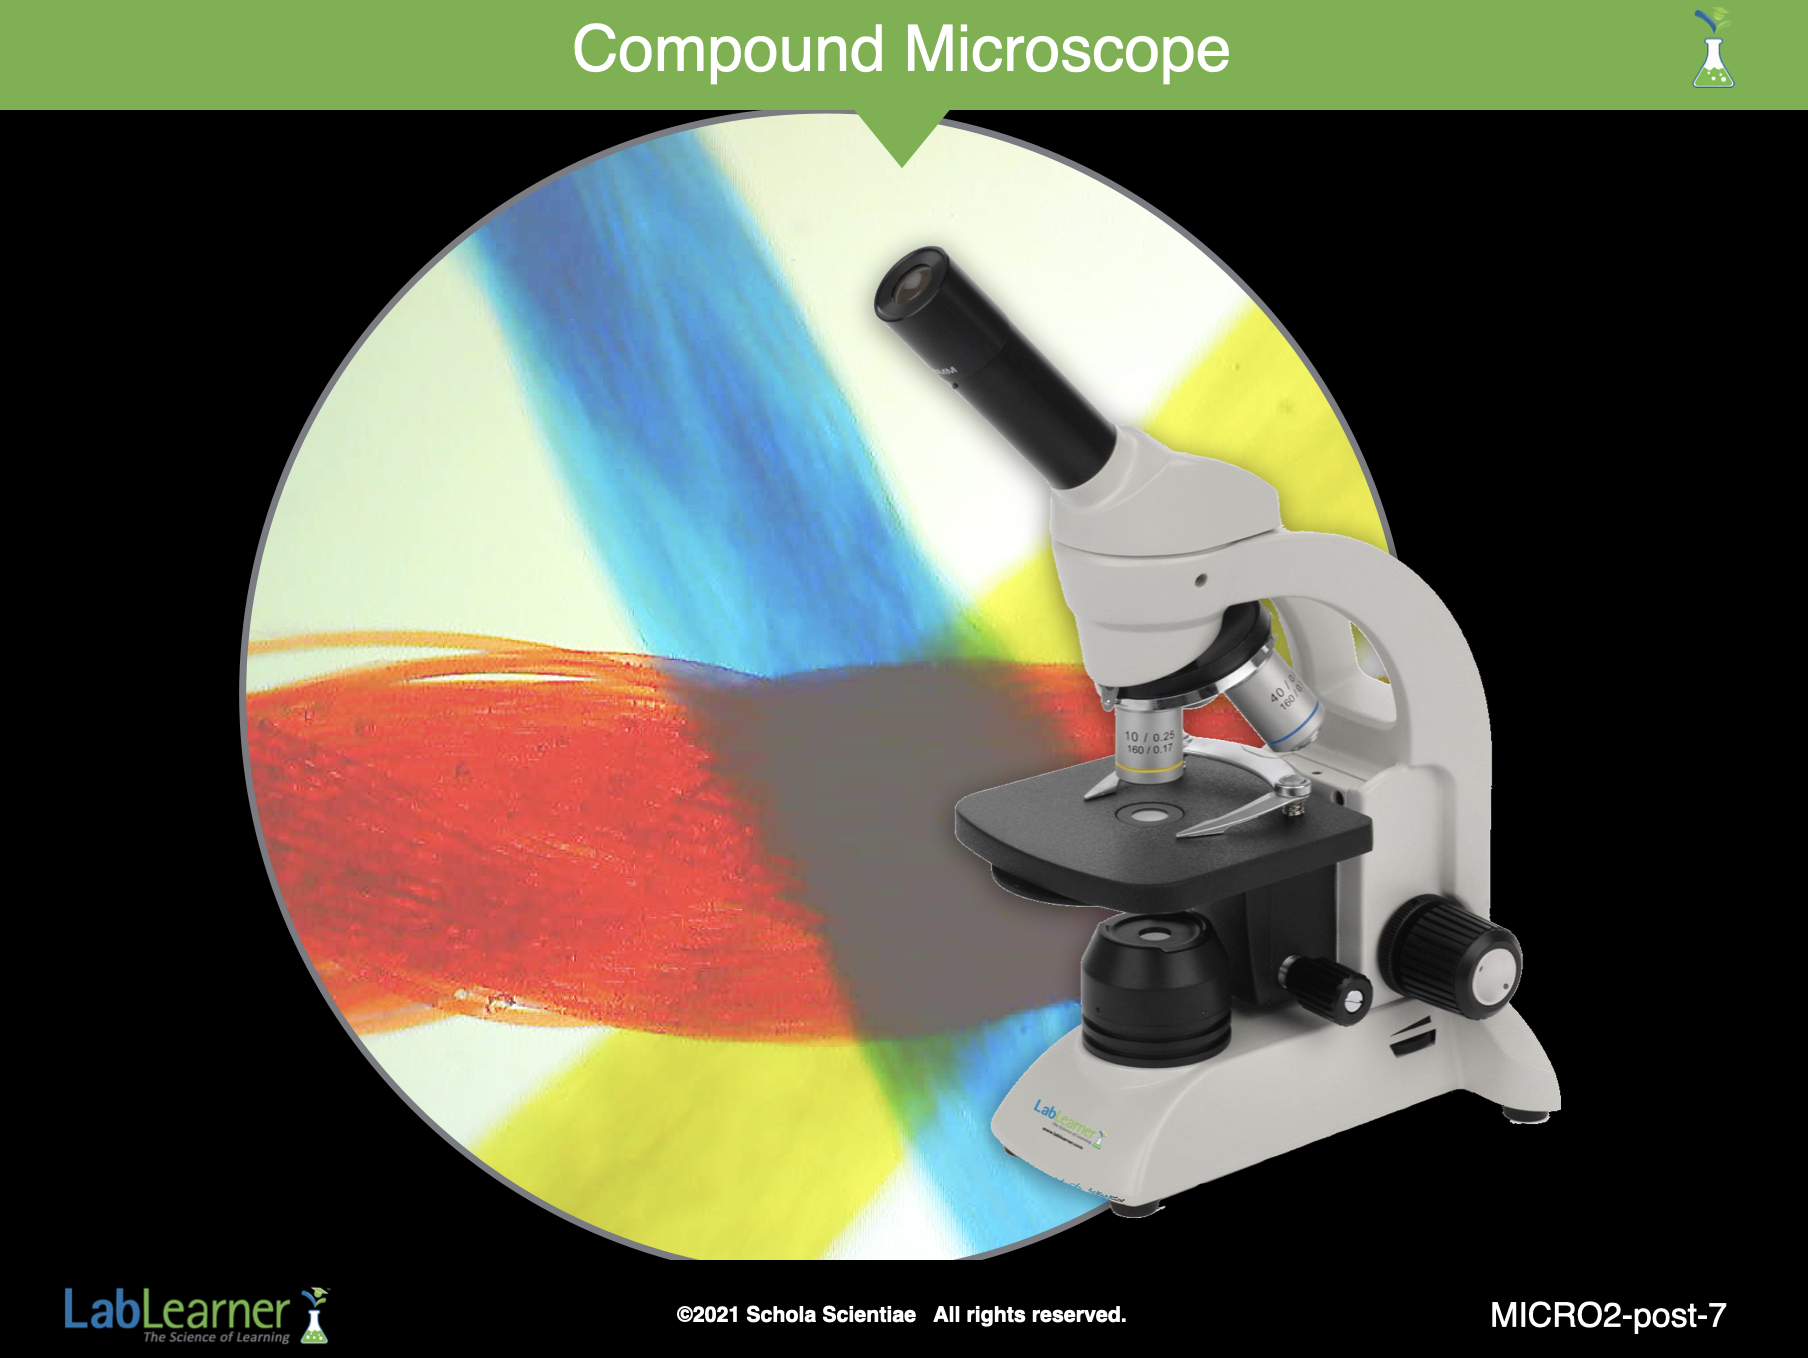
SLIDE MICRO2-post-7
Ask students: How would you answer the question? What conclusions can you draw about the power of magnification, resolution, and field of view of images? Use data from your experiments to support your answer. As the power of magnification of a lens increases, the resolution of images increases but the field of view decreases. In other words, as the power of magnification increases, more details of the object can be seen, but less of the object is visible under the lens. For example, as the cork specimen was viewed with lenses of increasing magnification, it was easier to see the small circular and rectangular, hollow structures that comprised the cork. However, at the highest magnification, only a small portion of the cork piece was visible at any one time. At the lowest magnification, all of the cork piece was visible, but it was difficult to see the structures of which the cork was composed. The same was true when the thread piece and the fingerprints were viewed.
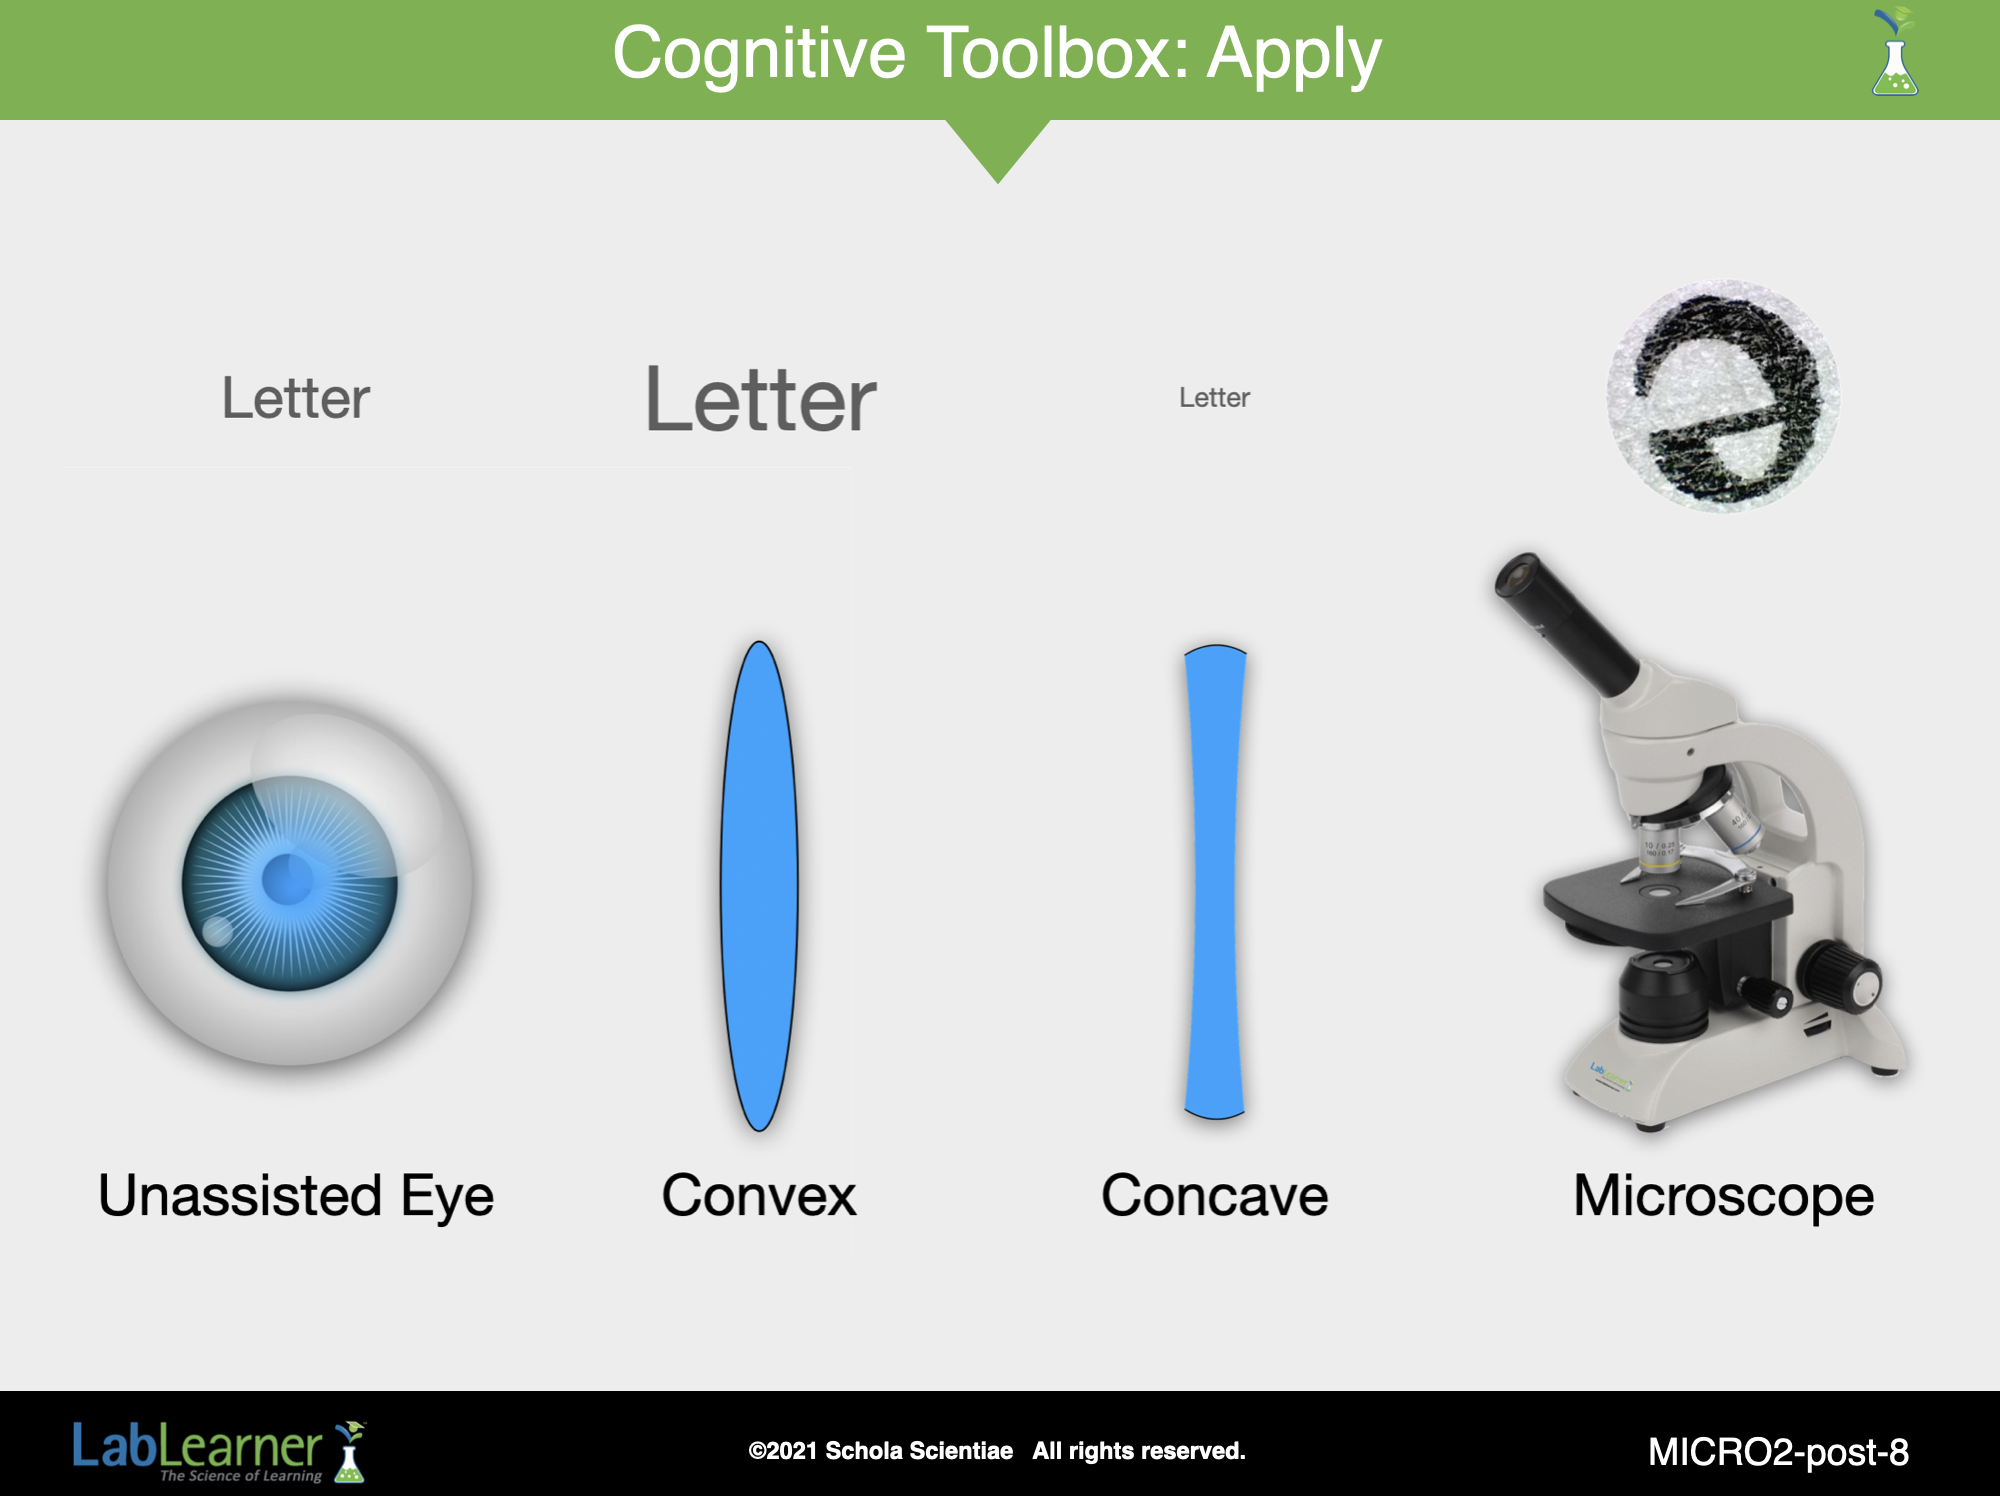
SLIDE MICRO2-post-8
Cognitive Toolbox: Apply
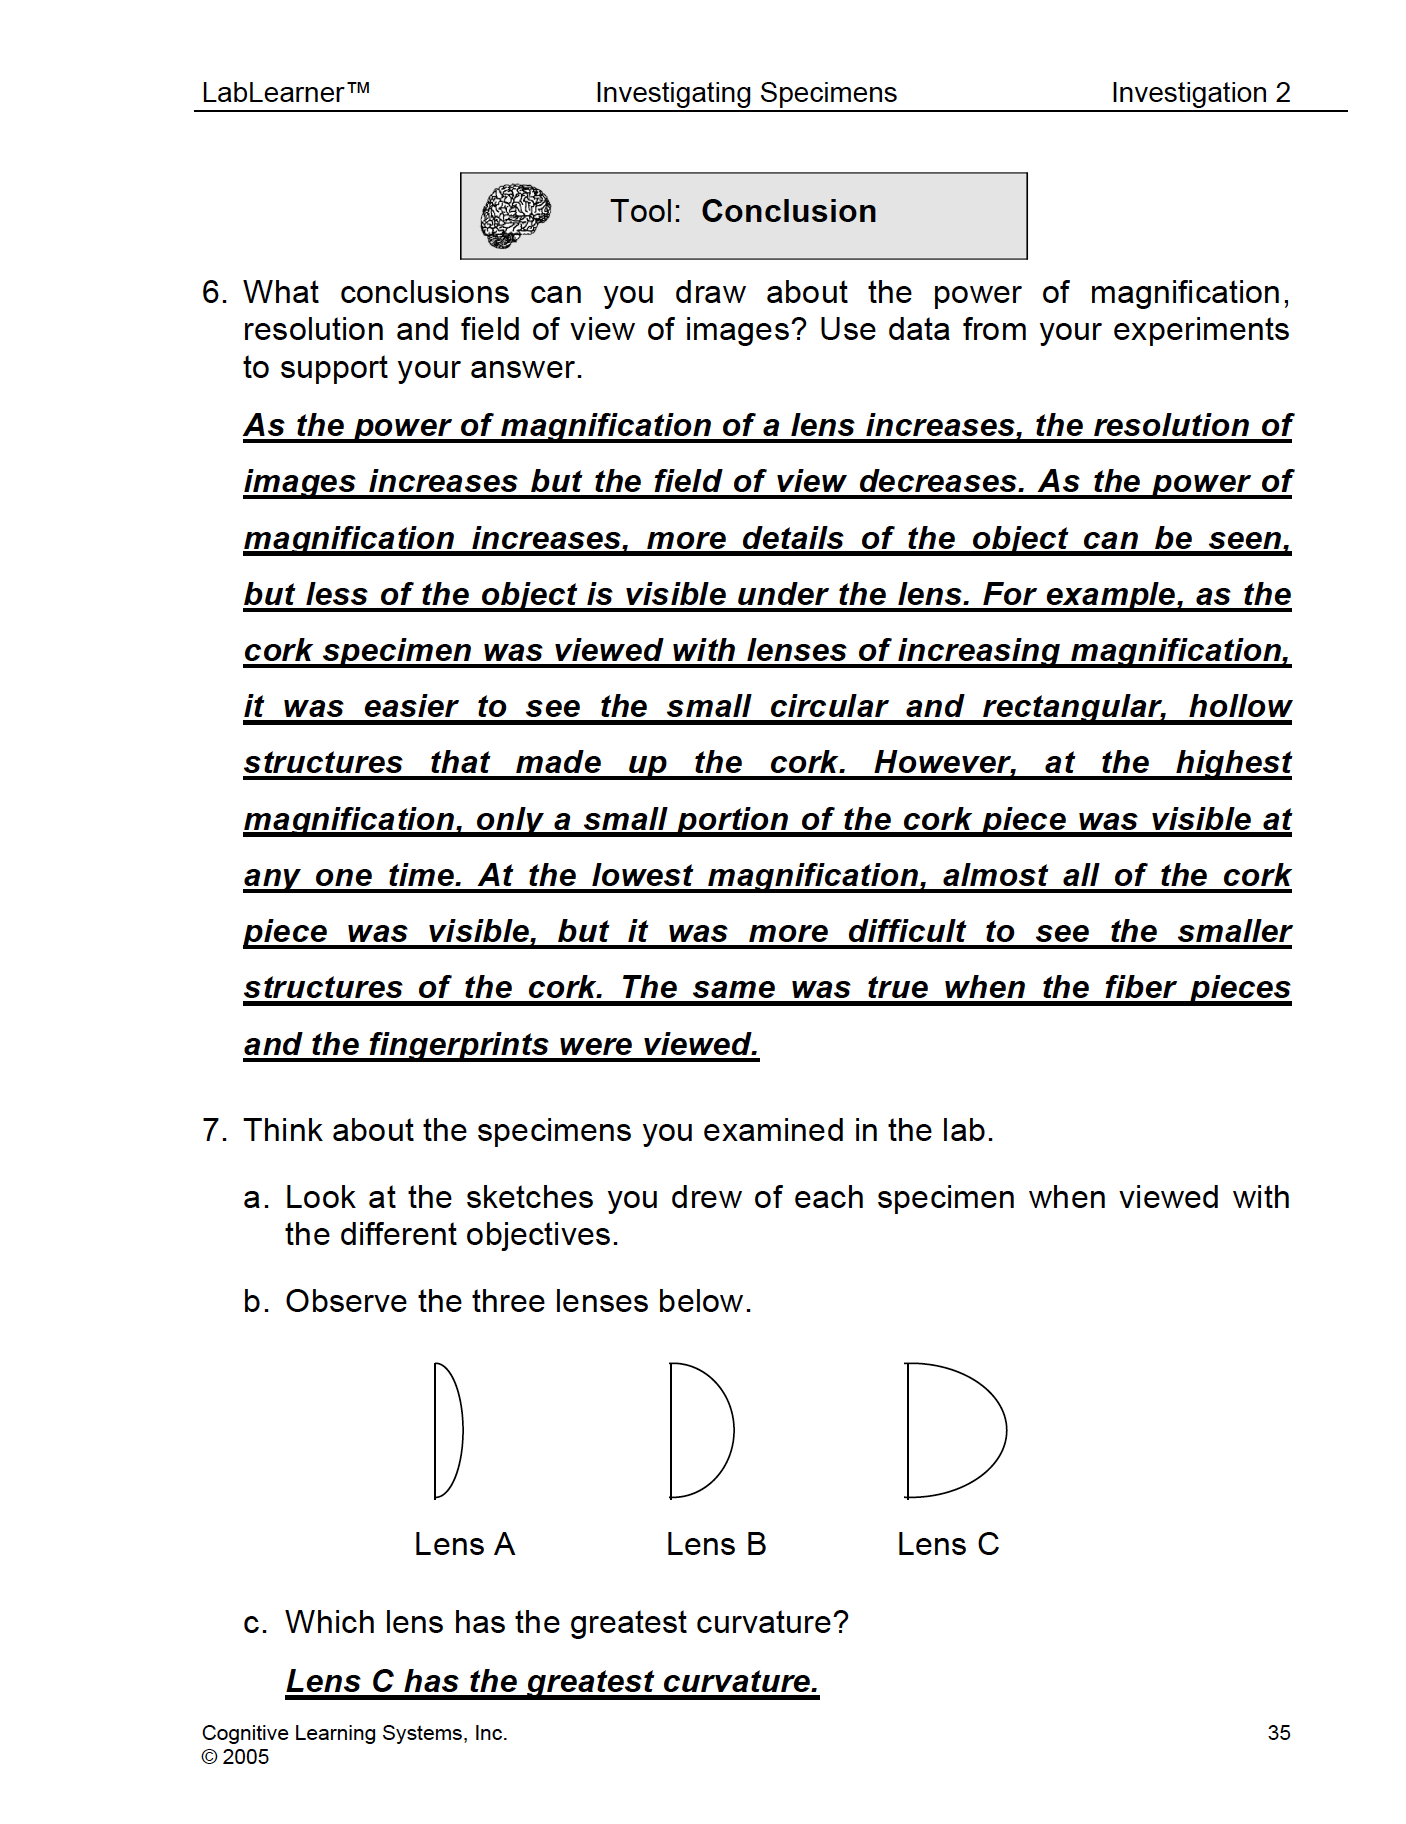
Look at the curvature of each of the three lenses. Which has the greatest curvature? Students should record their answers in problem 7c of their Scientist Data Record. Lens C has the greatest curvature.
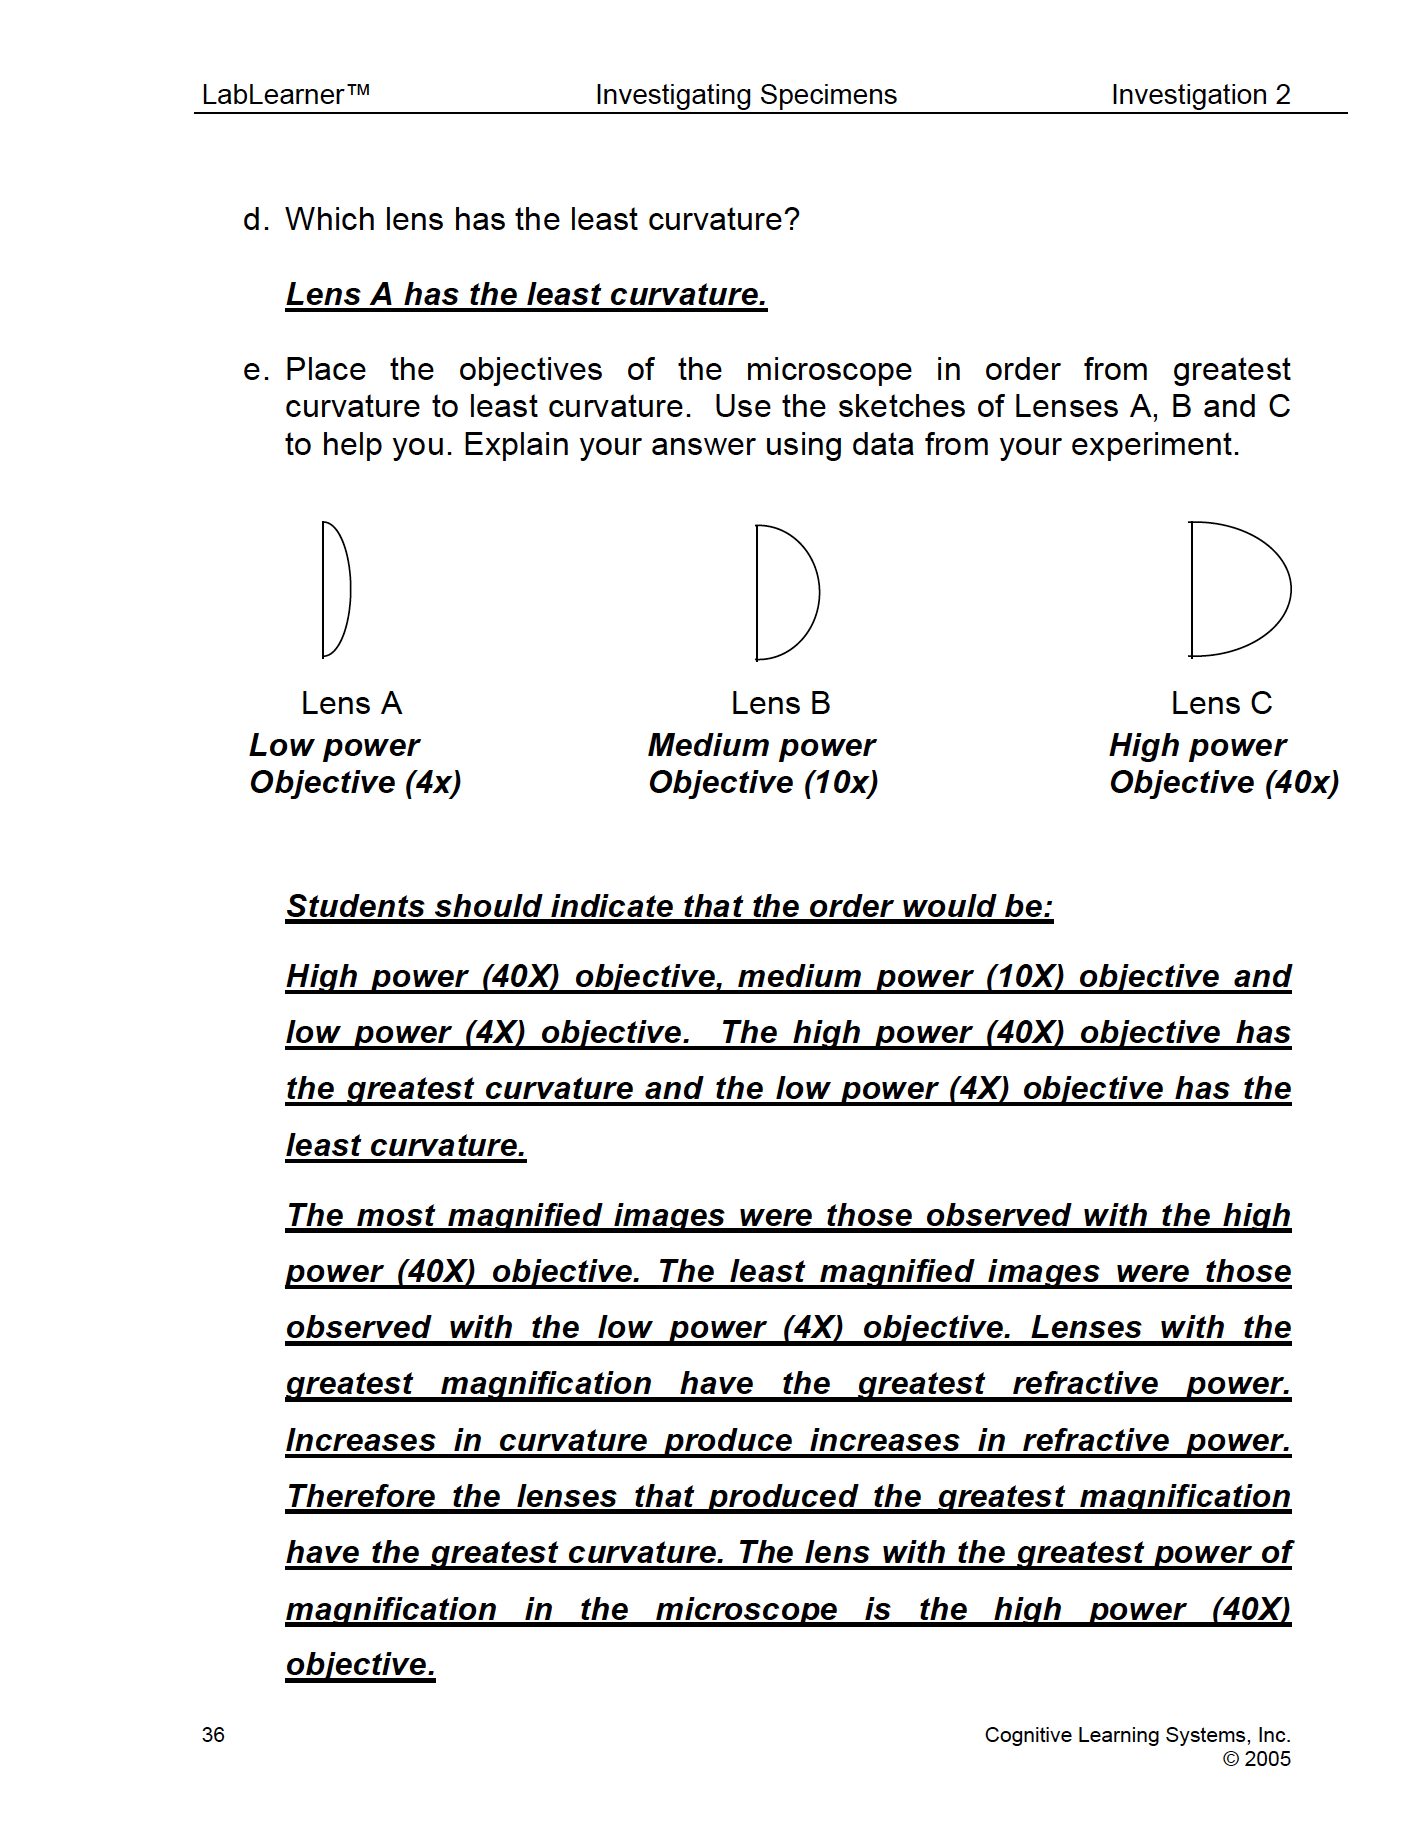
Which lens is the least curved? Students should record their answers in problem 7d of their Scientist Data Record. Lens A is the least curved.
What do you know about the curvature of a lens and its refractive power? The greater the curvature of a lens, the greater its refractive power.
What do you know about the refractive power of a convex lens and magnification? The greater the refractive power of a convex lens, the greater its magnification power.
Think about the specimens you examined in the lab. Look at the sketches you drew of each specimen when viewed with the different objectives. Can you place the objectives of the microscope in order from greatest curvature to least curvature? Students should record their answers in problem 7e of their Scientist Data Record. Students should indicate that the order would be: High power (40X) objective, medium power (10X) objective, and low power (4X) objective. The high power objective has the greatest curvature and the low power objective has the least curvature.
Explain your answer using data from your experiment. Students should record their answers in problem 7e of their Scientist Data Record. The most magnified images were those observed with the high power (40X) objective. The least magnified images were those observed with the low power (4X) objective. Lenses with the greatest magnification have the greatest refractive power. Increases in curvature produce increases in refractive power. Therefore the lenses that produced the greatest magnification have the greatest curvature. The lens with the greatest power of magnification in the microscope is the high power (40X) objective.
KEYS