Teacher Portal:
Atomic Structure
Investigation 1 – Lab

ZERO-IN
Italicized font represents information to be shared orally or physically completed with the students at this time.
The non-italicized font represents additional information included to support the teacher’s understanding of the content being introduced within the CELL.
MINDSET
This Investigation is designed to
- allow students to investigate the Periodic Table of Elements,
- give students the opportunity to explore the physical properties of elements, and
- introduce students to two different major categories of the Periodic Table: metals and nonmetals.
BE PREPARED
Teacher Preparation for the Investigation includes the following. This preparation should be done prior to students arriving in the lab.
- Label five weigh dishes, one for each group, using masking tape and a lab marker “sulfur”. Place 1 piece of sulfur, about 3 cm3, in each weigh dish.
- Label five weigh dishes, one for each group, using masking tape and a lab marker “carbon”. Place 1 piece of carbon, about 3 cm3, in each weigh dish. They can be obtained by breaking apart a carbon (charcoal) stick with a lab scoop.
- Label five weigh dishes, one for each group, using masking tape and a lab marker “magnesium”. Place 1 strip of magnesium metal ribbon, 5 cm in length, in each weigh dish.
- Label five weigh dishes, one for each group, using masking tape and a lab marker “silicon”. Place 1 piece of silicon, about 1 cm3, in each weigh dish.
- Label five of each metal strip (zinc, iron, copper, and aluminum) with masking tape and a lab marker. The metal strips do not need to be stored in a weigh dish.
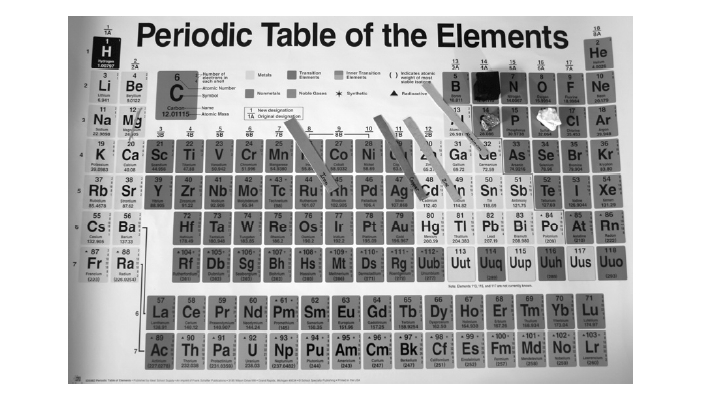
- Locate the large classroom poster of the Periodic Table of the Elements for the class.
- Put all materials at the distribution center.
- Divide the students into five cooperative groups.
Note: Each student lab group will need the materials listed below.
______________________________________
Student Preparation for the Investigation includes having students gather the following materials. This preparation takes place on lab day after student lab groups have settled at their assigned lab tables.
Note: The materials are listed in students’ SDRs. They are also listed below for your reference.
- (1) piece of carbon
- (1) 5 cm strip magnesium metal ribbon
- (1) sulfur lump
- (1) iron strip
- (1) aluminum strip
- (1) zinc strip
- (1) copper strip
- (1) silicon lump
- (1) lab marker
- (1) poster paper (76 cm x 63 cm)
- (1) roll of masking tape
- (1) Periodic Table per student
- (1) pair of vinyl gloves per student
- (1) pair of goggles per student
Direct one student from each lab group to collect the materials listed in their SDRs.
INVESTIGATE
-
- Explain to students that during this lab they will begin to investigate how the Periodic Table of the Elements is arranged. To do this, they will look at the eight different elements in front of them and group them together based on their physical properties.
- Encourage students to reflect on the PreLab video as they move through the procedural steps.
- Explain to students that during the Experiment, every procedural step is important. If one step is skipped, data can become invalid. To help students keep on track, direct them to read each step thoroughly, complete the step, then check it off (Read it – Do it – Check it off).
- Remind students to wear gloves, safety eyewear, and lab coats when handling chemicals.
- Direct students to complete the procedural steps in their SDRs.
Note: The procedural steps are listed below for your reference. Teacher “Notes” are inserted, as needed, to help facilitate the lab.
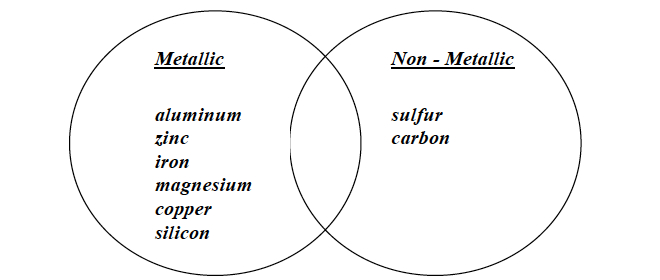
- Create a Venn diagram on the poster paper.
- Draw a large circle on the left side of the paper using the lab marker. The circle should extend past the middle of the paper.
- Draw a second large circle on the right side of the paper. Part of this circle should overlap the first circle.
Note: Students’ circles should be large enough to fill the paper and should look like this:

- Examine the physical properties of the eight elements that your group has. Consider how your group would separate the elements into two categories.
- Separate the elements into the two categories that your group selected. Label each circle with a category. If an element fits into both of your categories, place it in the overlapping space between the circles.
- When your group has decided which circle each element belongs in, write the name of each element in its assigned circle using the lab marker.
- Use the masking tape to hang your poster on the board in the front of the room. Discuss with the class how you choose to categorize the elements.
Note: Some student groups may choose to write Metals and NonMetals as shown in the video, while others may be more creative with their category designations. Either way is acceptable. Student groups will likely not have any elements to place in the overlapping portions of the circles. Upon completion of this CELL’s Investigations, students will re-examine the elements using a Venn diagram again. At that time, students will be able to identify elements that appear in the overlapping portions.
Note: A sample student poster is shown below.
MAKE SENSE OF IT
- Encourage each group to explain how they chose to categorize their elements. Remind students that there is no “right” or “wrong” way of sorting them since the groups were allowed to choose how the elements were sorted.
- Place the large copy of the Periodic Table of the Elements on one of the lab tables. Ask all of the students to join you around the table.
- As a class, designate each group to place one element on the large copy of the Periodic Table. Proceed until all elements have been used.
Note: Each sample should be placed on its corresponding box on the table. A sample of the placement is shown below.
- Instruct students to open their SDRs and circle the elements they placed in the shaded portion of Table A.
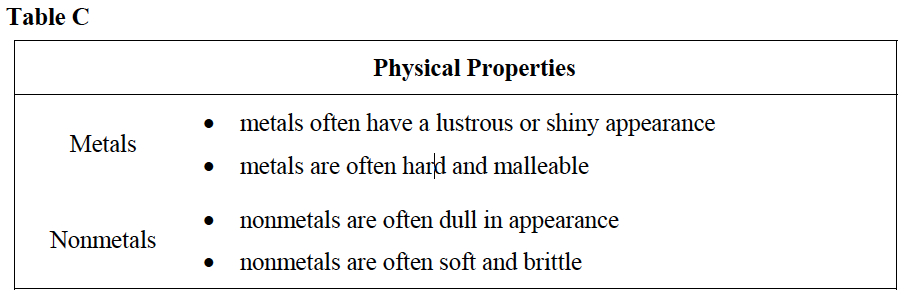
- Direct students to answer the following question in their SDRs. Encourage them to use Table C (below) as a guide. Use the suggested responses below to guide students’ answers.
- What are some words that describe the physical properties of the elements you identified in Table A? Students should indicate words like shiny, flexible, and metallic.
- Instruct students to open their SDRs and circle the elements they placed in the shaded portion of Table B.
- Direct students to questions in their SDRs. Encourage them to use Table C (below) as a guide. Use the suggested responses below to guide students’ answers.
- What are some words that describe the physical properties of the elements you identified in Table B? Students should indicate words like non-flexible and brittle.
- Can you use the information in Table C to identify a common property between the elements on the left side of the table and the right side of the table. Students should indicate that elements with metallic properties appear on the left side of the table while elements with nonmetallic properties appear on the right side of the table.
- Ask students if all eight elements have been circled. Explain to students that silicon is a special type of element that will be addressed in a later Investigation in this CELL.
Note: Most students would probably assume that silicon should be circled on Table A with the metal elements, due to some of its physical characteristics.
CLEAN UP
Let students know your expectations for clean up. Ask them to clean up.