Teacher Portal:
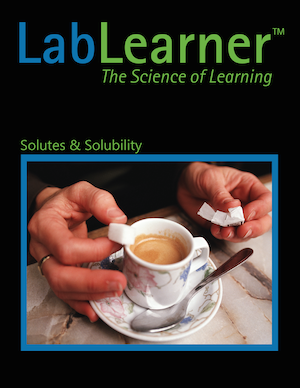
Solutes and Solubility
Investigation 2 – Lab
 Solutes and Solubility: Investigation 2 Lab
ZERO-IN
Non-italicized font represents additional information included supporting the teacher’s understanding of the content being introduced within the CELL.
Italicized font represents information to be shared orally or physically completed with the students at this time.
MINDSET
This Investigation is designed to
- demonstrate to students the difference between a mixture and a solution, and
- illustrate how the rate of solubility of a solute is changed by stirring.
BE PREPARED
Teacher Preparation for the Investigation includes the following. This preparation should be done prior to students arriving in the lab.
- The following masses of each compound are in excess of what each group will need, allowing them to weigh out the required mass.
- Student groups using baking soda will require approximately 20 g.
- Student groups using salt will require approximately 50 g.
- Student groups using sugar will require approximately 100 g.
- Place all materials at a central location.
- Divide students into five cooperative groups.
Note: Each student lab group will need the materials listed below.
Student Preparation for the Investigation includes having students gather the following materials. This preparation takes place on lab day after student lab groups have settled at their assigned lab tables.
Note: The materials are listed in students’ SDRs. They are also listed below for your reference.
- (1) triple beam balance
- (2) weigh dishes
- (2) 400 ml beakers
- (1) glass stir rod
- (1) lab scoop
- (1) 100 ml graduated cylinder
- (1) pitcher filled with water
- (1) stopwatch
- (1) calculator
- gloves for each student
- goggles for each student
- (1) marker
- (1) roll of masking tape
- According to the table below, each student group will make solutions using two of the following compounds: baking soda (NaHCO3), salt (NaCl), and sugar (C12H22O11).

- Student groups should obtain baking soda, salt, and sugar in the amounts shown in the following table.

Direct one student from each lab group to collect the materials listed in their SDRs.
INVESTIGATE
- Begin the Investigation by explaining to students that they will test the effect of stirring on the rate of solubility of two different solutes in the same solvent, water.
- Encourage students to reflect on the PreLab video as they move through the procedural steps.
- Explain to students that during the Experiment, every procedural step is important. If one step is skipped, data can become invalid. To help students keep on track, direct them to read each step thoroughly, complete the step, then check it off (Read it – Do it – Check it off).
- Direct students to complete the procedural steps in their SDRs.
Note: The procedural steps are listed below for your reference. Teacher “Notes” are inserted, as needed, to help facilitate the lab.
The Experiment includes the following:
- In Trials 1 and 2, each group will test the effect of stirring on the rate of solubility of two different solutes in water.
- Table A shows the two compounds that will be investigated by each group. Highlight or circle the compounds in Table A that your group will investigate.

Trial 1:
- In this Trial, you will test the effect of stirring on the rate of solubility of the first solute.
- Record: Write the name of the first compound circled in Table A that you will test. Student answers will vary according to their group.
- Use Table B to find the number of grams of the compound you should use in Trial 1. Write the mass of the sample in the middle column of Table C.

- Obtain the mass of the sample using the triple beam balance. Use Table C and refer to Measuring Mass Using a Weigh Dish or Beaker for help.
- Record: Write the mass of the weigh dish in the first column of Table C.
- Record: Write where the poises should be set for each mass in the last column of Table C.

- Pour the sample of the compound into one 400 ml beaker. Use the masking tape and the marker to label this beaker “Not Stirred.”
- Use the steps above to measure a second mass of the compound. Pour the sample of the compound into a second 400 ml beaker. Use the masking tape and the marker to label this beaker “Stirred.”
- Write the name of the compound in the first row of Table D.
- Use the graduated cylinder to measure 100 ml of water. Pour the water into the beaker labeled “Unstirred.” Put this beaker to the side. Do not stir it.
- Use the graduated cylinder to measure 100 ml of water. Pour the water into the beaker labeled “Stirred.”
- One group member should stir the contents of the beaker labeled “Stirred” using the stir rod. A second group member should use the stopwatch to time the stirring. All students should observe both beakers.
- Start the stopwatch. After 1, 2, 3, 4, 5, and 6 minutes, observe the contents of the two beakers and decide if the compound has dissolved or not dissolved. Record your observations for each time point in Table D.

- Pour the contents of the beakers into the sink. Rinse the beakers and the stir rod with water. Leave the labels on the beakers.
Trial 2:
- In this Trial, you will test the effect of stirring on the rate of solubility of the second solute.
- Record: Write the name of the second compound circled in Table A that you will test. Student answers will vary according to their group.
- Use Table B to find the number of grams of the compound you should use. Write the mass of the sample you need in the middle column of Table E.

- Obtain the mass of the sample using the triple beam balance. Use Table C and refer to the Procedure, Measuring Mass Using a Weigh Dish or Beaker for help.
- Pour the sample of the compound into one 400 ml beaker. If needed, use the masking tape and the marker to label this beaker “Not Stirred.”
- Use the steps above to measure a second mass of the compound. Pour the sample of the compound into a second 400 ml beaker. If not already labeled, use the masking tape and the marker to label this beaker “Stirred.”
- Use the graduated cylinder to measure 100 ml of water. Pour the water into the beaker labeled “Unstirred.” Put this beaker to the side and do not stir it.
- Use the graduated cylinder to measure 100 ml of water. Pour the water into the beaker labeled “Stirred.”
- One group member should stir the contents of the beaker labeled “Stirred” using the stir rod. A second group member should use the stopwatch to time the stirring. All students should observe both beakers.
- Start the stopwatch. After 1, 2, 3, 4, 5, and 6 minutes, observe the contents of the two beakers and decide if the compound has dissolved or not dissolved. Record your observations and the name of the compound in Table F.

- Pour the contents of the beakers into the sink. Rinse the beakers and the stir rod with water. Remove the labels from the beakers.
- Combine your data with the data from the other groups by completing Table G.
Note: When students have finished their Investigation, the teacher may opt to use the board to combine the data from each student group and ask students to complete Table G in the Student Data Record

- Did stirring increase the solubility of each of the compounds compared to when each compound was not stirred? Use the data from the Investigation to support your answer. More of each compound dissolved in water when stirred as compared to when the compound was not stirred in water. For example, 20 g of salt dissolved in 100 ml of water when the water was stirred, but less than 20 g of salt dissolved in 100 ml of water when the water was not stirred. Therefore stirring increased the solubility of each compound in water.
CLEAN UP
Let students know your expectations for cleanup. Ask them to clean up.