Teacher Portal
Friction: Investigation 1 –
Lab

ZERO-IN
Italicized font represents information to be shared orally or physically completed with the students at this time.
The non-italicized font represents additional information included to support the teacher’s understanding of the content being introduced within the CELL.
MINDSET
This Investigation is designed to:
- illustrate to students the effect of frictional force on motion,
- encourage students to view speeding up and slowing down as either positive or negative acceleration,
- help students understand that velocity is a measure of speed in a certain direction,
- help students identify friction as a force,
- illustrate to students that when an object moves at a constant velocity, its acceleration is zero, and
- help students apply the Law of Conservation of Matter and Energy to a practical problem.
BE PREPARED
Teacher Preparation for the Investigation includes the following. This preparation should be done prior to students arriving in the lab.
- Place all materials at a central location.
Note: Each student lab group will need the materials listed below.
- Divide students into cooperative groups of five students.
Student Preparation for the Investigation includes having students gather the following materials. This preparation takes place on lab day after student lab groups have settled at their assigned lab tables.
Note: The materials are listed in students’ SDRs. They are also listed below for your reference.
- (1) penny per student
- (1) roll of masking tape
- (1) meter stick
- (1) metric ruler
- (1) 5 N spring scale
- (1) woodblock with hook
- (1) stopwatch
Direct one student from each lab group to collect the materials listed in their SDRs.
INVESTIGATE
- Inform students that they will be conducting three Trials during the Experiment, the first of which is a simple game.
- Encourage students to reflect on the PreLab video as they move through the procedural steps.
- Explain to students that during the Experiment, every procedural step is important. If one step is skipped, data can become invalid. To help students keep on track, direct them to read each step thoroughly, complete the step, then check it off (Read it – Do it – Check it off).
- Direct students to complete the procedural steps in their SDRs.
Note: The procedural steps are listed below for your reference. Teacher “Notes” are inserted, as needed, to help facilitate the lab.
Trial 1
- Place two 5 cm pieces of tape approximately 40 cm from one end of the table.
- Place the other two pieces of tape toward the other end of the table, using the meter stick to measure a distance of 80 cm between the second two pieces of tape and the first.
- The four pieces of tape should form a square.
- The first pair of tape marks a start line and the second pair of tape marks a finish line.
- Your goal is to push your penny from behind the start line so that it stops moving close to the finish line.
- If your penny slides past the finish line you are out of the game.
- Allow each student in your group to push their penny. Leave each penny on the table where it stops until all group members have had a turn.
- Determine which penny is the closest to the goal line without being past the line.
- Lay the meter stick across the two pieces of tape which form the goal line.
- Use the metric ruler to measure the distance between the penny and the meter stick.
- Determine the winner of your game.
After students have completed the game ask the following questions.
- After you stopped pushing the penny, what happened to it? The penny continued to move forward but eventually slowed down to a stop.
- What is acceleration? Acceleration is the rate of change in velocity. It does not refer only to an object whose speed increases. An object accelerates if it speeds up, slows down, or changes direction.
Note: Velocity involves both the speed at which an object moves and the direction in which an object moves. Acceleration is the rate of change in velocity. Therefore, a change in speed or direction affects acceleration. If an object remains at a constant speed in a constant direction, velocity does not change and therefore the object has no acceleration. A person running in a straight line who then turns to the left, changes velocity, even if the person continues at the same speed. Due to the change in velocity, the person’s acceleration also changed. This may be a new definition of acceleration for students. However, if students know that acceleration results from a change in speed or direction, they will have sufficient knowledge to perform the activities in this Core Experience Learning Lab.
Explain to students that scientists who study motion refer to positive and negative acceleration. Positive acceleration refers to an object whose velocity increases while moving away from the origin. Negative acceleration refers to an object whose velocity decreases while moving away from the origin.
Ask students the following questions.
- Did your penny experience positive acceleration, negative acceleration, or both? Students’ pennies experienced positive acceleration as they were pushed, and negative acceleration as they slowed down.
- What caused a penny’s negative acceleration? Friction between the penny and the table caused the penny to have negative acceleration.
Explain to students that Newton’s First Law of Motion states that an object in a state of uniform motion stays in that state unless acted upon by an outside force.
Ask students the following questions.
- According to Newton’s First Law, what must have caused the penny to slow down? A force must have caused the change.
- If friction caused the penny to slow down, what must friction be? Friction must be a force.
- What would happen to the penny if frictional force did not act on it? The penny would continue to move at the same velocity until an outside force acted on it.
Tell students that they will continue the Investigation by experimenting with frictional force.
Trial 2
- Use a spring scale to measure the magnitude of a force. Use the Spring Scale (5N) Use and Operation procedure.
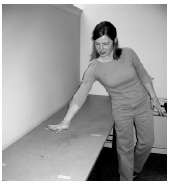
- Attach the spring scale to the hook on the woodblock and place it on the table.
- Gently pull on the spring scale until the woodblock moves across the table and then slow the woodblock to a stop.
- Observe any changes in force that occur when first moving the block, the period in the middle of its motion, and the force as the block is slowed.
Discuss the movement of the large woodblock.
- What happened to the force the student exerted on the large wood block so that the block moved? The force of the pull increased until the force was great enough to move the woodblock. At that point, the force was greater than the frictional force.
- What happened to the force the student exerted on the large woodblock as it moved? After the block was accelerated and moving at a constant speed, the force required to move the block equaled the frictional force.
- What happened to the force the student exerted on the large woodblock as it slowed? When stopping the spring scale, the force required to move the block was less than the frictional force.
Tell students that in the next activity they will measure frictional force. Instruct students to use the starting and finishing lines on the table.
Trial 3
- Measure the frictional force between the woodblock and the table.
- Using the start line and finish line marked with tape on your table, place the front of the woodblock 20 cm behind the starting line.
- Secure the spring scale to the woodblock so that the Newton scale is visible.
- Choose one person from your group to pull the block, one person to be the timekeeper, and one person to read the spring scale.
- If you are pulling the block:
- Pull the woodblock past the first line and at least 20 cm past the second line. It is important that you begin motion before you reach the start line and continue after you cross the finish line.
- Pull the wood block between the starting line and finish line in 8 seconds. The student pulling the block must pull it at a steady velocity.
- If you are the timekeeper:
- Begin timing only after the front of the woodblock crosses the start line and will stop timing as soon as the front of the woodblock crosses the finish line.
- This will make sure that the woodblock moves at a constant velocity for the entire time it moves between the two lines.
- If you are reading the spring scale:
- Read the number of Newtons exerted on the spring scale to pull the woodblock across the 80 cm course.
- Practice the trial: Pull the block until the student pulling the block knows the approximate velocity at which to pull it.
Note: The student pulling must keep a constant velocity. If the student completed the trial in six or fewer seconds, he or she will try again, this time a little slower.
Note: Encourage students to perform several practice trials until the student can pull the woodblock 80 cm in 8 sec.
- Perform the trial. Record the number of Newtons.
- Calculate the average velocity of the woodblock.
- Calculate the sum of all of the forces on the block.
- Calculate the frictional force between the block and the table.
CLEAN UP
Let students know your expectations for clean up. Ask them to clean up.