Teacher Portal:
Plants and Animals Journey
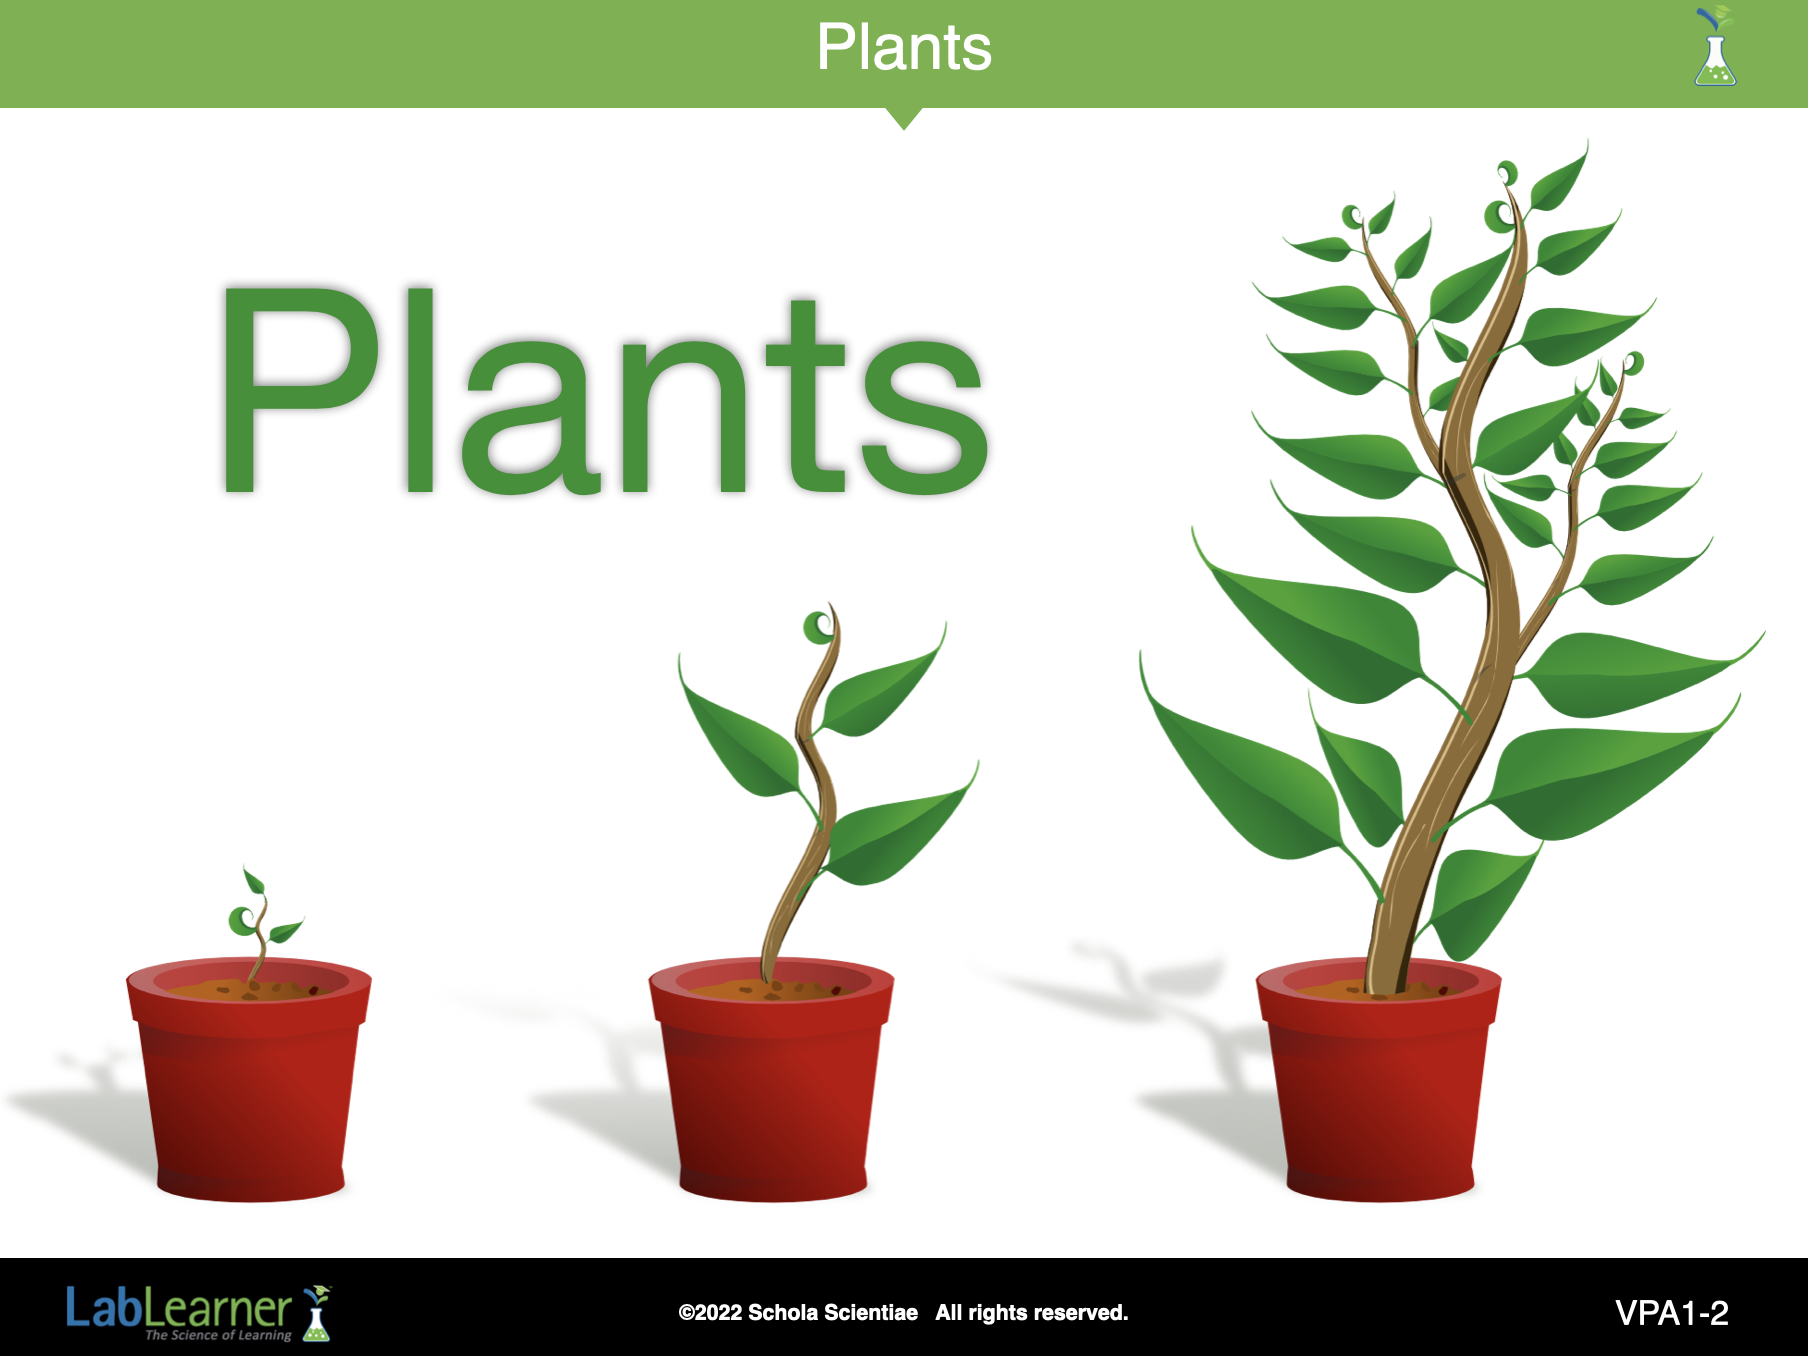
One: Plants
 PRINT IT
Use your browser to download a printable PDF as help during the slide presentation and to make additional notes. In your browser, go to File > Print and then choose to save as PDF.
NAVIGATE IT
Once the slide presentation is launched
- use your left and right arrows to advance or go back in the slide presentation, and
- hover your mouse over the left edge of the presentation to get a view of the thumbnails for all the slides so that you can quickly move anywhere in the presentation.
- Click HERE to launch the slide presentation for the CELL.
SHARE IT

SLIDE 1VPA-1
This is the first of three sections (presentations) of the LabLearner Plants and Animals Journey. In this section, students will focus on plants.
______________________________________________
SLIDE 1VPA-2
This is an introductory slide. The teacher might ask students:
Ask students: What might you learn about plants in this presentation? Student answers will vary.
______________________________________________
SLIDE 1VPA-3
Begin the lesson by introducing the Plants and Animals Journey to the class. This first presentation focuses structures and functions of plants. The questions below may be used to introduce the topic to the students.
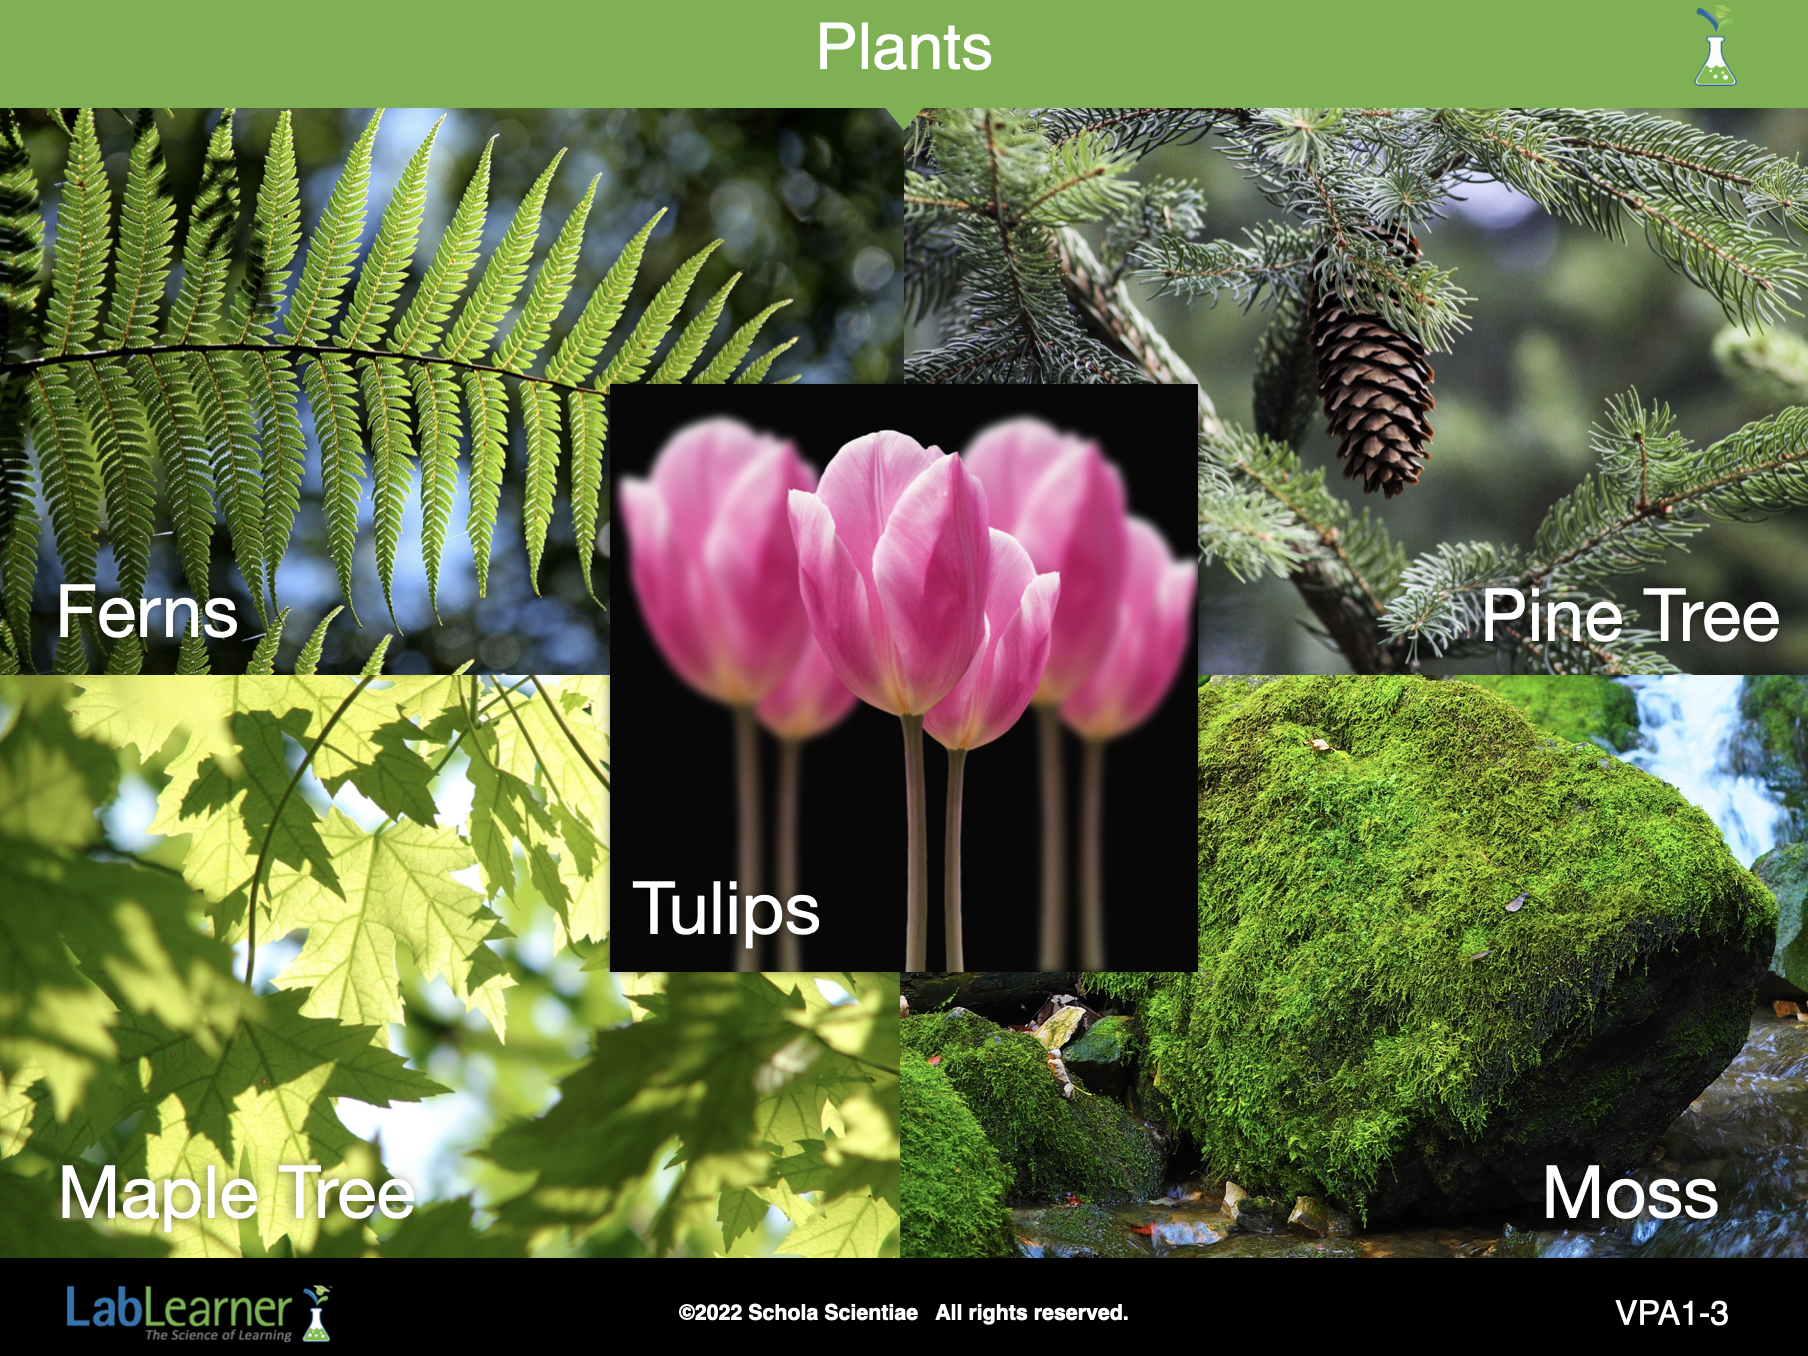
Look at the pictures. These are all pictures of plants. The pictures show a fern (upper left), tulips (center), pine tree (upper right), moss (lower right), and maple tree (lower left).
Ask students: Do the plants all look the same? What do you think they have in common? Student answers will vary. They are green. They live outside. They have leaves.
Ask students: How are the plants different? Student answers will vary. Some are big, like trees, and some are small, like the flowers/tulips.
Allow students time to discuss the similarities and differences of the plants. This open discussion should provide time for students to express their opinions. They will have an opportunity later to come to more firm conclusions about structures such as stems, roots, and leaves.
______________________________________________
SLIDE 1VPA-4
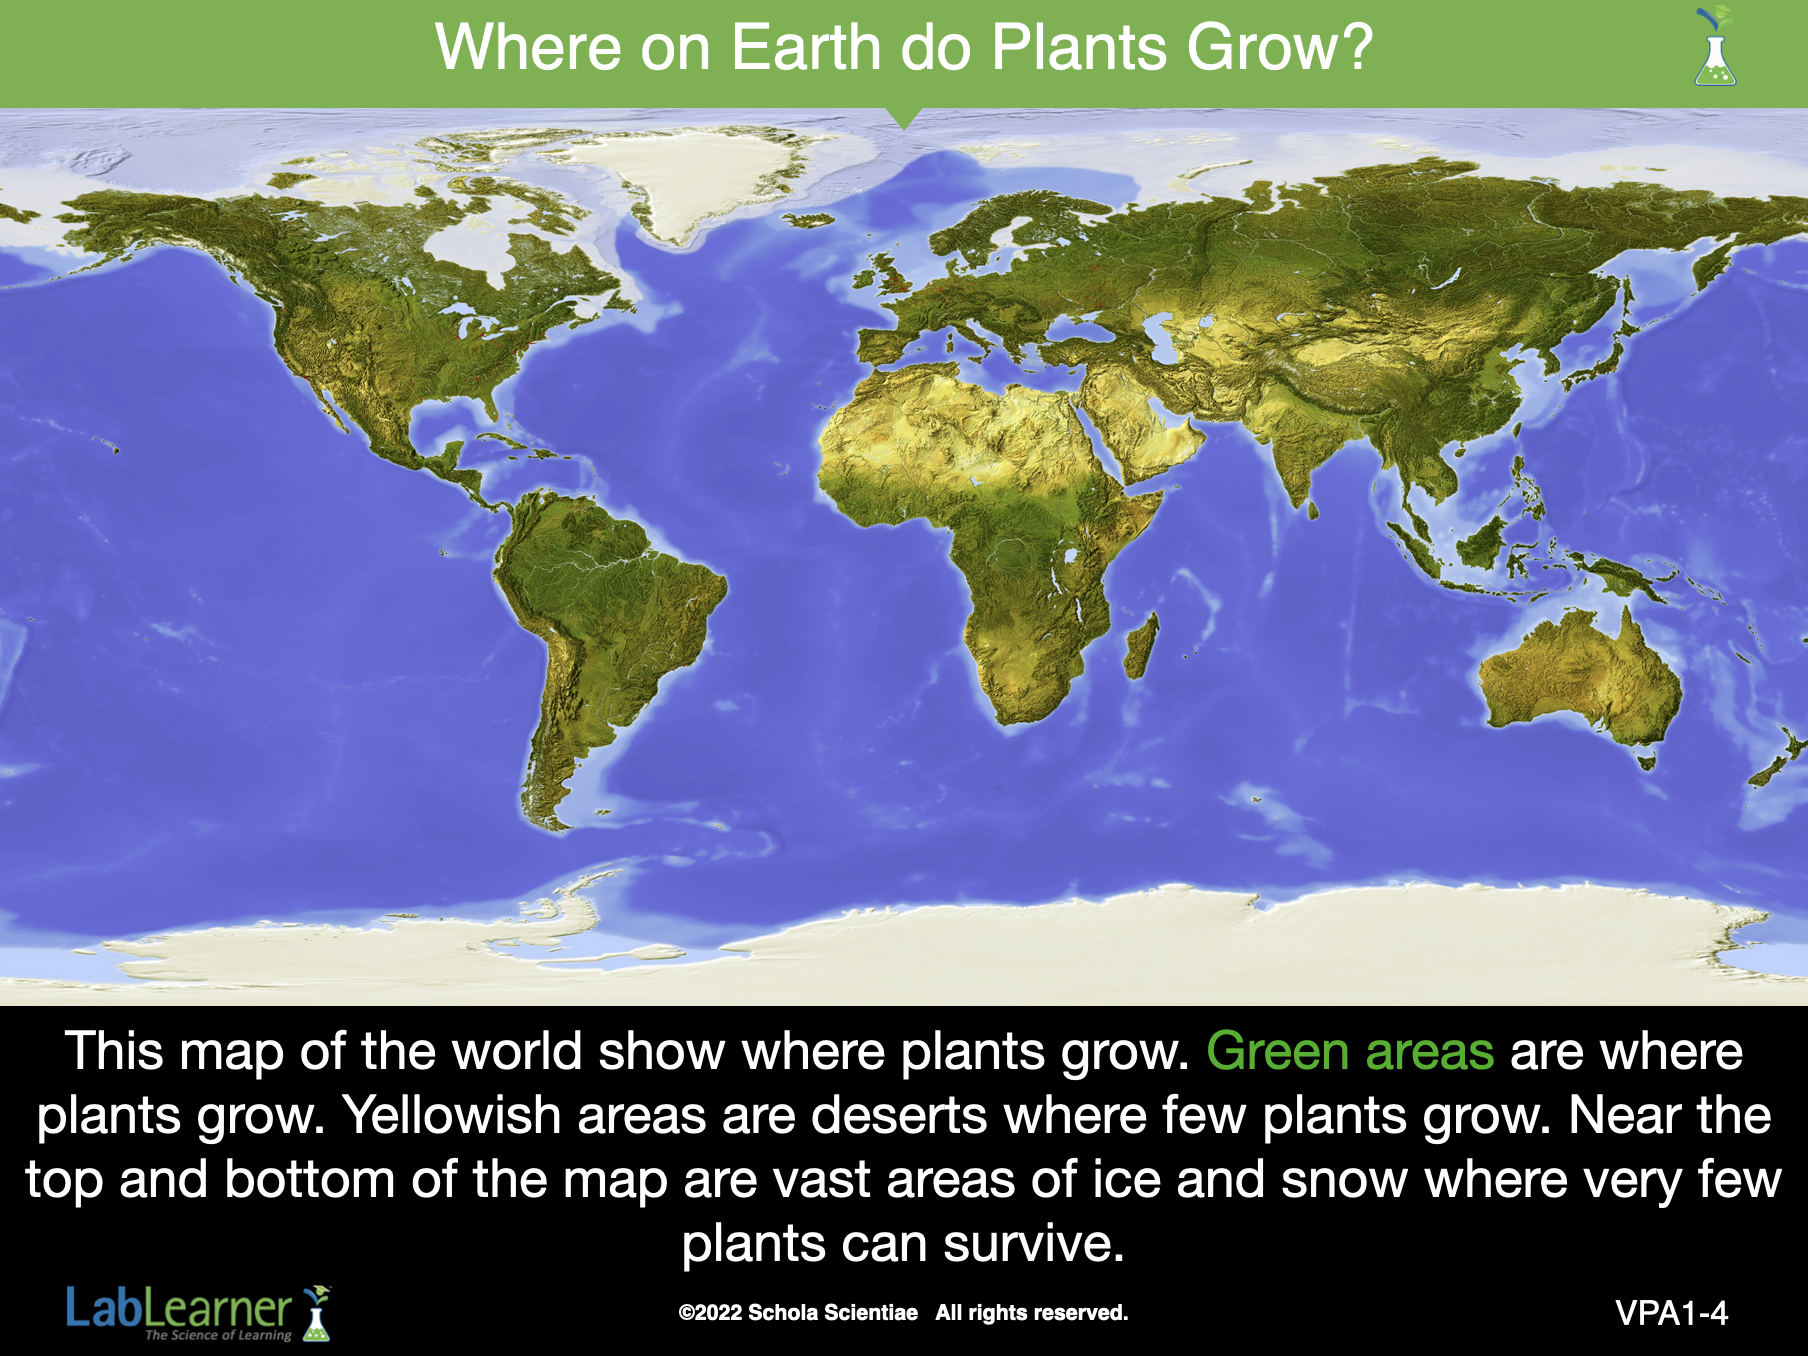
Direct students’ attention to the large map of the world. Ask students the following questions:
Look at the picture. This is a map of the world. The blue areas are water, the tan and green areas are land. Ask students: Where would you find plants? Student answers will vary.
Ask students: Would you find plants on the land? Student answers will vary. Discuss various answers proposed by students.
Ask students: Would you find plants under the water? Would you find plants growing in the water? Student answers may vary.
After allowing some discussion, tell students that plants are found on the land, under the water, and growing in the water. Give examples, such as the trees and flowers they may see near the school or their homes.
Discuss plants that grow in the water, such as lilies (lily pads), grasses, and seaweed. Tell students that although plants grow in the water and on land, plants are in greater variety on land than in the water.
Use this difference to lead into a discussion of the needs and structures of typical “land” plants which will be presented in the next set of slides.
______________________________________________
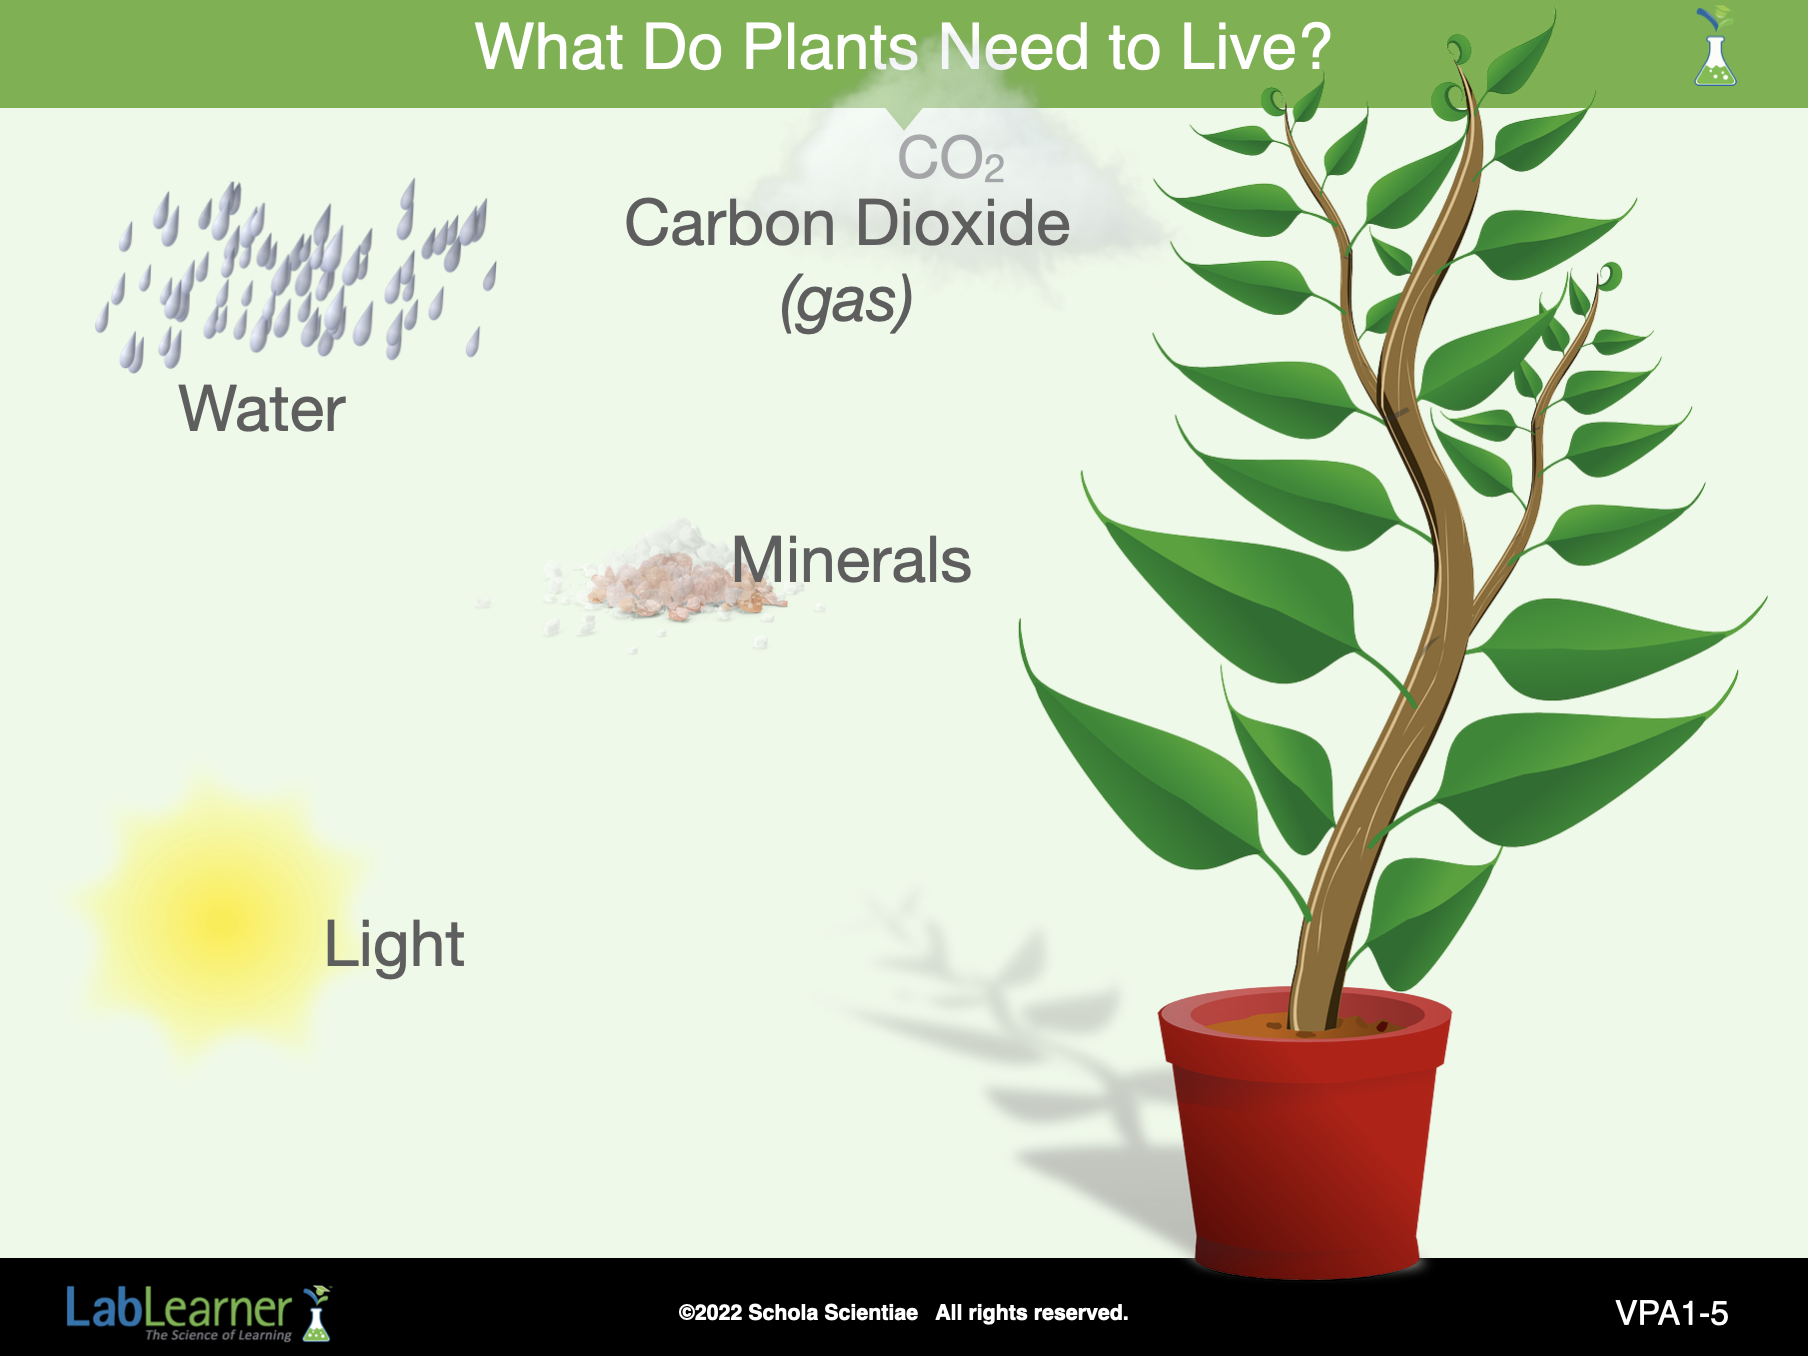
SLIDE 1VPA-5
Use this slide and the next several slides to help students focus on the structures and functions of plants. The structures of plants presented in this set represent the structures found in most “land plants.” Therefore seaweed, water lilies, and plants that grow in the water are technically classified as “land plants” because they have common structures with other land plants.
This slide introduces students to four basic needs of plants: light (which can be from the sun or artificially generated), carbon dioxide (a gas we exhale), nutrients, and water. Over the course of the Earth’s long history, plants evolved specific structures to obtain these substances. The structures they developed evolved in part because plants are immobile. They cannot move from place to place to obtain their requirements for life.
______________________________________________
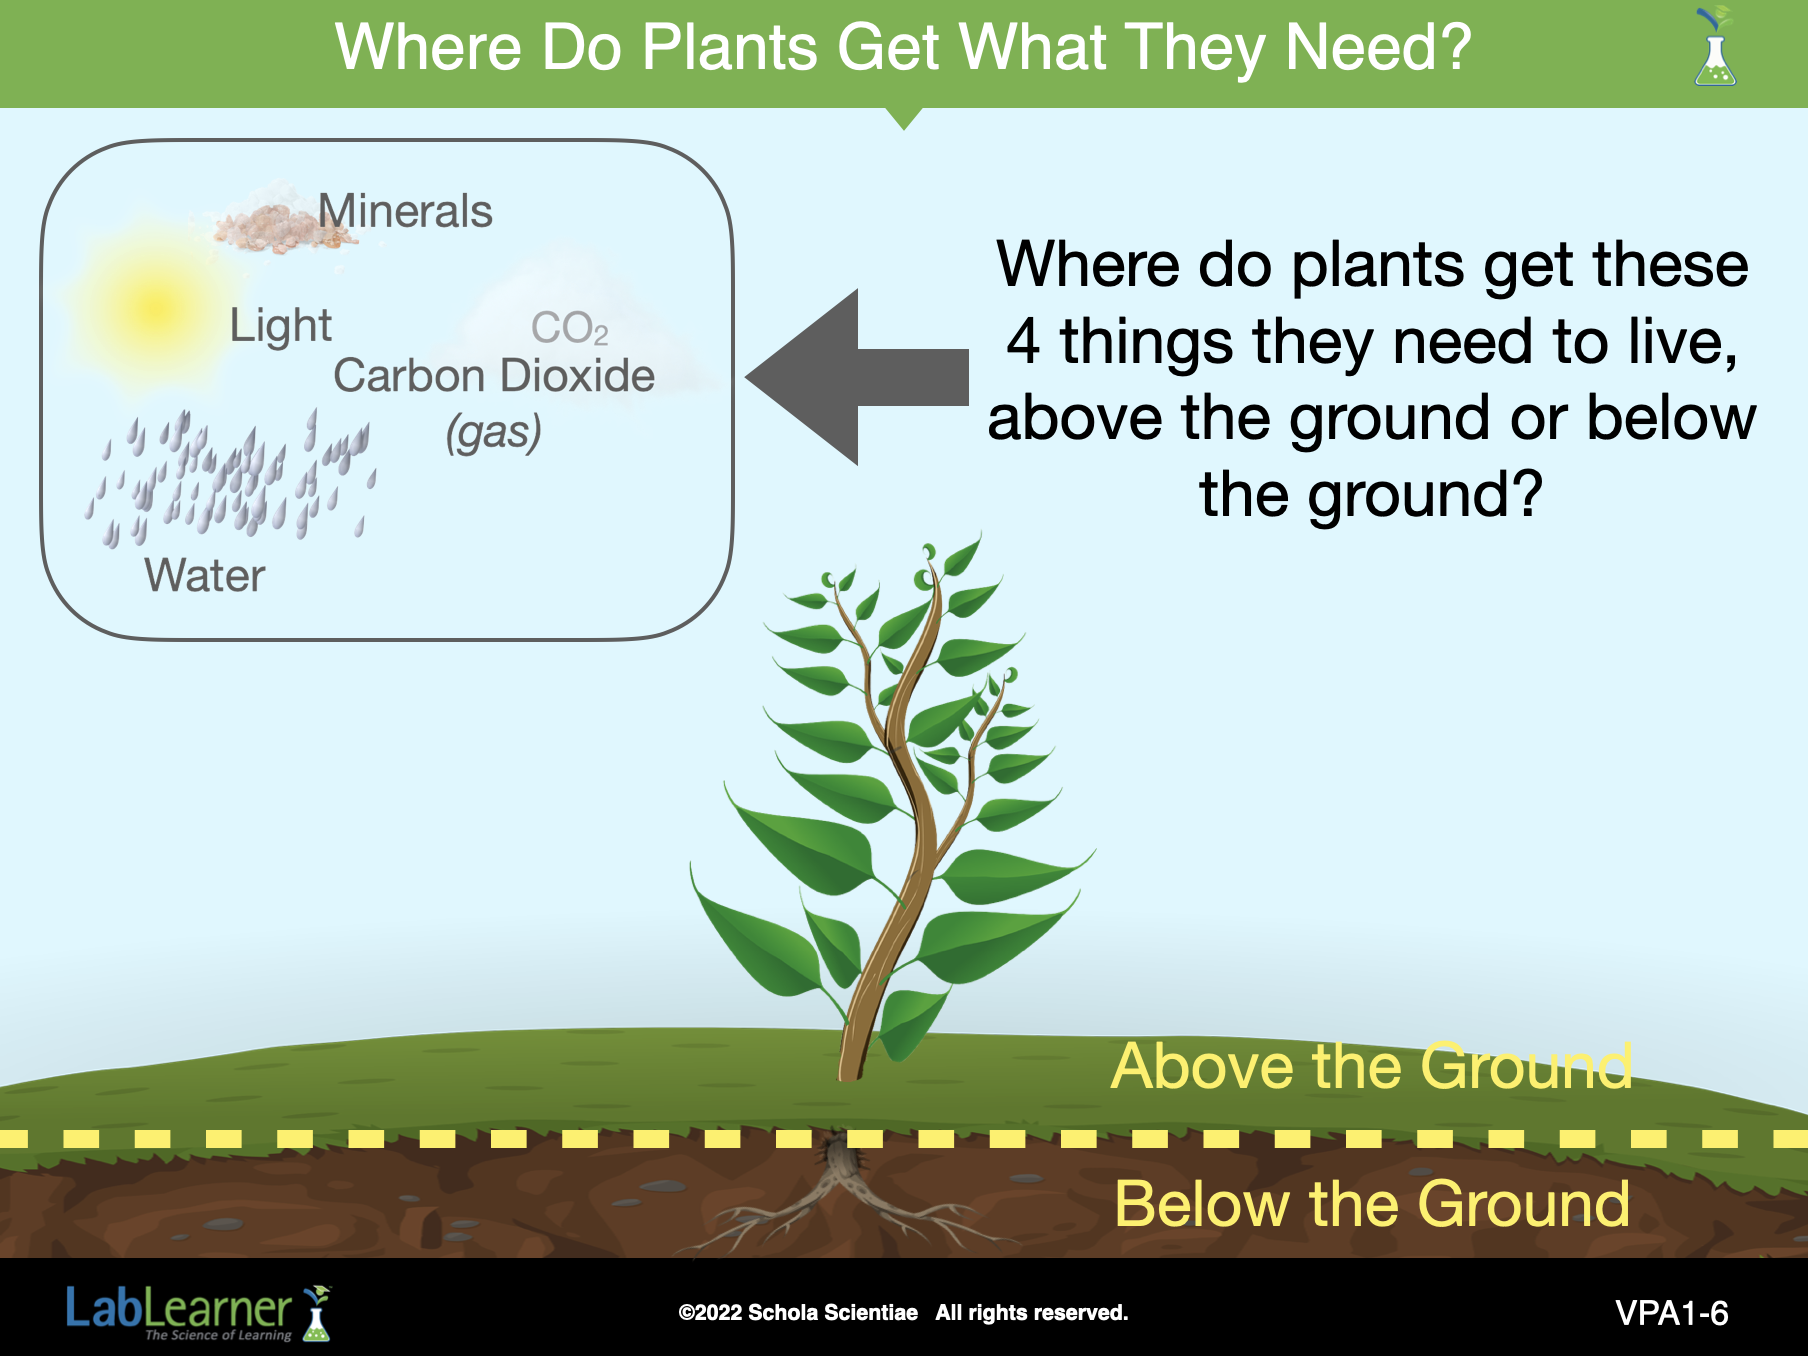
SLIDE 1VPA-6
Discuss the four basic needs of plants and where these resources are located: above or below the ground. Understanding the location of these resources should help students associate the parts of the plant shown in the next slide with the various resources plants need to live.
______________________________________________
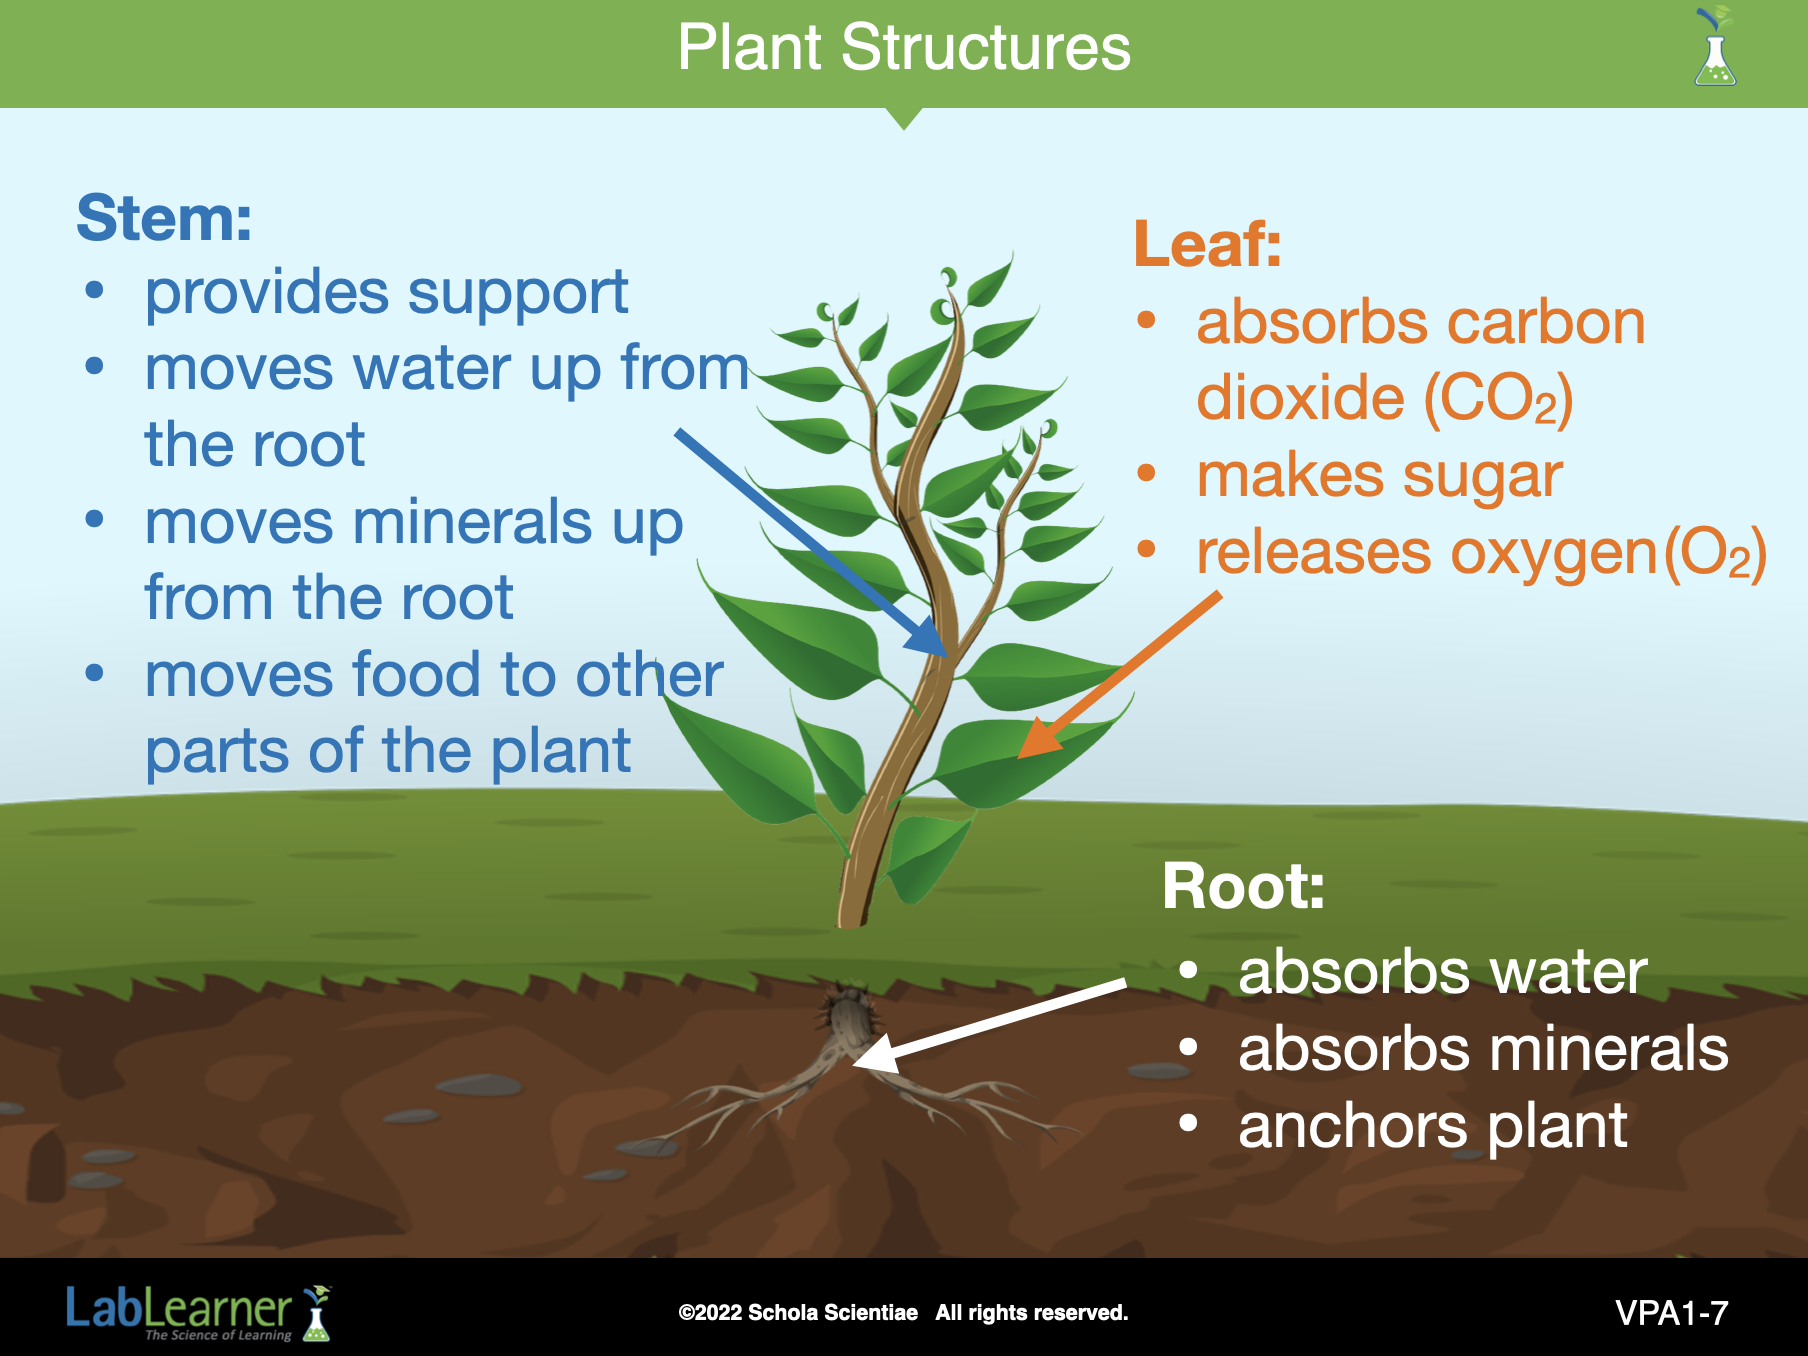
SLIDE 1VPA-7
Direct students’ attention to three main parts of the plant: roots, stems, and leaves. Discuss the various functions of each and the location of each. Encourage students to make connections between the location of different plant structures and the need for certain resources.
For example, plants need water and nutrients, which, in most cases, are located beneath the surface of the Earth. Roots are the parts of plants located underground and can obtain the water and minerals plants need.
The functions listed in this slide are basic. However, the information listed below is provided if students ask additional questions:
Stems can also store food, have structures that protect the plant, such as thorns, and perform photosynthesis on plants that do not have leaves with large surface areas, such as cacti.
Leaves also help regulate water loss by opening and closing small holes called stomata. Leaves can also help protect the plant, such as the spines (leaves) on cacti, and can help attract insects to pollinate.
Roots can also store food such as carrots, sweet potatoes, and radishes.
Students may question whether the same structures exist in plants that they see growing in water. In general, roots, stems, and leaves are found in plants that grow below and in water. Their structures may differ slightly, and some of the functions of those structures may not be the same as for plants that grow on land. For example, some plants that grow in water have differently shaped roots that allow them to float on the water rather than anchor them to the bottom of the lake, river, or ocean.
______________________________________________
SLIDE 1VPA-8
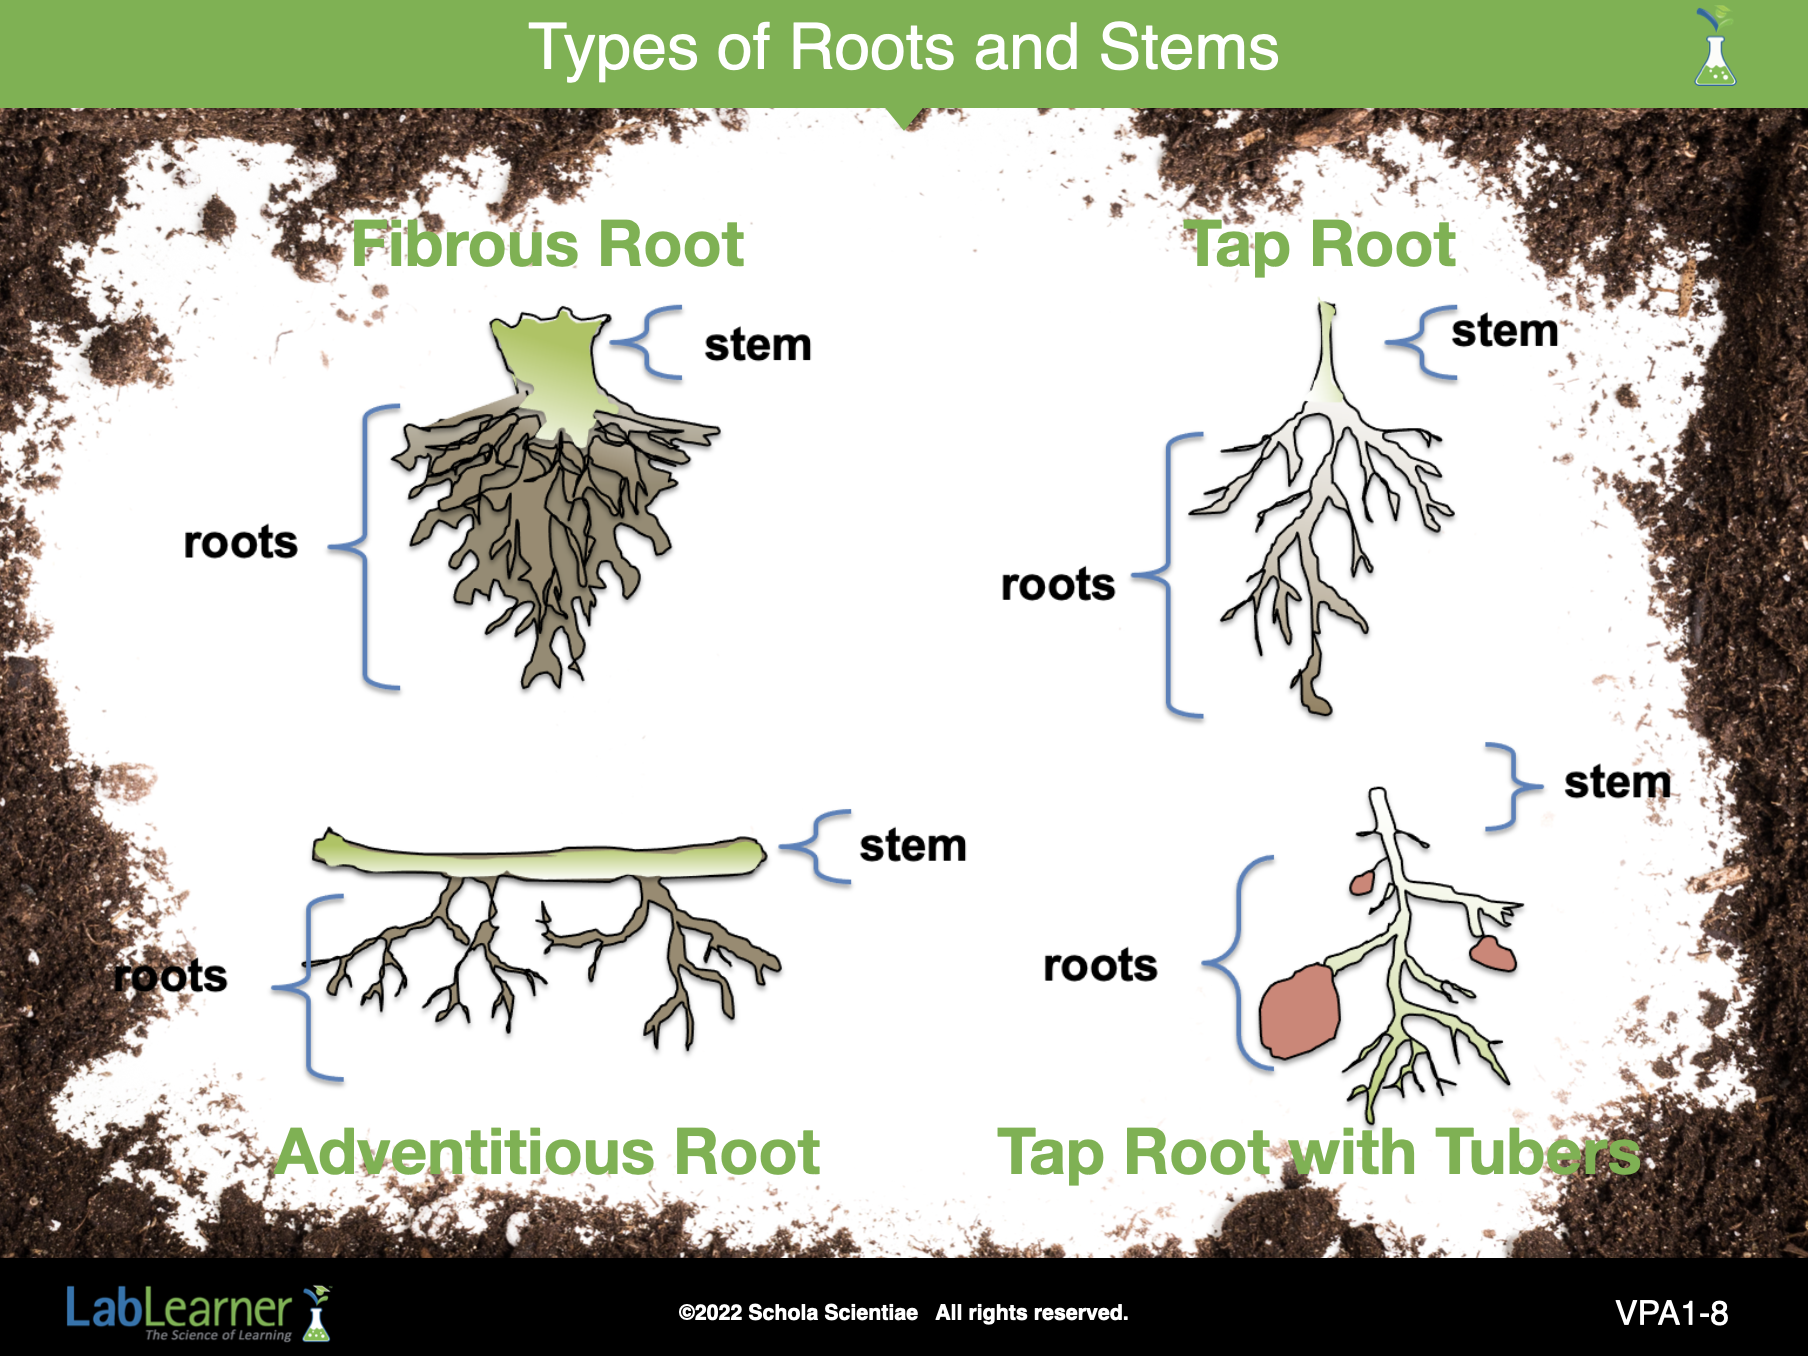
Ask students whether they think that the basic parts of a plant appear the same in all plants. Help students understand the concept of similar but not identical parts of plants by showing them the pictures in the next two slides. These slides illustrate different types of roots, stems, and leaves found in plants, including grasses, flowering plants, and trees.
In this slide, the following examples of roots and stems are shown. It is not expected that students should memorize the different root types.
Top left: Fibrous root, which helps to anchor plants and reaches in many directions to obtain nutrients and water. These roots often absorb water before it sinks deep into the ground. The structure of fibrous roots helps prevent erosion of soil. Grass has fibrous roots.
Top right: Tap Root, which anchors the plant in the ground more firmly than fibrous roots and can travel far below the ground to find water. Certain desert plants have very long tap roots. Dandelions are also known for their long tap roots.
Bottom left: Adventitious Root, which has shallow extensions along the length of the stem. These roots often help provide the extra support needed for climbing plants such as ivies.
Bottom right: A taproot with tubers attached. Tubers can be part of the stem or root. They store food. Some examples of tubers are potatoes, carrots, and turnips. Carrots and turnips are tubers that are roots. A potato tuber is part of the stem.
As students view the different types of roots and stems, they may ask about examples from their own experiences. The information below is provided should they ask about two common plant structures that are found underground:
Bulbs: A bulb is an underground storage area of the stem. The plant uses the food in the bulb during the growing season. After the growing season is over, food is diverted from the leaves to the bulb for storage until the next growing season. Two examples of these stems include onions and tulips.
Corm: A corm is an underground storage area of the stem. The plant uses the food in the corm during the growing season. After the growing season, food is diverted from the leaves to the corm for storage until the next growing season. Ginger plants have corms.
______________________________________________
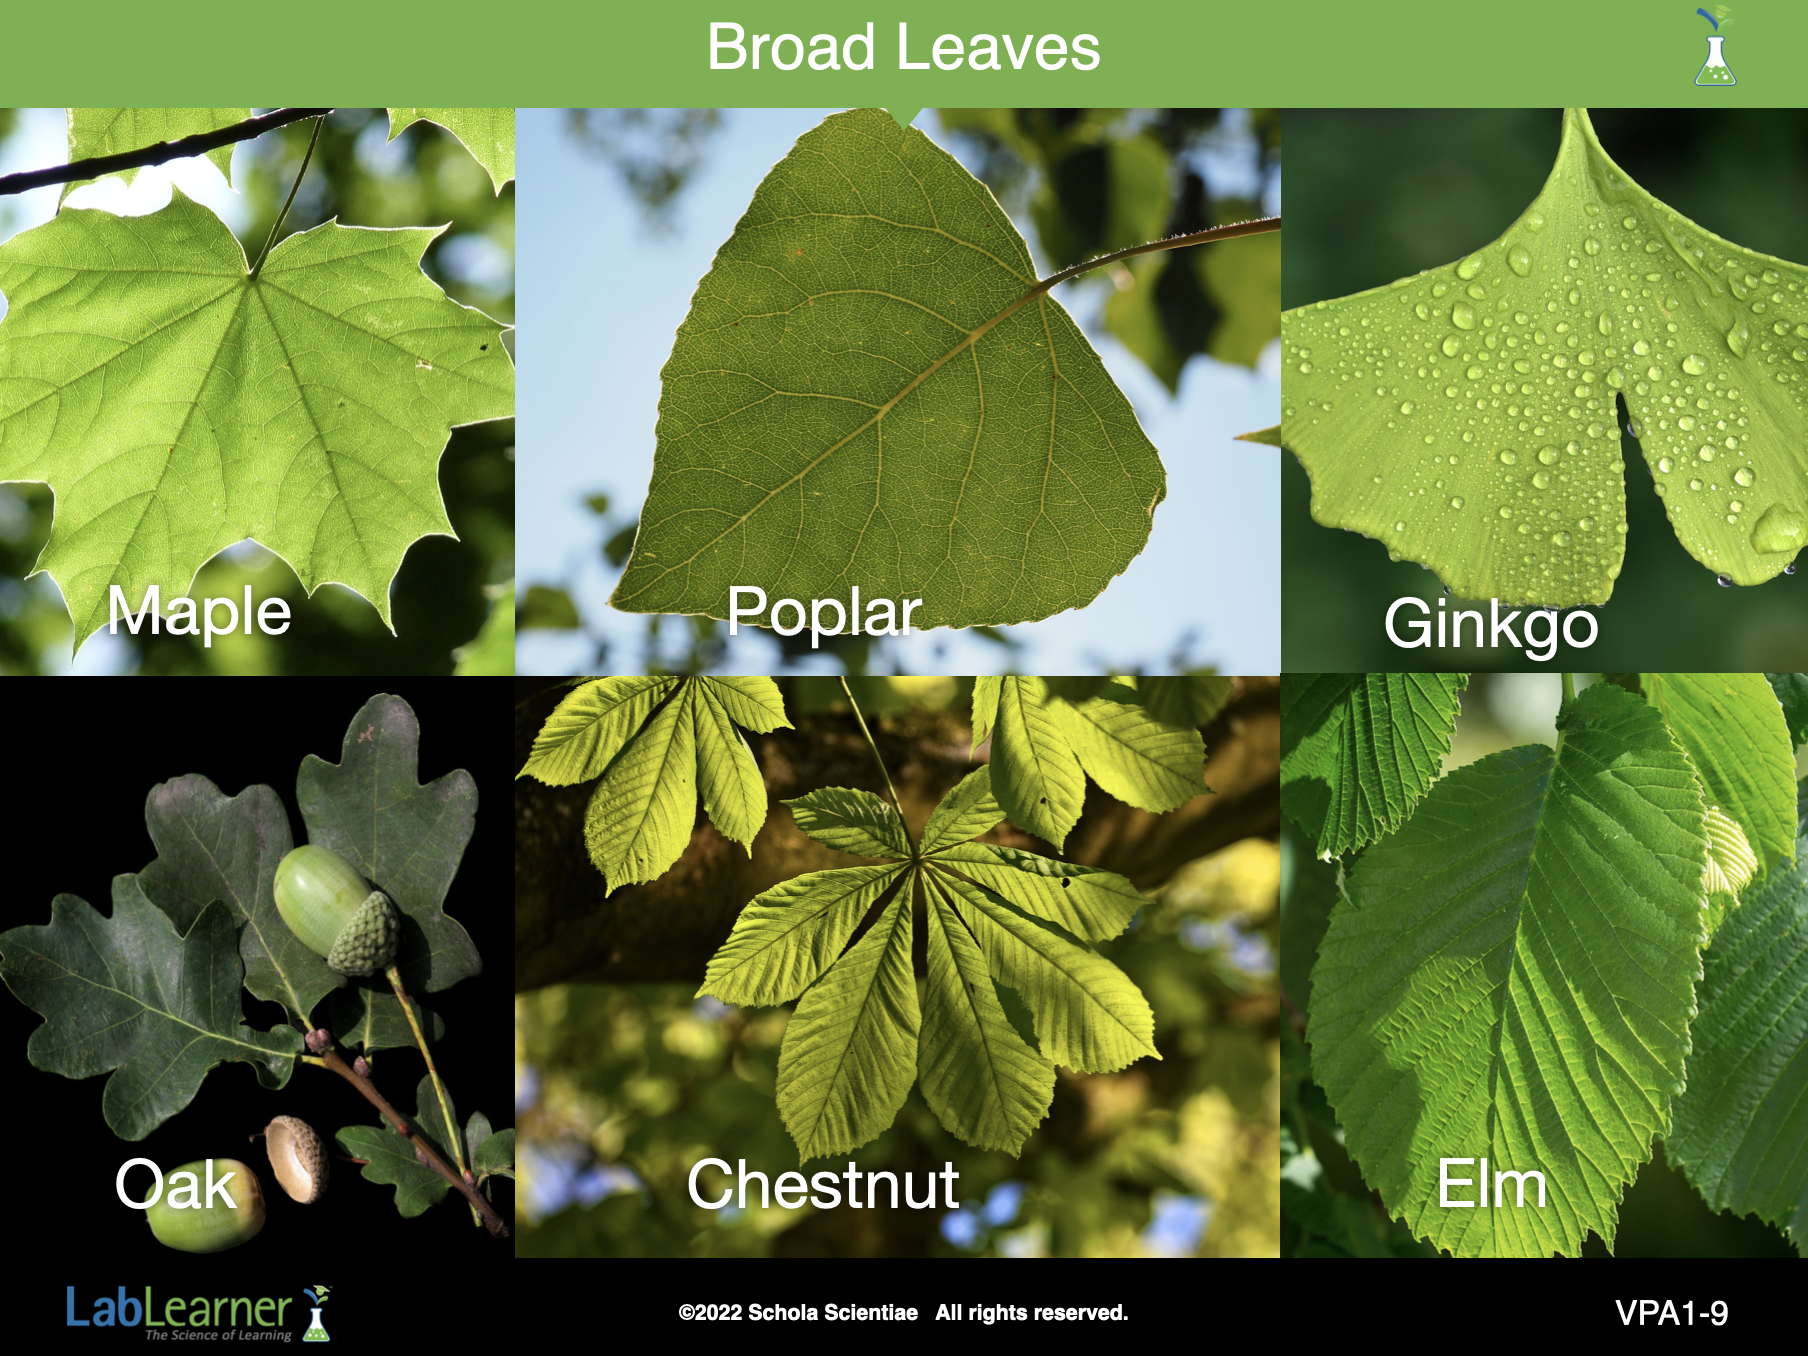
SLIDE 1VPA-9
Complete this set of slides by highlighting two main categories of leaves: broad leaves and needle-like leaves.
Students will be able to review what they have learned about the parts of plants in the next slide set Check Understanding: Plants.
______________________________________________
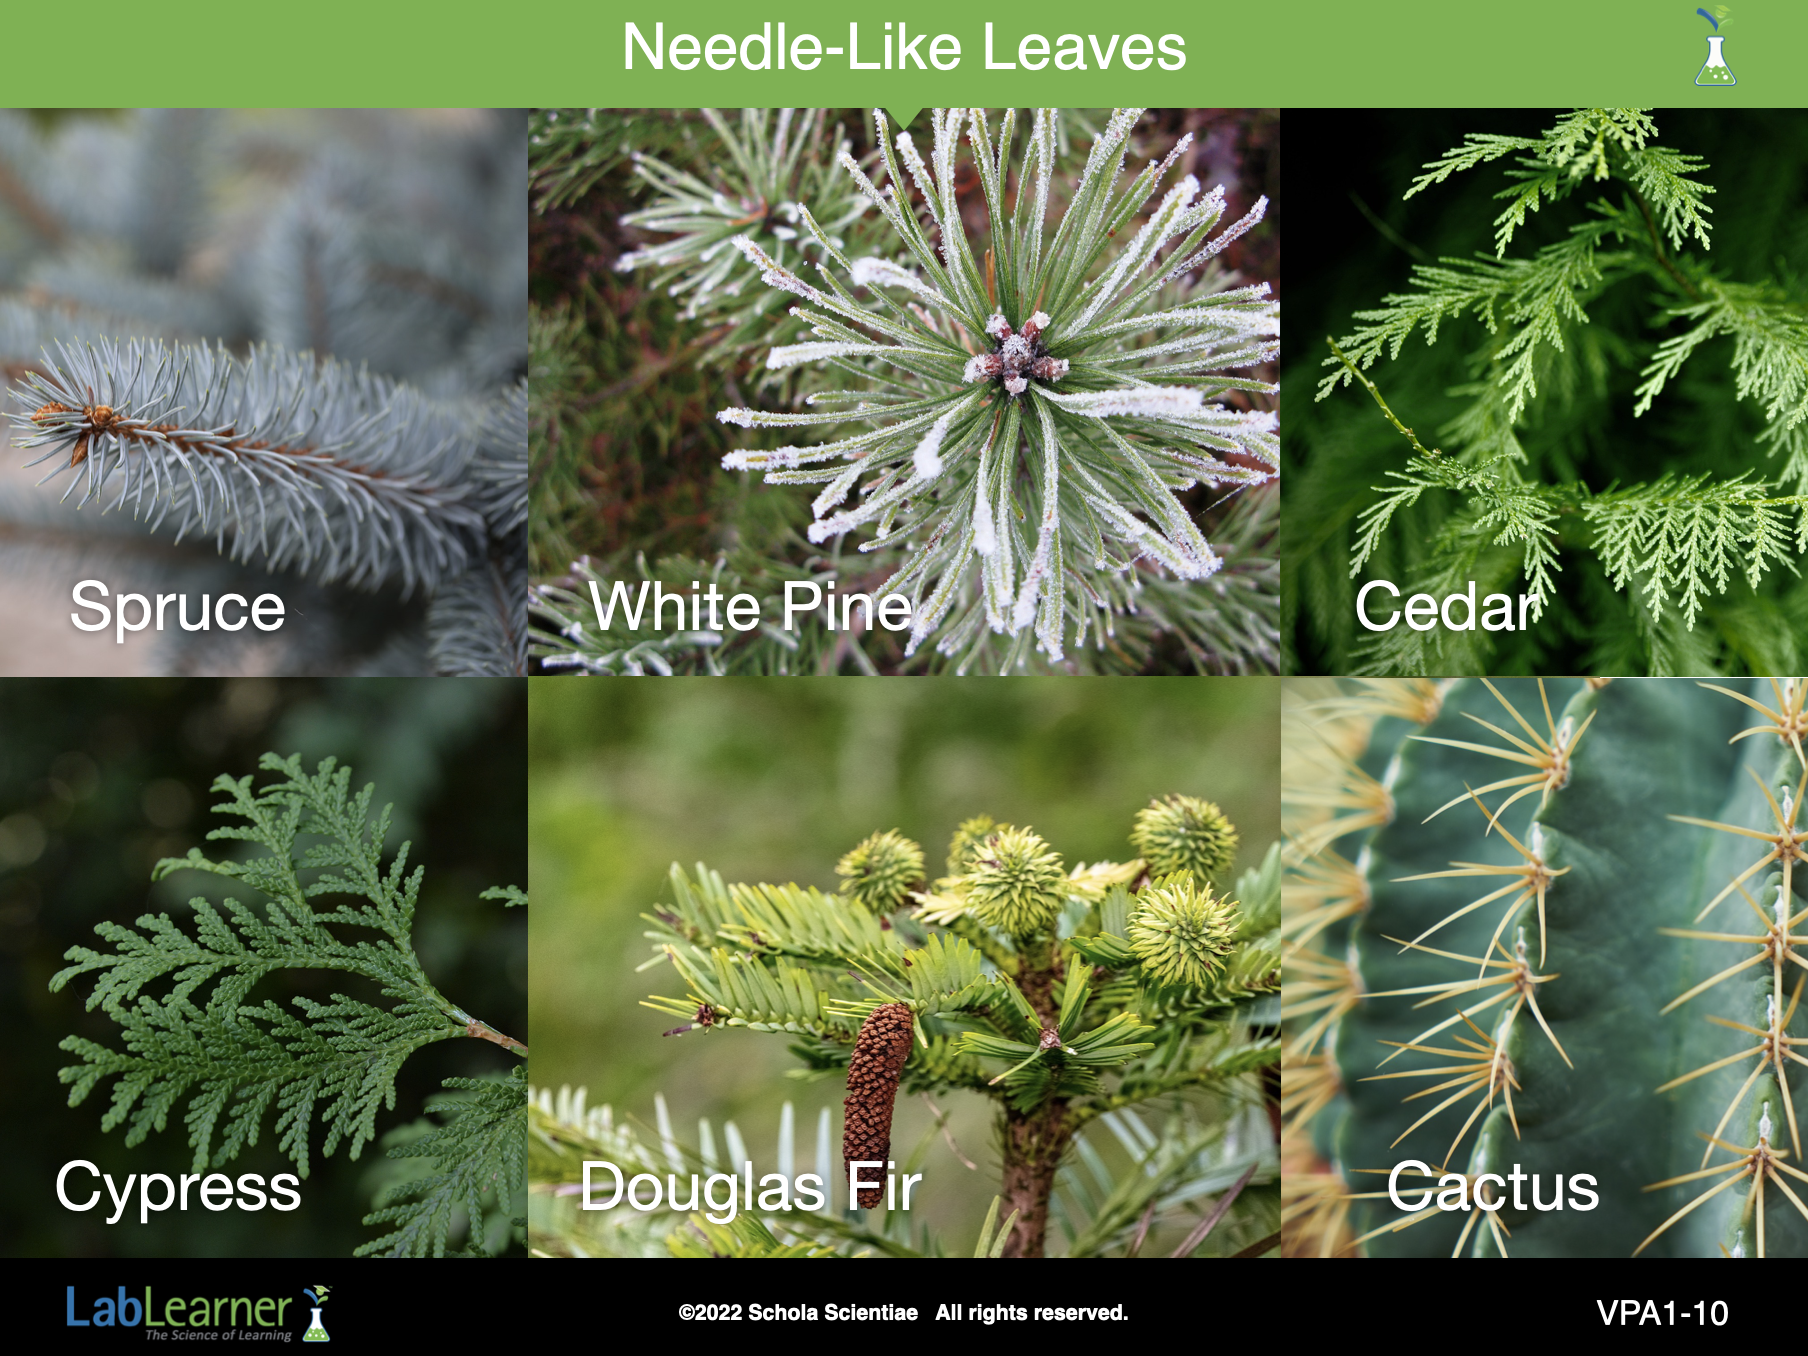
SLIDE 1VPA-10
Complete this set of slides by highlighting two main categories of leaves: broad leaves and needle-like leaves.
Students will be able to review what they have learned about the parts of plants in the next slide set Check Understanding: Plants.
______________________________________________
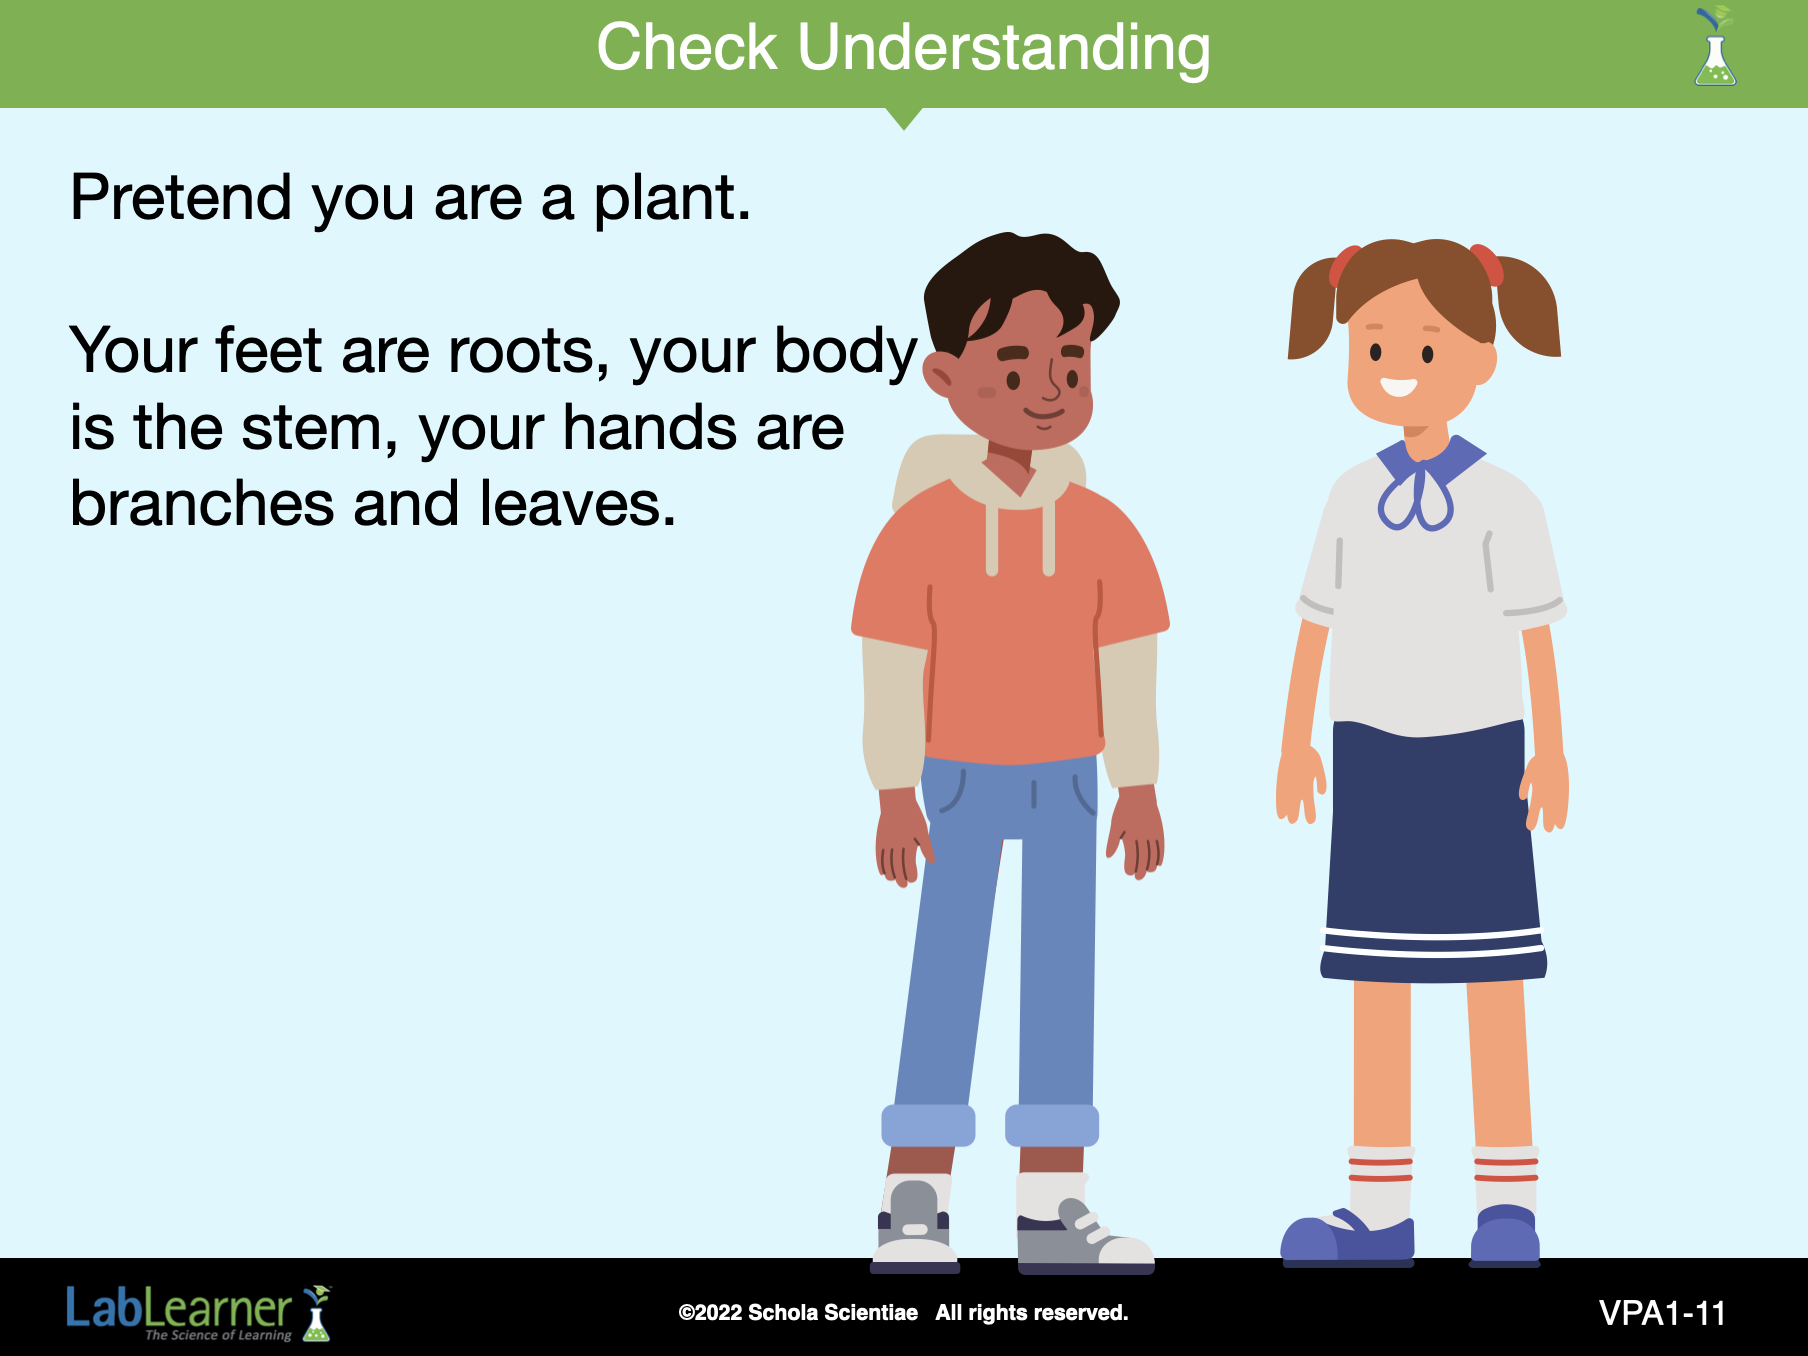
SLIDE 1VPA-11
Have students pretend they are a plant. Their feet are roots, their body is the stem, and their hands are branches and leaves.
______________________________________________
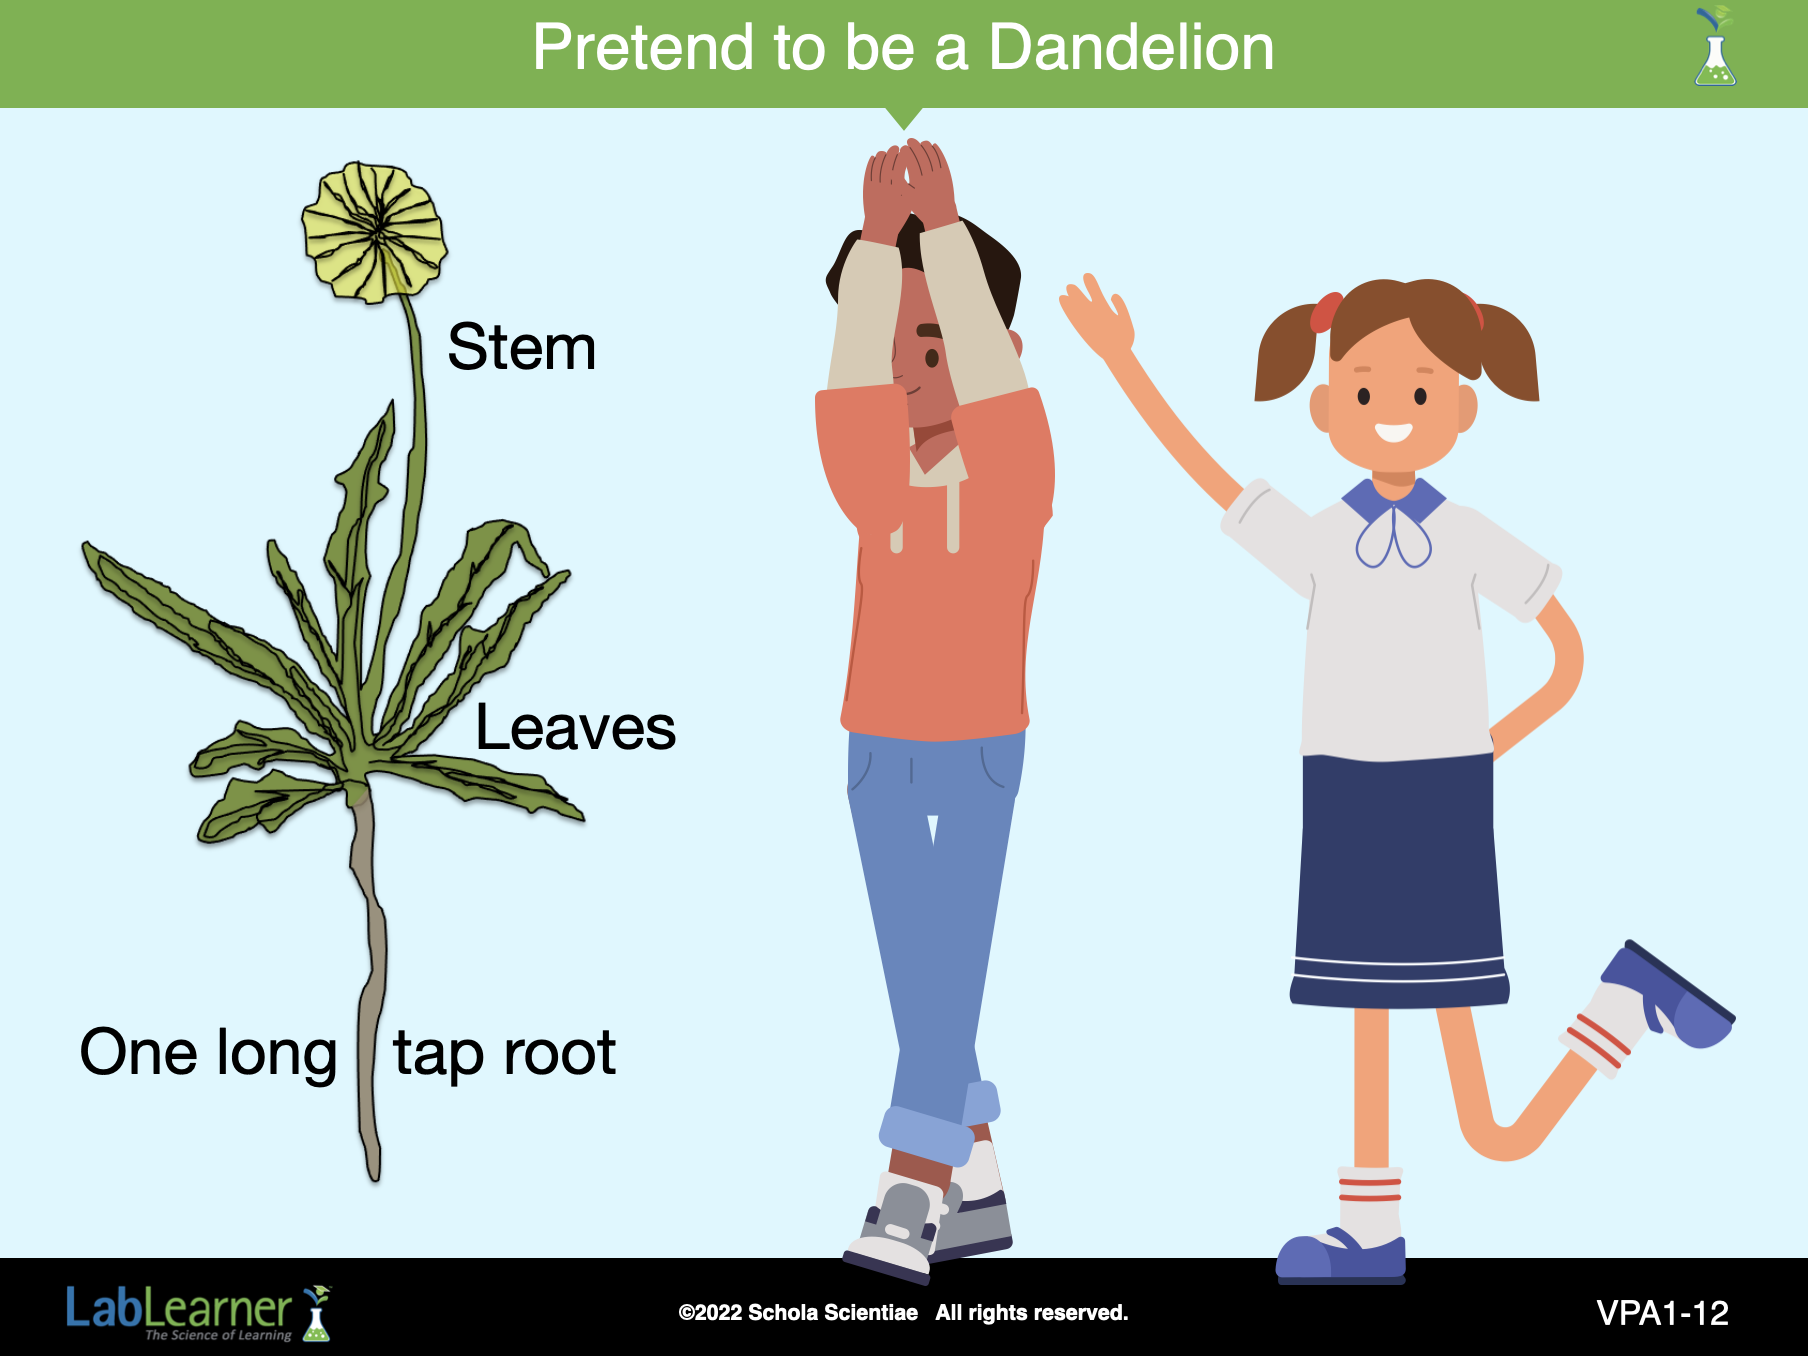
SLIDE 1VPA-12
______________________________________________
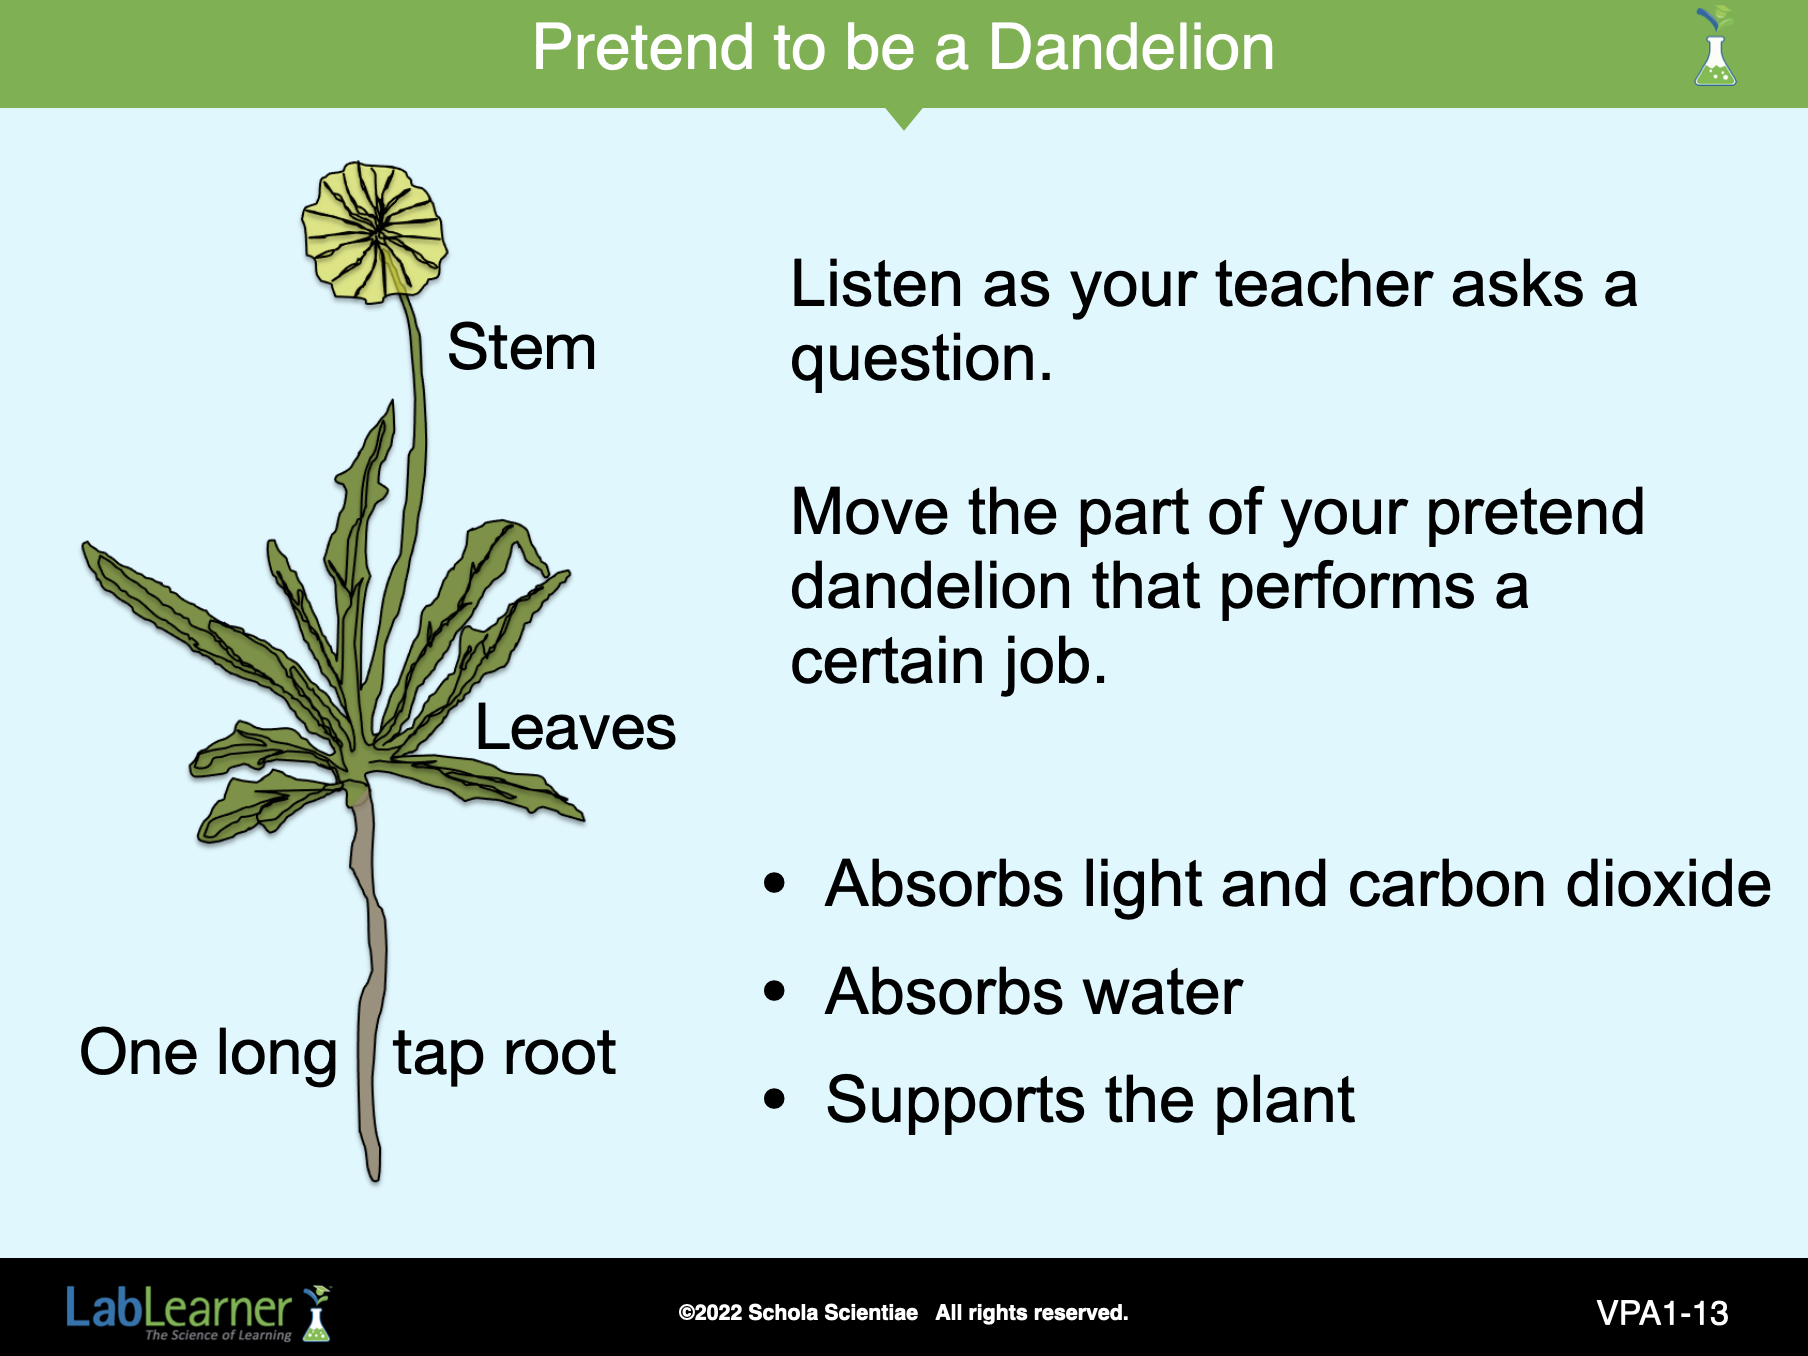
SLIDE 1VPA-13
Explain that you will say a function of a part of a dandelion. The students are to move the part of their “model dandelion” that performs the function.
______________________________________________
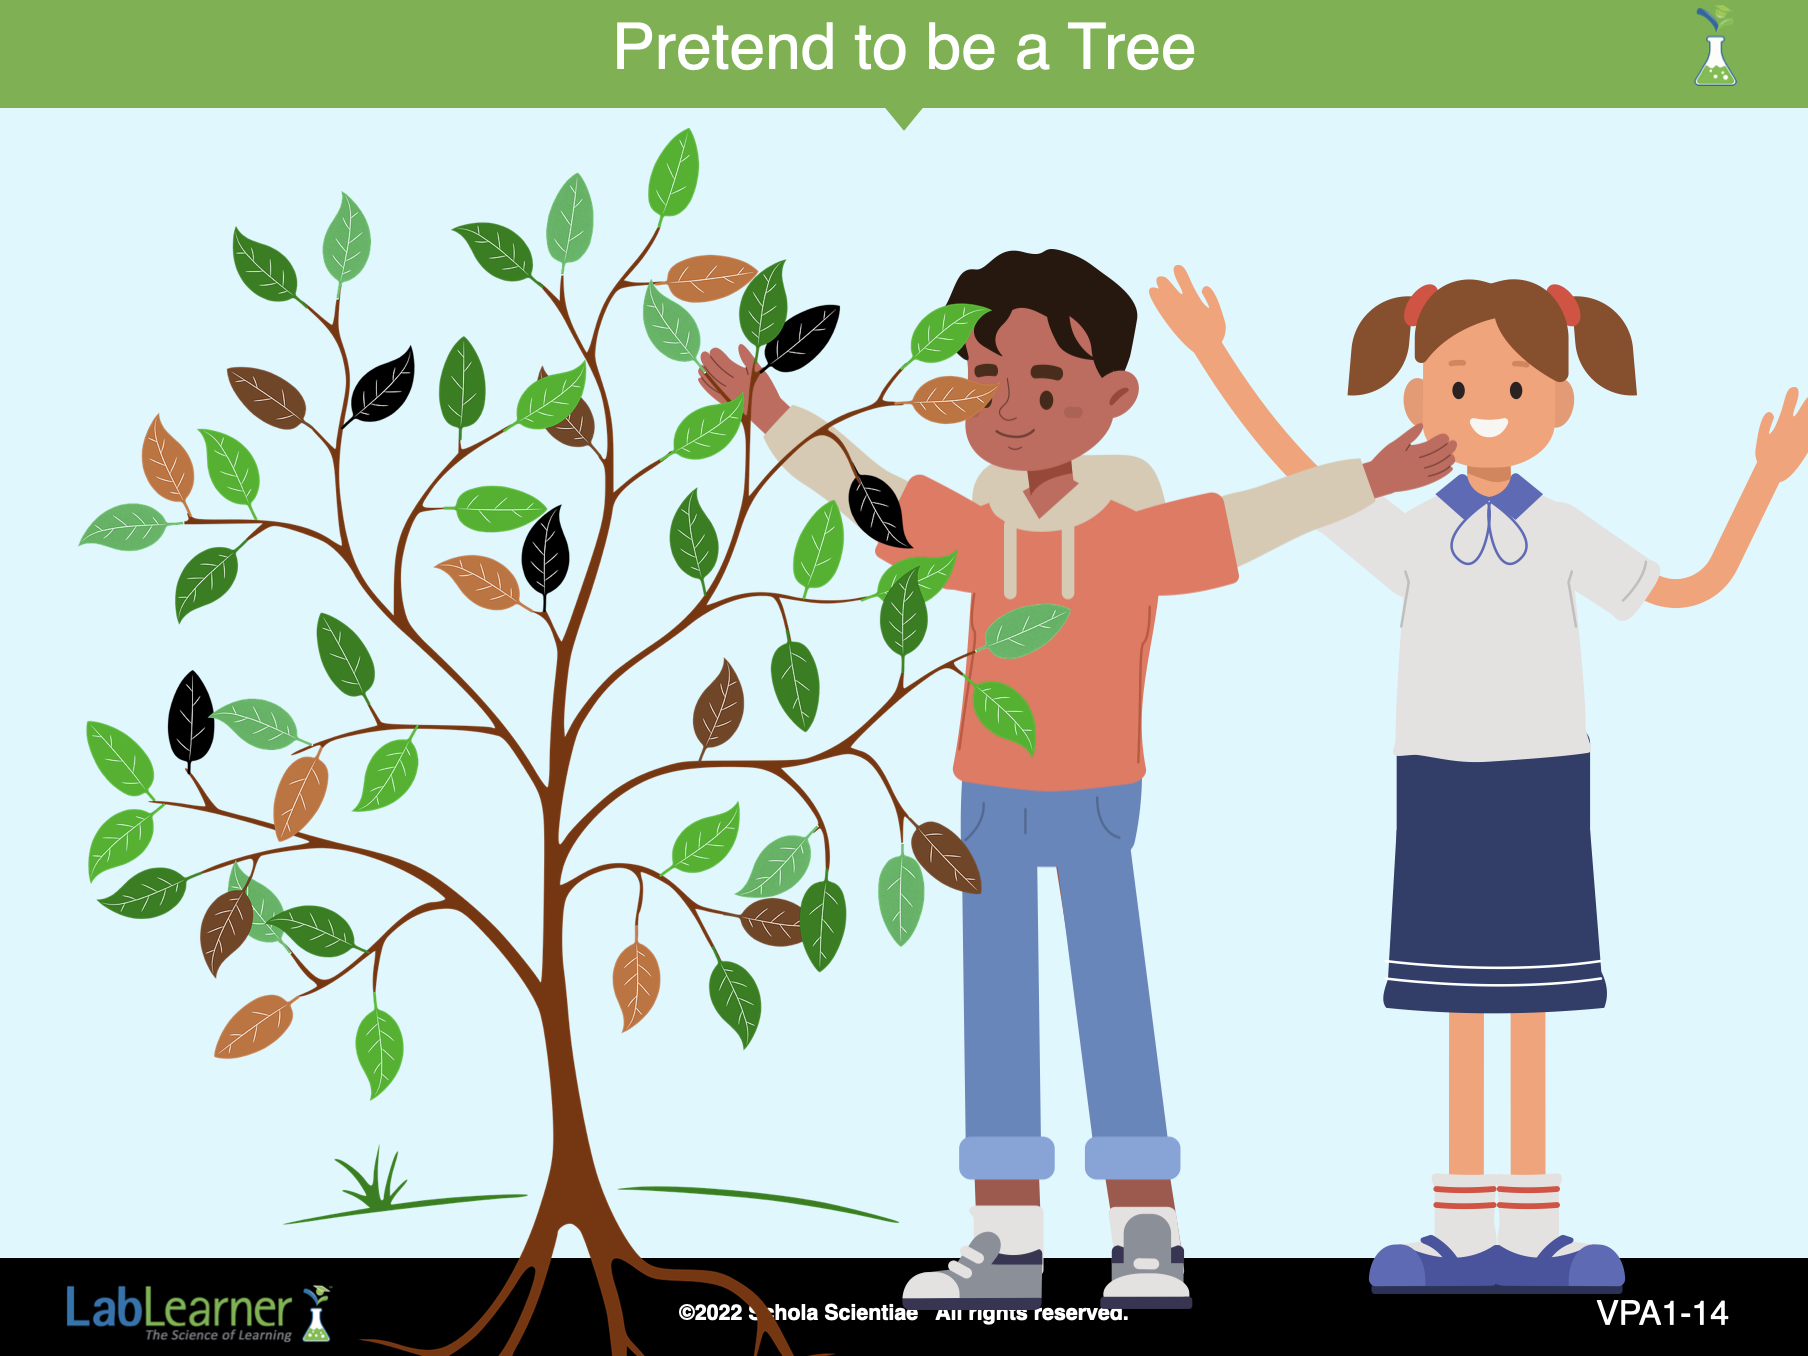
SLIDE 1VPA-14
Follow the same type of directions for the role play and the correspondence of the structures to the functions of the tree. Use this slide and the next for the second part of the role play.
Pretend to be a tree. You should:
- Stand straight (Body models trunk/stem of tree)
- Hold hands out with palms up and fingers together (Hands model broad leaves of the tree)
- Stand on two feet (Two feet model fibrous roots of the tree).
______________________________________________
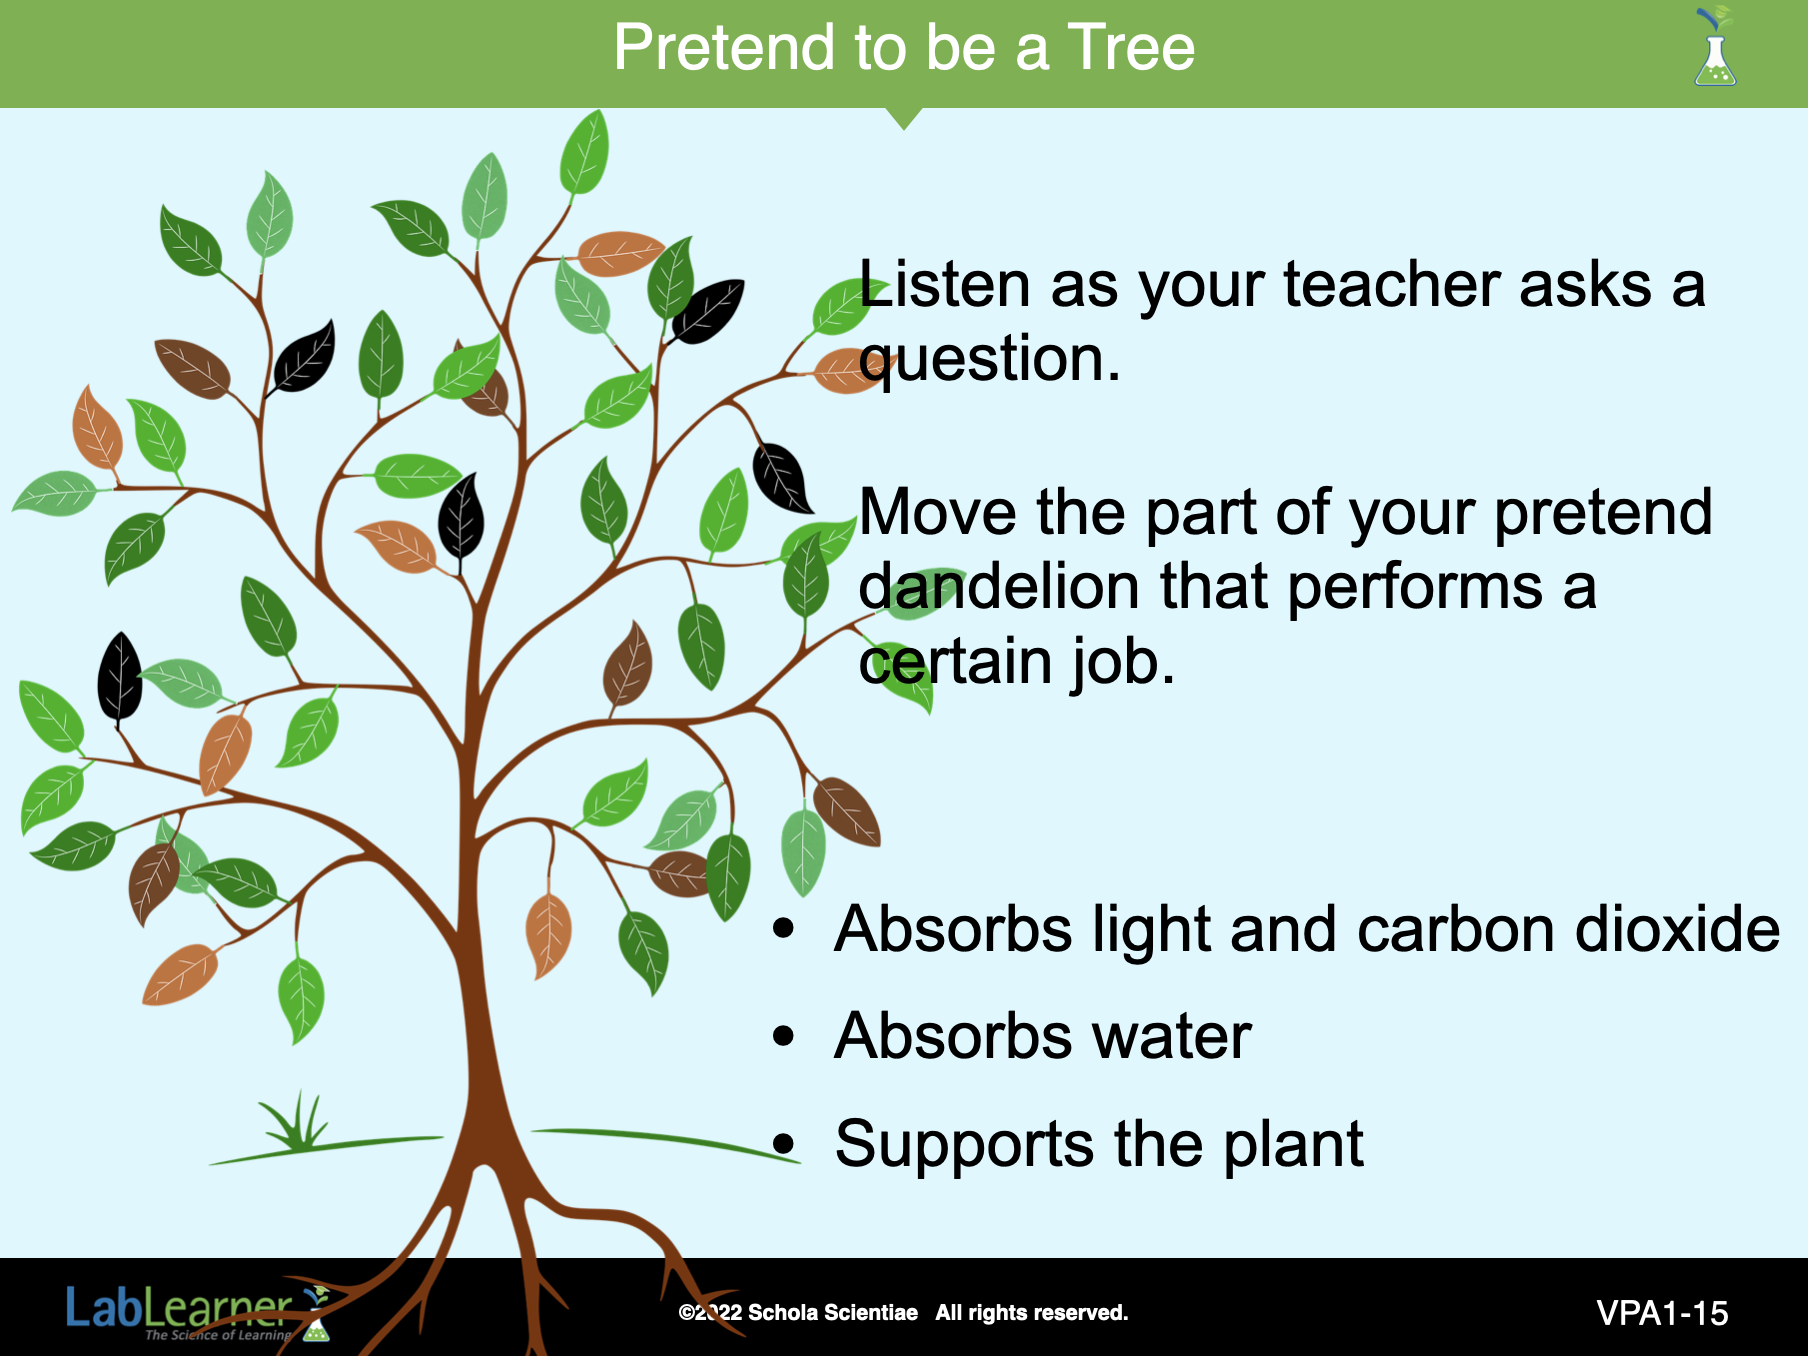
SLIDE 1VPA-15
You may choose to extend the role-play with students incorporating other types of plants or may ask students to give suggestions for both plants and ways in which to model the plants. You may also wish to have students work in pairs, with one student suggesting a plant and the other modeling it. A couple additional options are given below for an extension of the role play:
- Model needle-like leaves by holding up one finger.
- Model bulbs by curling into a ball or kneeling on the floor.
______________________________________________
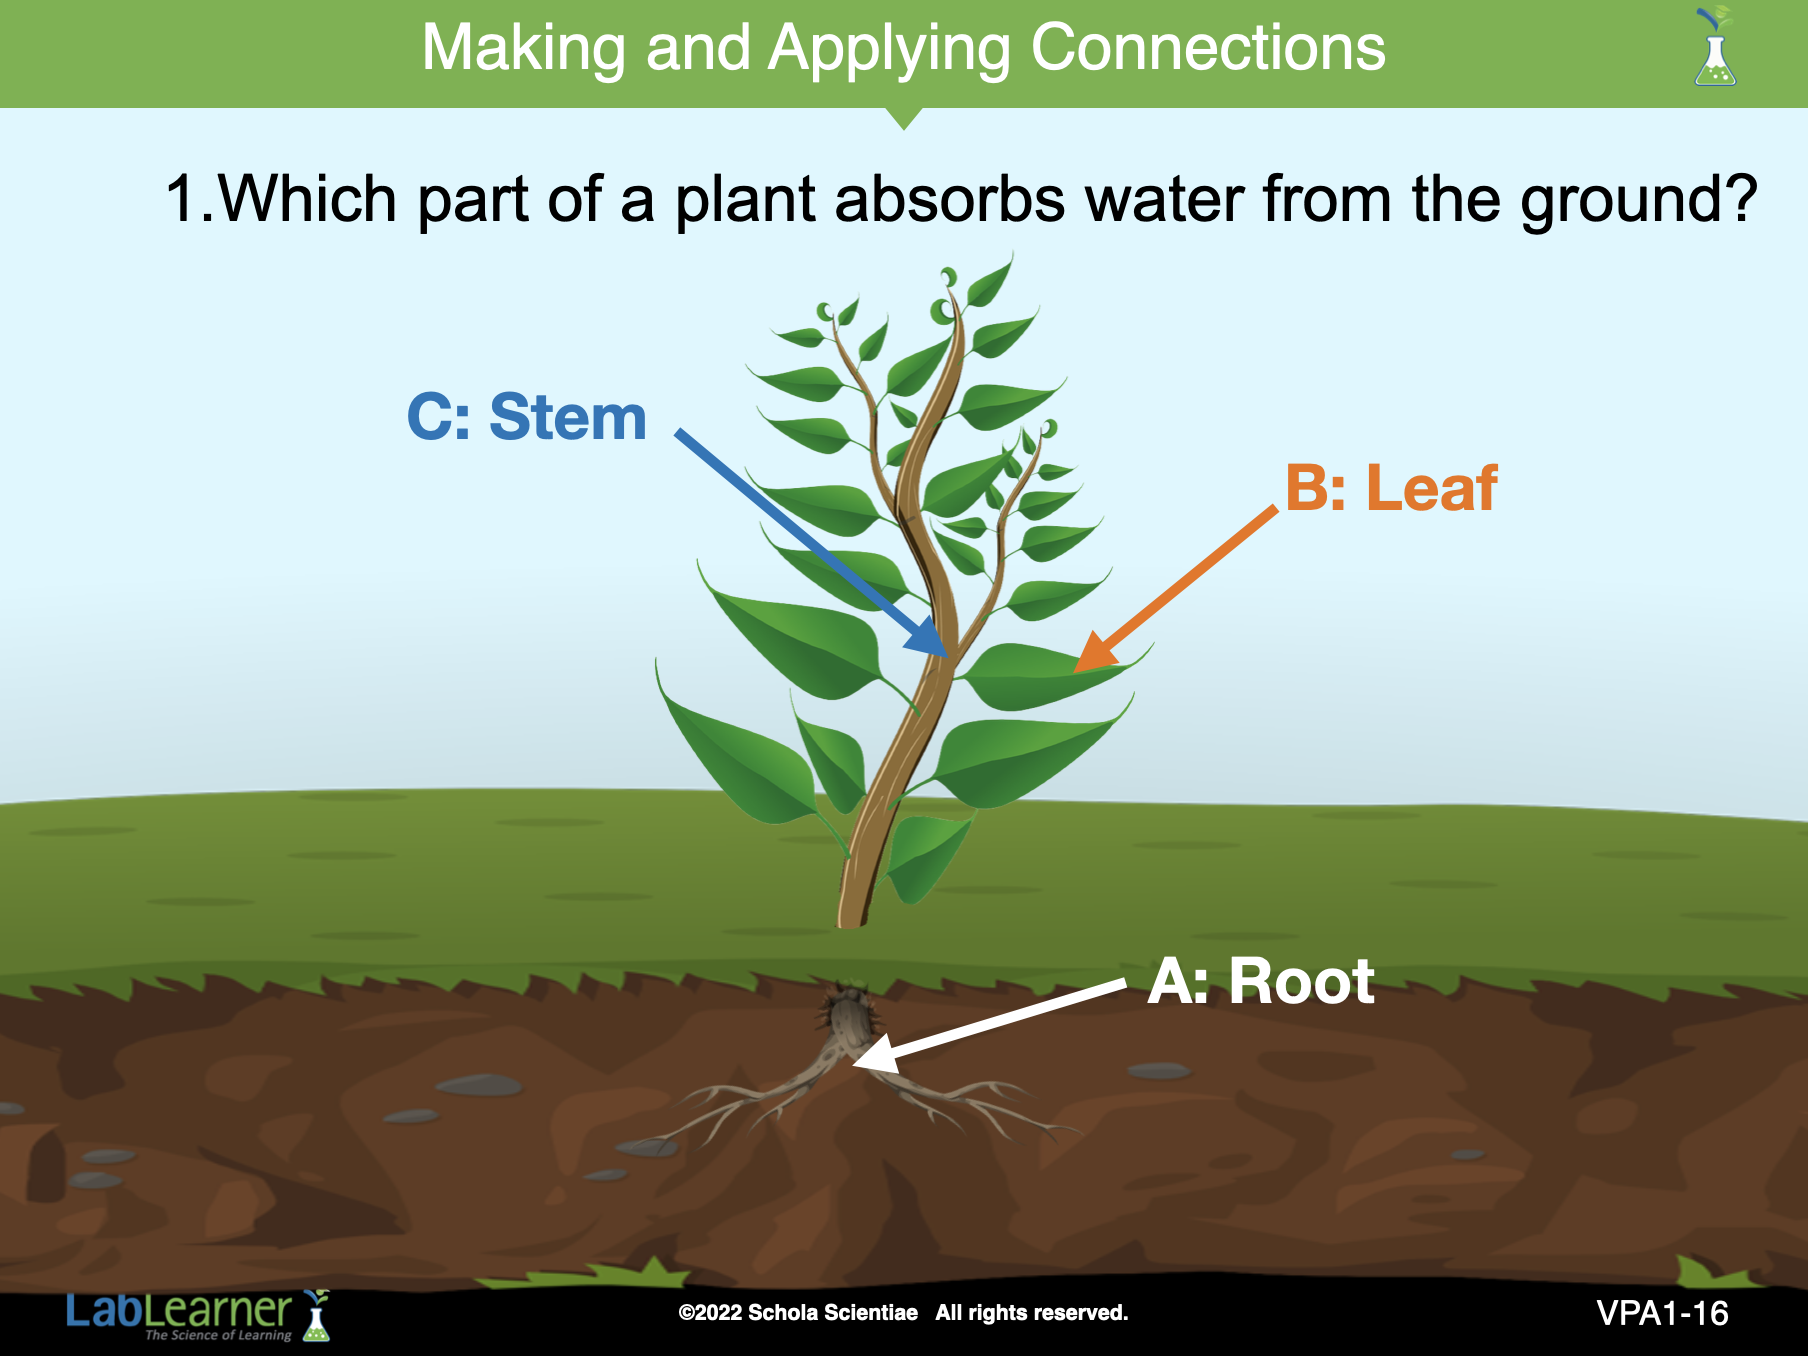
SLIDE 1VPA-16
The Making and Applying Connections section of the Journey has been provided as a way to help students rehearse and process the information learned thus far, as well as to become more familiar with test-taking strategies and various types of analysis questions.
Answers
Question 2: A (Root)
______________________________________________
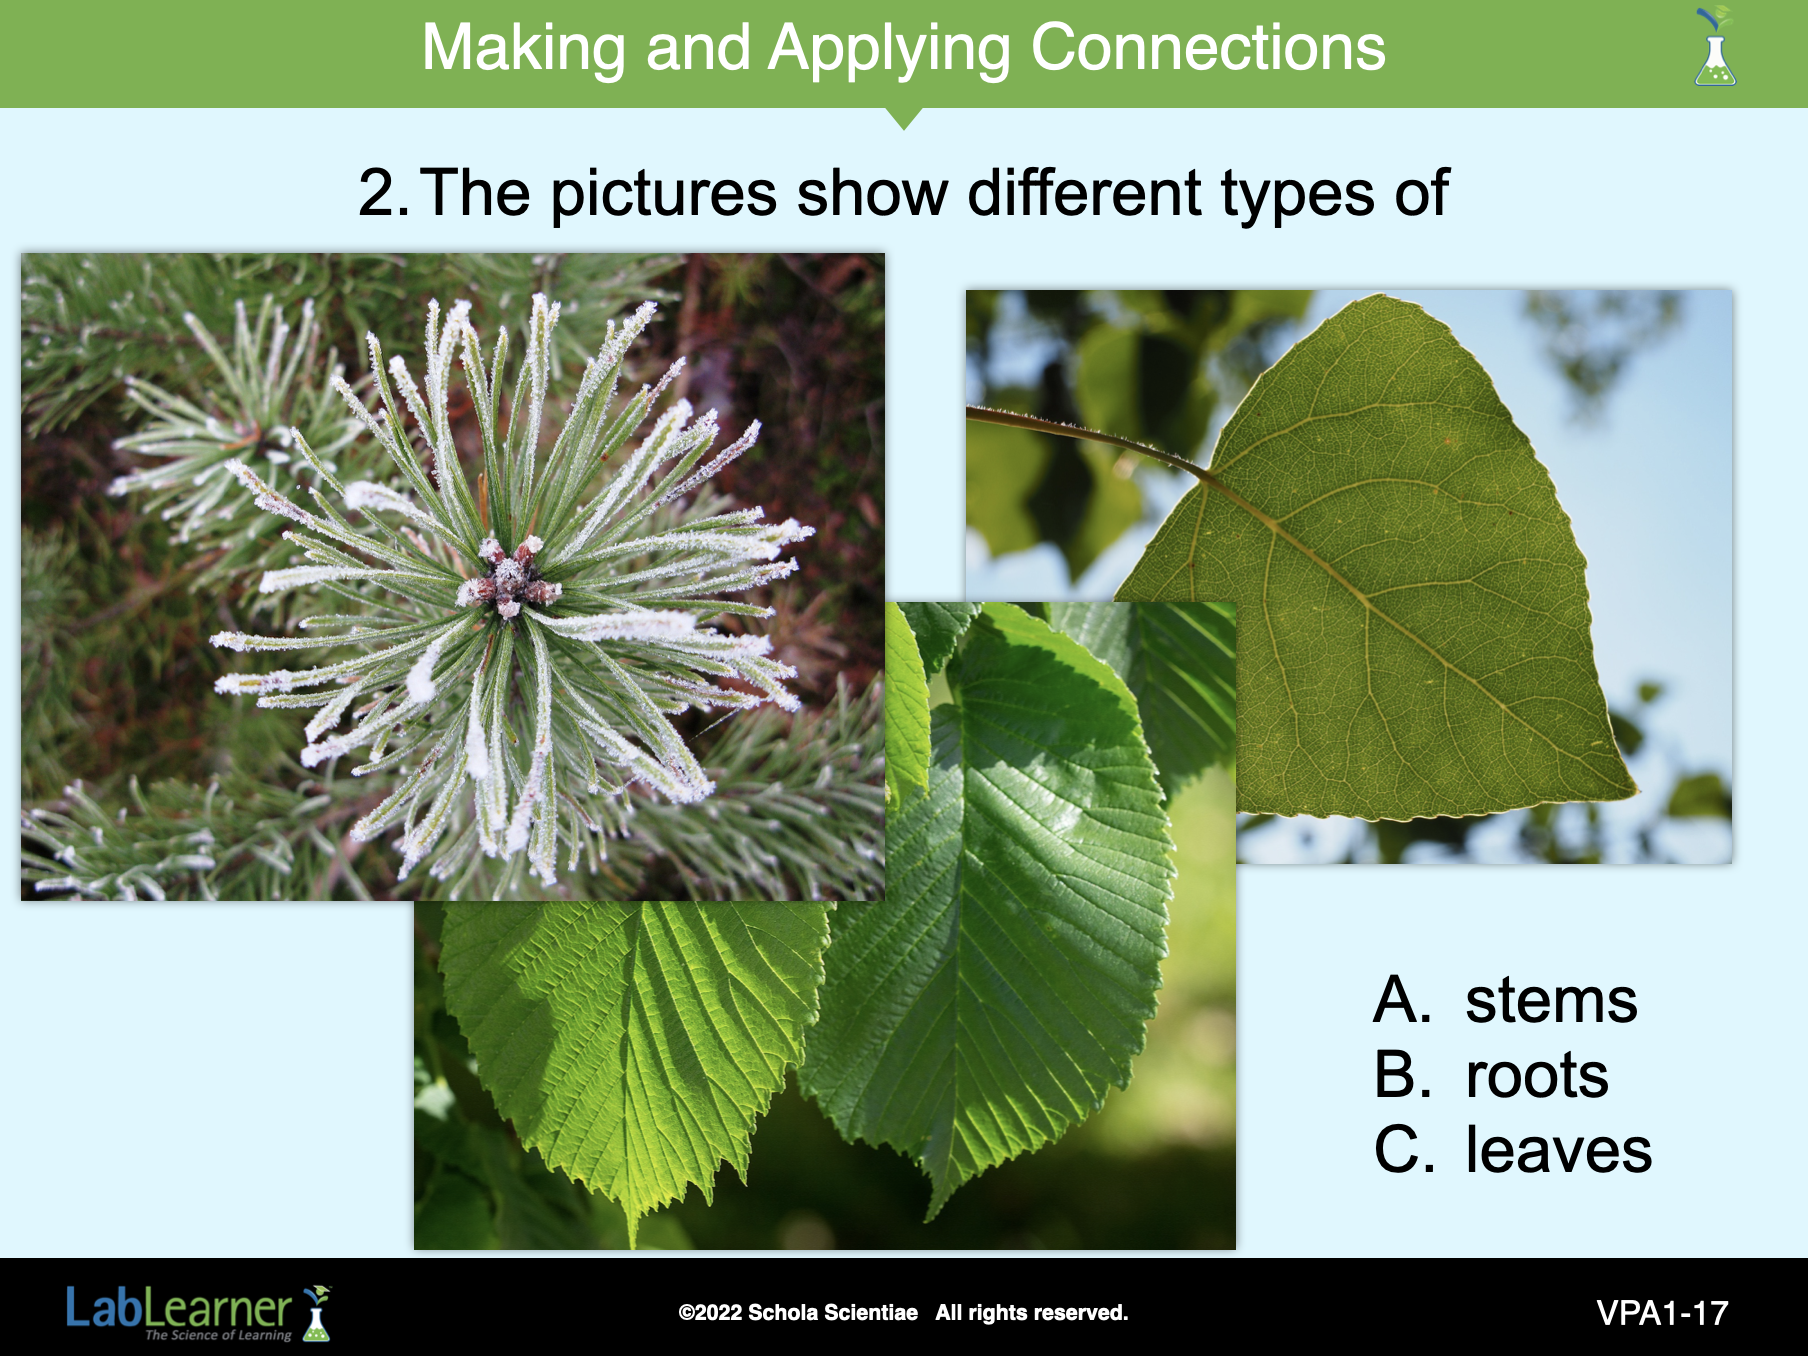
SLIDE 1VPA-17
Answers
Question 2: C (leaves)
______________________________________________
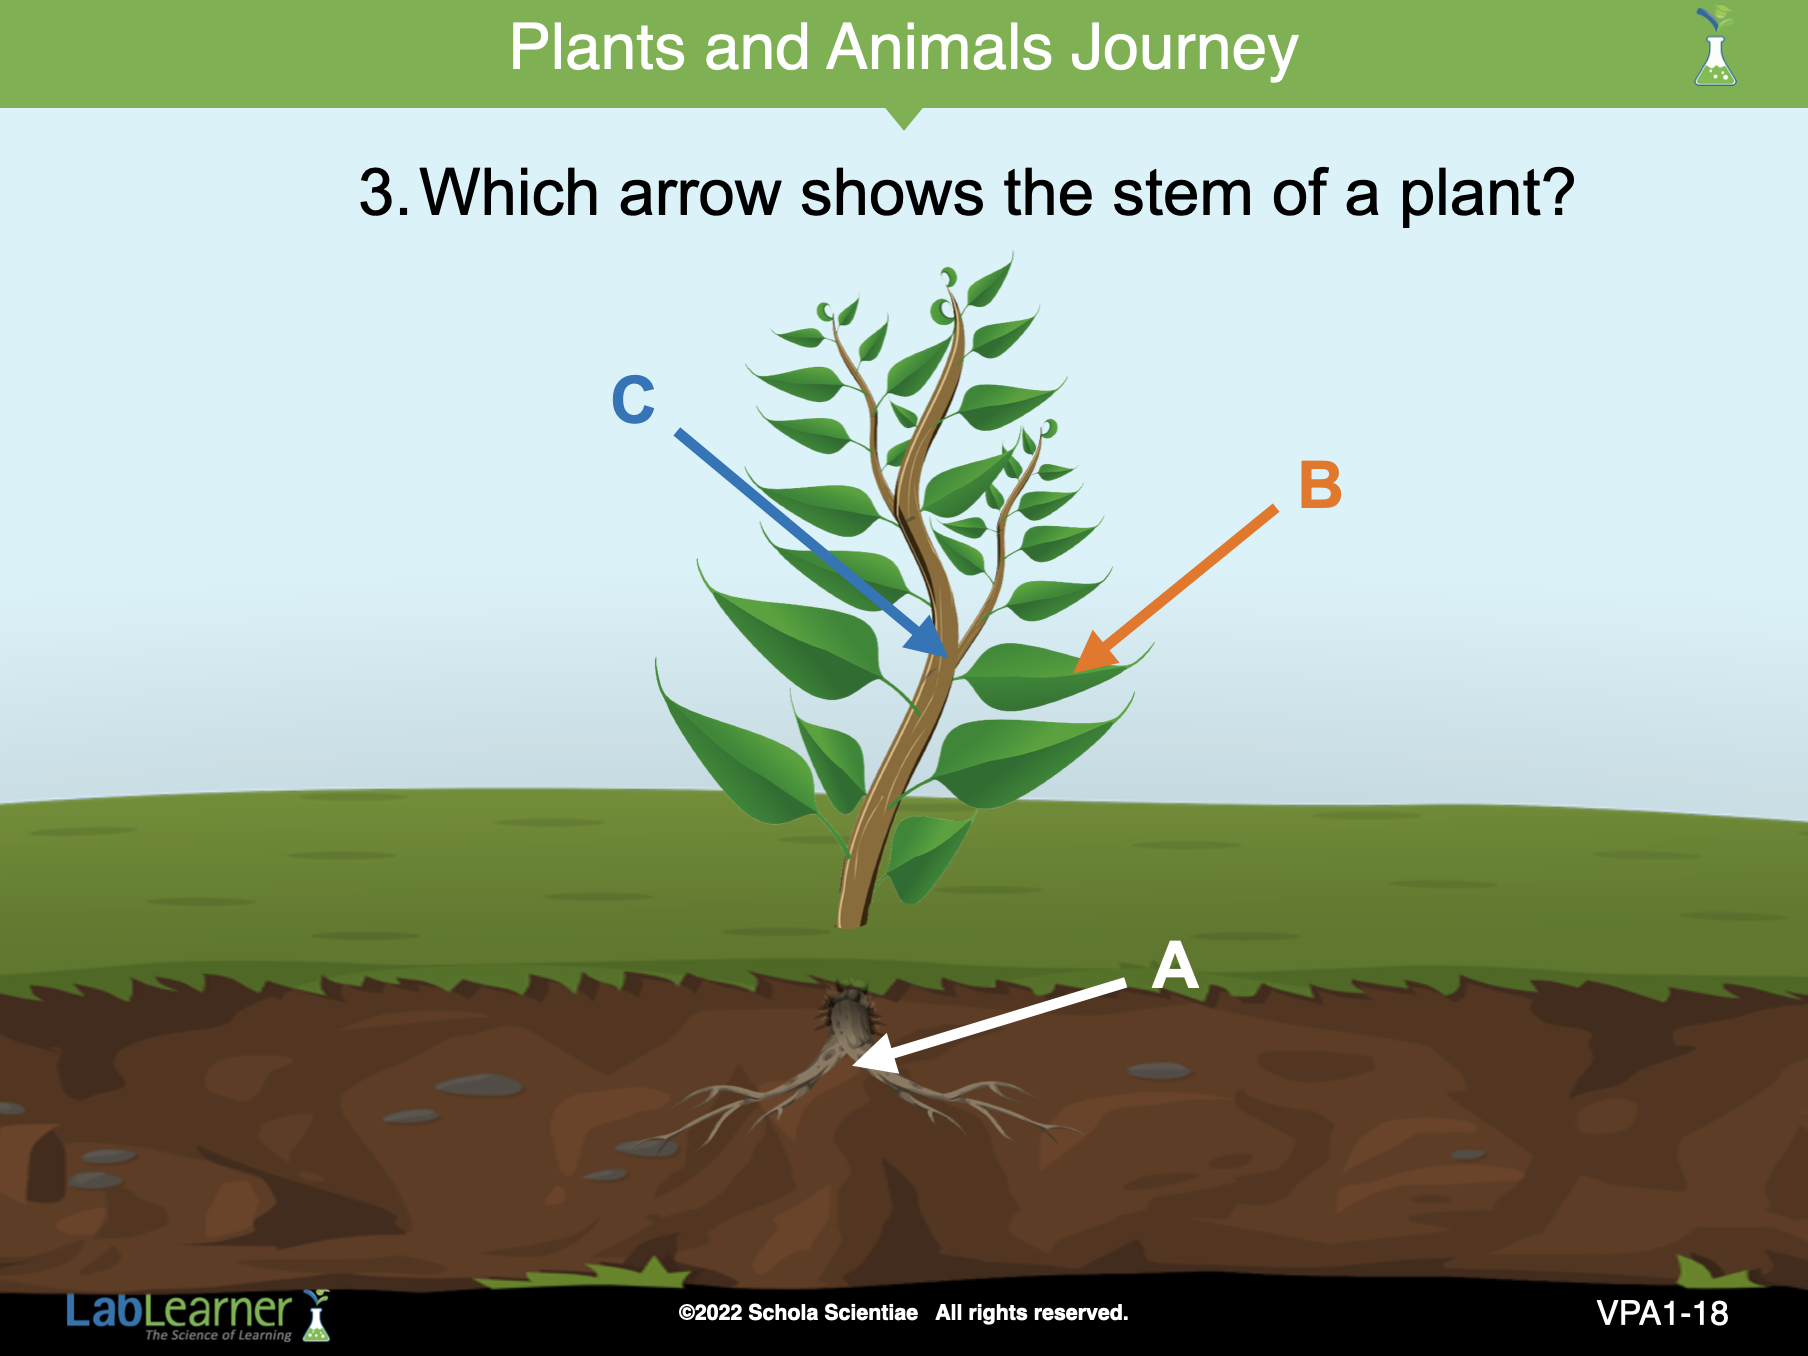
SLIDE 1VPA-18
Answers
Question 3: C