Teacher Portal:
Chemistry, Matter and Interactions
Investigation 4 – Lab
 ASK WHY
There are five major branches of chemistry today – organic chemistry, analytical chemistry, physical chemistry, inorganic chemistry, and biochemistry. Organic chemistry is a brank of chemistry that focuses upon molecules and compounds that contain the carbon atom. Since living organisms contain many thousands of types of carbon-containing molecules, organic chemistry is sometimes associated with compounds derived from living organisms.
BRANCH OUT
According to the American Chemical Society, “inorganic chemistry is concerned with the properties and behavior of inorganic compounds, which include metals and minerals.
“While organic chemistry is defined as the study of carbon-containing compounds, inorganic chemistry is the study of the remaining (i.e., not carbon-containing) subset of compounds.
“Many inorganic chemists work in industry, but they also work in academic institutions and government labs. Inorganic chemists who work in government say their time is increasingly spent writing grant proposals and competing for research money”.
BE PREPARED
Supplies and Equipment:
Class Materials:
- 1 liter ice
- 930 ml water
- 15 ml white vinegar
- 1 apple
- 1 6-cm diameter ball play dough
- 1 knife
- 6 g baking soda
- 67 g sugar
- 56 g powdered (non-chlorine) bleach
- 1 liter pitcher
- blue food coloring
- 10 ml dish detergent
- 100 ml beaker
- 1 plastic dropper
- paper towels
- masking tape
Group Materials:
Trials 1-4:
- 1 400 ml beaker
- 1 100 ml beaker
- 1 glass stirring rod
- 1 thermometer
- 1 timer or stopwatch
Trials 5-6:
- 1 timer or stopwatch
- 2 100 ml beakers
- 1 test tube rack
- 3 test tubes
- 5 15 ml falcon tubes
- 3 balloons
- 1 funnel
- 1 glass stirring rod
- 1 thermometer
Individual Materials:
- 1 Student Data Record
- 1 pair of safety goggles
Teacher demonstration materials:
- 1 stir plate
- 1 400 ml beaker
- 2 hot hand protectors
Teacher Preparation
Trials 1-4:
a. Fill one (1) 400 ml beaker to the 200 ml mark with water.
b. Fill five (5) 100 ml beakers with 60 ml of water.
c. Immediately before the beginning of lab obtain one (1) liter ice and divide evenly between five (5) 400 ml beakers.
Note: If desired, this Investigation may be divided into two lab experiences. Students may perform Trials 1-4 one day and Trials 5-6 the following day. If this is the chosen method of implementation, conclude the preparation for Trials 1-4 by separating the class into five groups and then begin the experiment.
Trials 5-6:
a. Fill ten (10) 100 ml beakers with 60 ml of water.
b. Label five (5) falcon tubes “baking soda”, and fill to the 1 ml mark with baking soda.
c. Label five (5) falcon tubes “vinegar” and fill with 3 ml of vinegar.
d. Label five (5) falcon tubes “water” and fill with 6 ml of water.
e. Label five (5) falcon tubes “sugar” and fill with sugar.
f. Label five (5) falcon tubes “bleach” and fill with powdered (non-chlorine) bleach.
g. Place three (3) test tubes and one (1) of each of the five different falcon tubes in each test tube rack.
h. Pour 10 ml of dish detergent into a 100 ml beaker and place at distribution point with the plastic dropper.
Note: The efficacy of the powdered chlorine bleach may be affected by its storage conditions as it’s chemical reactivity is sensitive to humidity and shelf life. Efforts to store powdered chlorine bleach in a dry place should be made. Powdered chlorine bleach older than a year should be replaced with new stock.
Instruction
Direct each student group to obtain the following necessary materials from the distribution point: one (1) 400 ml beaker of ice, one (1) 100 ml beaker of water, one (1) glass stirring rod and one (1) thermometer, and one (1) timer/stopwatch.
GET FOCUSED
-
The trials in this investigation will focus on the physical and chemical changes that can occur as matter interacts. While students can easily describe the difference between physical and chemical changes through definitions, and the signs of chemical changes, identifying a physical or chemical change in a lab setting is often much more difficult as students need to combine the signs of chemical changes with additional previous knowledge of specific reactions.
-
In addition, many physical changes may appear to exhibit the signs of chemical changes when viewed by naïve learners. Trial 1 has been designed to help students understand that what may appear to be signs of chemical changes are the results of the specific changes of melting, boiling, and dissolution, so that students can identify the processes of melting, boiling, and dissolution as physical changes in the future.
INVESTIGATE
Trials 1-3
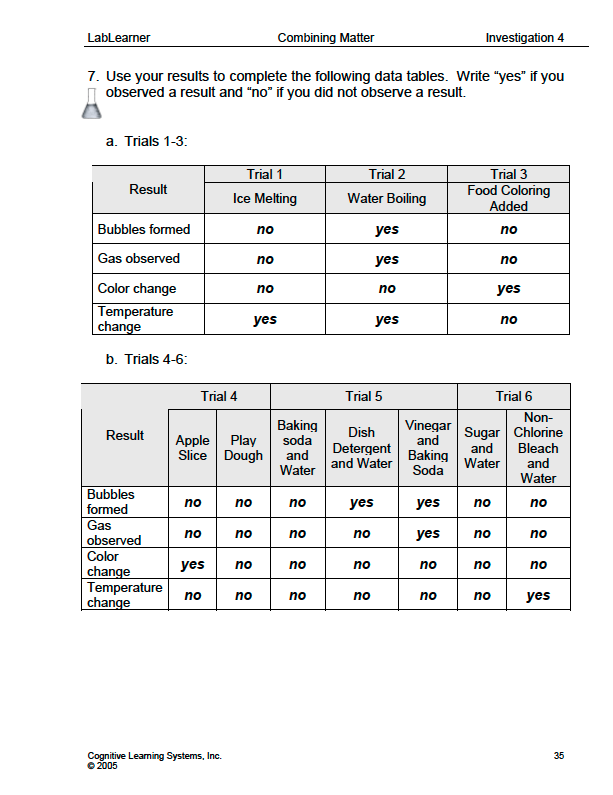
a. Direct students to locate the beaker of ice. Explain that scientists know that water freezes and melts at 0oC. Explain that this is called the melting (or freezing) point of water and is a property of water.
Ask students: Is the melting point a qualitative or a quantitative property? Why? Students should indicate that melting point is a quantitative property because it can be measured.
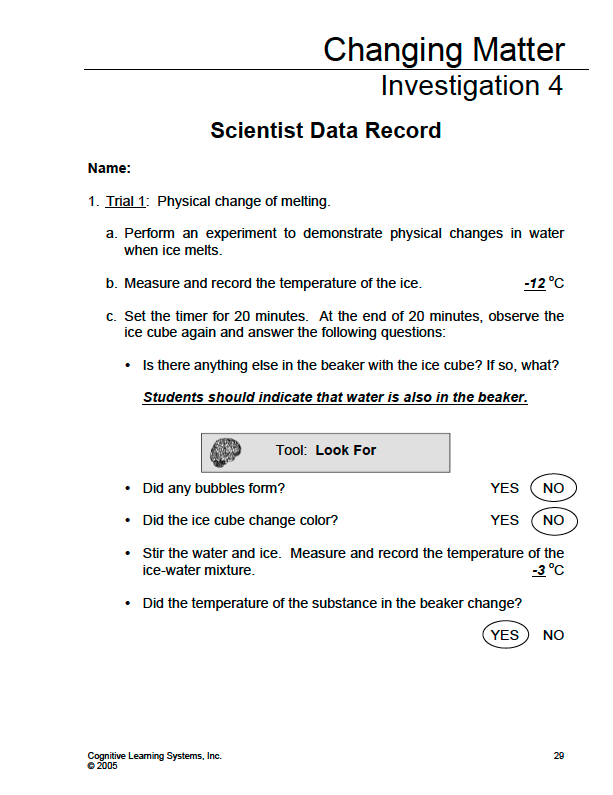
b. Direct students to measure the temperature of the ice and record the answer in Problem 1b of their Student Data Record.
c. Direct students to set their timer or stopwatch for 20 minutes. Explain that at the end of that time they will come back to the ice for further study. When the time expires, direct students to complete Problem 1c.
d. Direct students’ attention to the 400 ml beaker containing 200 ml of water at the front of the classroom. Place the beaker on the stir plate, and turn the heating control to “10”. Explain that the boiling point of water is 100oC.
Ask students: What happens to water when it reaches its boiling point? Students should indicate that liquid water becomes steam, the gaseous form of water.
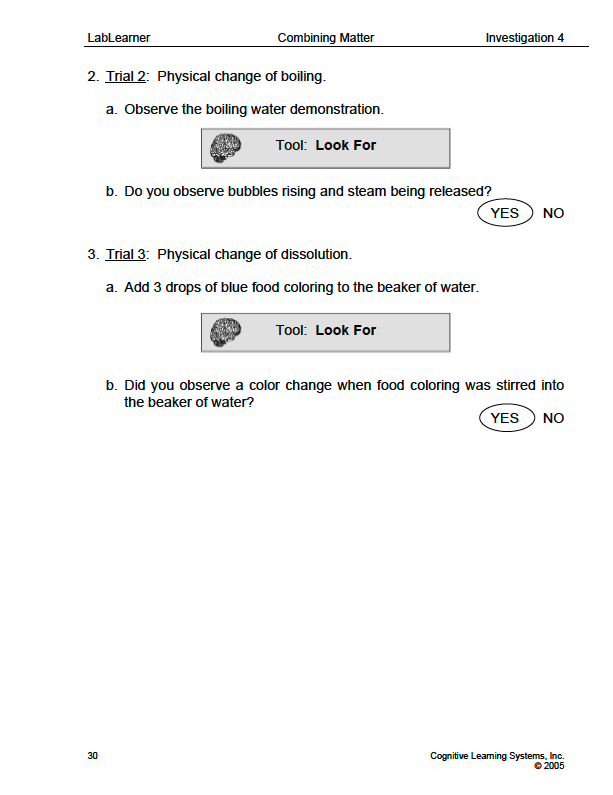
e. Continue with the trial while the water comes to a boil. When the water is boiling, direct students to observe the boiling water and use their observations to answer Problem 2b.
f. Explain to students that you will be adding blue food coloring to a beaker of water for each group.
Ask students: What do you expect to happen to the water when the color is added? Student answers may vary. Students most likely will indicate that they expect the water to turn the color of the food coloring.
g. Add 3 drops of blue food coloring to the beaker containing 60 ml of water for each group. Direct students to stir the food coloring thoroughly into the water and answer Problem 3b.
Note: Proceed to Trial 2 if the timers for the ice have not sounded at the completion of the color segment of Trial 1. Return to the ice-melting and water boiling portions of Trial 1 during one of the subsequent trials if necessary to measure the temperature of the ice and make the observations of the boiling water.
Trial 4
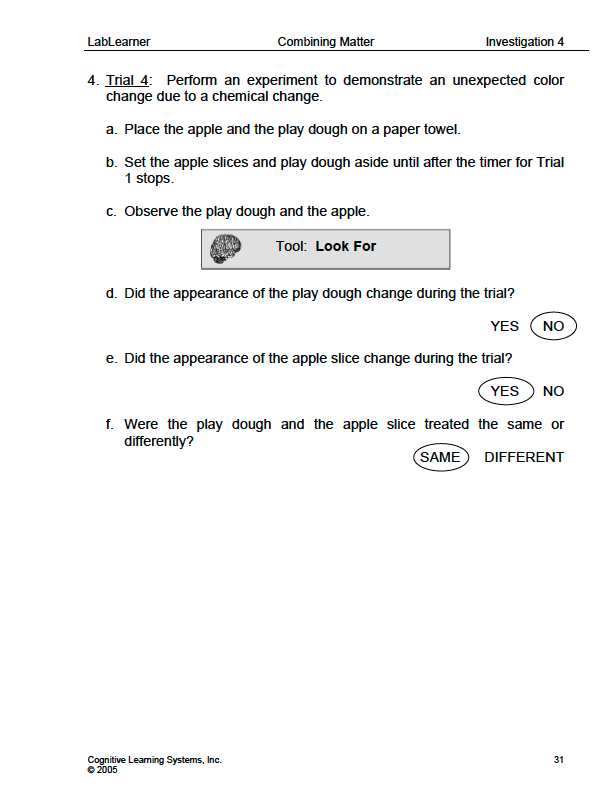
In Trial 3, students observed a change in the color of water upon the addition of blue food coloring. Although this does represent a color change in the most literal terms, the color change that is used as a sign of a chemical change is one of an unexpected color change. In Trial 3, the change of color of the water from clear to blue was expected or predictable. In this Trial, students will observe an unexpected color change as an apple is exposed to air. The oxidation of the apple’s surface by the air is a chemical change and observable as the browning of the apple’s surface.
In Trial 4, students will compare a cut slice of apple exposed to air with a cut section of play dough exposed to air. The play dough will serve as a control to demonstrate that the apple browns due to a chemical change on the apple’s surface in response to contact with air, rather than the color being physically deposited by the air.
a. Hold up the apple. Ask students: What will happen when an apple and play dough are cut and exposed to air? Student answers may vary.
b. Slice the apple into five (5) slices and give one (1) slice to each student group. Clean and dry the knife with a paper towel. Slice the playdough into five (5) slices and give one (1) slice to each group.
Note: The chemicals in the apple that react to the air to form the characteristic brown color can be transferred to the play dough, causing an accidental color change on the play dough which would give students an erroneous experimental result. Therefore, it is important that the knife be clean and dry before the play dough is sliced. It is suggested that the apple slice and play dough be given to different students if dispensed from the distribution center. Alternatively, visit each student group to dispense apple slices first then make a second visit to each group to dispense slices of play dough. Discourage students from handling the slices during the experiment.
c. Direct students to place the playdough and the apple slice on a paper towel and set them aside until the timer for the ice experiment sounds. After completing the observations for the ice experiment, students should observe the apple slice and the playdough and complete Problem 4.
d. Ask students: Why did the apple turn brown? Why didn’t the playdough change? Student answers may vary. Some students may suggest that the air causes the apple to turn brown. Others may suggest that the browning is a result of contact of the apple flesh with the blade of the knife.
e. Explain that the cut surface of an apple turns brown because of a chemical change on the surface of the apple slice. The brown color is the result of a new chemical forming when the air comes in contact with the slice. The same chemical change does not occur between the play dough and the air. Scientists call the browning of the apple an unexpected color change because most substances when exposed to air, like the playdough, do not turn brown.
Note: If desired, this Investigation may be divided into two lab experiences. Students may perform Trials 1 through 4 one day and perform Trials 5 and 6 the following day. If this is the chosen method of implementation, end the lab experiment at this point and allow students to clean up the lab and return the materials and equipment to their assigned locations. If desired, the following materials may be left on the lab tables for the completion of Trials 5 and 6: one (1) glass stirring rod and one (1) thermometer.
__________________________________________________
Trial 5
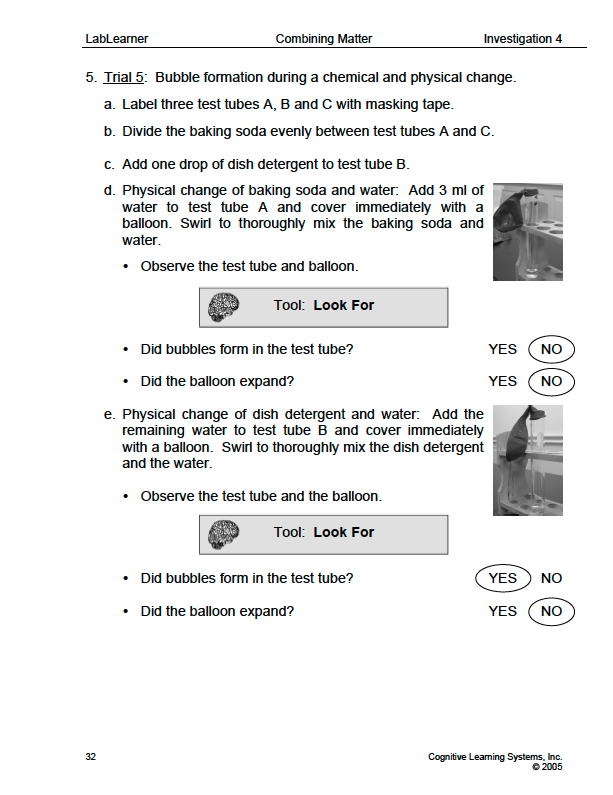
In this trial, students will observe the release of gas as the result of a chemical change. Students will compare the effects of mixing water and baking soda and water and dish detergent with the effects of mixing vinegar and baking soda on the expansion of a balloon.
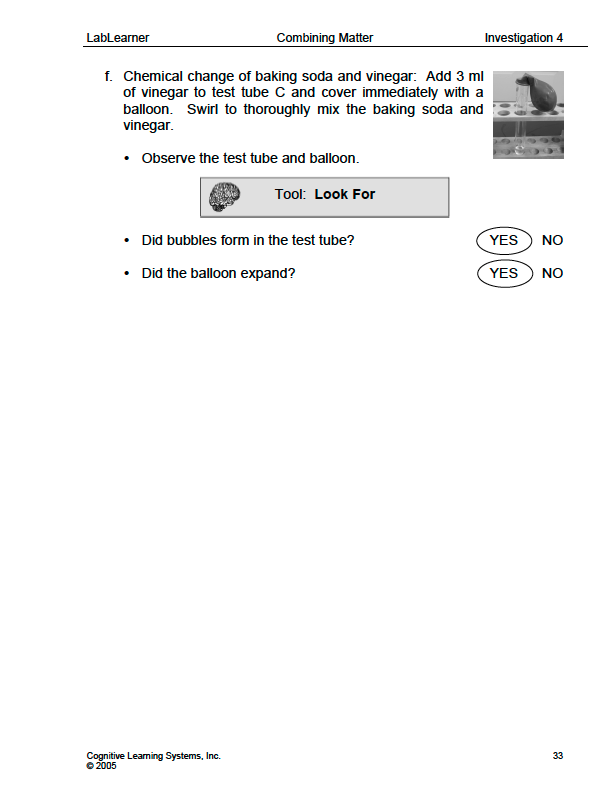
Students will learn that the bubbling and production of gas that occurs in the vinegar and baking soda solution is due to the contact of the two chemicals with each other, resulting in a chemical change that causes the release of a new compound, carbon dioxide gas. In contrast, the combination of baking soda and water, also a combination of solute and solvent, does not produce a chemical change as evidenced by the absence of gas production (bubbles). An additional solute-solvent combination, water and dish detergent, is included to demonstrate that not all bubbles in a solution form as the result of gas production.
The experiments in this Trial have been designed to provide a comparison of the production of gas during a chemical change to the appearance of bubbles (release of steam; gaseous form of water) during the physical change of boiling that students observed in Trial 2.
Note: Lab coats (if provided) and safety goggles should be worn for the remainder of the Investigation to protect eyes.
a. Direct students to obtain the following necessary materials from the distribution point: one (1) test tube rack containing the falcon (centrifuge) tubes of baking soda, water, vinegar, sugar, and non-chlorine bleach plus three (3) empty test tubes, three (3) balloons, two (2) 100 ml beakers of water, one (1) funnel, one (1) timer or stopwatch and masking tape. Students should also obtain one (1) glass stirring rod and one (1) thermometer if necessary.
b. Begin this Trial by reminding students that sometimes combining two chemicals results in the production of a new chemical not present before the two chemicals were mixed. This new chemical may be a gas.
c. Ask students: How can you tell if a gas is produced? Student answers will vary. Students may indicate that bubbles should form in the liquid. Students may also indicate that the gas may be visible.
d. Remind students that not all bubbles occur as a result of gas production and that not all gases are visible. Ask students: How can you determine whether a gas is produced if it cannot be seen, even if bubbles are present? Student answers will vary.
e. Explain that in this experiment, the gas produced cannot be seen and therefore students will use a balloon to trap any gas that is produced. Ask students: How will the balloon tell you if a gas was produced? The balloon will expand if gas is produced.
f. Direct students to label their test tubes A, B and C using masking tape. Students should divide the baking soda between the test tubes A and C, using the funnel to prevent spills. Explain that they will test the interaction of baking soda with two solvents, water and vinegar, and determine whether a gas is produced. Direct one student from each group to obtain dish detergent from the distribution center and place a drop in test tube B. Explain that the dish detergent will be combined with water as a comparison of bubble formation.
g. Students will next add solvents to the test tubes and cap each with a balloon. Use the following steps to help students with the process.
- Direct one student to stretch the neck of a balloon and hold it (Figure 3.1a).
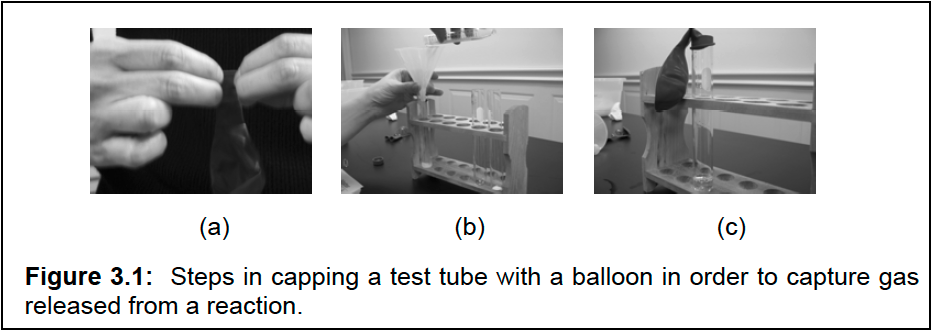
- Direct a second student to hold steady test tube A while a third student uses a funnel to pour the water from the falcon tube into the test tube (Figure 3.1b).
- The student with the balloon should immediately cap the test tube with the balloon (Figure 3.1c). Direct students to gently swirl test tube A to dissolve the baking soda in the water. Direct students to observe the test tube and balloon and use their observations to answer problem 5d.
- Direct students to repeat the process with water in test tube B and use their observations to answer Problem 5e.
- Direct students to repeat the process with vinegar in test tube C and use their observations to answer Problem 5f.
Trial 6
Some chemical reactions generate energy during the formation of new products, causing the temperature of the solution to increase. Other chemical reactions may absorb energy during the formation of new products, causing the temperature of the solution to decrease. In the last trial of this investigation, students will learn that a change in temperature after two substances interact may also be a sign that a chemical change has occurred.
The reaction that students will observe in Trial 6 is an exothermic reaction, a reaction in which energy is released as a new substance is formed when non-chlorine bleach and water are combined. The release of energy results in an increase in the temperature of the solution. In addition to combining non-chlorine bleach and water, students will combine sugar and water in order to provide a control for their experiment. The dissolution of sugar in water is not a chemical change and is not accompanied by a change in temperature.
Note: The inability to see a temperature change following the reaction of water and the powdered chlorine bleach may result from powdered chlorine bleach that has exceeded its shelf life or been subjected to humid storage conditions.
Finally, Trial 6 serves as a comparison for the temperature change students observed as the ice melted into water in Trial 1. Although the temperature of water increases as it melts, melting does not produce a new substance and is therefore considered a physical change.
a. Begin the Trial by reminding students that a change in temperature can occur when some substances are combined and a chemical change occurs. Explain that students will perform an experiment to demonstrate a temperature change due to a chemical change in a solution. Students will also perform an experiment to show that not all combinations of solute and solvent are chemical changes.
b. Ask students: How can you prove that a temperature change has occurred? Student answers will vary. Some students may indicate that a temperature change can be determined by touching the beaker or the solution. Others may suggest using a thermometer to measure the temperature change. Remind students that touching surfaces or liquids that may be hot can be dangerous and that what may feel warm or cold to one person may not feel warm or cold to another. Explain that scientists prefer to use methods of measurement such as a thermometer when possible to observe the results of experiments.
c. Remind students that lab coats (if provided) should be buttoned and safety goggles must be in place before beginning this Trial for safety reasons and to protect clothing from the bleach.
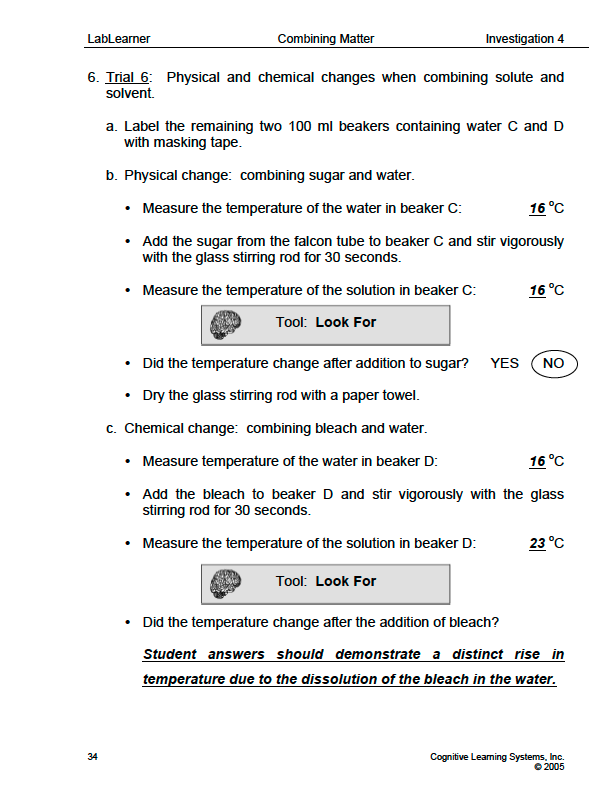
d. Direct students to label the two remaining 100 ml beakers of water C and D and measure the temperature of the water in each. Students should record the temperatures in Problem 6b.
e. Direct students to add the sugar to beaker C and stir vigorously for 30 seconds, then record the temperature of the solution in Problem 6c.
f. Direct students to add the bleach to beaker D and stir vigorously for 30 seconds, then record the temperature of the solution in Problem 6c.
g. Direct students to use their results to answer Problems 6c in their Student Data Record.
KEYS

CLEAN UP
Let students know your expectations for clean-up. Ask them to clean up.