Teacher Portal:
Science and Art
Investigation 3 – Lab
 BE PREPARED
Supplies and Equipment:
Class Materials:
- Red food coloring
- Blue food coloring
- Yellow food coloring
- water
Group Materials:
- 2 meter sticks
- 3 400 ml beakers
- 1 plastic dropper
Individual Materials:
- 1 Student Data Record
Teacher Preparation:
1. Organize the required materials at a distribution point.
2. Divide students into cooperative groups of three.
Instruction:
1. Direct each student group to obtain the following necessary materials from the distribution point: two (2) meter sticks, three (3) 400 ml beakers, one (1) plastic dropper.

GET FOCUSED
Investigation Three continues to familiarize students with concept of perspective in nature and, more specifically, perspective in art. Students will explore point of view and learn that any scene will look different depending on the position and perspective of the viewer.
INVESTIGATE
1. The Trials in this Investigation focus on how objects appear from different points of view, including those objects that are near to the observer and those that are farther from the observer.
Each trial includes steps that are used to set-up the experiment. In following the directions for set-up, students may be tempted to focus more on the steps of the procedure and less on the observations they will make after the experiment design has been prepared. Therefore:
Ask students: What will you Look For when observing objects in the investigation? Students should indicate that they should observe how different objects appear from their point of view.
Setup for Trials 1 and 2
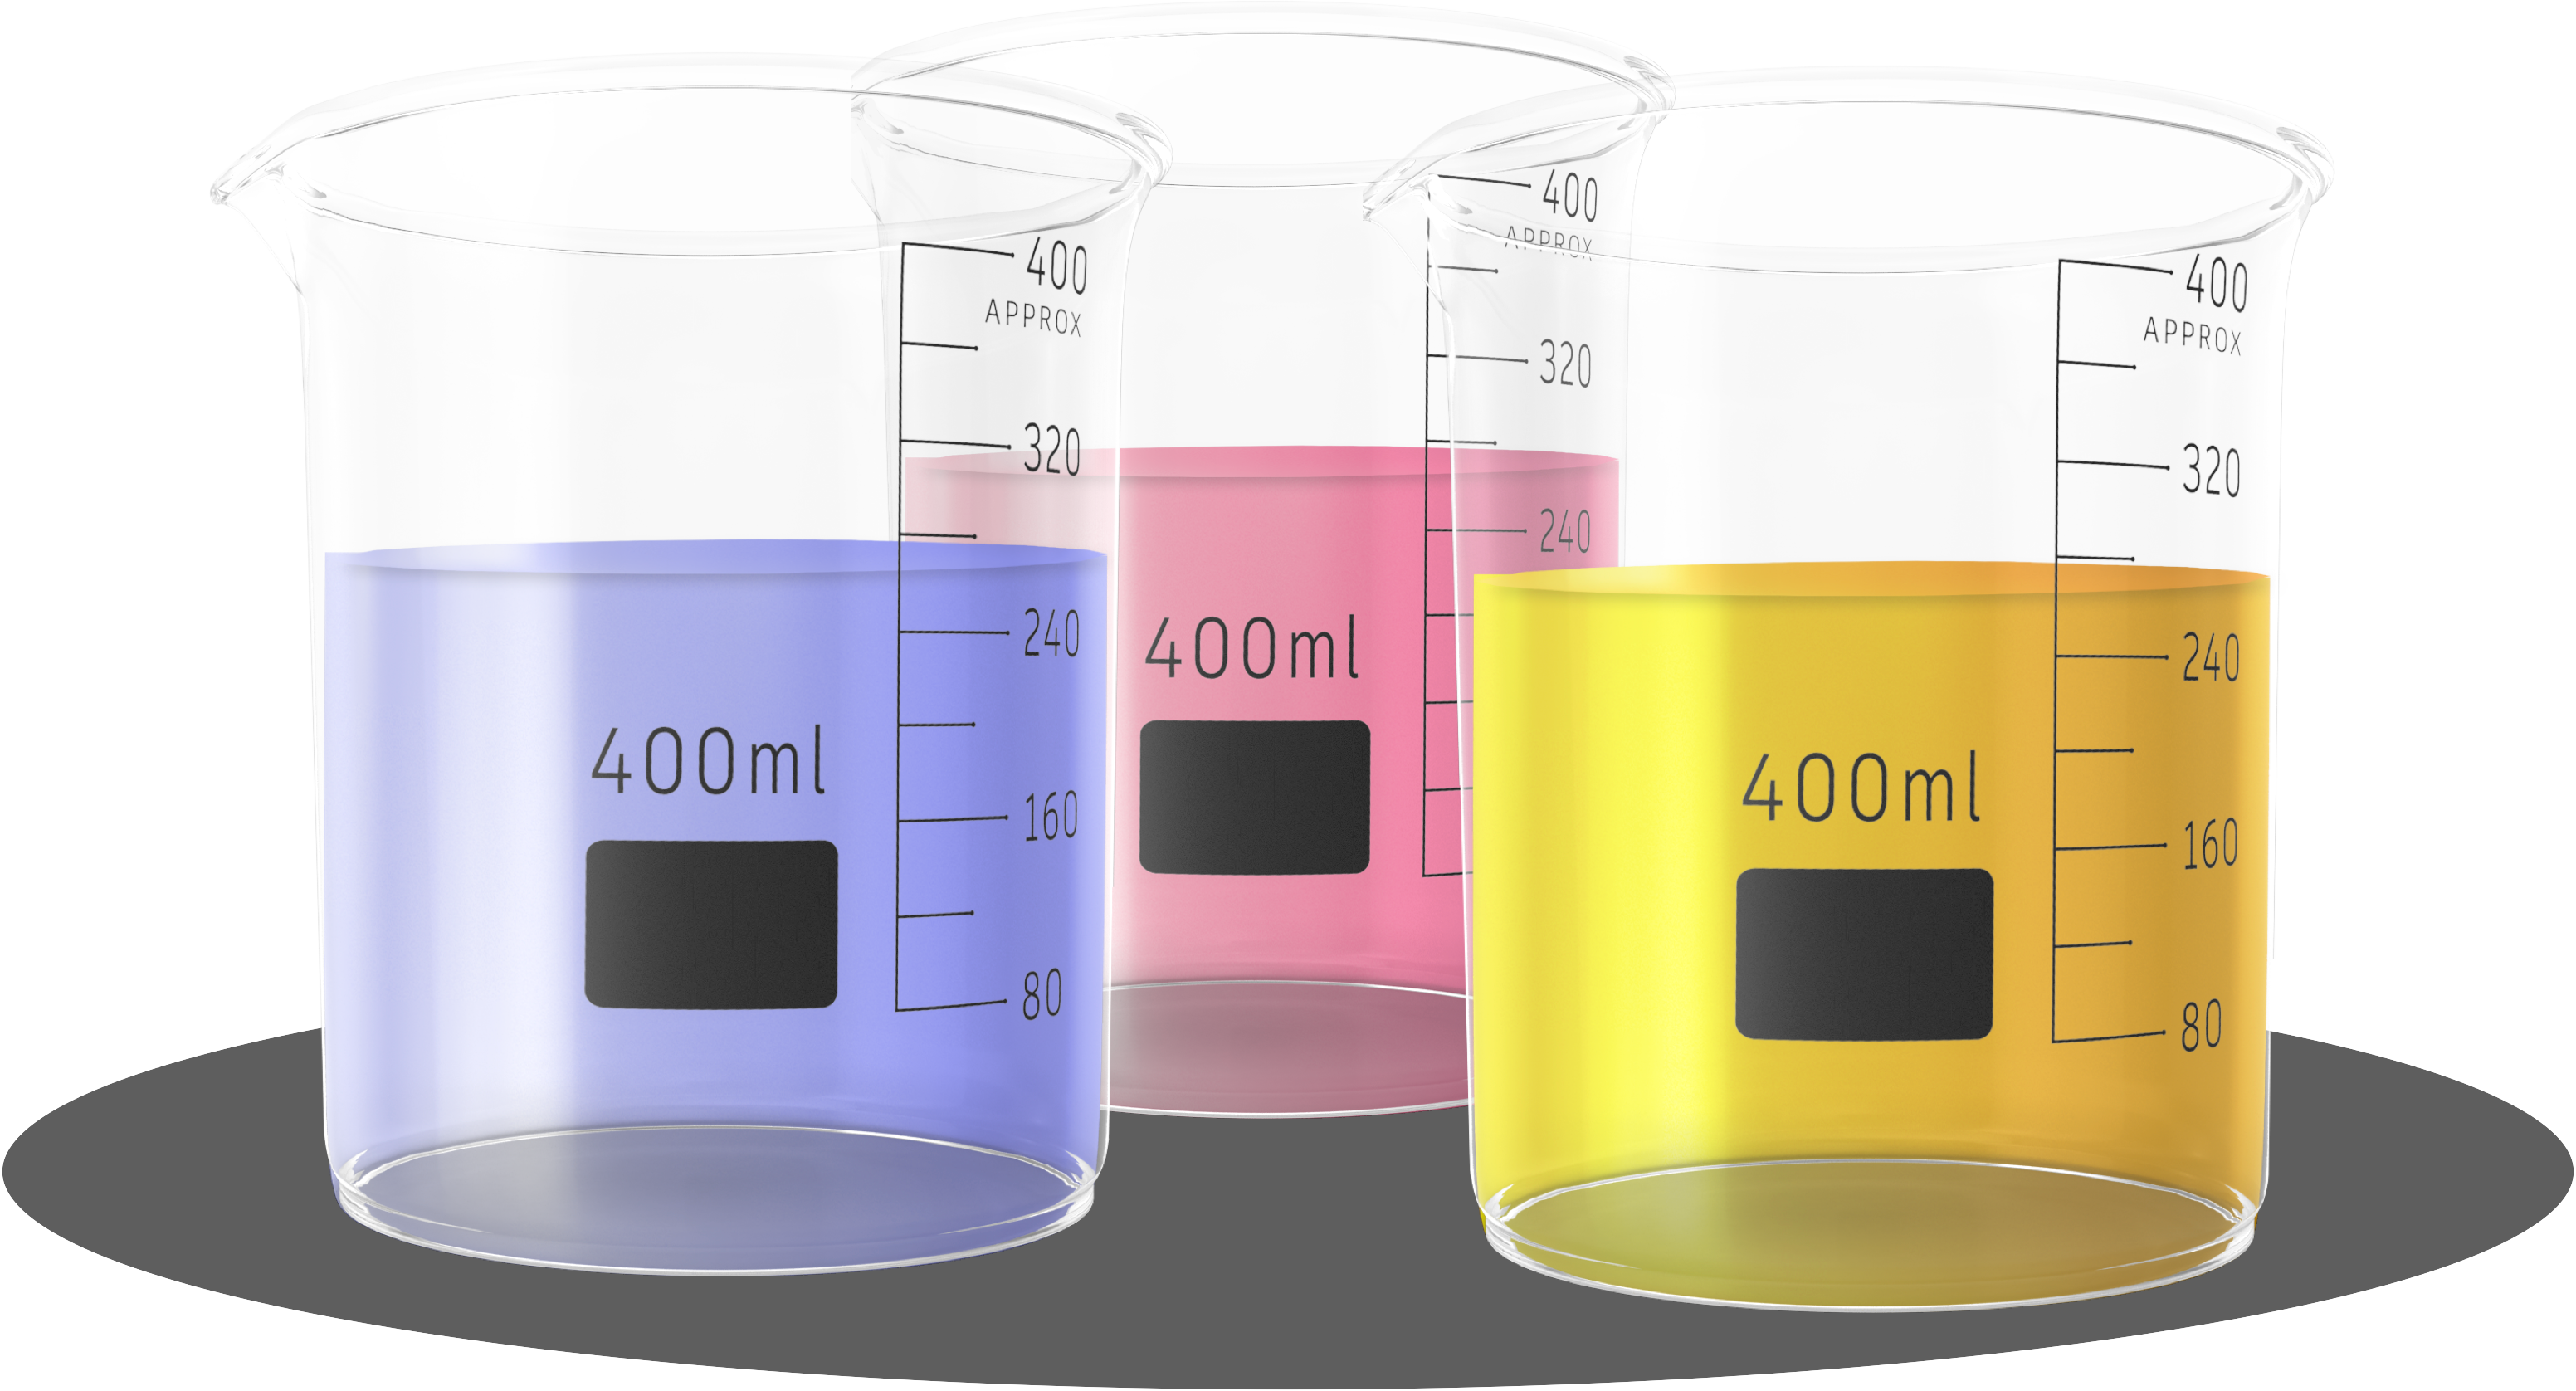
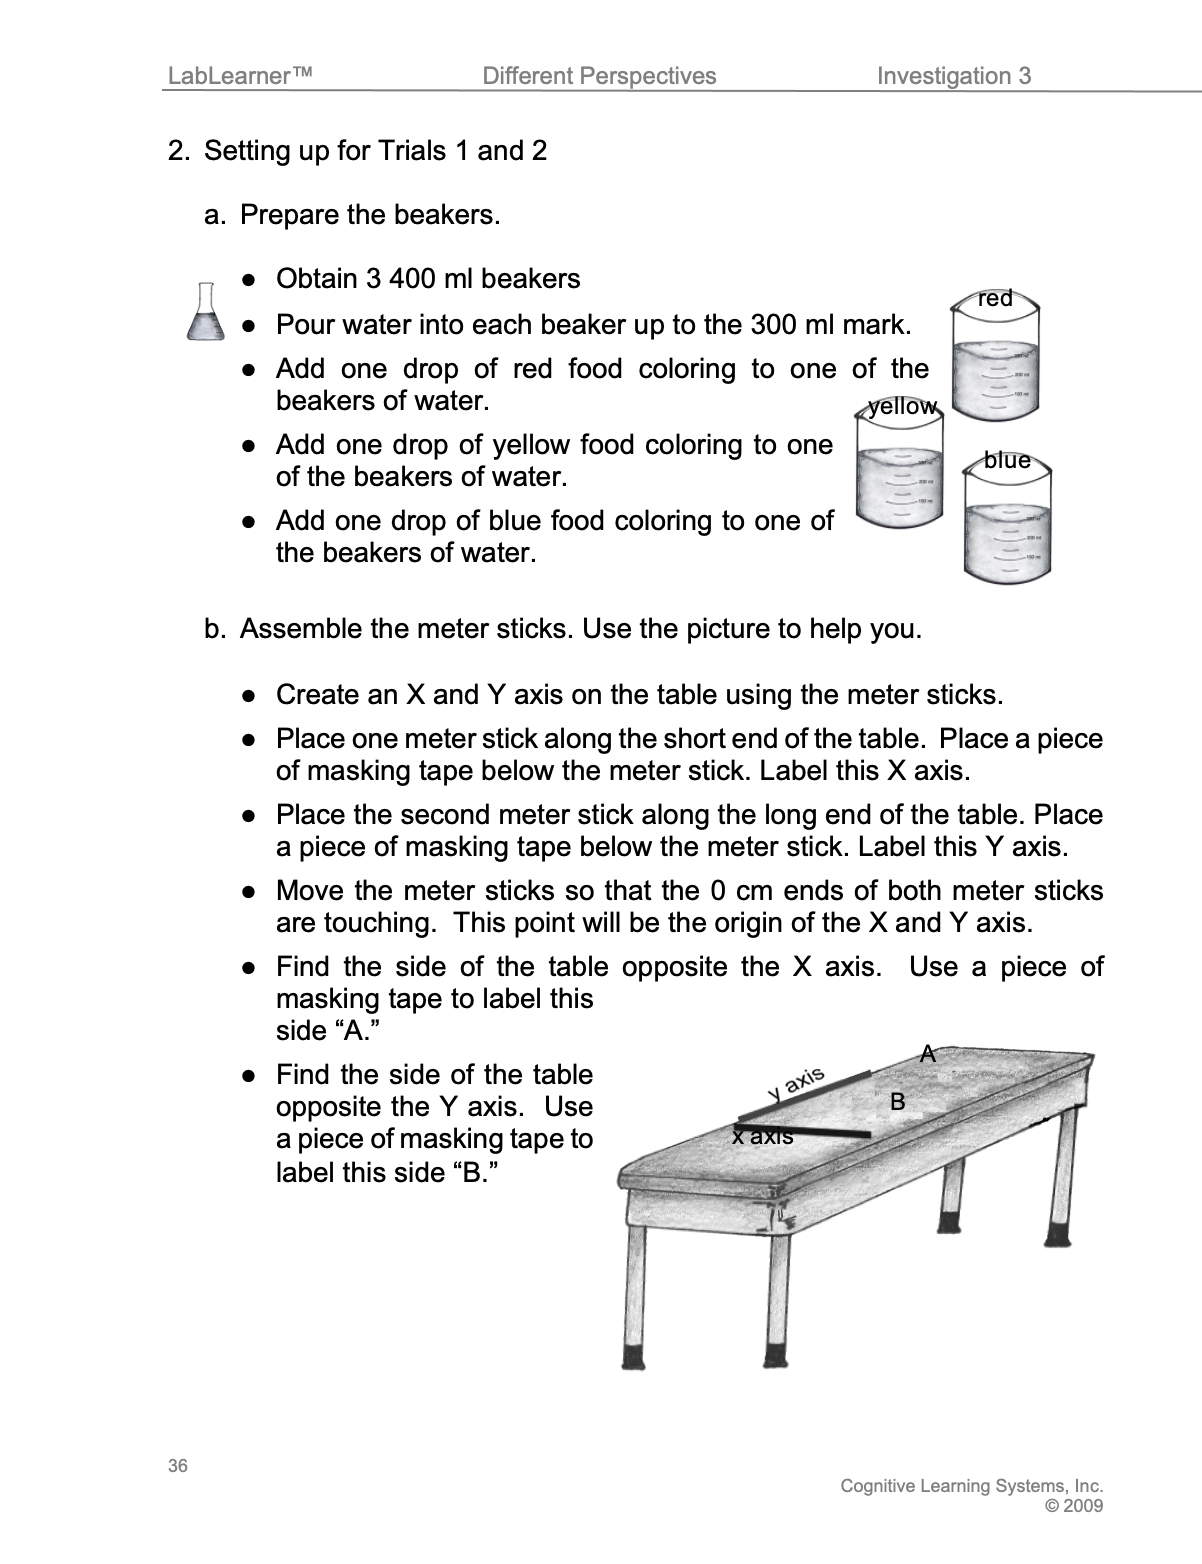
a. Prepare the beakers.
- Obtain 3 400 ml beakers
- Pour water into each beaker up to the 300 ml mark.
- Add one drop of red food coloring to one of the beakers of water.
- Add one drop of yellow food coloring to one of the beakers of water.
- Add one drop of blue food coloring to one of the beakers of water.
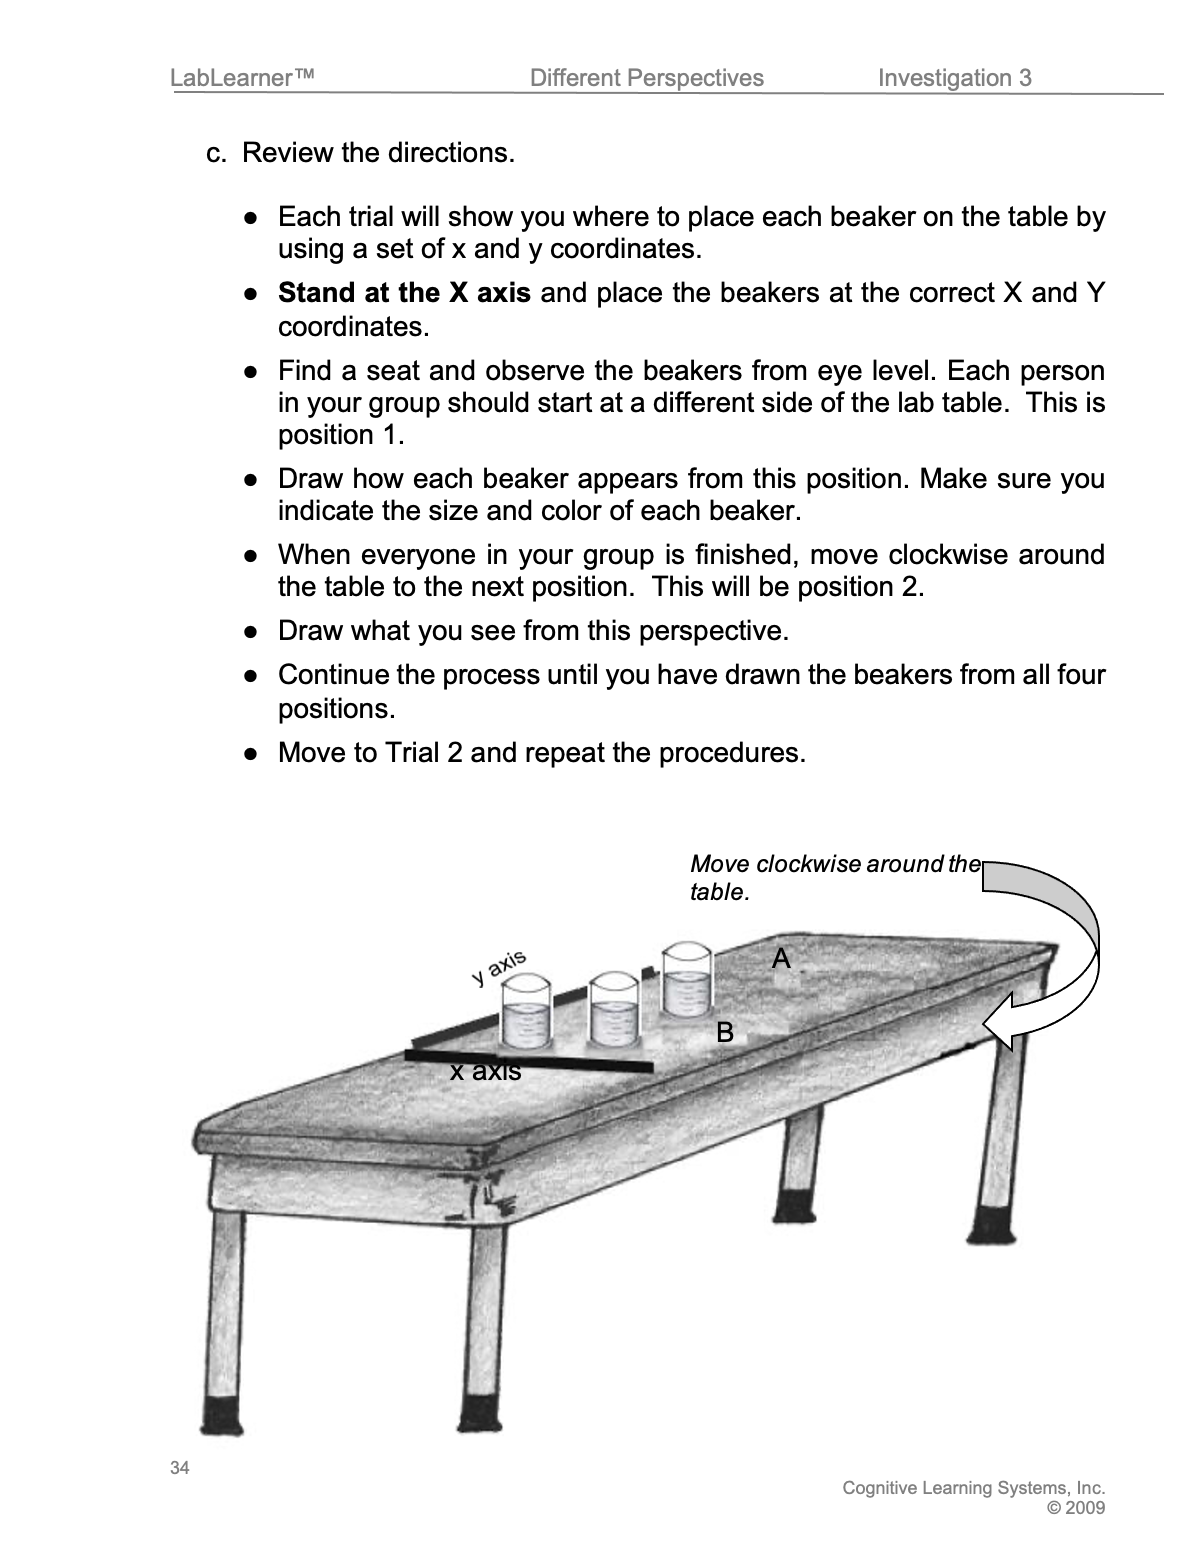
b. Assemble the meter sticks. Use the picture to help you.
- Create an X and Y axis on the table using the meter sticks.
- Place one meter stick along the short end of the table. Place a piece of masking tape below the meter stick. Label this X axis.
- Place the second meter stick along the long end of the table. Place a piece of masking
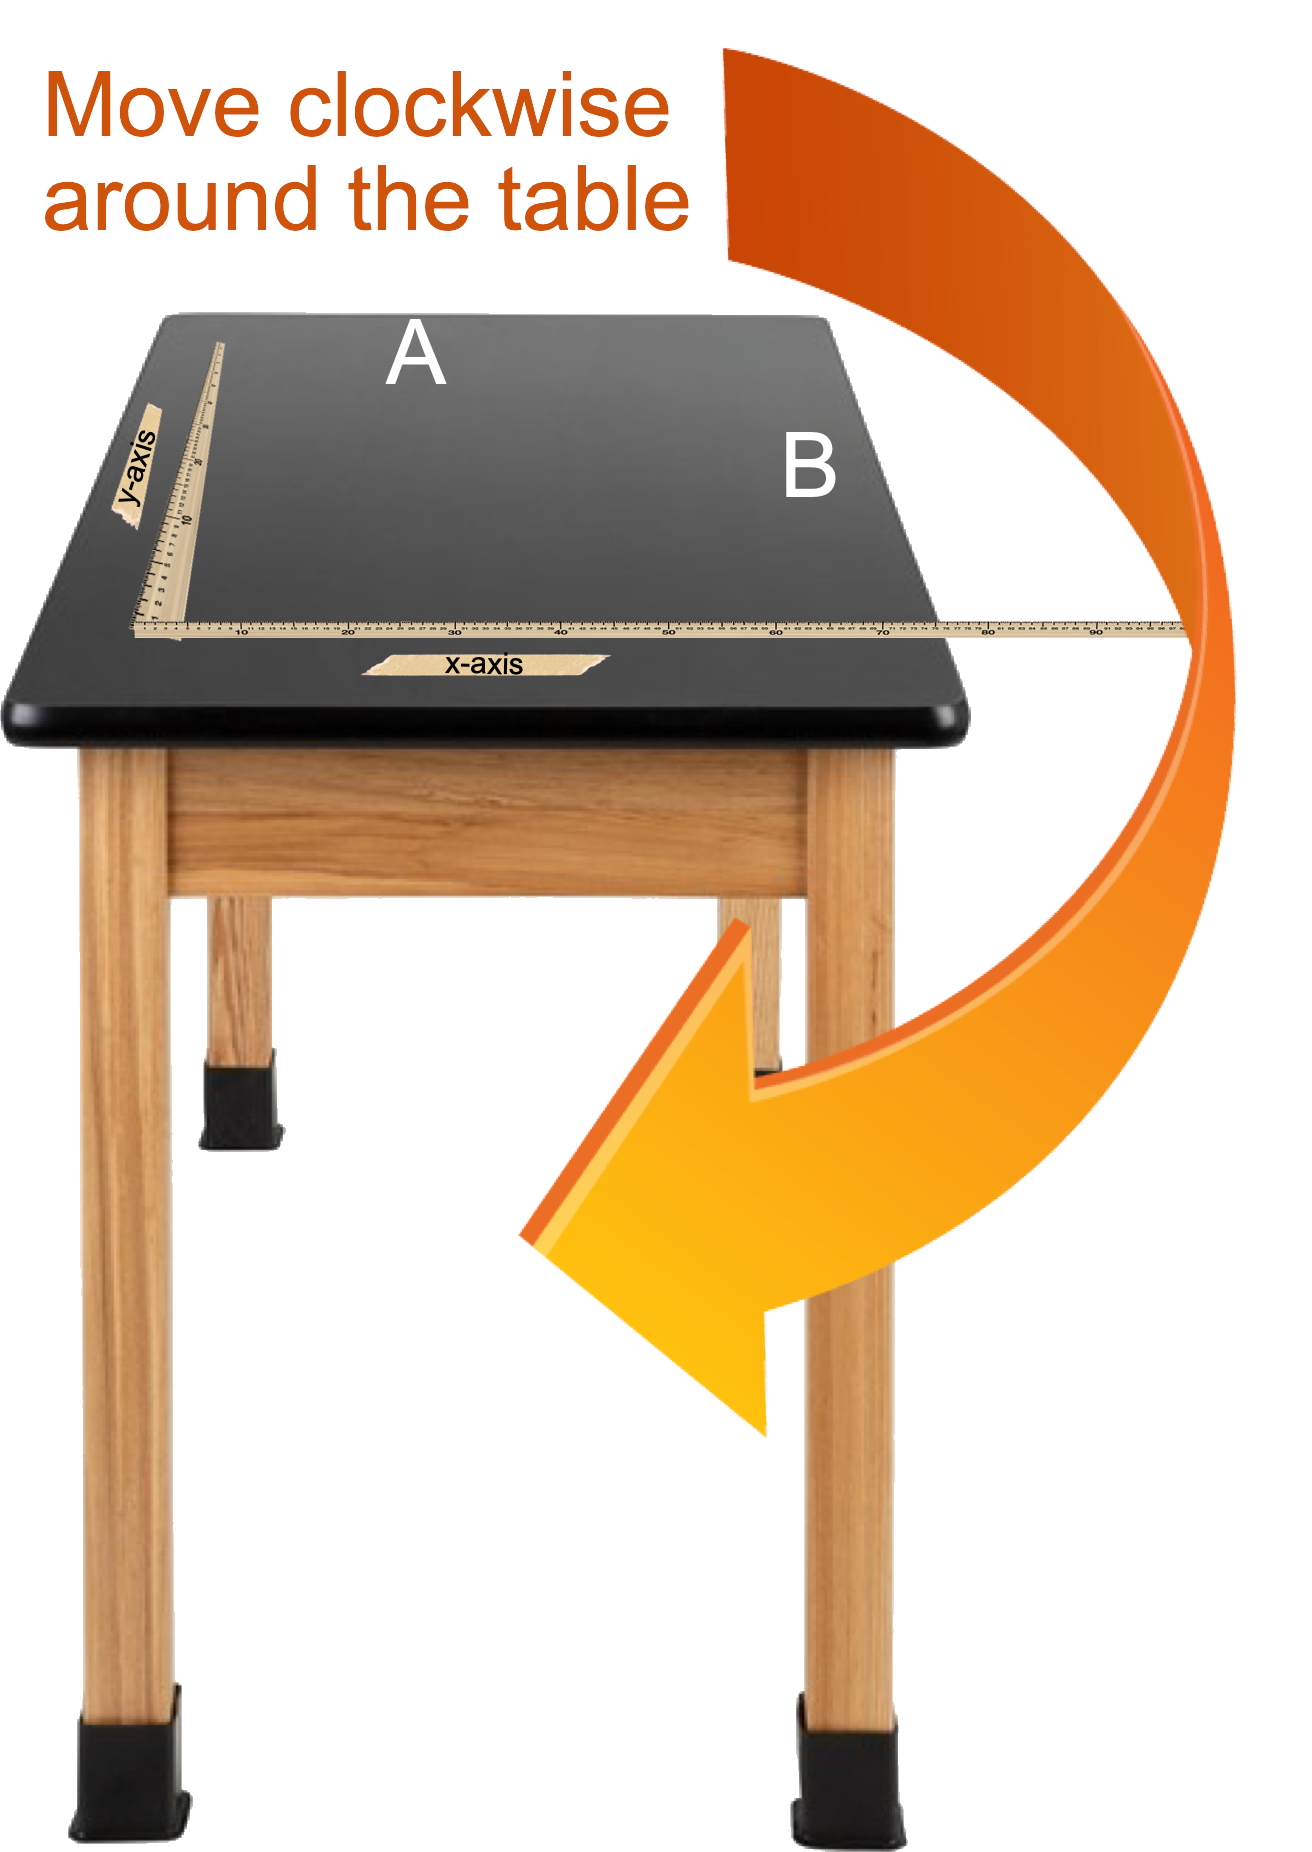 tape below the meter stick. Label this Y axis.
 - Move the meter sticks so that the 0 cm ends of both meter sticks are touching. This point will be the origin of the X and Y axis.
- Find the side of the table opposite the X axis. Use a piece of masking tape to label this side “A.”
- Find the side of the table opposite the Y axis. Use a piece of masking tape to label this side “B.”
c. Review the directions.
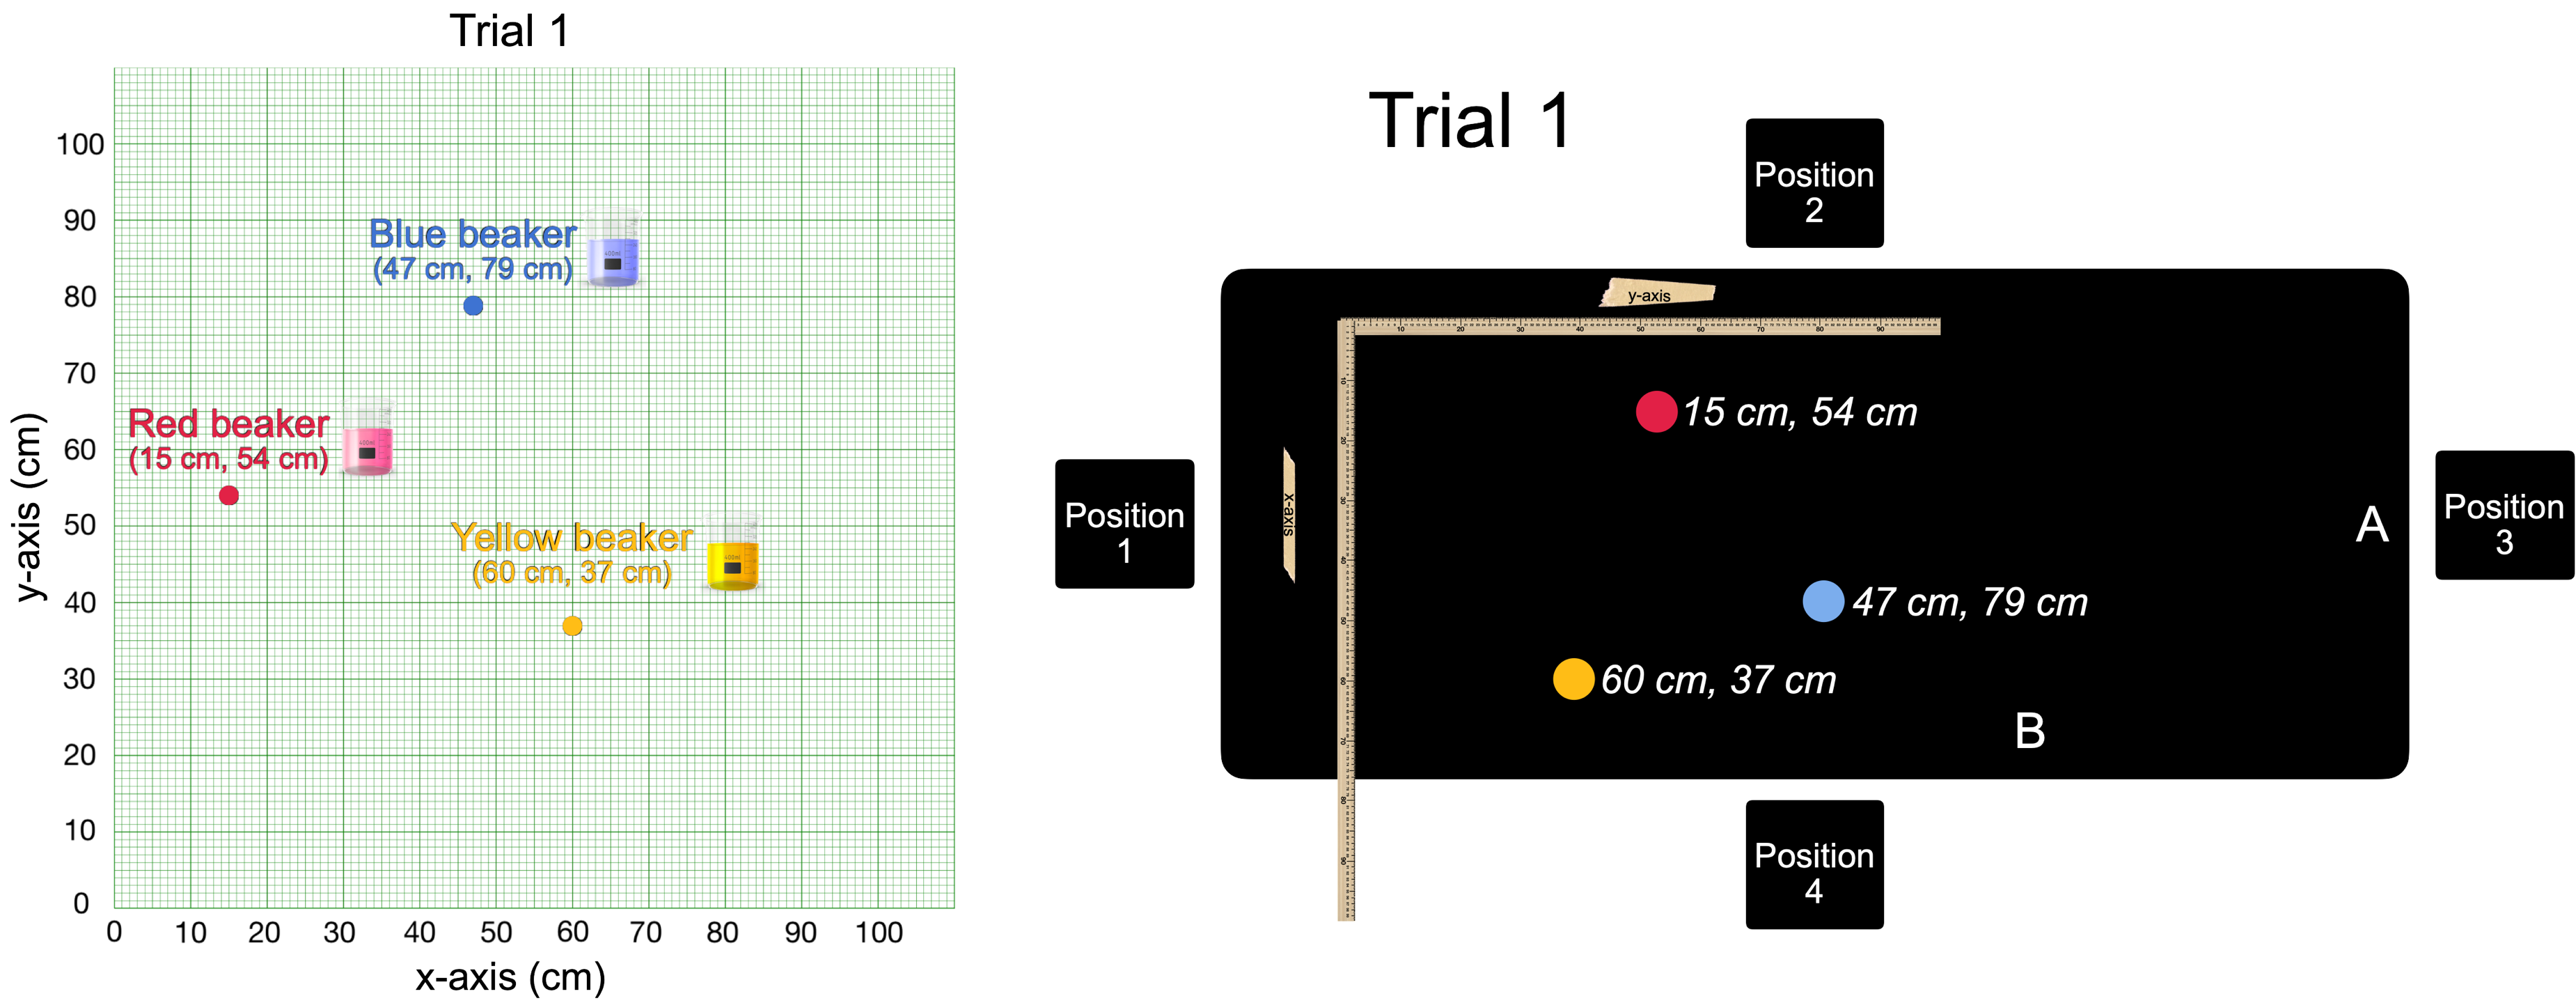
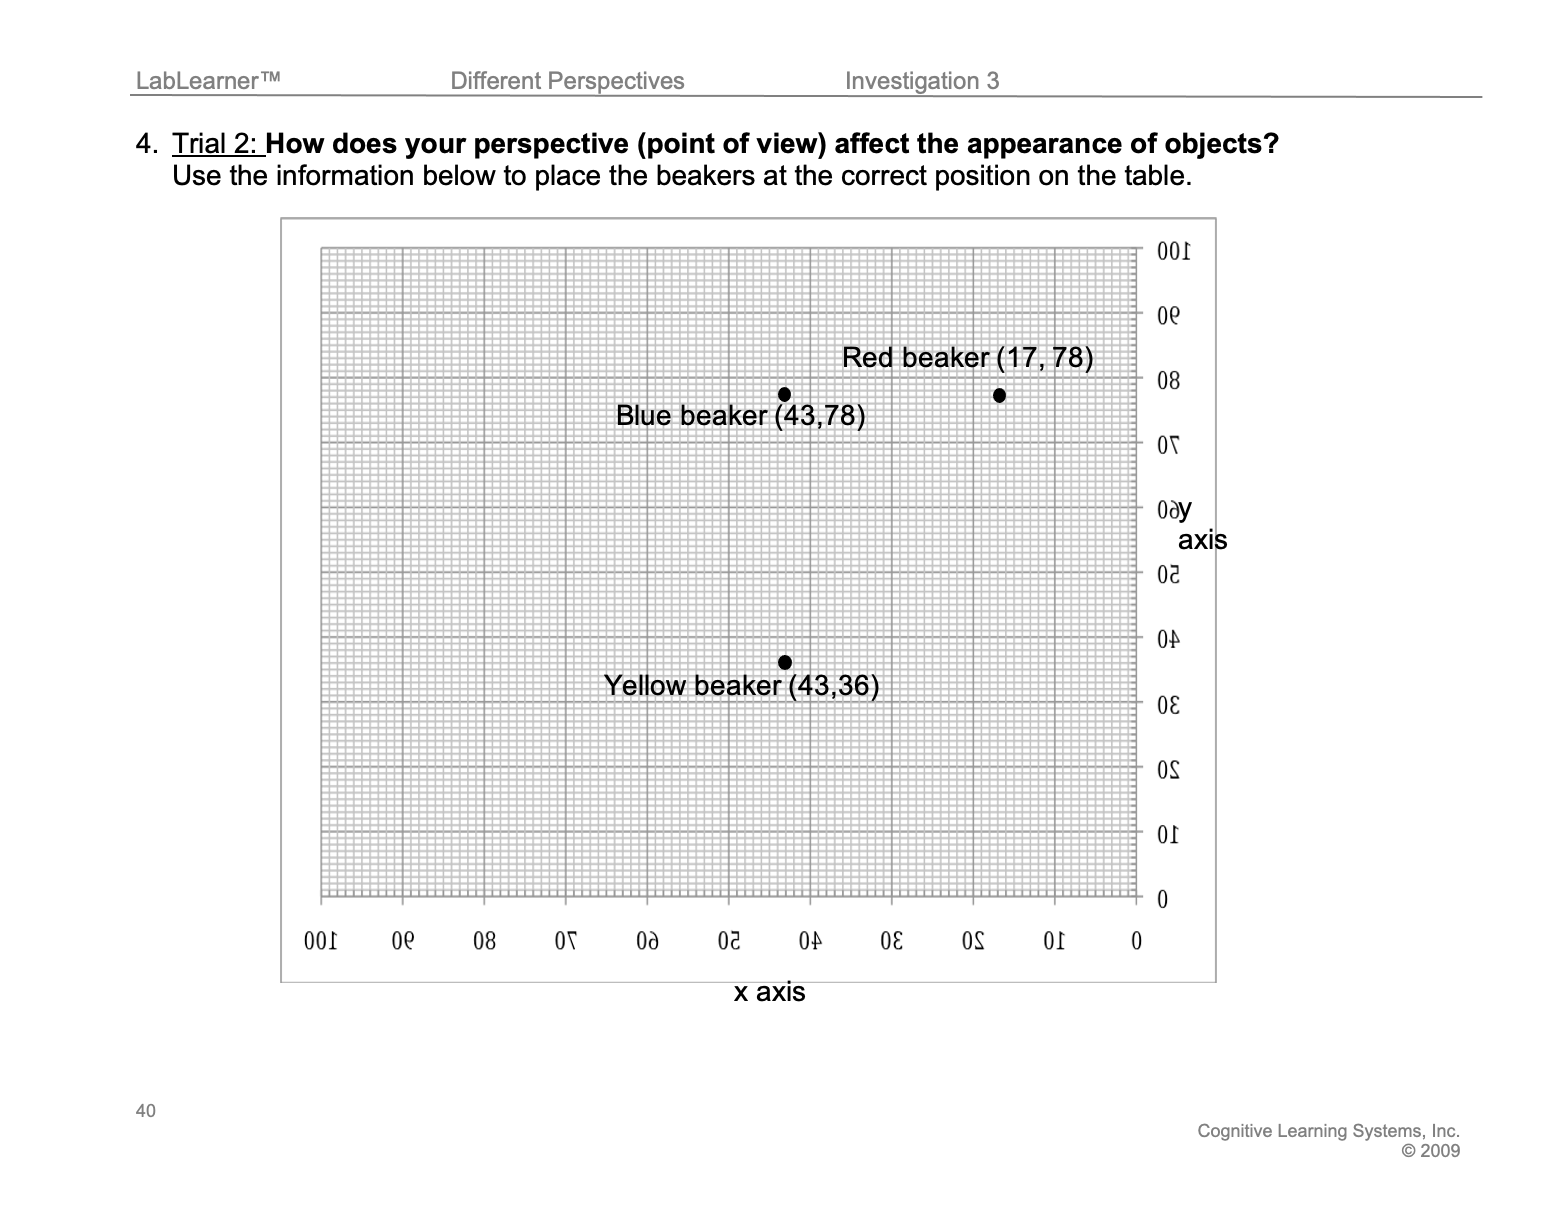
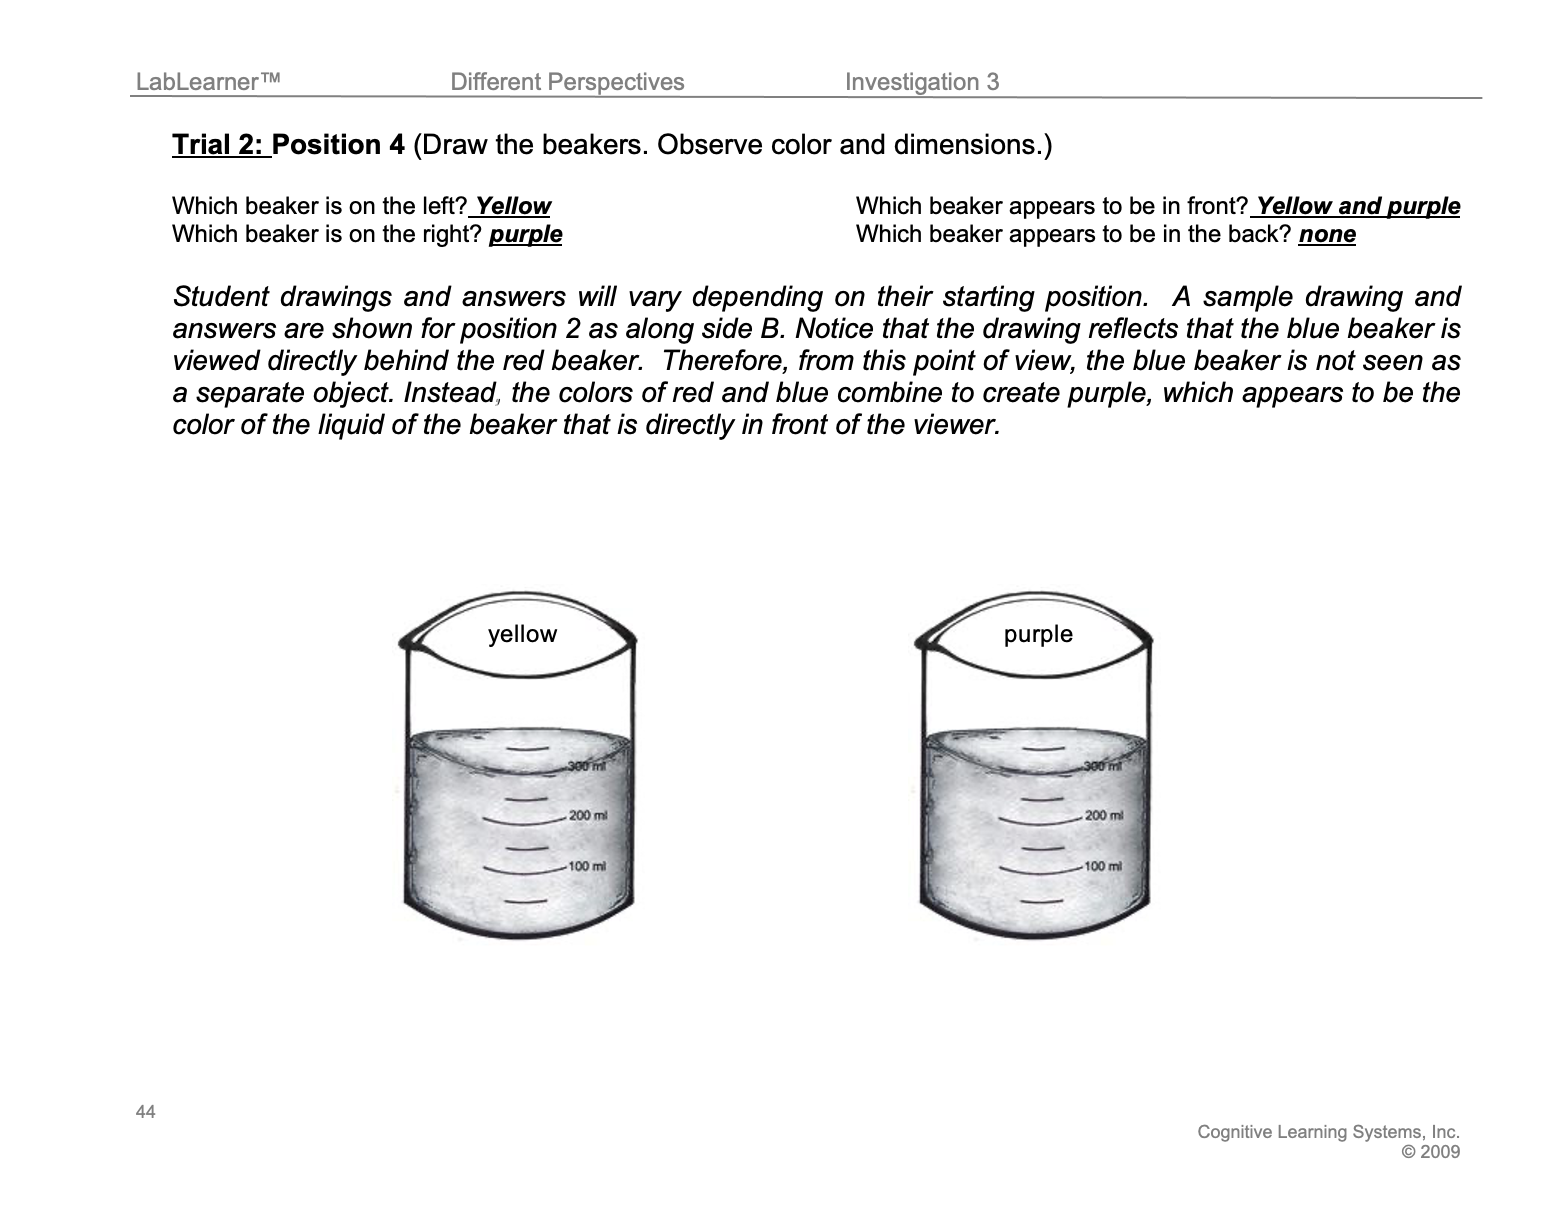
- Each Trial will show you where to place each beaker on the table by using a set of x and y coordinates.
- Stand at the X axis and place the beakers at the correct X and Y coordinates.
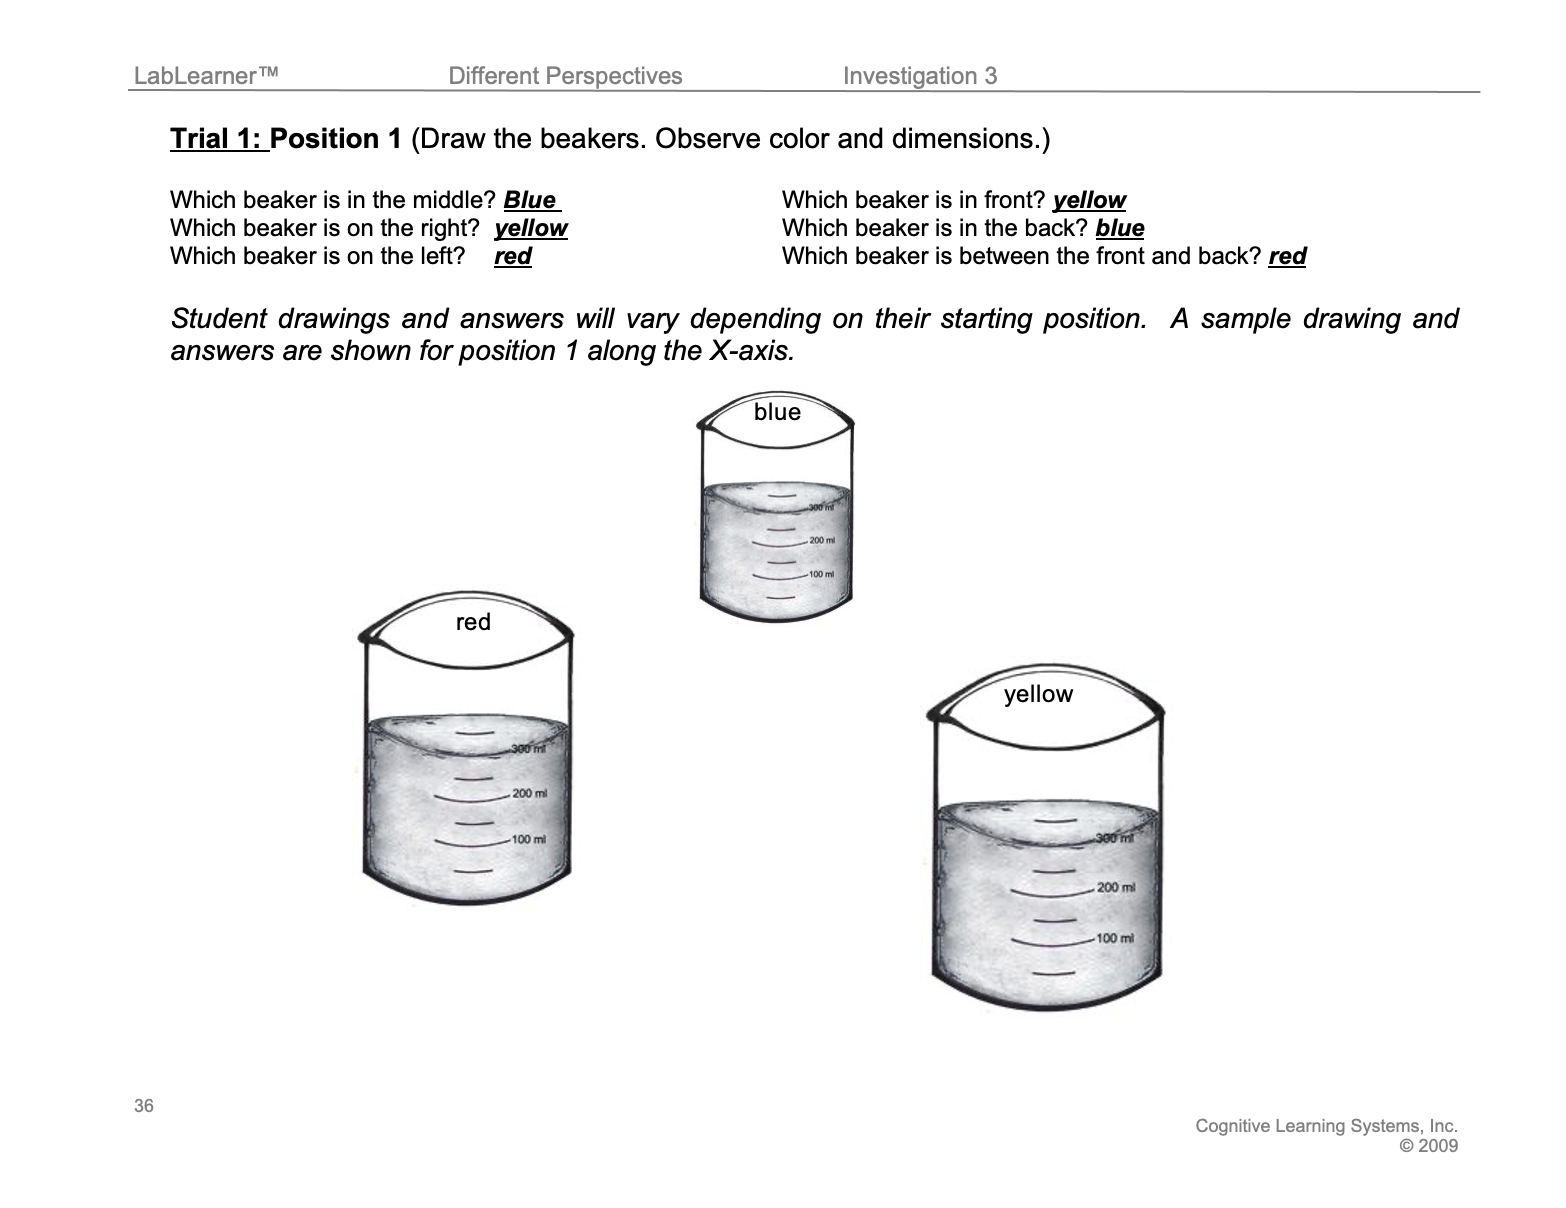
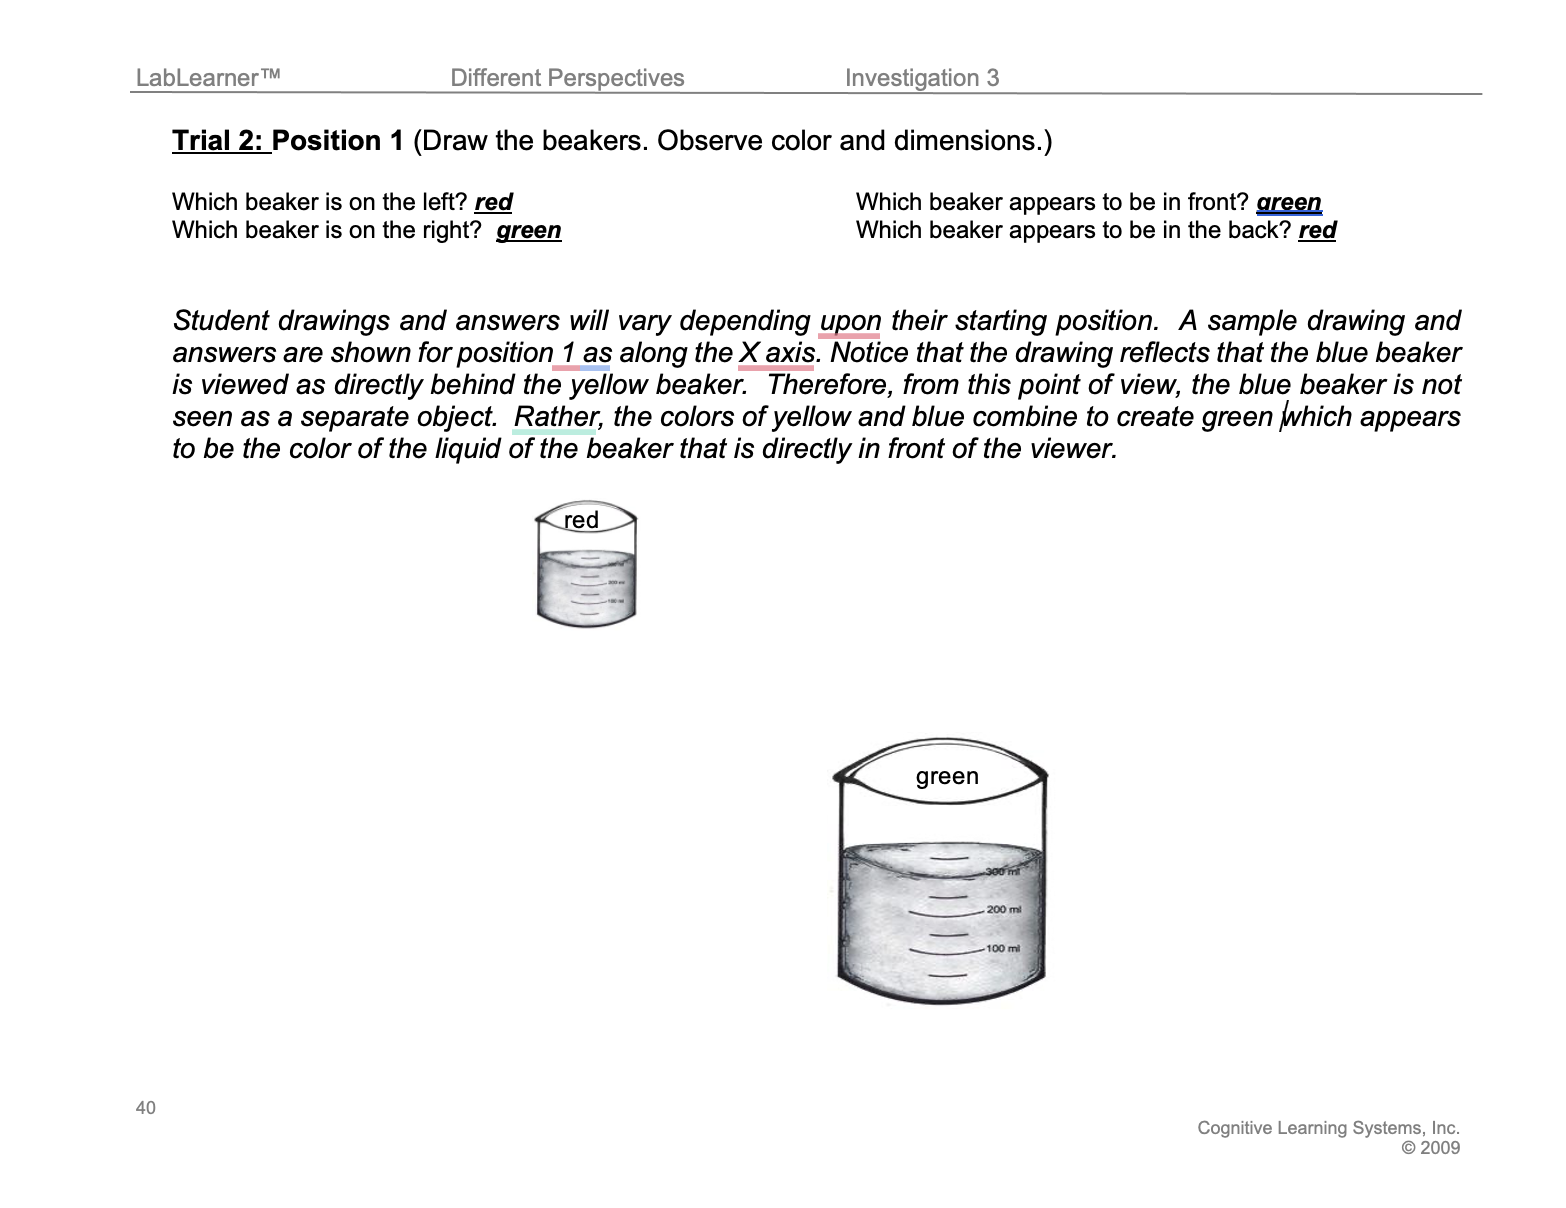
- Find a seat and observe the beakers from eye level. Each person in your group should start at a different side of the lab table. This is position 1.
- Draw how each beaker appears from this position. Make sure you indicate the size and color of each beaker.
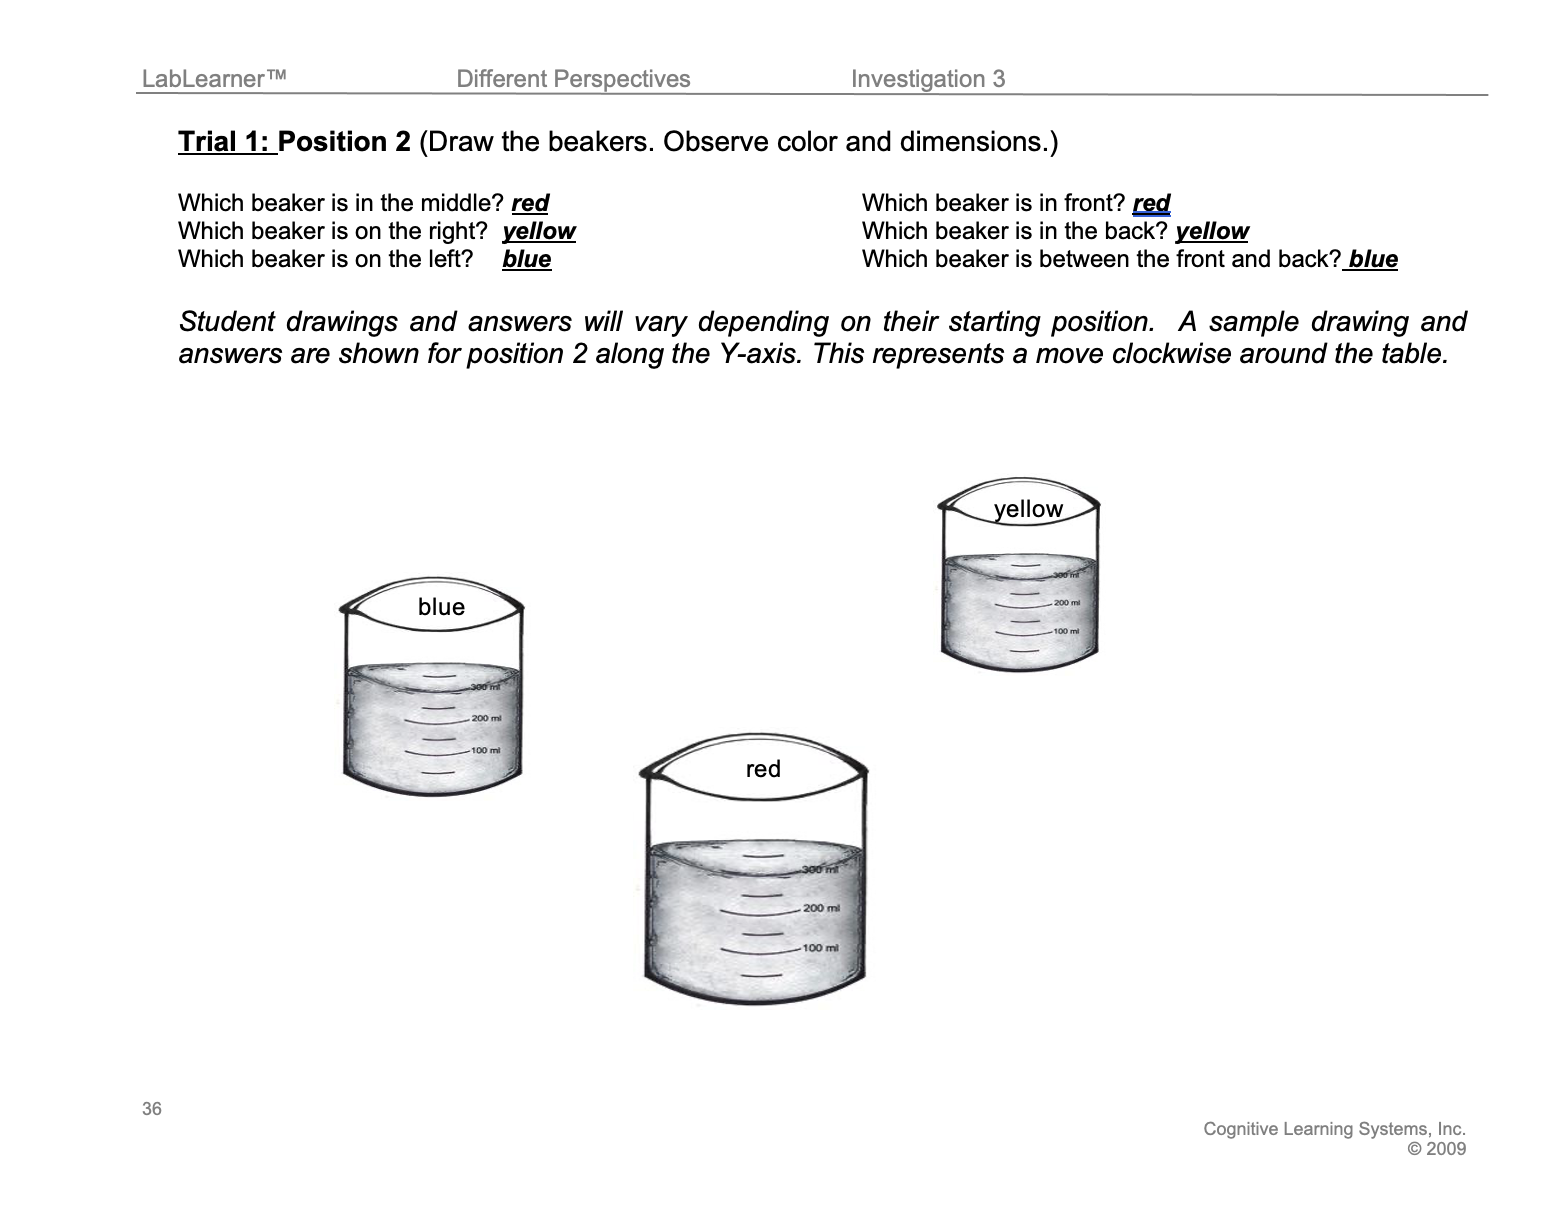
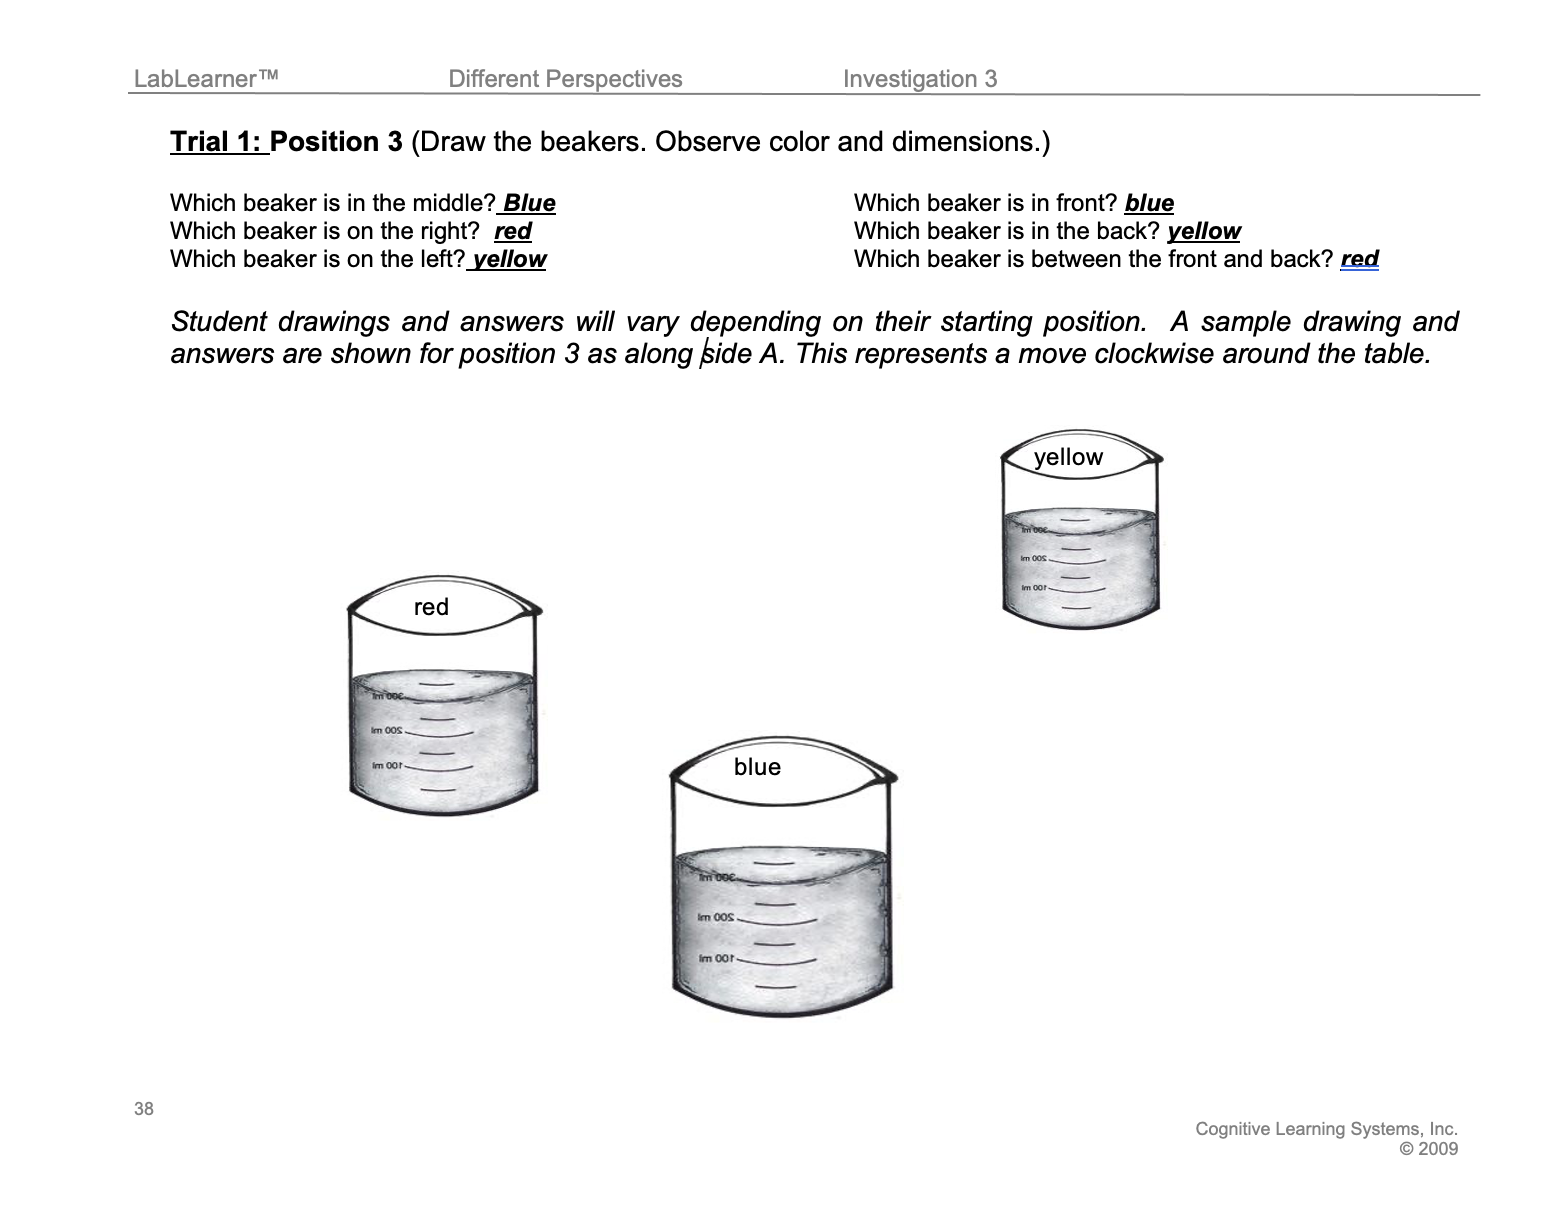
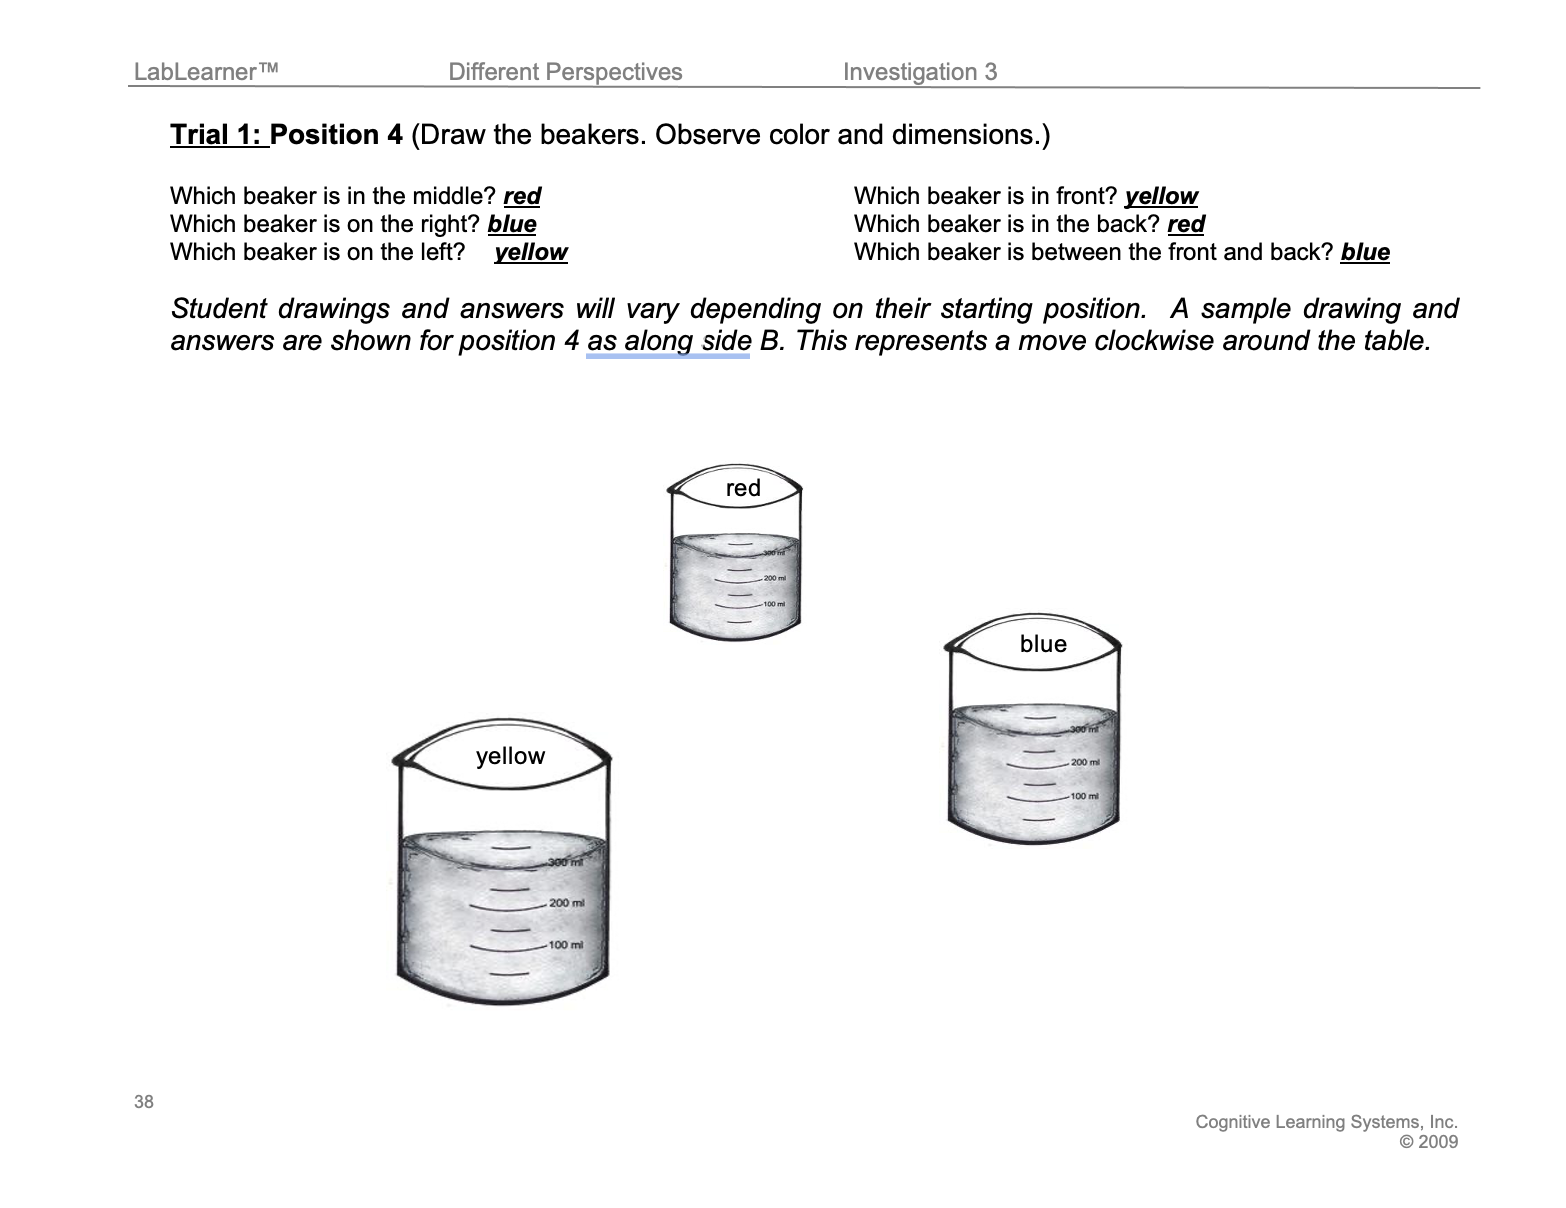
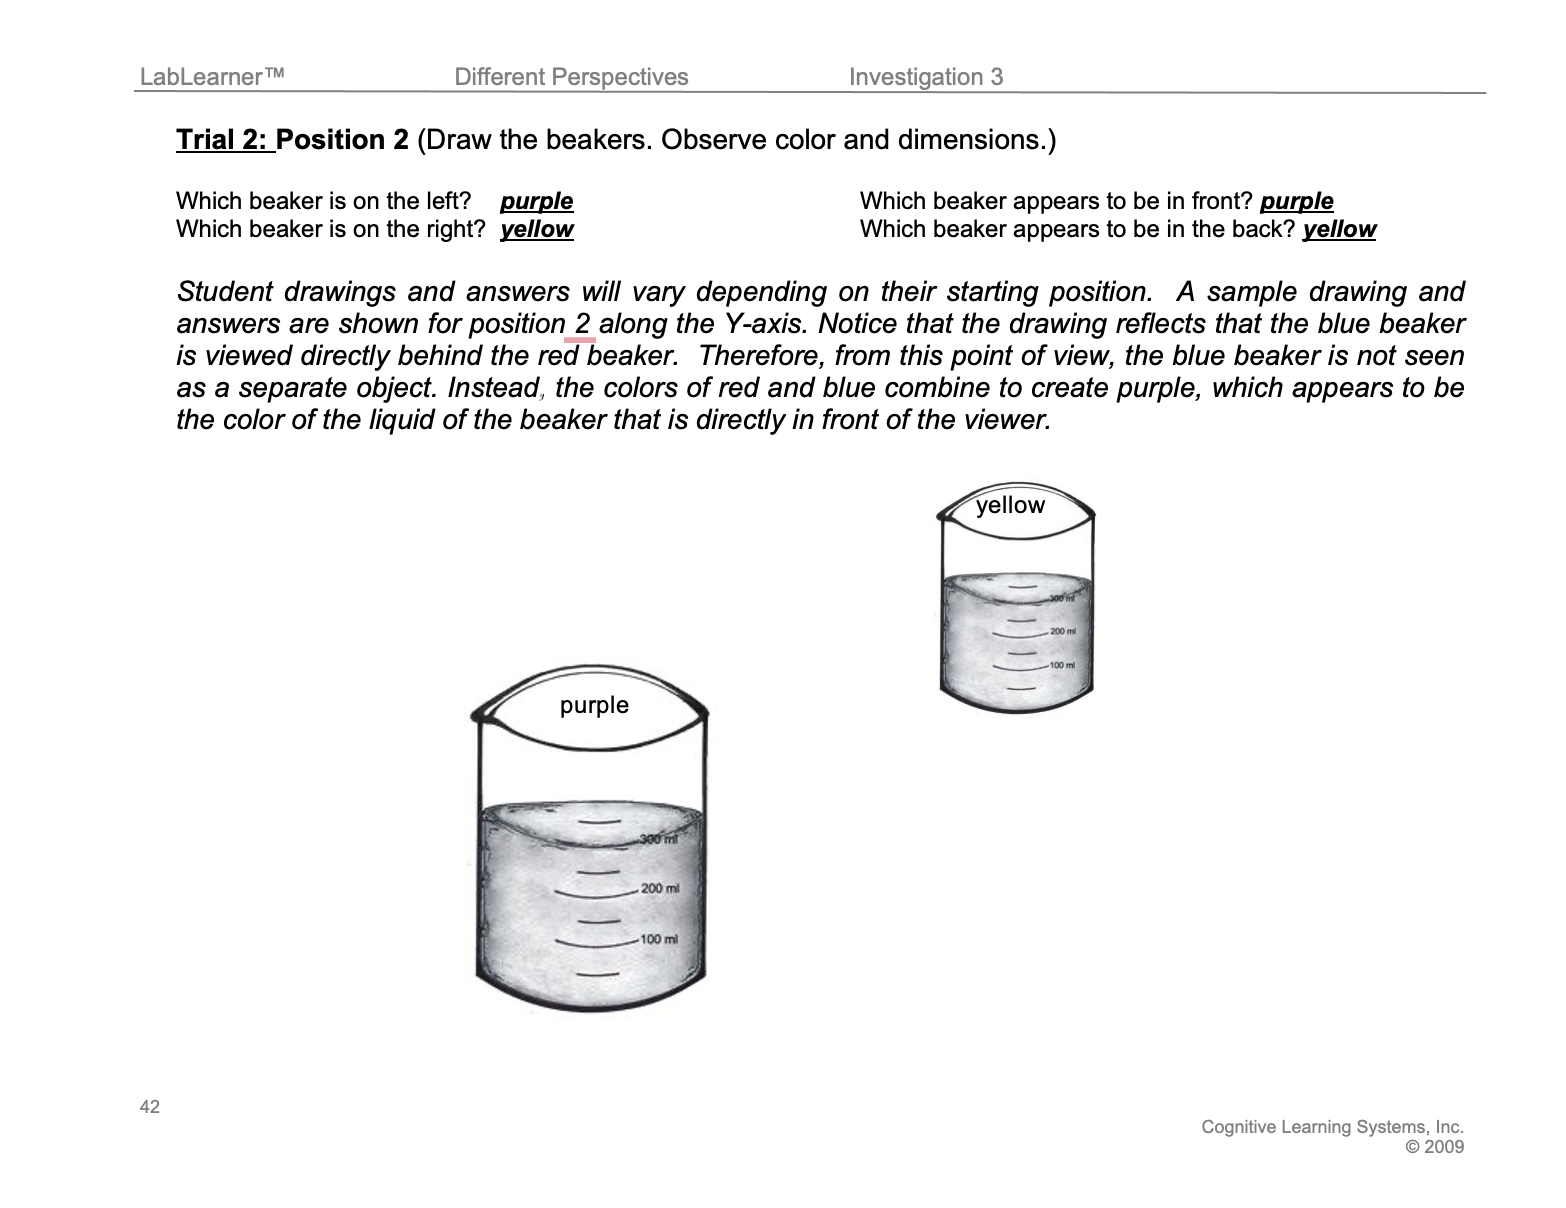
- When everyone in your group is finished, move clockwise around the table to the next position. This will be position 2.
- Draw what you see from this perspective.
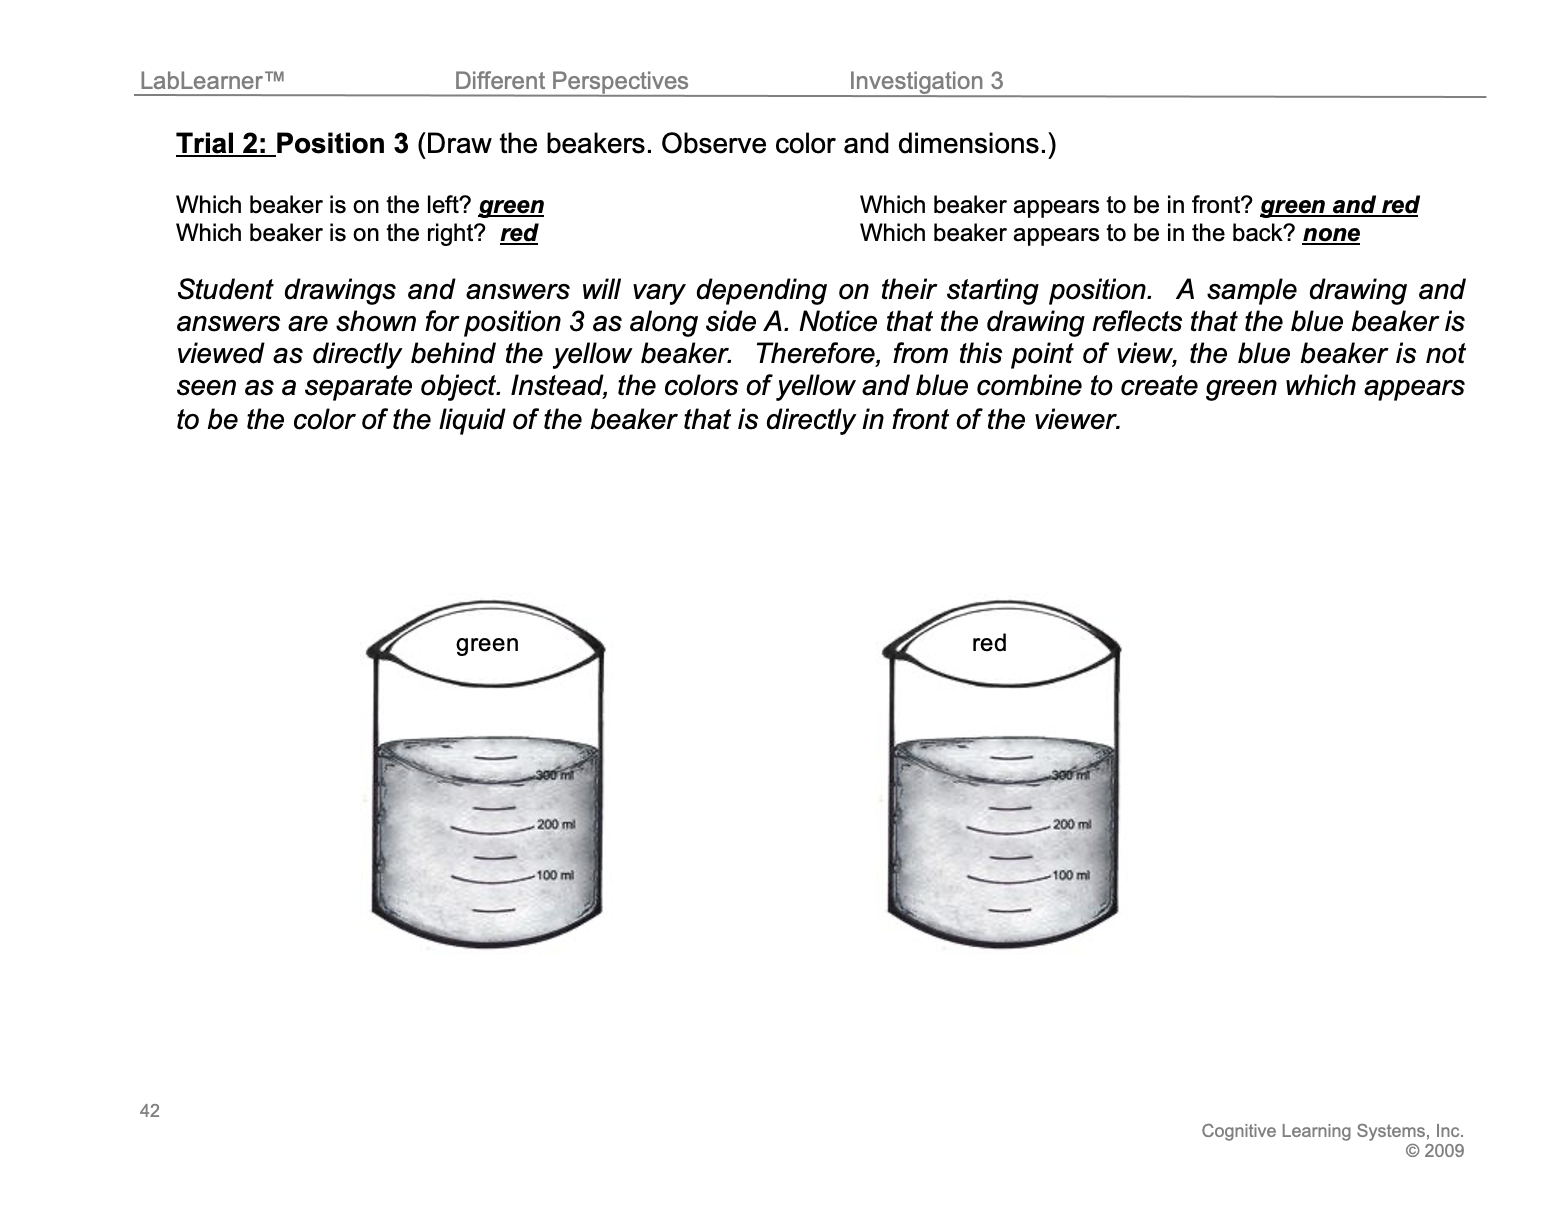
- Continue the process until you have drawn the beakers from all four positions.
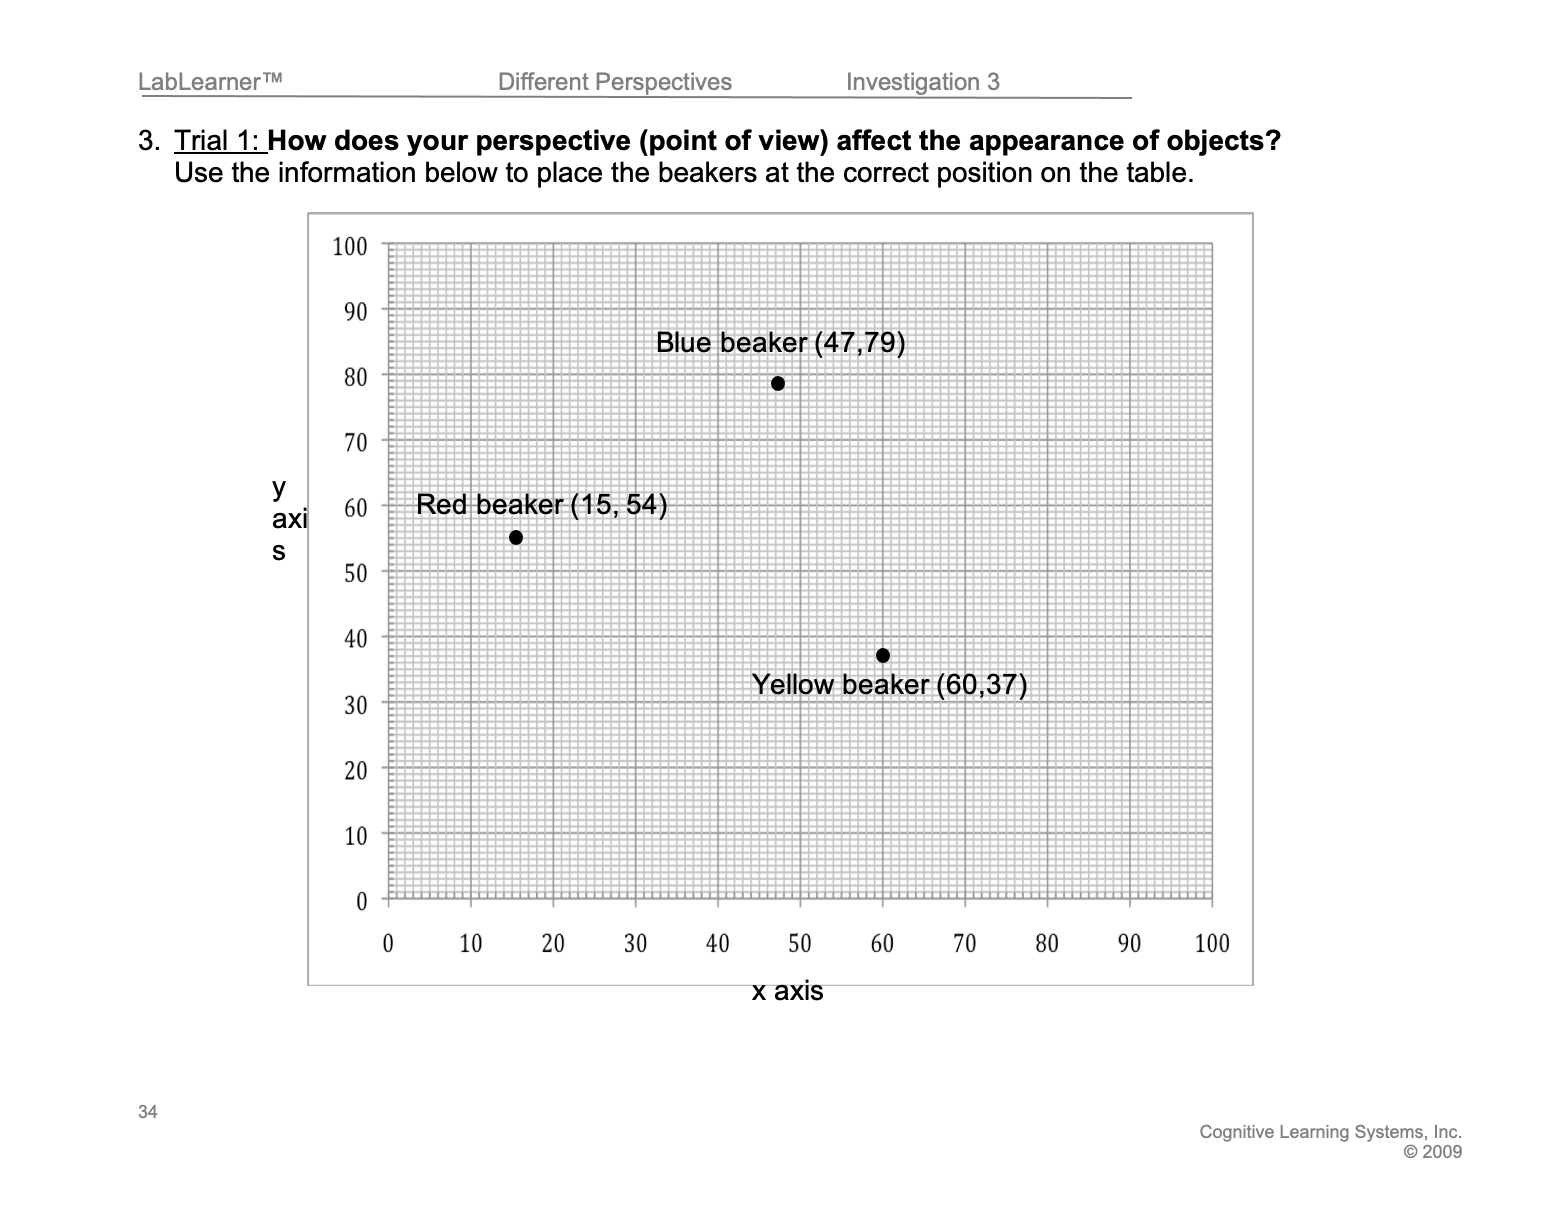
Trial 1
- Move to Trial 2 and repeat the procedures.
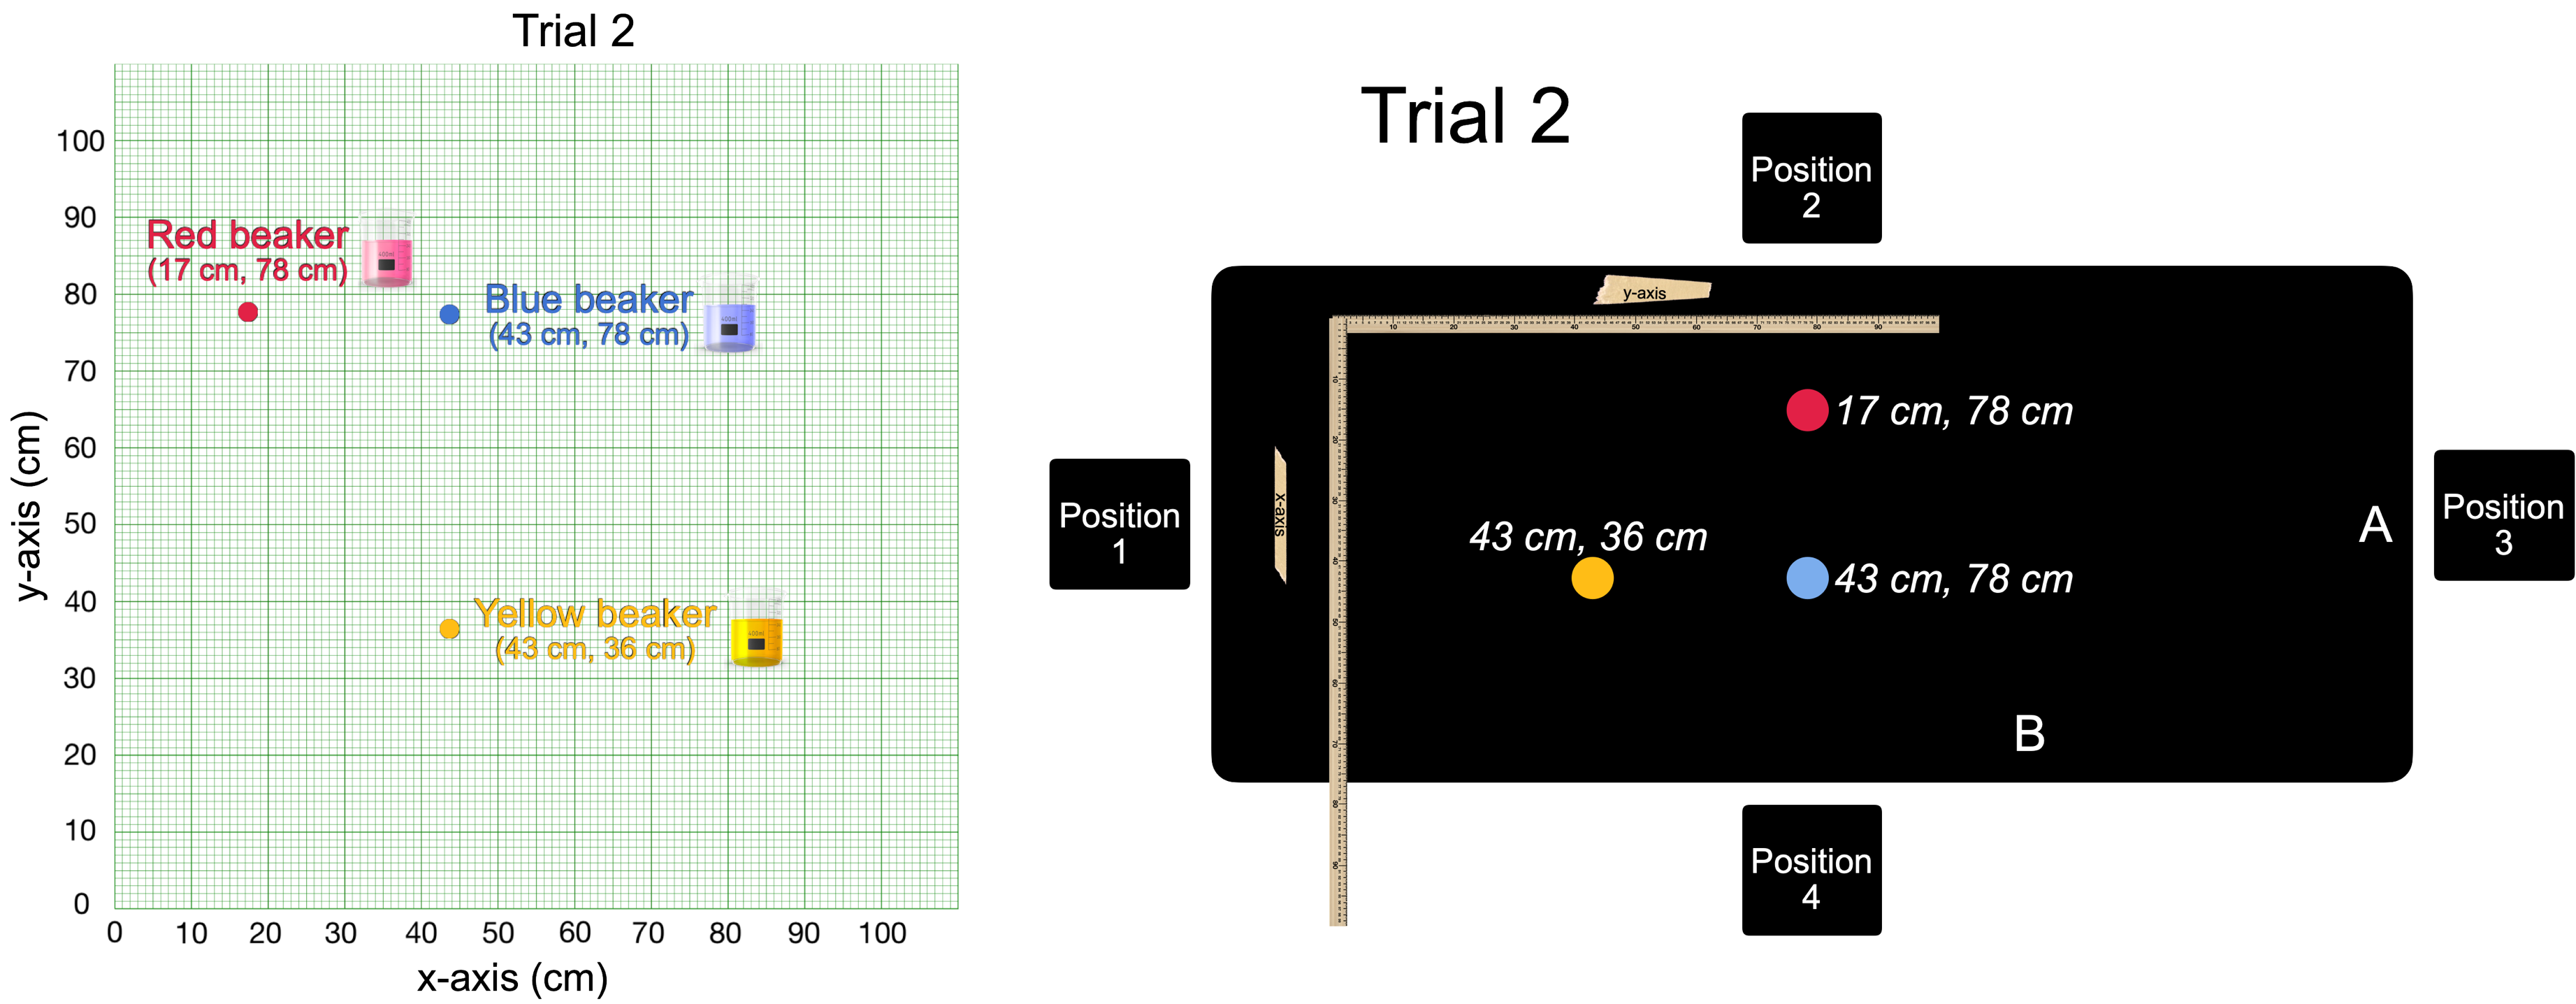
Trial 2
KEYS
CLEAN UP
Let students know your expectations for clean-up. Ask them to clean up.