Teacher Portal:
The Human Body
Investigation 2 – PostLab
ASK WHY

The human body is organized into systems that are made up of many parts and that these systems each perform both individual and complementary functions that occur at the same time in the body.
BRANCH OUT
Orthopedic surgeons focus on bones, muscles, tendons and ligaments in the body. They cast broken bones and can replace joints when joints stop working. Common joint replacements are knee, hip and shoulder replacements.
PRINT IT
Use your browser to download a printable PDF as help during the slide presentation and to make additional notes. In your browser, go to File > Print and then choose to save as PDF.
NAVIGATE IT
Once the slide presentation is launched
- use your left and right arrows to advance or go back in the slide presentation, and
- hover your mouse over the left edge of the presentation to get a view of the thumbnails for all the slides so that you can quickly move anywhere in the presentation.
- Click HERE to launch the slide presentation for the CELL.
SHARE IT
SLIDE BODY2post-1
In this PostLab session, we are going to learn about two other systems of the human body, the skeletal, and muscular systems.
______________________________________________

SLIDE BODY2post-2
Begin the analysis of the Lab experiment by reviewing several of the concepts introduced in Trials 1 and 2. The following questions can be used to initiate a discussion of these concepts:
Which body systems did you explore in Trials 1 and 2? Students have explored the skeletal system and the muscular system.
What is the function of the skeletal system? What are some of its parts? The skeletal system provides structure, protection, and support for the body. It is made up of various bones, such as the skull, ribs, and backbone.
Where are the bones connected to one another? What are some examples? The bones are connected at the joints. The elbow, knee, and hip are examples of joints.
- Provide students with an example of how ligaments connect bones together using the hip joint. One of the ways the upper thigh bone (femur) connects to the hip or pelvis is through the ischiofemoral ligament. The ligament is named for the specific parts of the bones it connects. The ischium is a part of the pelvis and the upper thigh bone is the femur.
https://en.wikipedia.org/wiki/File:Muscular_system.svg
______________________________________________
SLIDE BODY2post-3
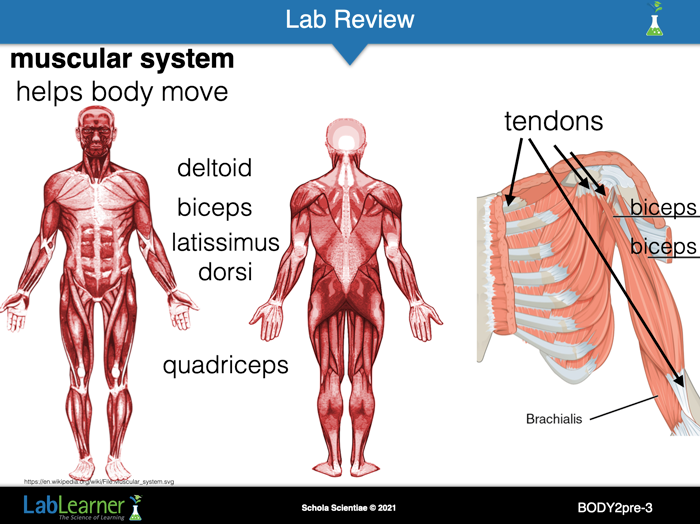
What surrounds or covers the bones? The muscles surround or cover the bones.
What is the function of the muscular system? Student answers may vary. Students may or may not indicate that the tendons connect the muscles to the bones. Encourage students to realize that structures called tendons help to keep the muscles connected to bones. Both tendons and ligaments are elastic and stretchy.
A close-up illustration of the ribs and biceps is added to point out tendons. Tendons are the part of a muscle that attaches to bones. They tend to be white as compared to the reddish color of muscles.
https://en.wikipedia.org/wiki/File:Muscular_system.svg
______________________________________________
SLIDE BODY2post-4
Note: This slide has animation. The teacher may wish to practice before viewing with students.
Continue the analysis of the investigation by referring students to the model they observed in Trial 3.
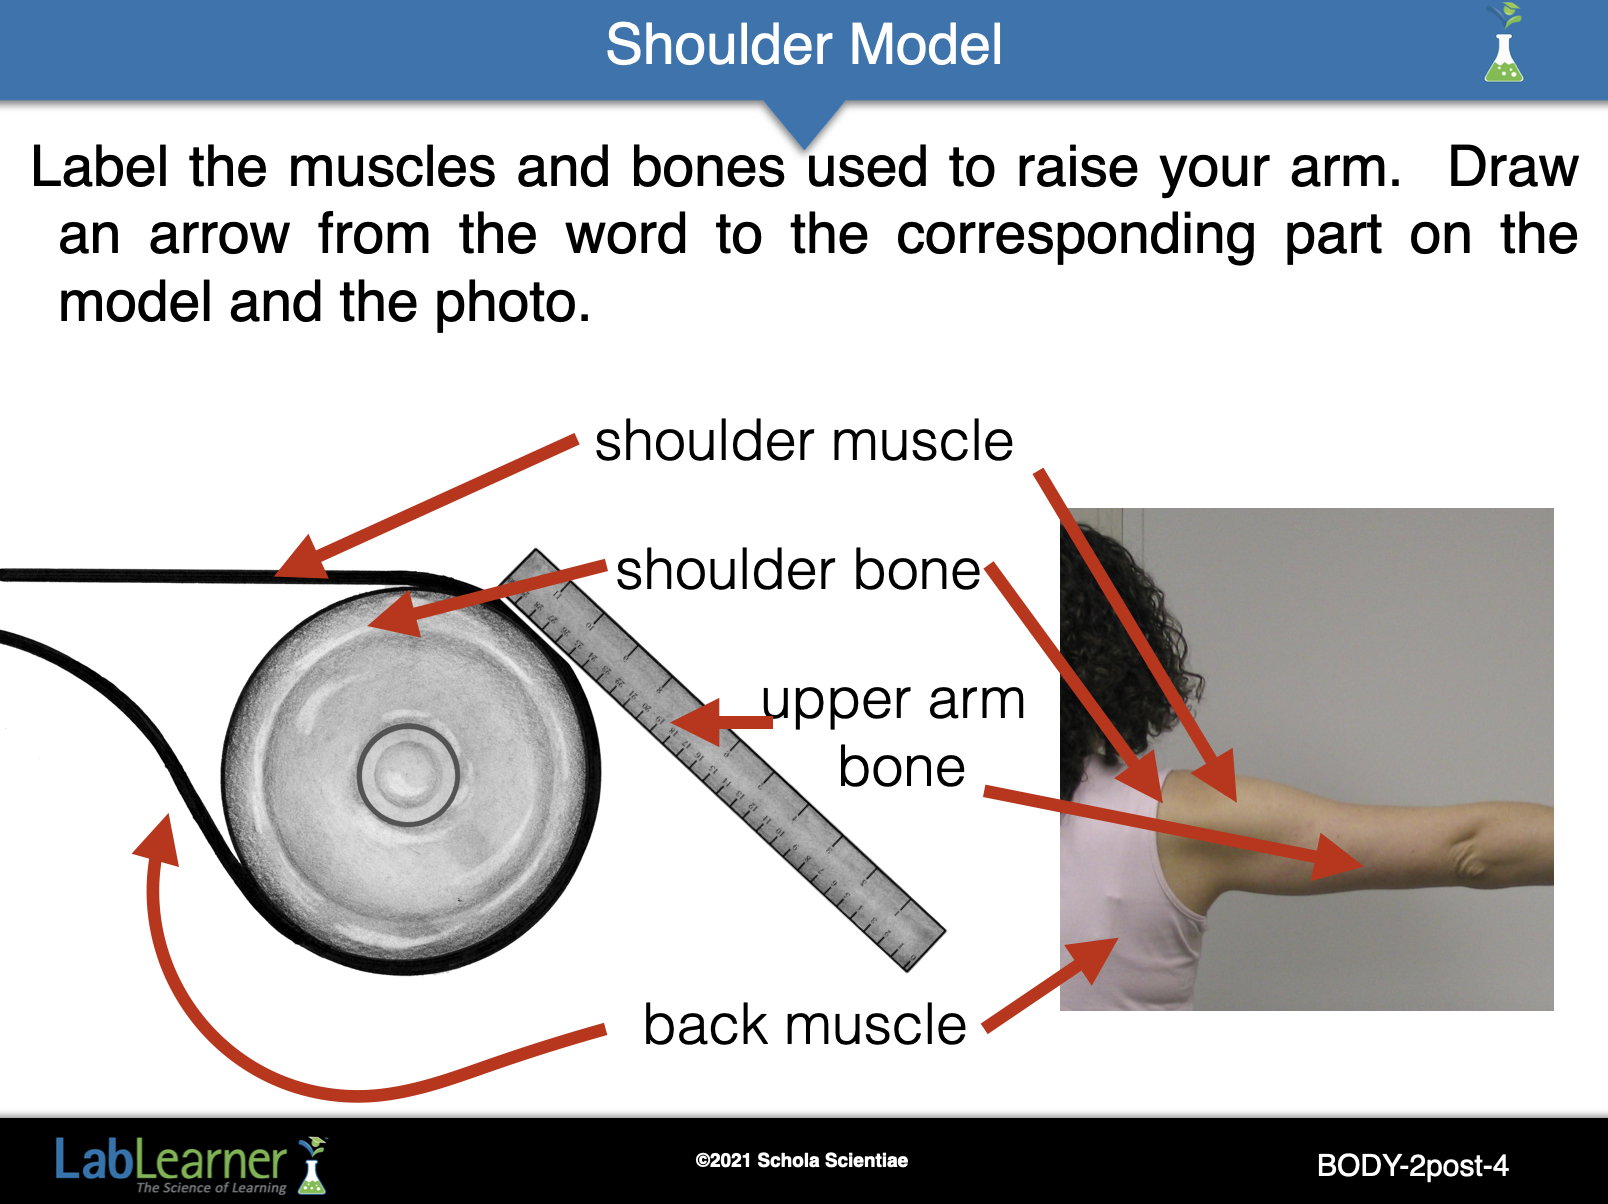
Ask students: Which body parts did the model represent? Students should indicate that the model was a representation of the bones and muscles in the back and shoulder that are used to raise and lower the upper arm.
Tell students to locate problem 10 in their Scientist Data Record. Explain that there is a simple line drawing of the shoulder model and a photograph of a real shoulder and arm. There are four body parts (shoulder muscle, shoulder bone, upper arm bone, and back muscle) listed between the two pictures.
Ask students to recall the human model they drew in the PreLab. Each part of the human model had a corresponding part on the real human.
Tell students that the shoulder model they observed yesterday has corresponding parts to a real shoulder.
Instruct students to draw a line from the words “shoulder muscle” to the part on the model that represents the shoulder muscle. Students should then draw a second line from the words “shoulder muscle” to that part on the real shoulder.
Direct students to complete labeling the shoulder model and the real shoulder. Allow sufficient time to complete the activity. Once students have completed the activity review the parts of the model.
Ask students: On this model, what does the ruler represent? Pulley? Rubber bands? The ruler represents the upper arm bone, the pulley represents the shoulder bone, and the rubber bands represent the muscles.
______________________________________________
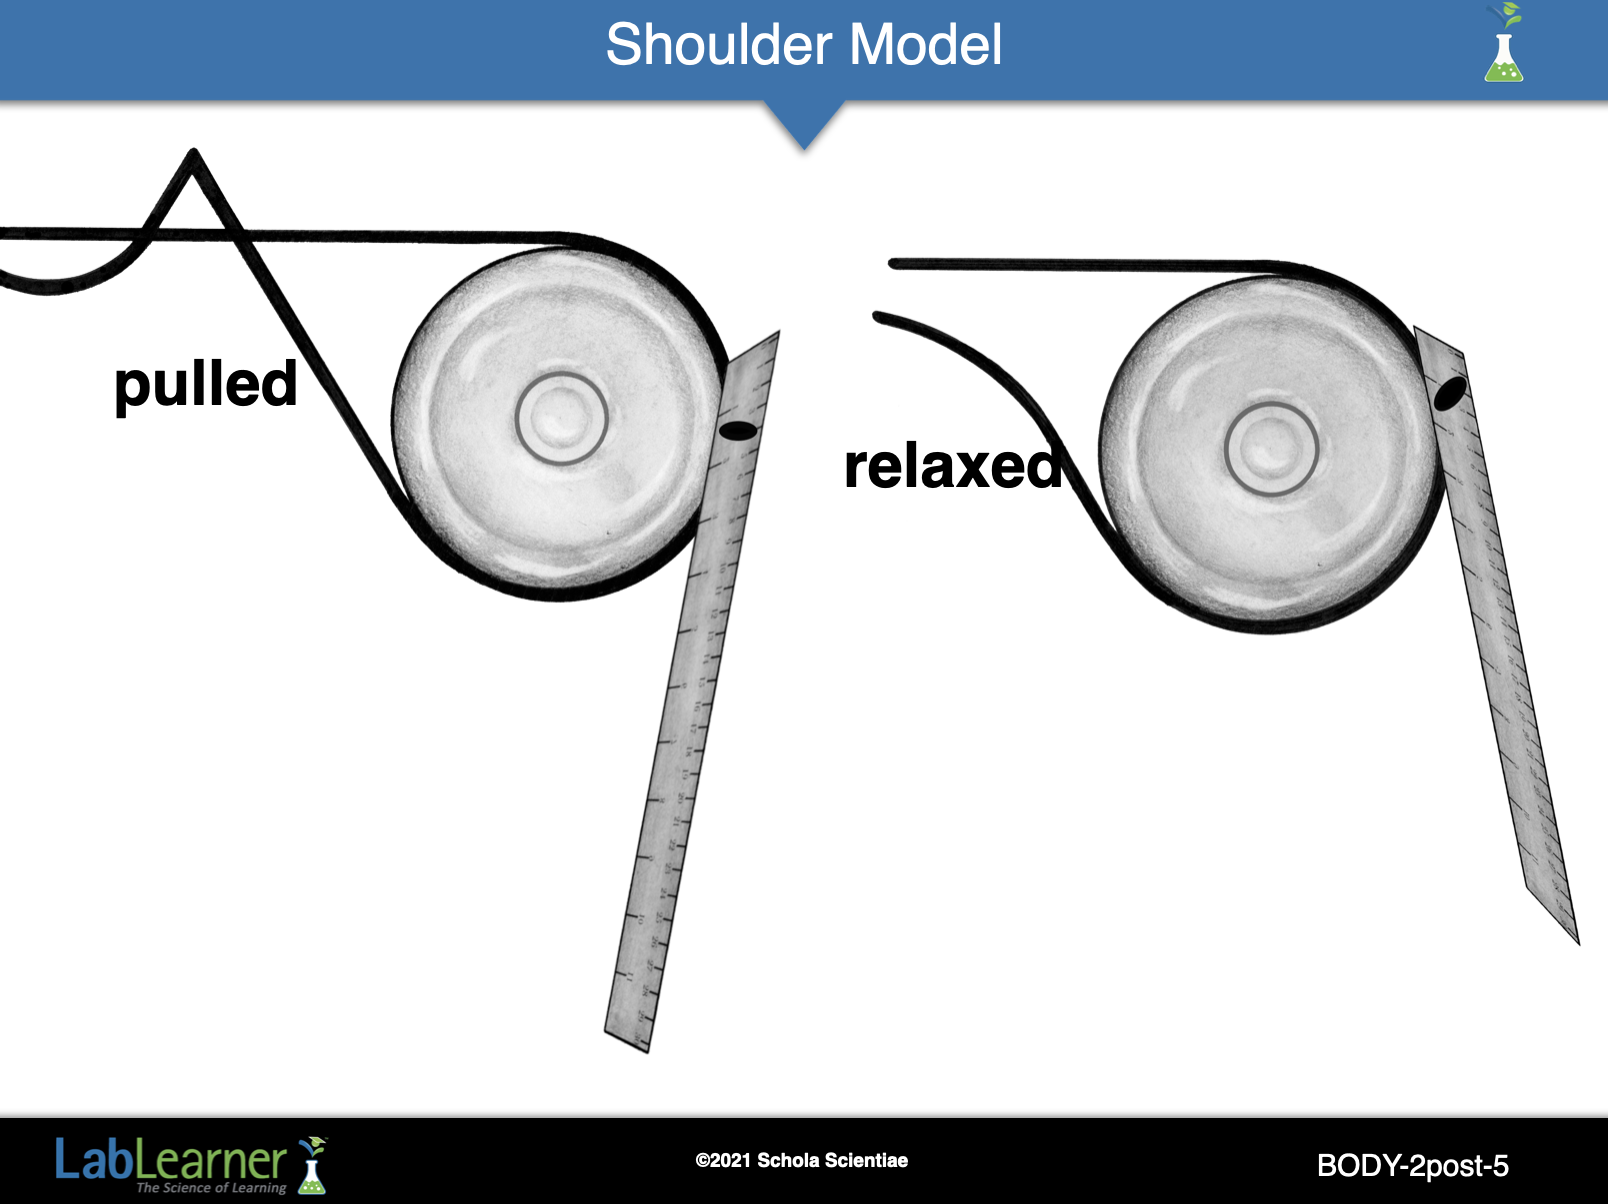
SLIDE BODY2post-5
Ask students to use the Mind Movie tool to rehearse their experiment. Tell students that when using a Mind Movie, they should imagine the answer to the question by using pictures in their head from when they did the experiment.
Ask students: Imagine pulling on the different rubber bands. What happened when the different rubber bands were pulled? Students should indicate that by pulling the top rubber band parallel with the table, the ruler rose up and became parallel with the floor.
Ask students: Imagine releasing the rubber bands. What happened when you released the rubber bands? Students should indicate that the ruler returned to its original position (resting position) when the rubber bands were released.
______________________________________________
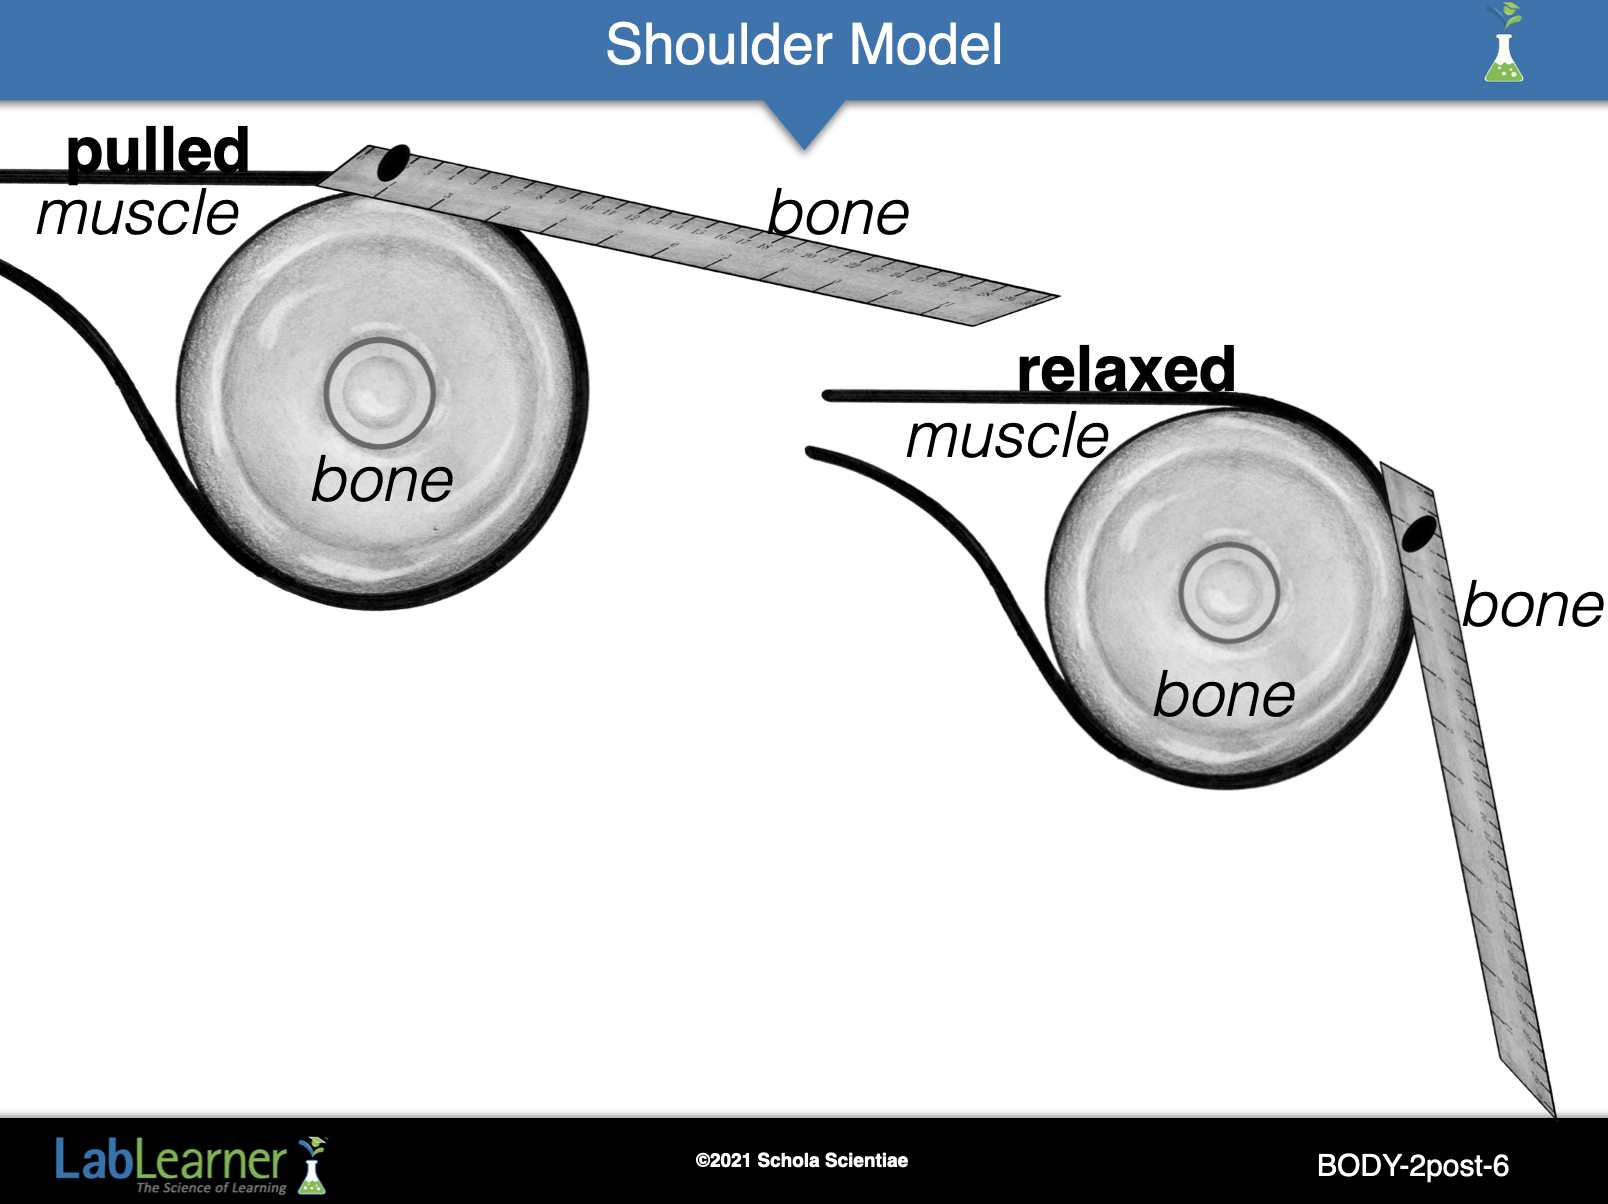
SLIDE BODY2post-6
Note: This slide is animated. Teachers may wish to practice prior to showing to students.
Ask students: Imagine pulling on the different rubber bands. What happened when the different rubber bands were pulled? By pulling the bottom rubber band perpendicular to the table, the ruler lowered towards the floor.
Ask students: Imagine releasing the rubber bands. What happened when you released the rubber bands? Students should indicate that the ruler returned to its original position (resting position) when the rubber bands were released.
Ask students: Think about this model. Can you explain how the skeletal and muscular systems work together? Students should indicate that the muscles (rubber bands) were attached to the bones (pulley and ruler). As the muscles pulled on the bones, a movement was created.
______________________________________________
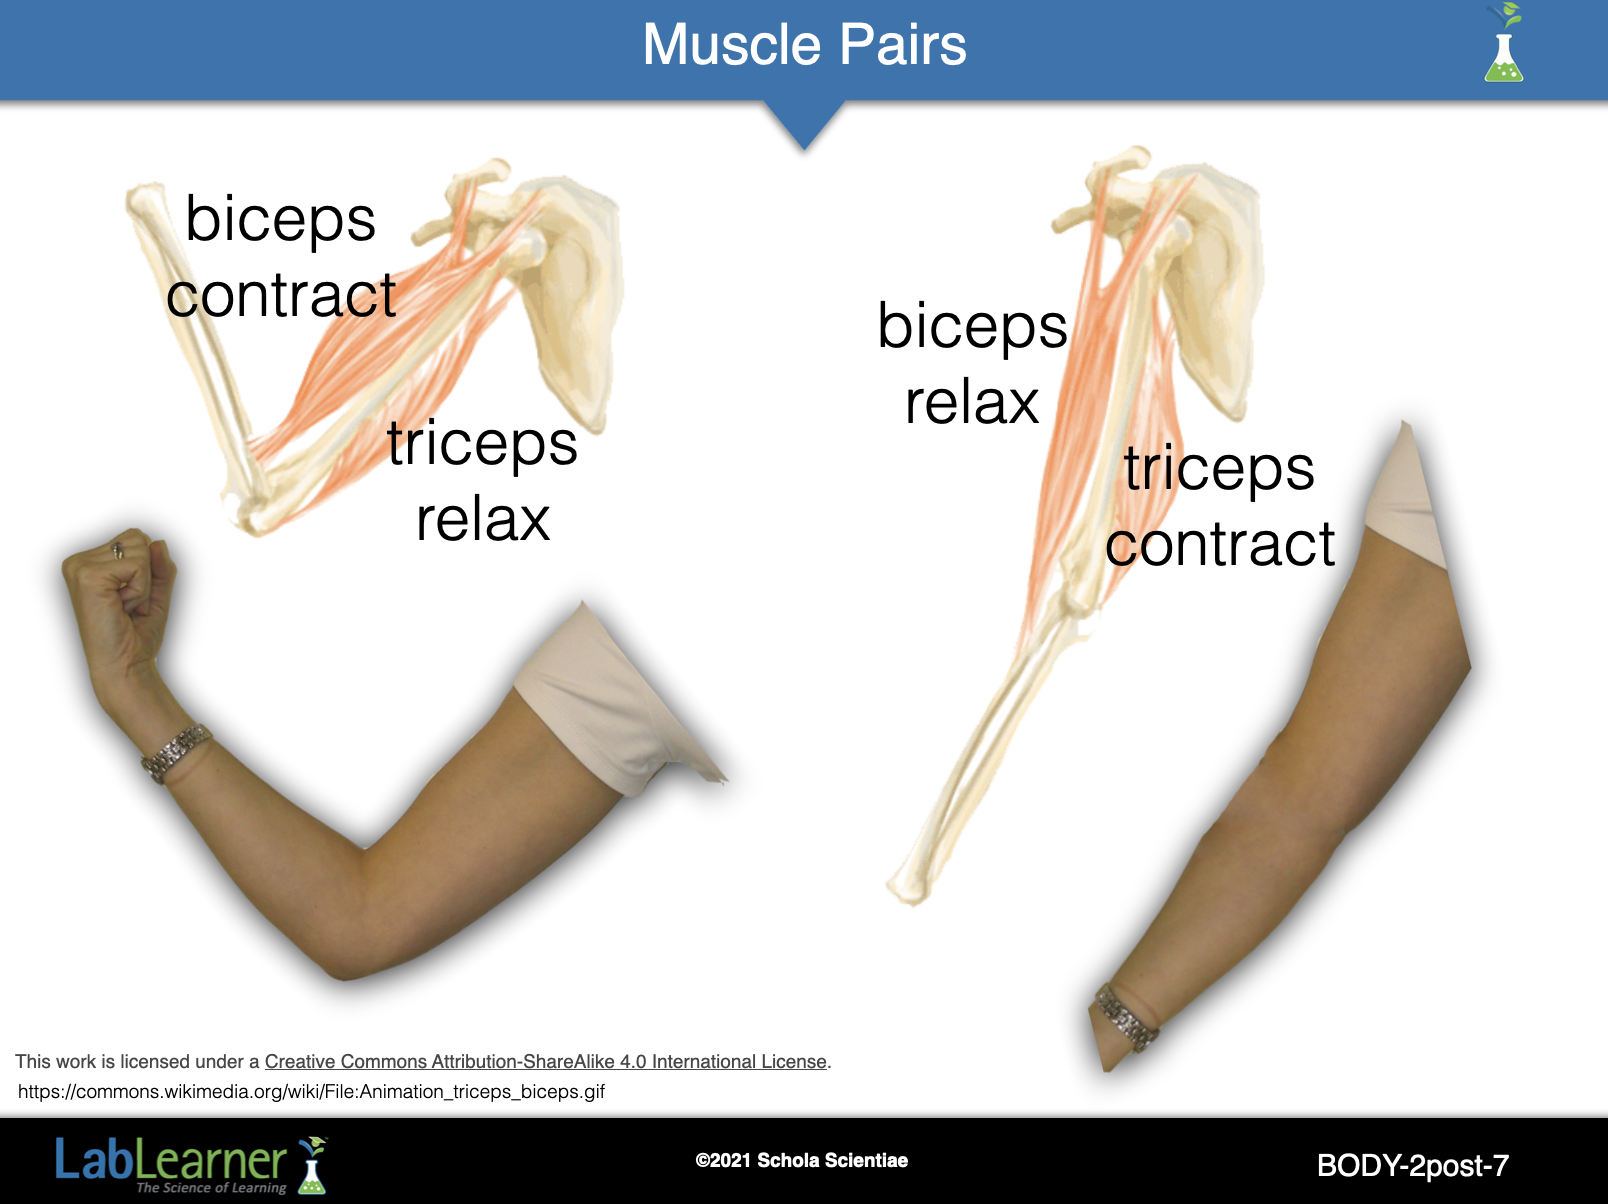
SLIDE BODY2post-7
Begin a discussion of the terms contract and relax. Explain to students that in order to cause body movements, muscles do two simple things: contract (tighten up) and relax (loosen).
Tell students that most of the bones in the body are surrounded by a pair of muscles. As one muscle in the pair contracts, the other relaxes.
Ask students to bend their left lower arm into a right angle as if making a muscle Tell students that their upper arm has a pair of muscles that allows the arm to straighten and bend.
When the arm is bent, the muscle on top is contracting while the muscle on the bottom is relaxing. Instruct students to touch these two muscles.
Ask students to straighten their arms. When the arm is straightened, the muscle on the top is relaxing while the muscle on the bottom is contracting. Instruct students to touch these two muscles.
https://commons.wikimedia.org/wiki/File:Animation_triceps_biceps.gif
______________________________________________
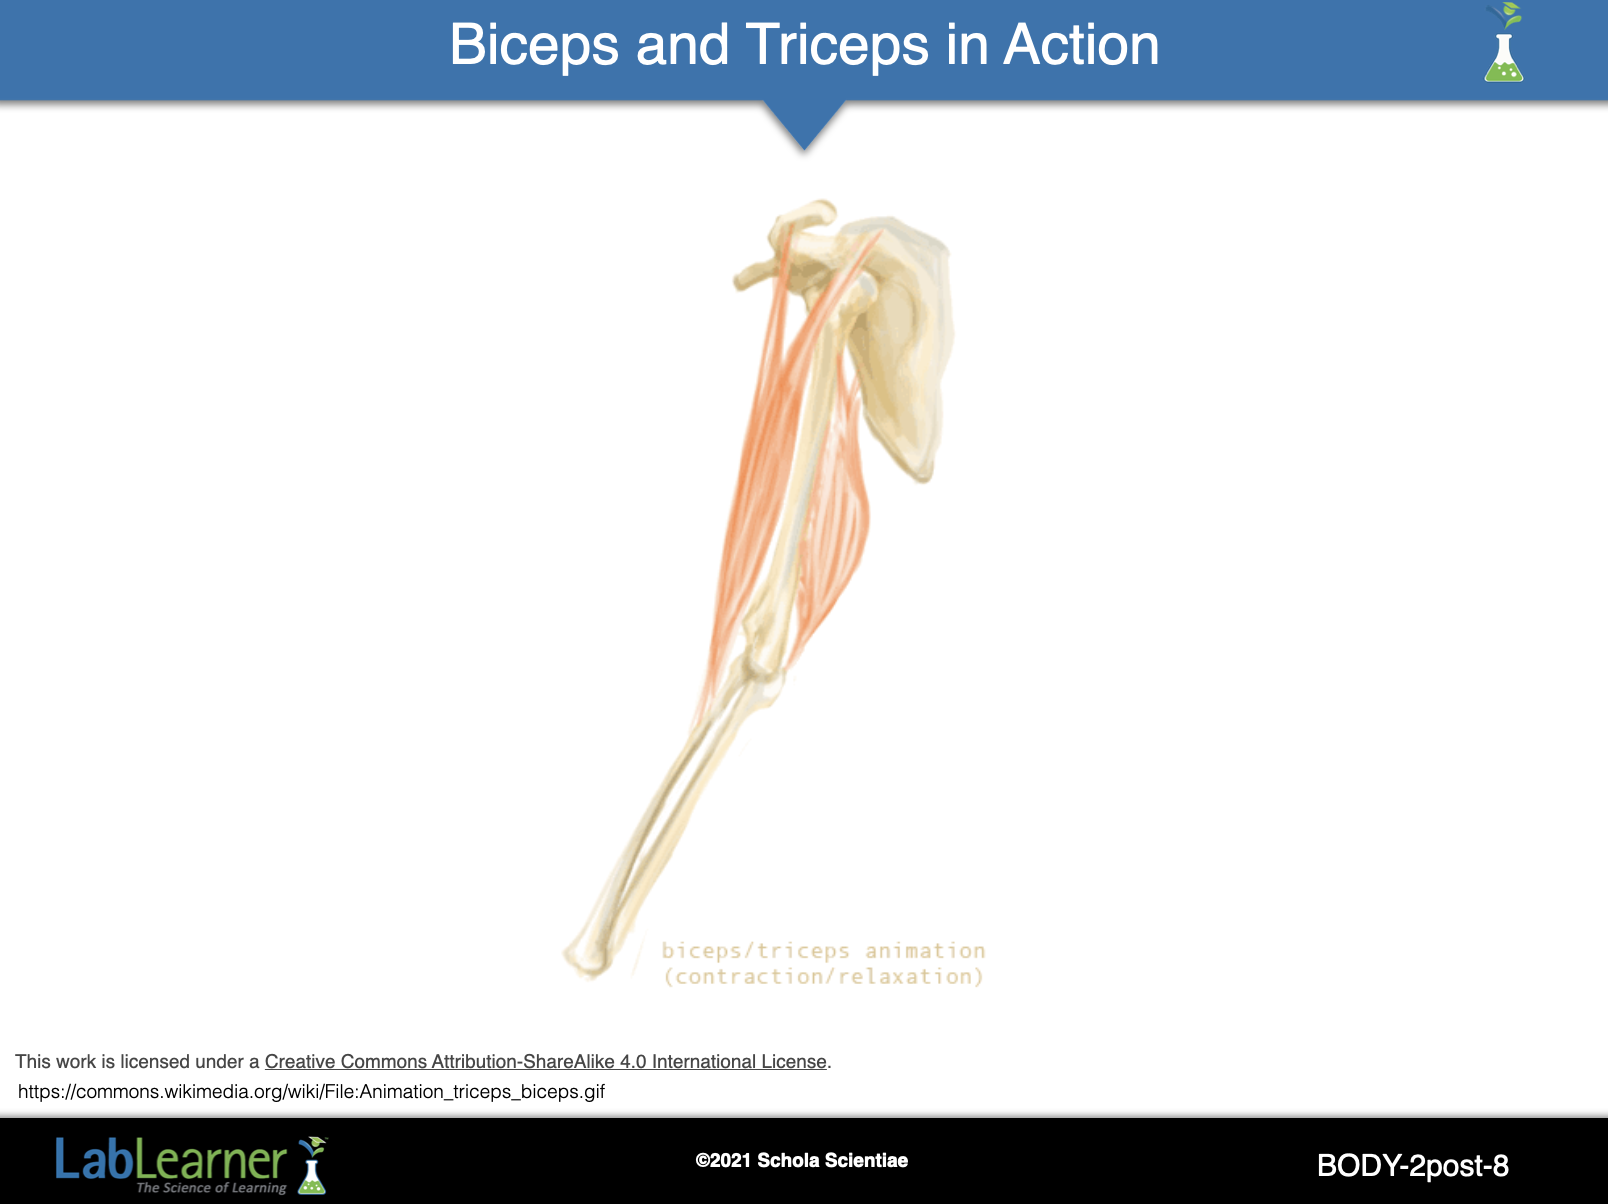
SLIDE BODY2post-8
This slide provides an animation for students to watch the biceps and triceps muscles in action.
https://commons.wikimedia.org/wiki/File:Animation_triceps_biceps.gif
______________________________________________
SLIDE BODY2post-9
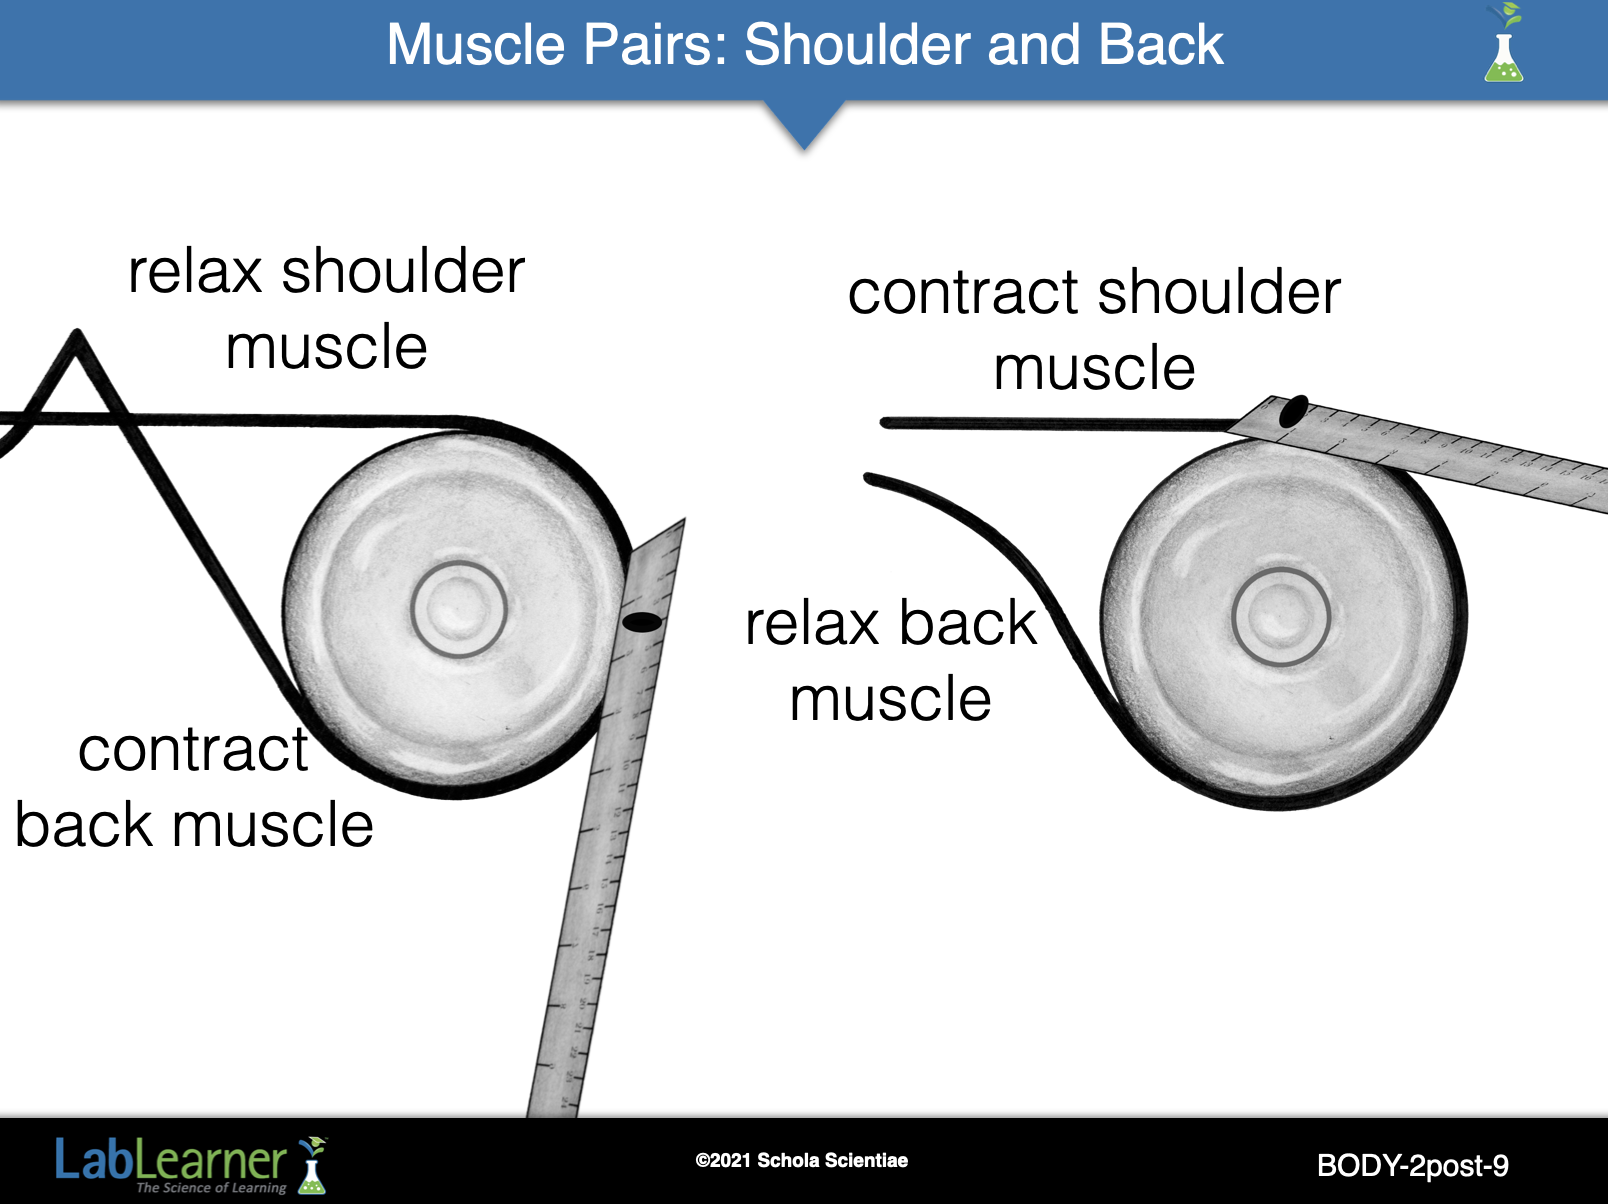
Note: This slide is animated. The teacher may wish to practice prior to presenting to the class.
Ask students: How did the muscle pair work in order to raise and lower your arm? Students should indicate that as the arm was raised, the shoulder muscle contracted while the back muscle relaxed. As the arm was slowly lowered, the shoulder muscle relaxed and the back muscle contracted.
Ask students: Based on your experiment, how did the muscular system work with the skeletal system? Students should indicate that the muscles are attached to the bones. As the muscles contract and relax, they pull on the bones causing movement to occur. The bones provide structure to the muscles and give them a place to be attached.
______________________________________________
SLIDE BODY2post-10
Note: This slide is animated. The teacher may wish to practice prior to presenting to the class.
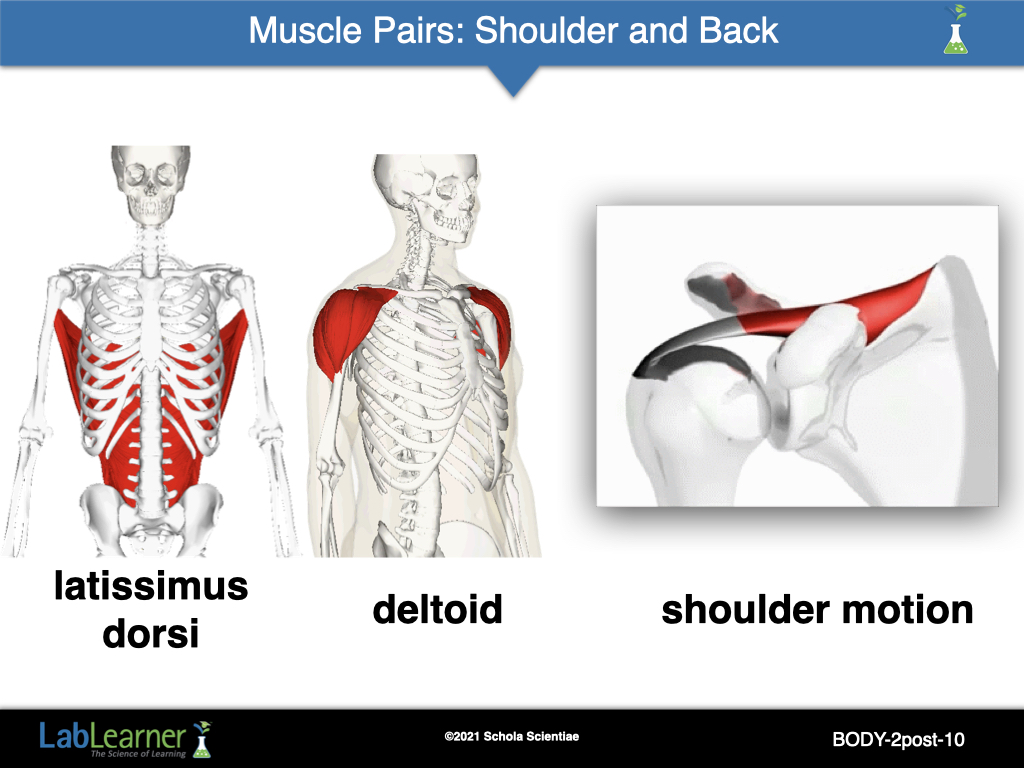
This slide provides an opportunity for students to view the deltoid and latissimus dorsi (“door-sigh”) muscles on the skeleton and to view the deltoid contracting.
The deltoid muscle is actually a group of muscles and is the “shoulder muscle” that the students modeled in the lab.
The latissimus dorsi is the back muscle that students modeled in the lab.
https://upload.wikimedia.org/wikipedia/commons/b/bd/Deltoid_muscle_animation3.gif
https://upload.wikimedia.org/wikipedia/commons/2/2c/Latissimus_dorsi_muscle_animation.gif
https://en.wikipedia.org/wiki/File:Shoulder_motion_with_rotator_cuff_(supraspinatus).gif
______________________________________________
SLIDE BODY2post-11
Encourage students to apply their knowledge of the skeletal system and the muscular system as you read a short story aloud to them.
Ask students: How often in your day do you think you use your skeletal and muscular systems? Student answers may vary. Students may or may not indicate that they use their skeletal and muscular systems every time they move.
Tell students that you are going to re-read the short story about Mr. Freeman aloud to them. Instruct students to find the story in their Student Data Record. Encourage students to follow along as you re-read the story to them.
Remind students to use the Mind Movie tool as they listen to the following story.
A Mind Movie is a tool that can be used to help a person imagine something with a lot of detail if he or she listens carefully.
______________________________________________
SLIDE BODY2post-12
Encourage students to apply their knowledge of the skeletal system and the muscular system as you read a short story aloud to them.
Ask students: How often in your day do you think you use your skeletal and muscular systems? Student answers may vary. Students may or may not indicate that they use their skeletal and muscular systems every time they move.
Tell students that you are going to re-read the short story about Mr. Freeman aloud to them. Instruct students to find the story in their Student Data Record. Encourage students to follow along as you re-read the story to them.
Remind students to use the Mind Movie tool as they listen to the following story.
A Mind Movie is a tool that can be used to help a person imagine something with a lot of detail if he or she listens carefully.
______________________________________________
SLIDE BODY2post-13
After you have finished re-reading the story aloud, Ask students: How often did Mr. Freeman use his skeletal system and muscular system throughout his trip from the breakfast table to his office? Student answers may vary. Encourage students to realize that every time Mr. Freeman moves a part of his body, he is using his skeletal and muscular systems.
To help students understand the many times Mr. Freeman used his skeletal and muscular systems, suggest that you mark these parts of the story. To see how he used these syste
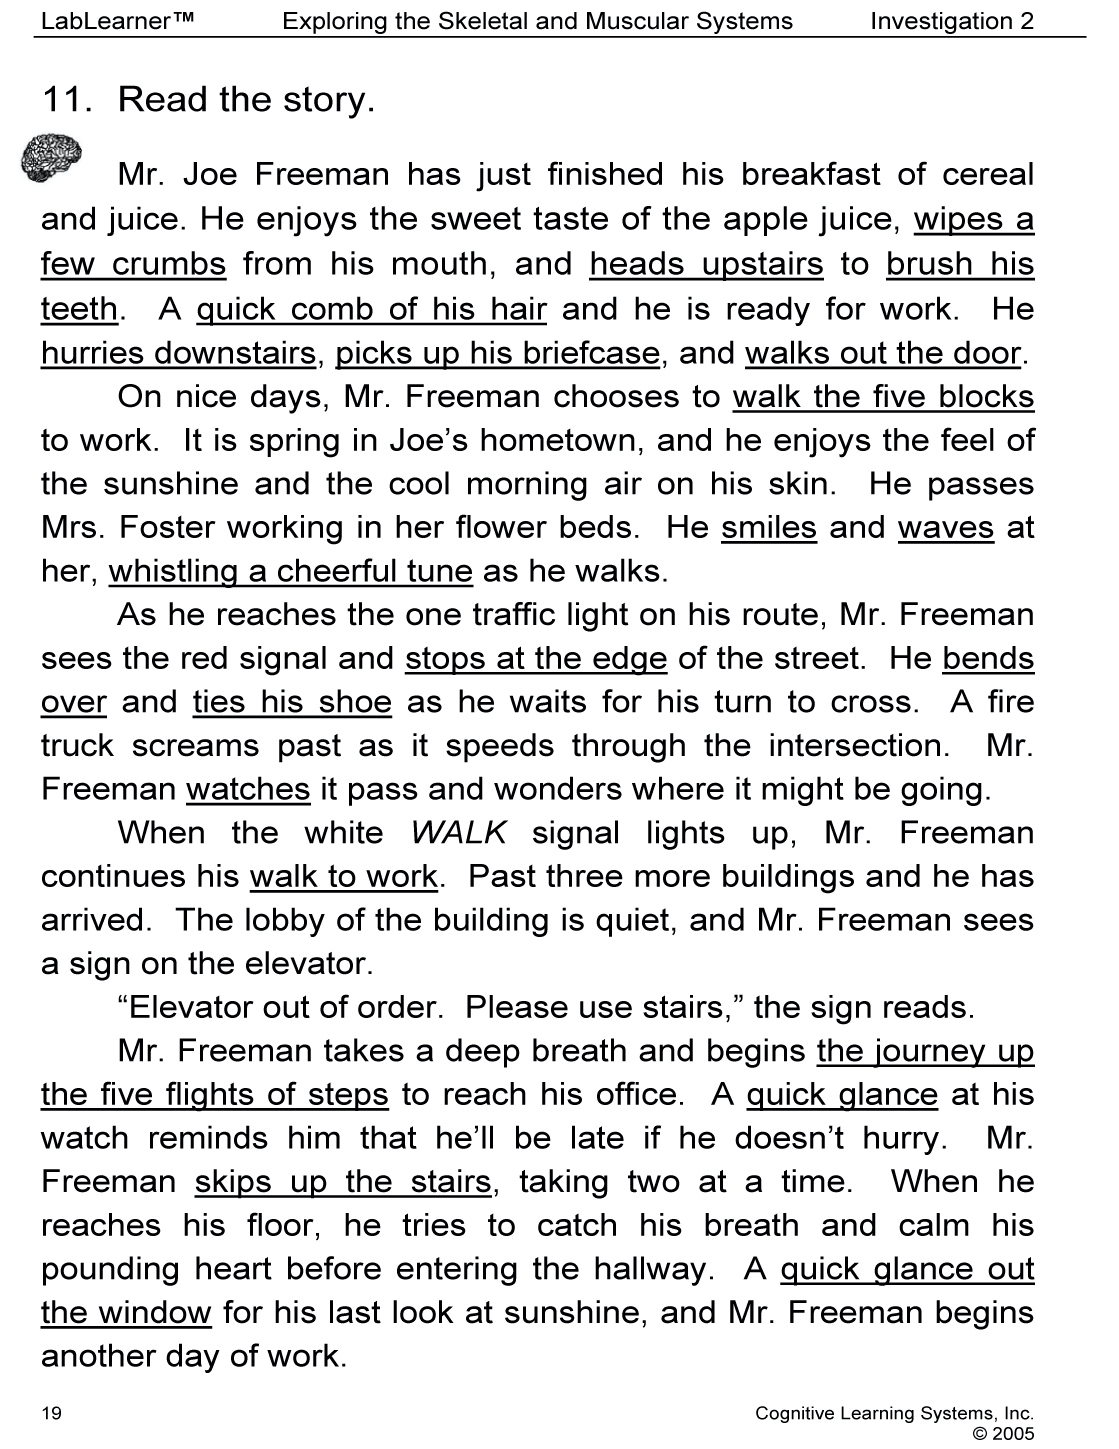
ms, first ask students: How did Mr. Freeman use his skeletal and muscular systems? Underline student’s responses from the story . Encourage students to underline the passages in their story. Student answers may vary. Sample answers include: wiping his mouth, combing his hair, waving to Mrs. Foster, and skipping up the stairs.
Ask the class to look at the story with its markings. Ask students: It looks like Mr. Freeman used his skeletal system and muscular system many times on his way to work. Do you think that Mr. Freeman ever used his skeletal system without using his muscular system? Student answers may vary. Students should indicate that every time Mr. Freeman used his skeletal system, he was also using his muscular system. This is because the muscles are attached to the bones.
Ask students: Was Mr. Freeman using his nervous system while he was moving? Encourage students to remember that they read this story in Investigation One and marked all of the times that Mr. Freeman used his nervous system. Students may wish to refer back to problem 8 of Investigation One to help answer this question. Students should indicate that he was using his nervous system.
Ask students: How do the nervous, skeletal, and muscular systems work together? Students should indicate that the nervous system was sending signals to the muscular systems to tell it how and when to move the parts of the skeletal system.
Ask students: Do you think that the skeletal and muscular systems could work without the nervous system? Students should indicate that they could not work without the nervous system.
Conclude the Investigation by encouraging students to think about all of the different ways that the nervous, skeletal, and muscular systems work together. Ask students to consider whether Mr. Freeman could get to work if one of the three systems (nervous, skeletal, or muscular) were impaired or missing.
______________________________________________