Vernier Dissolved Oxygen Probe
 1. If you haven’t already, install Vernier Graphical Analysis® on your computer, Chromebook™, or mobile device.
2. Charge your Dissolved Oxygen probe for at least eight hours before first use using the included power supply. Disconnect the power supply before attempting to collect data. You should not have the power supply attached while collecting data wirelessly.
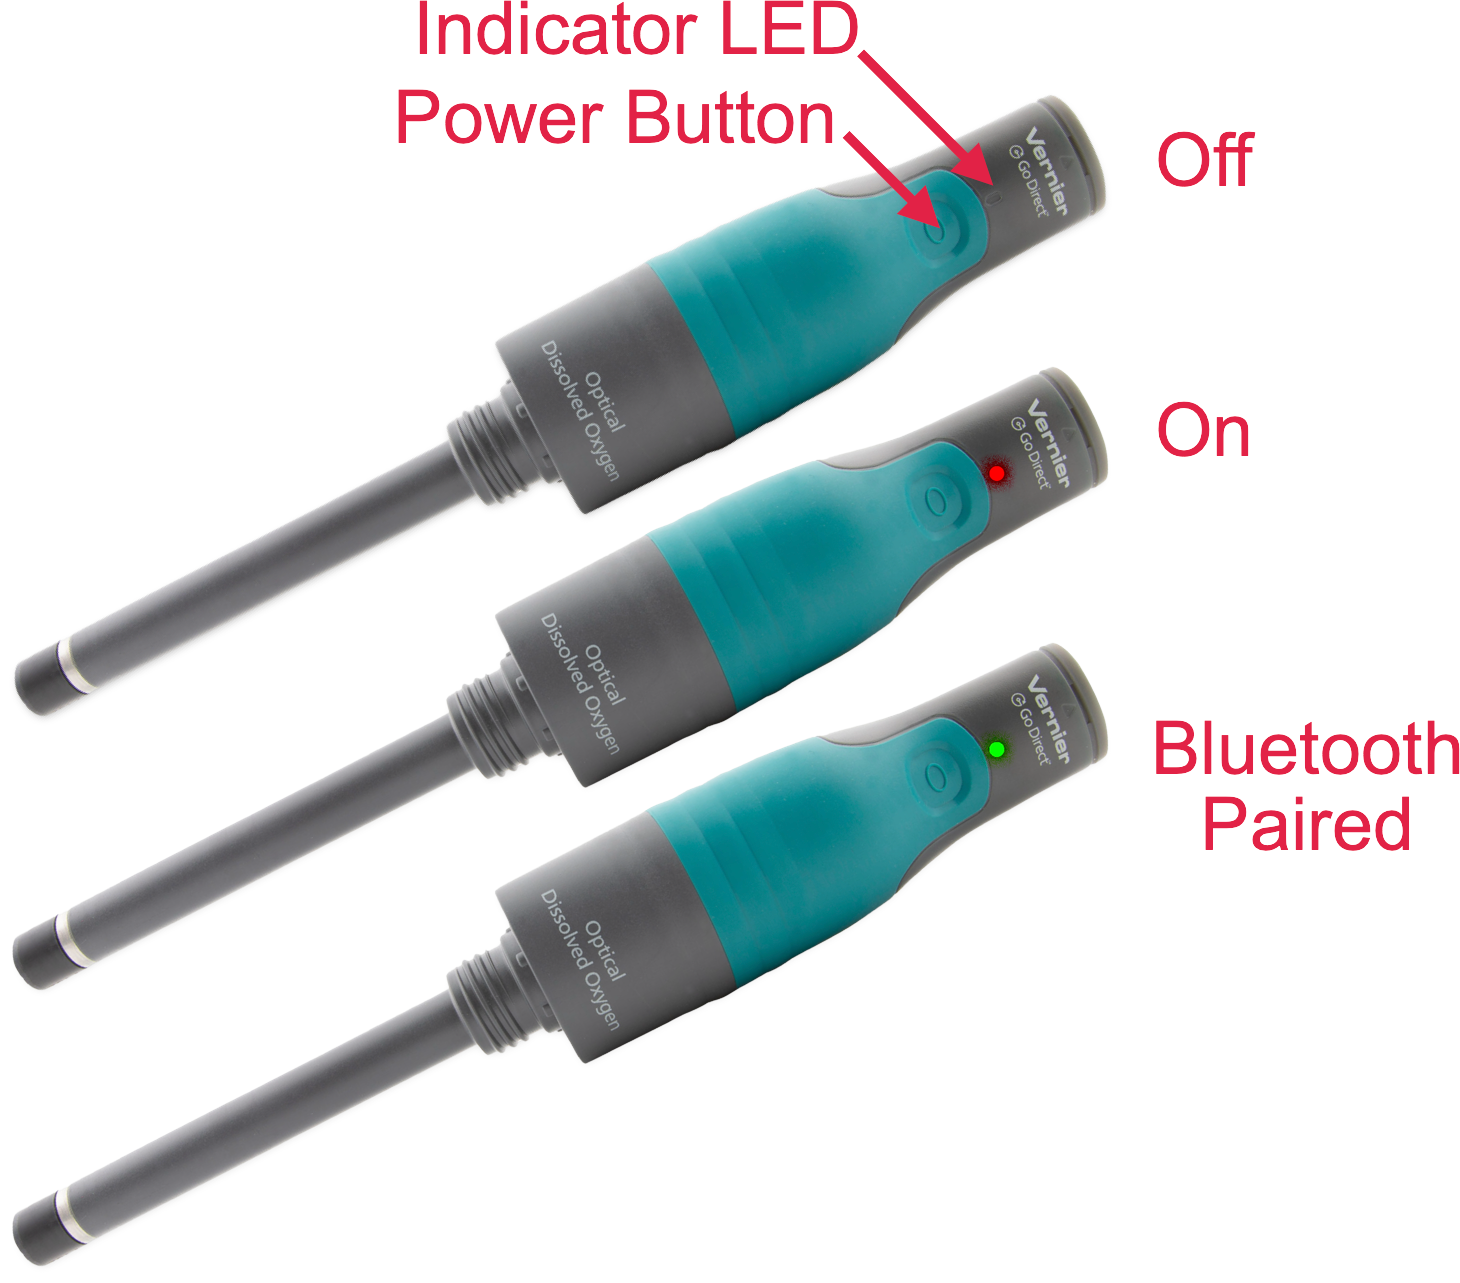
3. Turn on the oxygen probe by pressing the power button until it flashes red. The Bluetooth® LED will blink.
Collecting Dissolved Oxygen Data
4. Launch the Graphical Analysis app on your device (computer, iPad, Chromebook, etc.)
5. Click or tap Sensor Data Collection (see below).
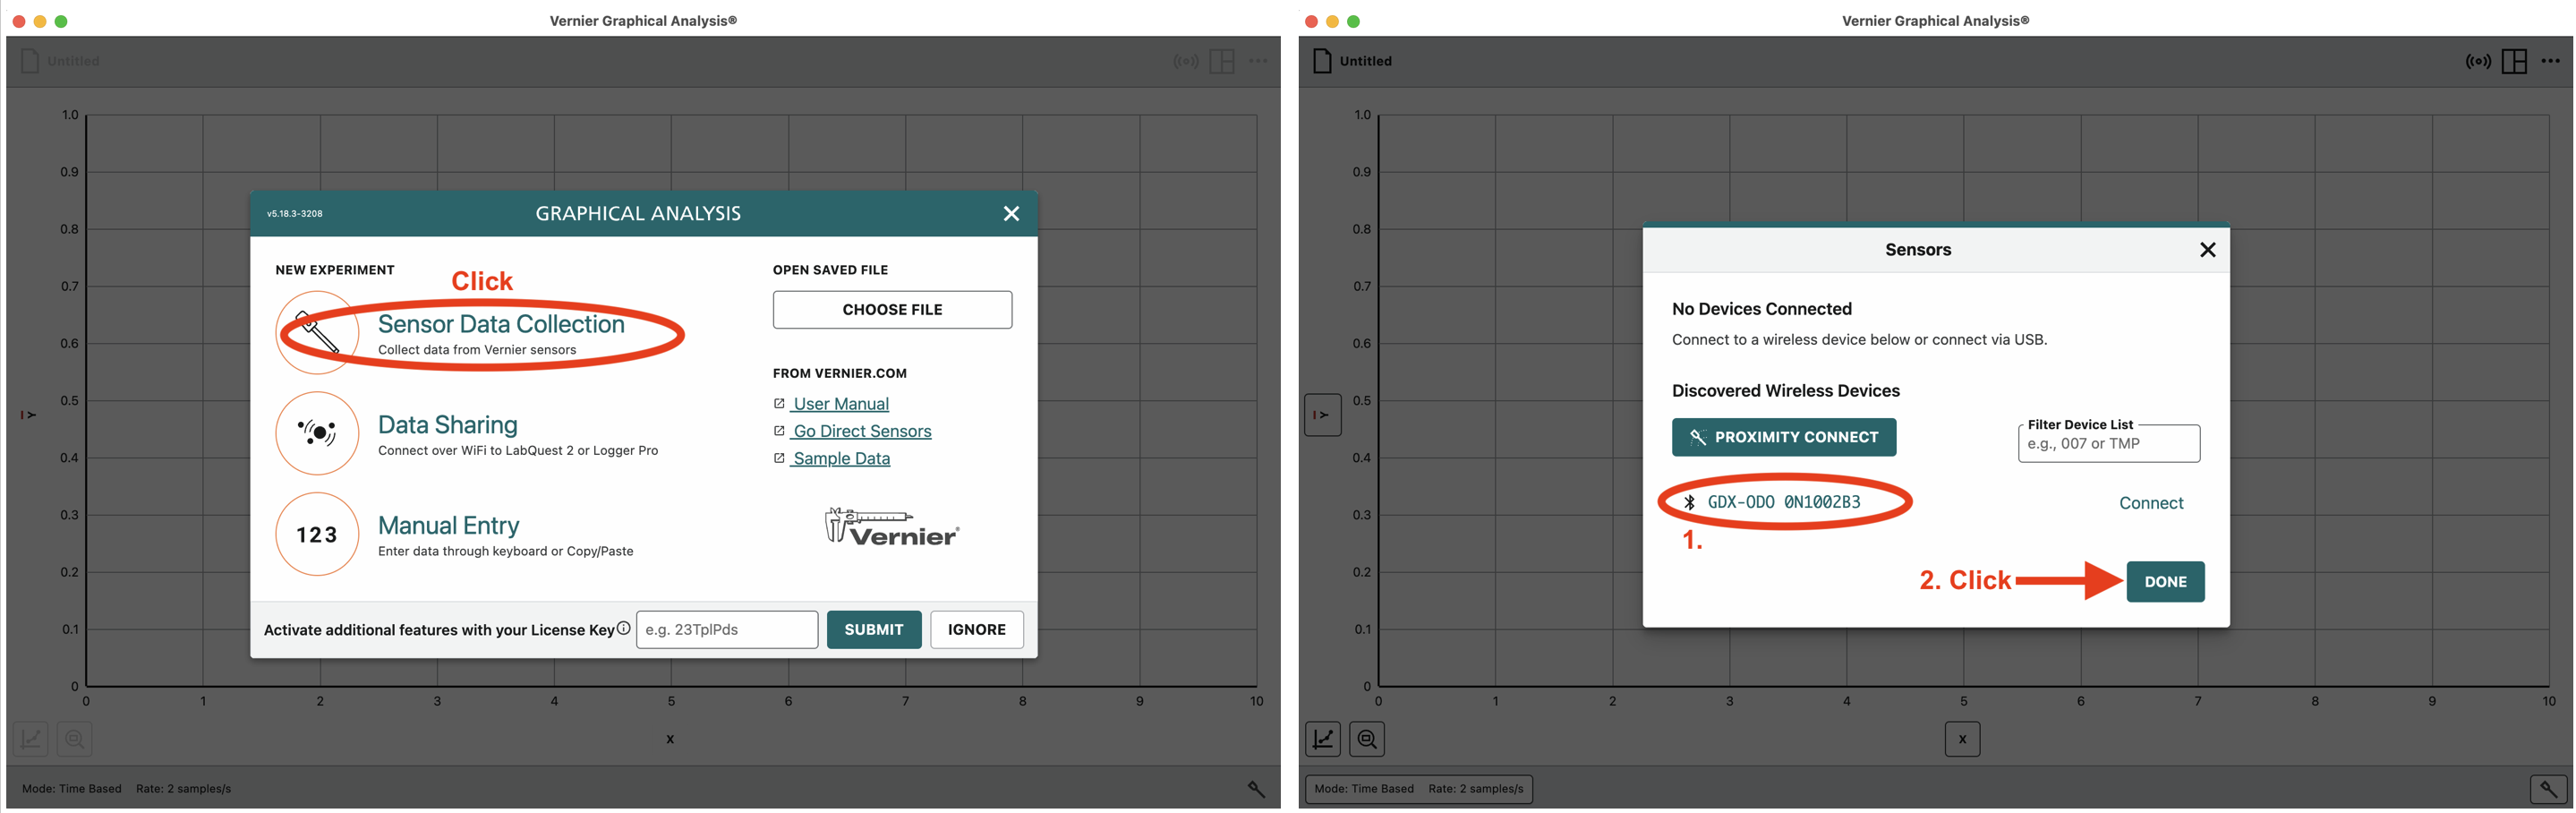
6. Select your Go Direct Dissolved Oxygen Probe from the list of Discovered Wireless Devices. Your oxygen probe’s ID is located near the barcode on the back of the probe. The Bluetooth LED on the sensor will flash green once paired.
7. Click or tap Done to enter data-collection mode. You are now ready to continue your experiment.
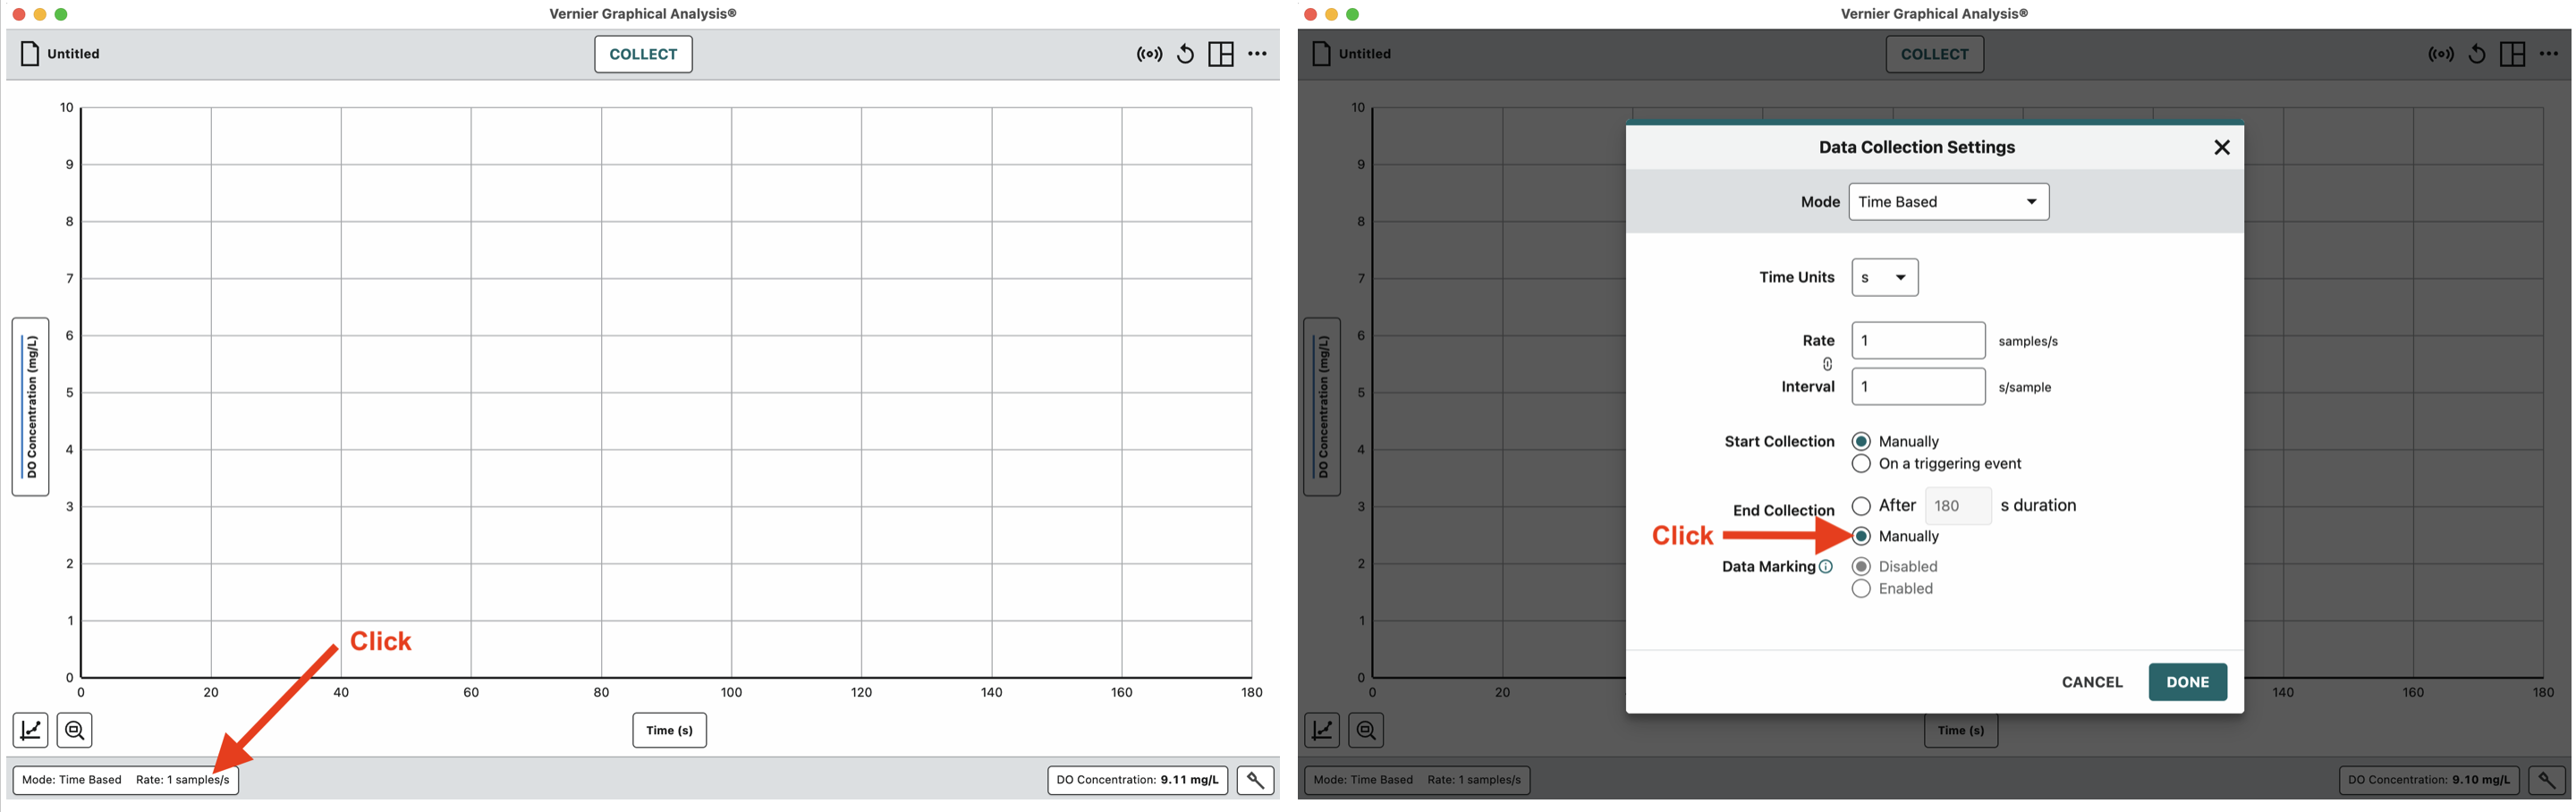
8. You can change the settings so that you control the time of data collection manually:
a. Click on the rate button on the lower left.
b. Then click the End Collection Manually button (see below).
9. Lower the tip of the oxygen probe into the sample. Be sure to mix (either by swirling the sample or the probe).
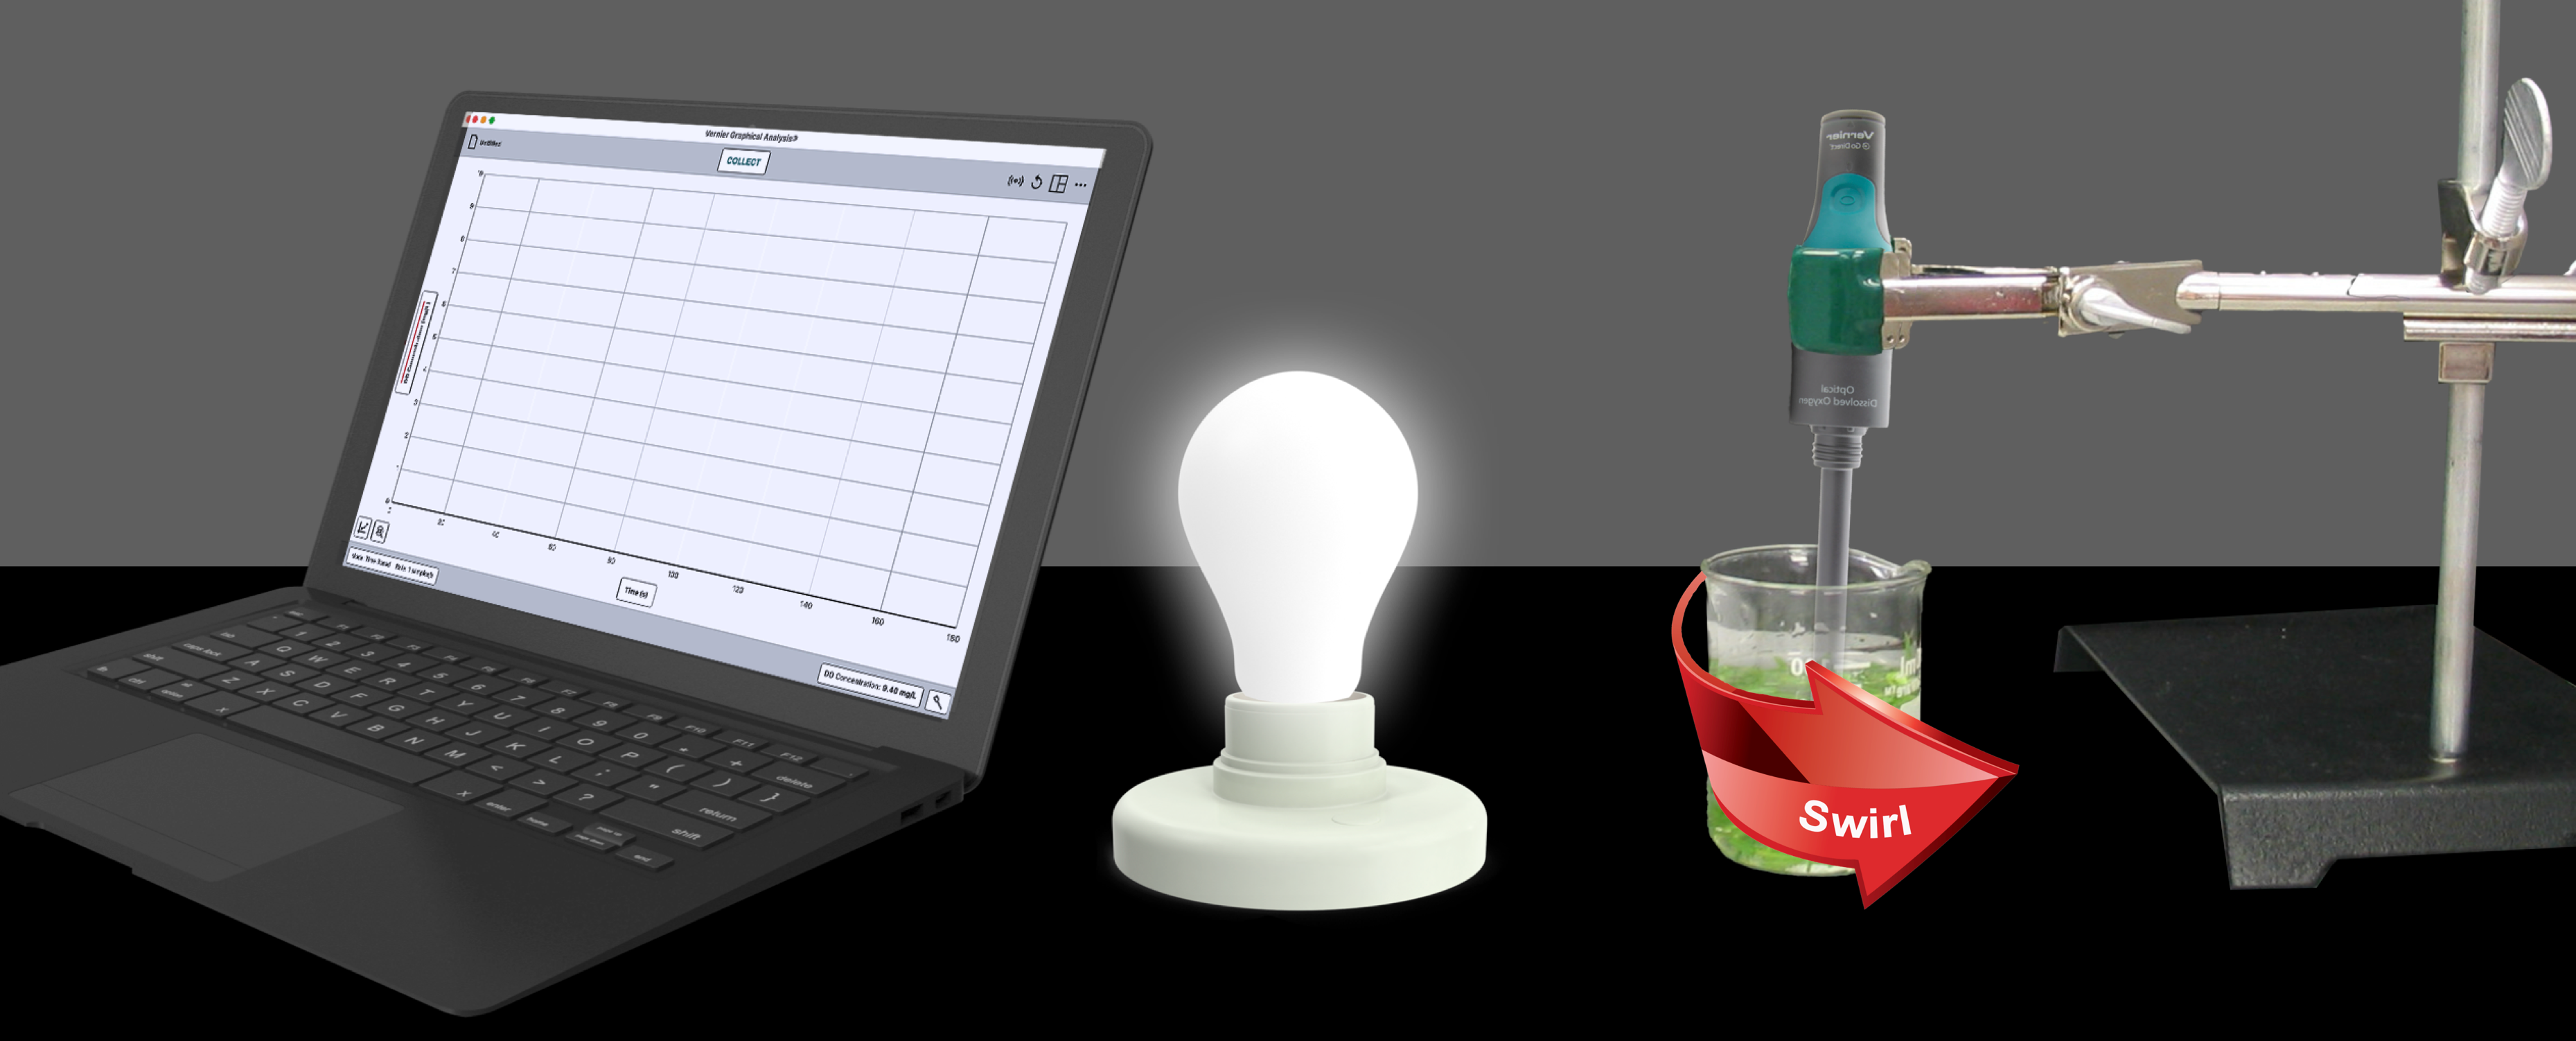
10. Click on COLLECT to capture data (below).
11. Click on the STOP button at the top to discontinue collecting data.
12. Click the “Untitled” button at the upper left to export and save your data.
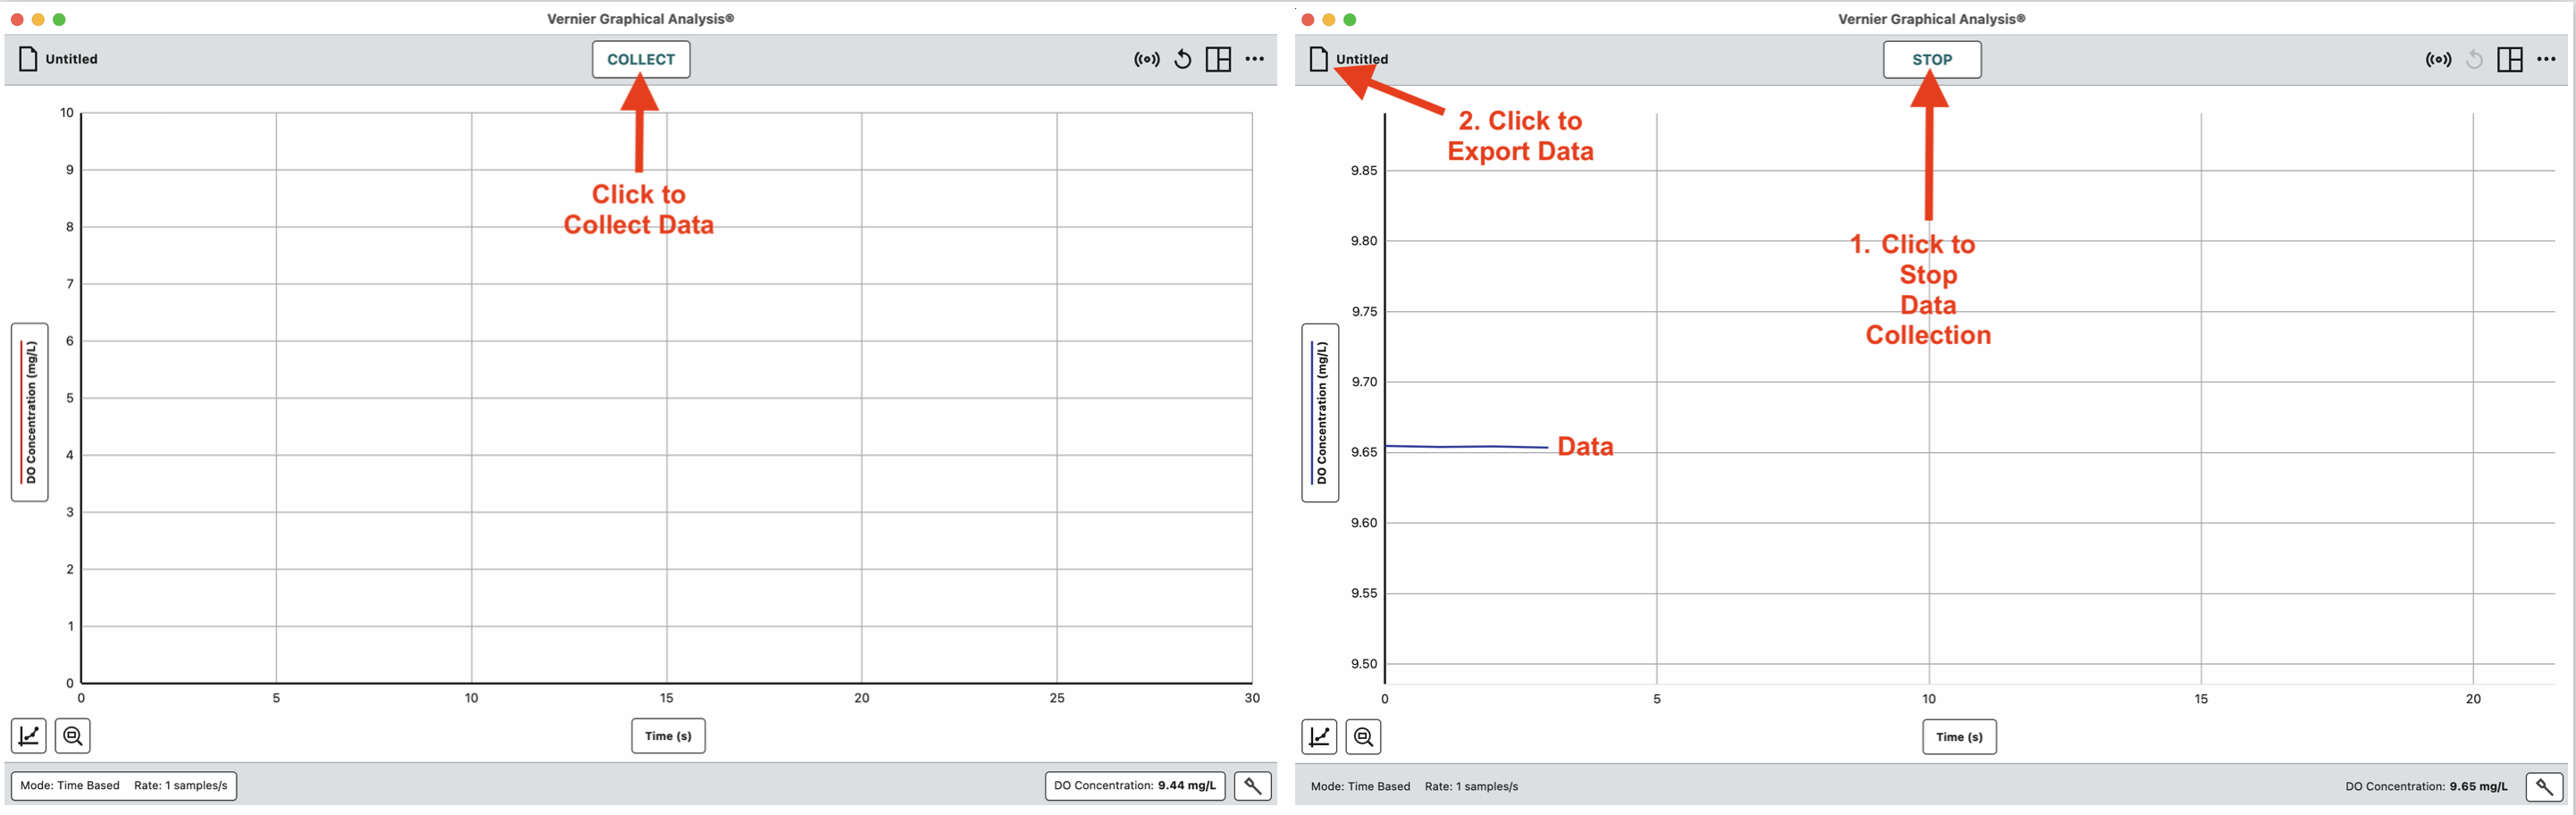
13. For a single data point, you can read the dissolved oxygen concentration directly from the lower right-hand corner of the window.
