Teacher Portal
Science and Art
PostLab Slides 1
PostLab Slides 1
Science and Art

Science and Art
Investigation 1
PostLab Slides


SLIDE VART1post-1
This was the first Investigation of the LabLearner CELL Science and Art. In it, students began an exploration of perspective and the illusion of depth in paintings.
______________________________________________
SLIDE VART1post-2
Begin this part of the Investigation by encouraging students to summarize their activities in the Lab. Prompt student discussion by posing the following questions:
1. Ask students: What were the main questions we wanted to investigate in this lab? Students should indicate that the questions were: How does your point of view affect how objects appear? How does distance from an object change its appearance? Does the field of view change?
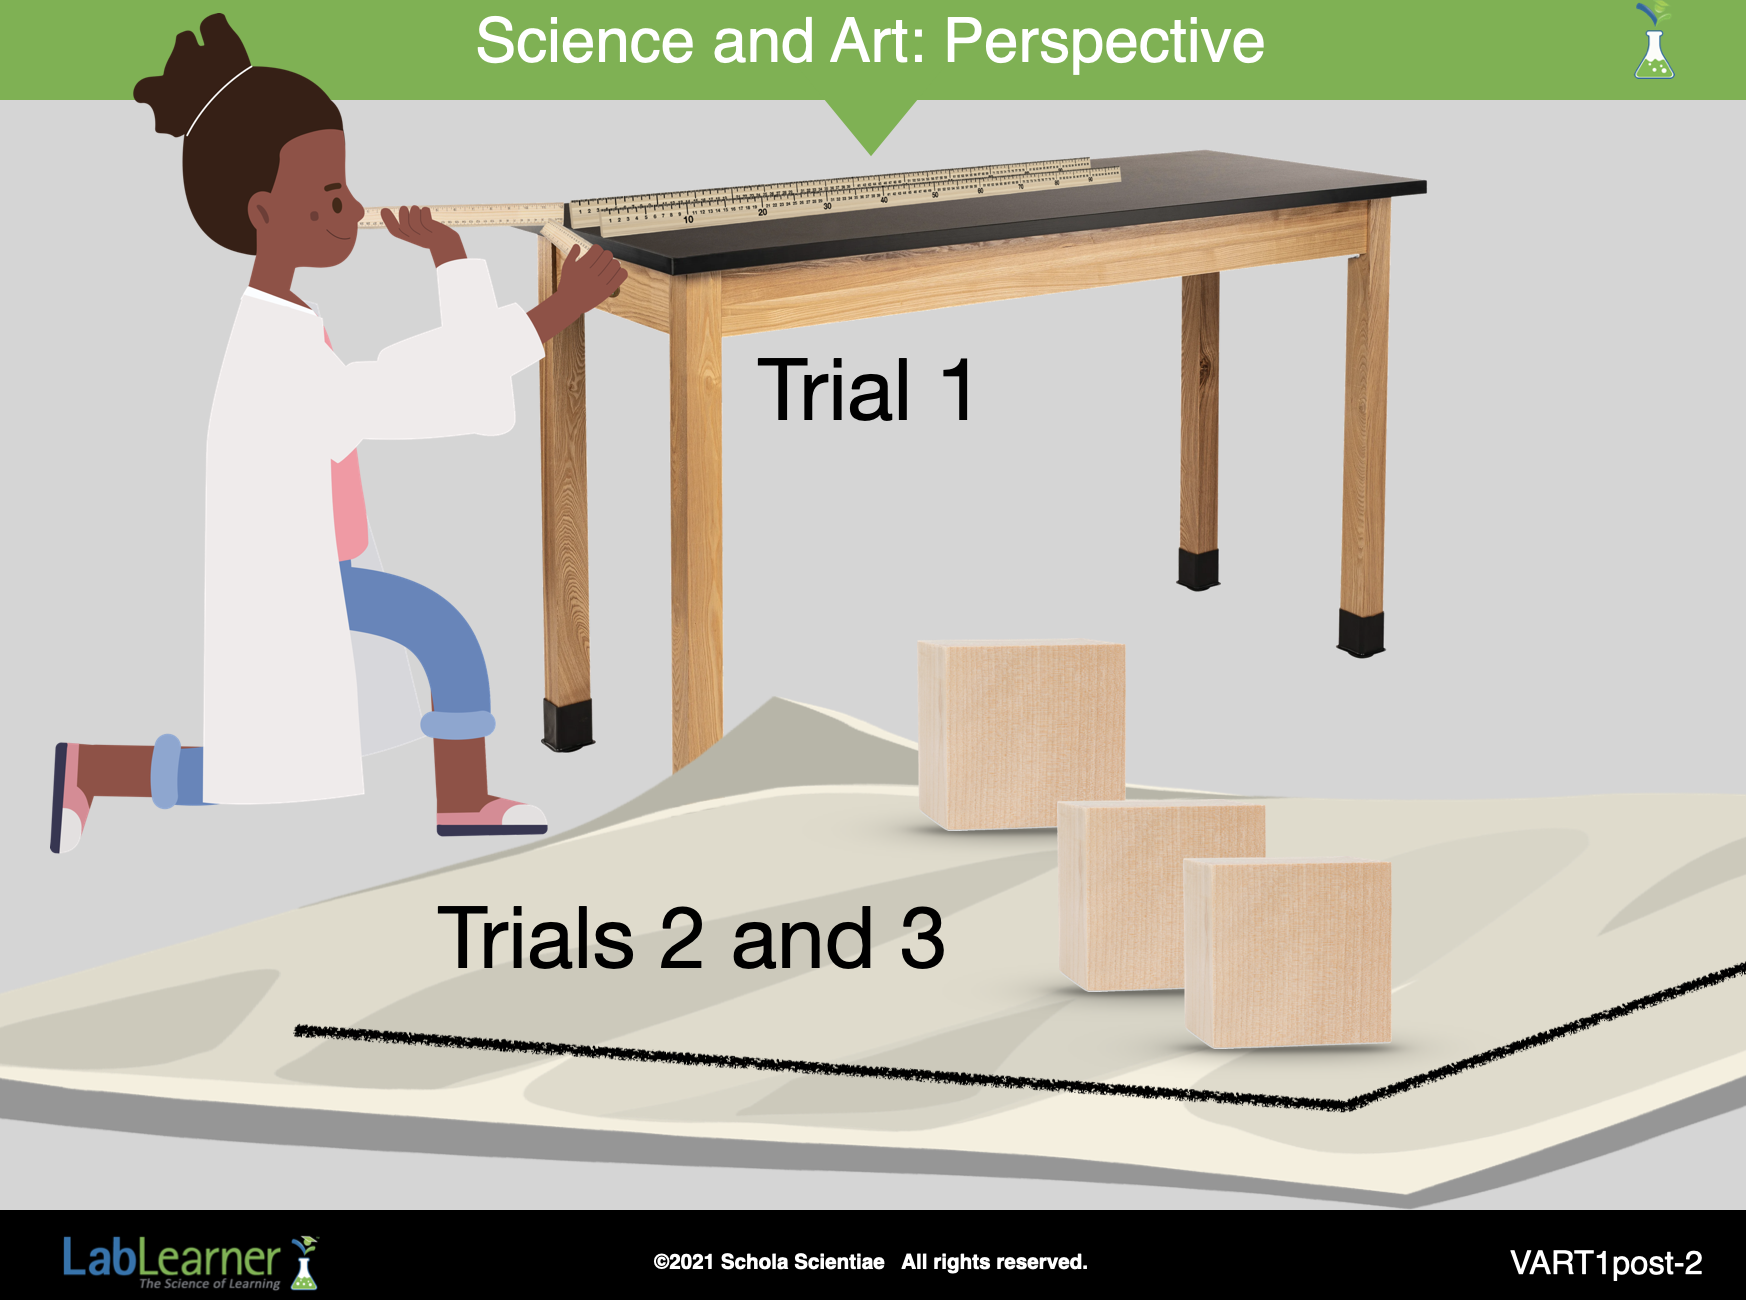
2. Ask students: How would you summarize the types of experiments that you performed to investigate these questions? Students should indicate that in Trial 1, they looked at two meter sticks that were parallel to each other. They look at the 100 cm end and the 0 cm end from above and from the 0 cm end of the meter sticks. They also measured the distance between the meter sticks at the 0 cm end and the 100 cm end from both points of view.
In Trial 2, they created a model of a person’s field of view and an object in the field of view using a flashlight and a wood block. They measured the width of the wood block when it was 2.5 cm and 5 cm away from a model eye. They measured the width of the field of view when the wood block was at both distances from the eye.
In Trial 3 they viewed the wood block when it was 2.5 cm, 5 cm, and 50 cm from their own eyes.
______________________________________________
SLIDE VART1post-3
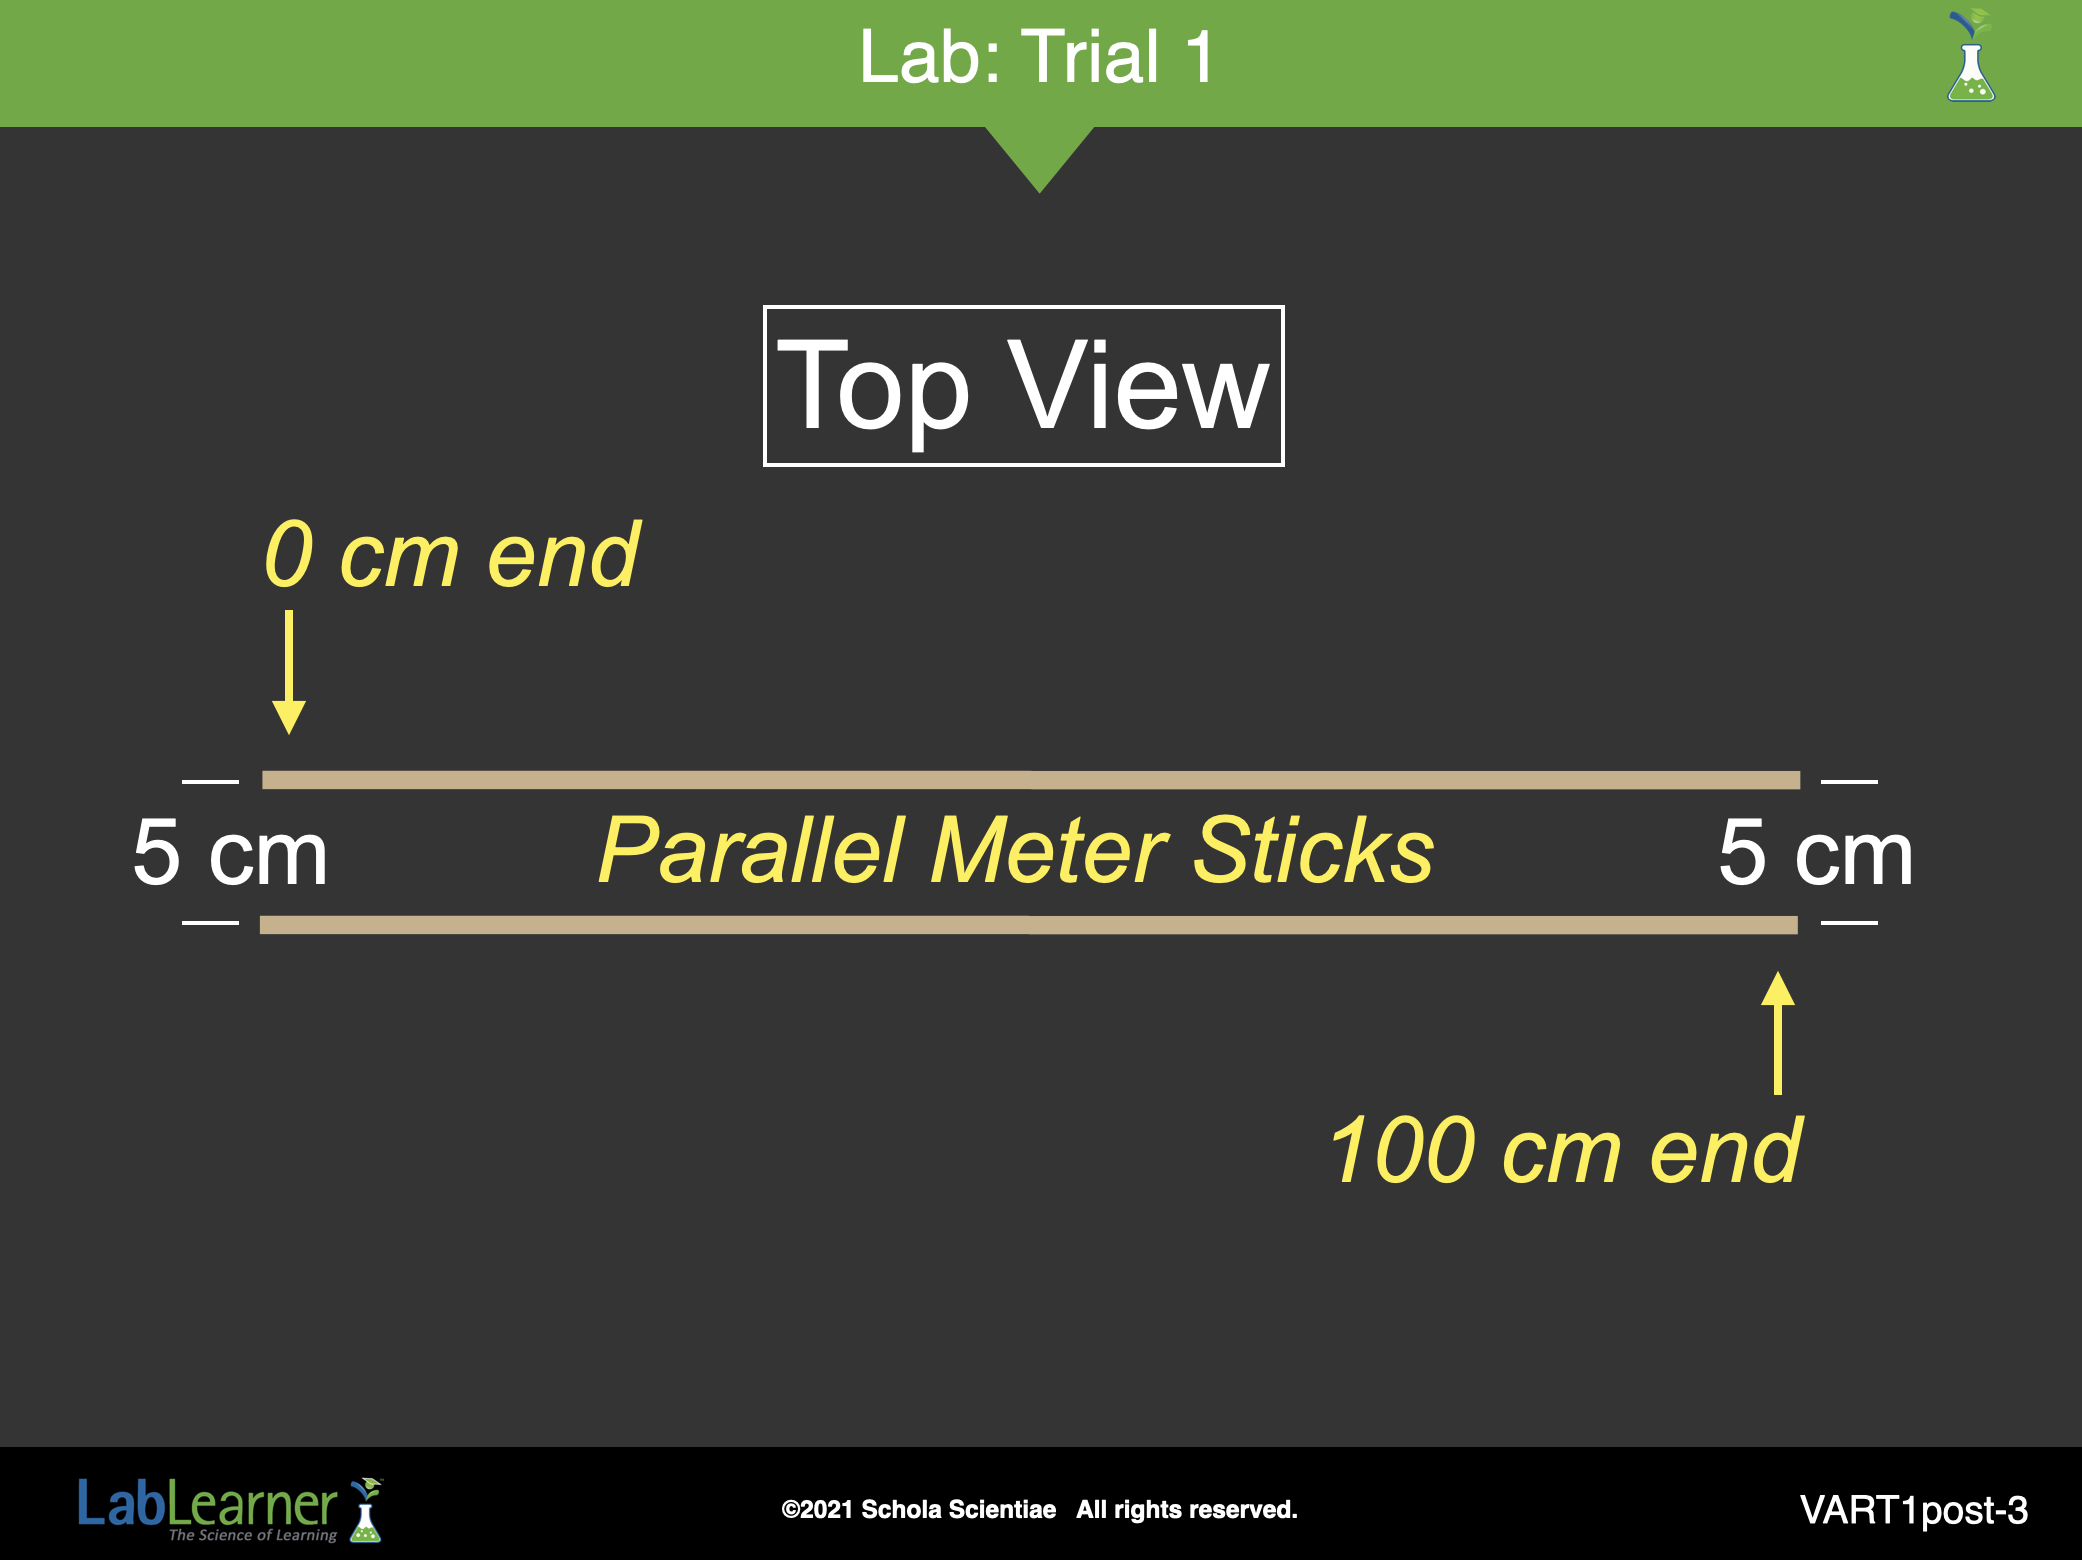
1. Refer to the drawing on this slide as a visual aid. Ask students: Is this how the meter sticks appeared? Students should indicate that this is how the meter sticks appeared.
2. Ask students: You measured the distance between the meter sticks at the 0 cm end and the 100 cm end when you were looking at them from above. What were the measurements? Were they the same? Why? Student answers may vary slightly depending on the group. However, most students should indicate that the distance between the meter sticks was 5 cm at both ends. The measurements were the same because the meter sticks were parallel to each other. This means that they were the same distance apart at all points.
3. Emphasize the concept by pointing out the measurements alongside the appropriate parts of the meter sticks on the slide.
______________________________________________
SLIDE VART1post-4
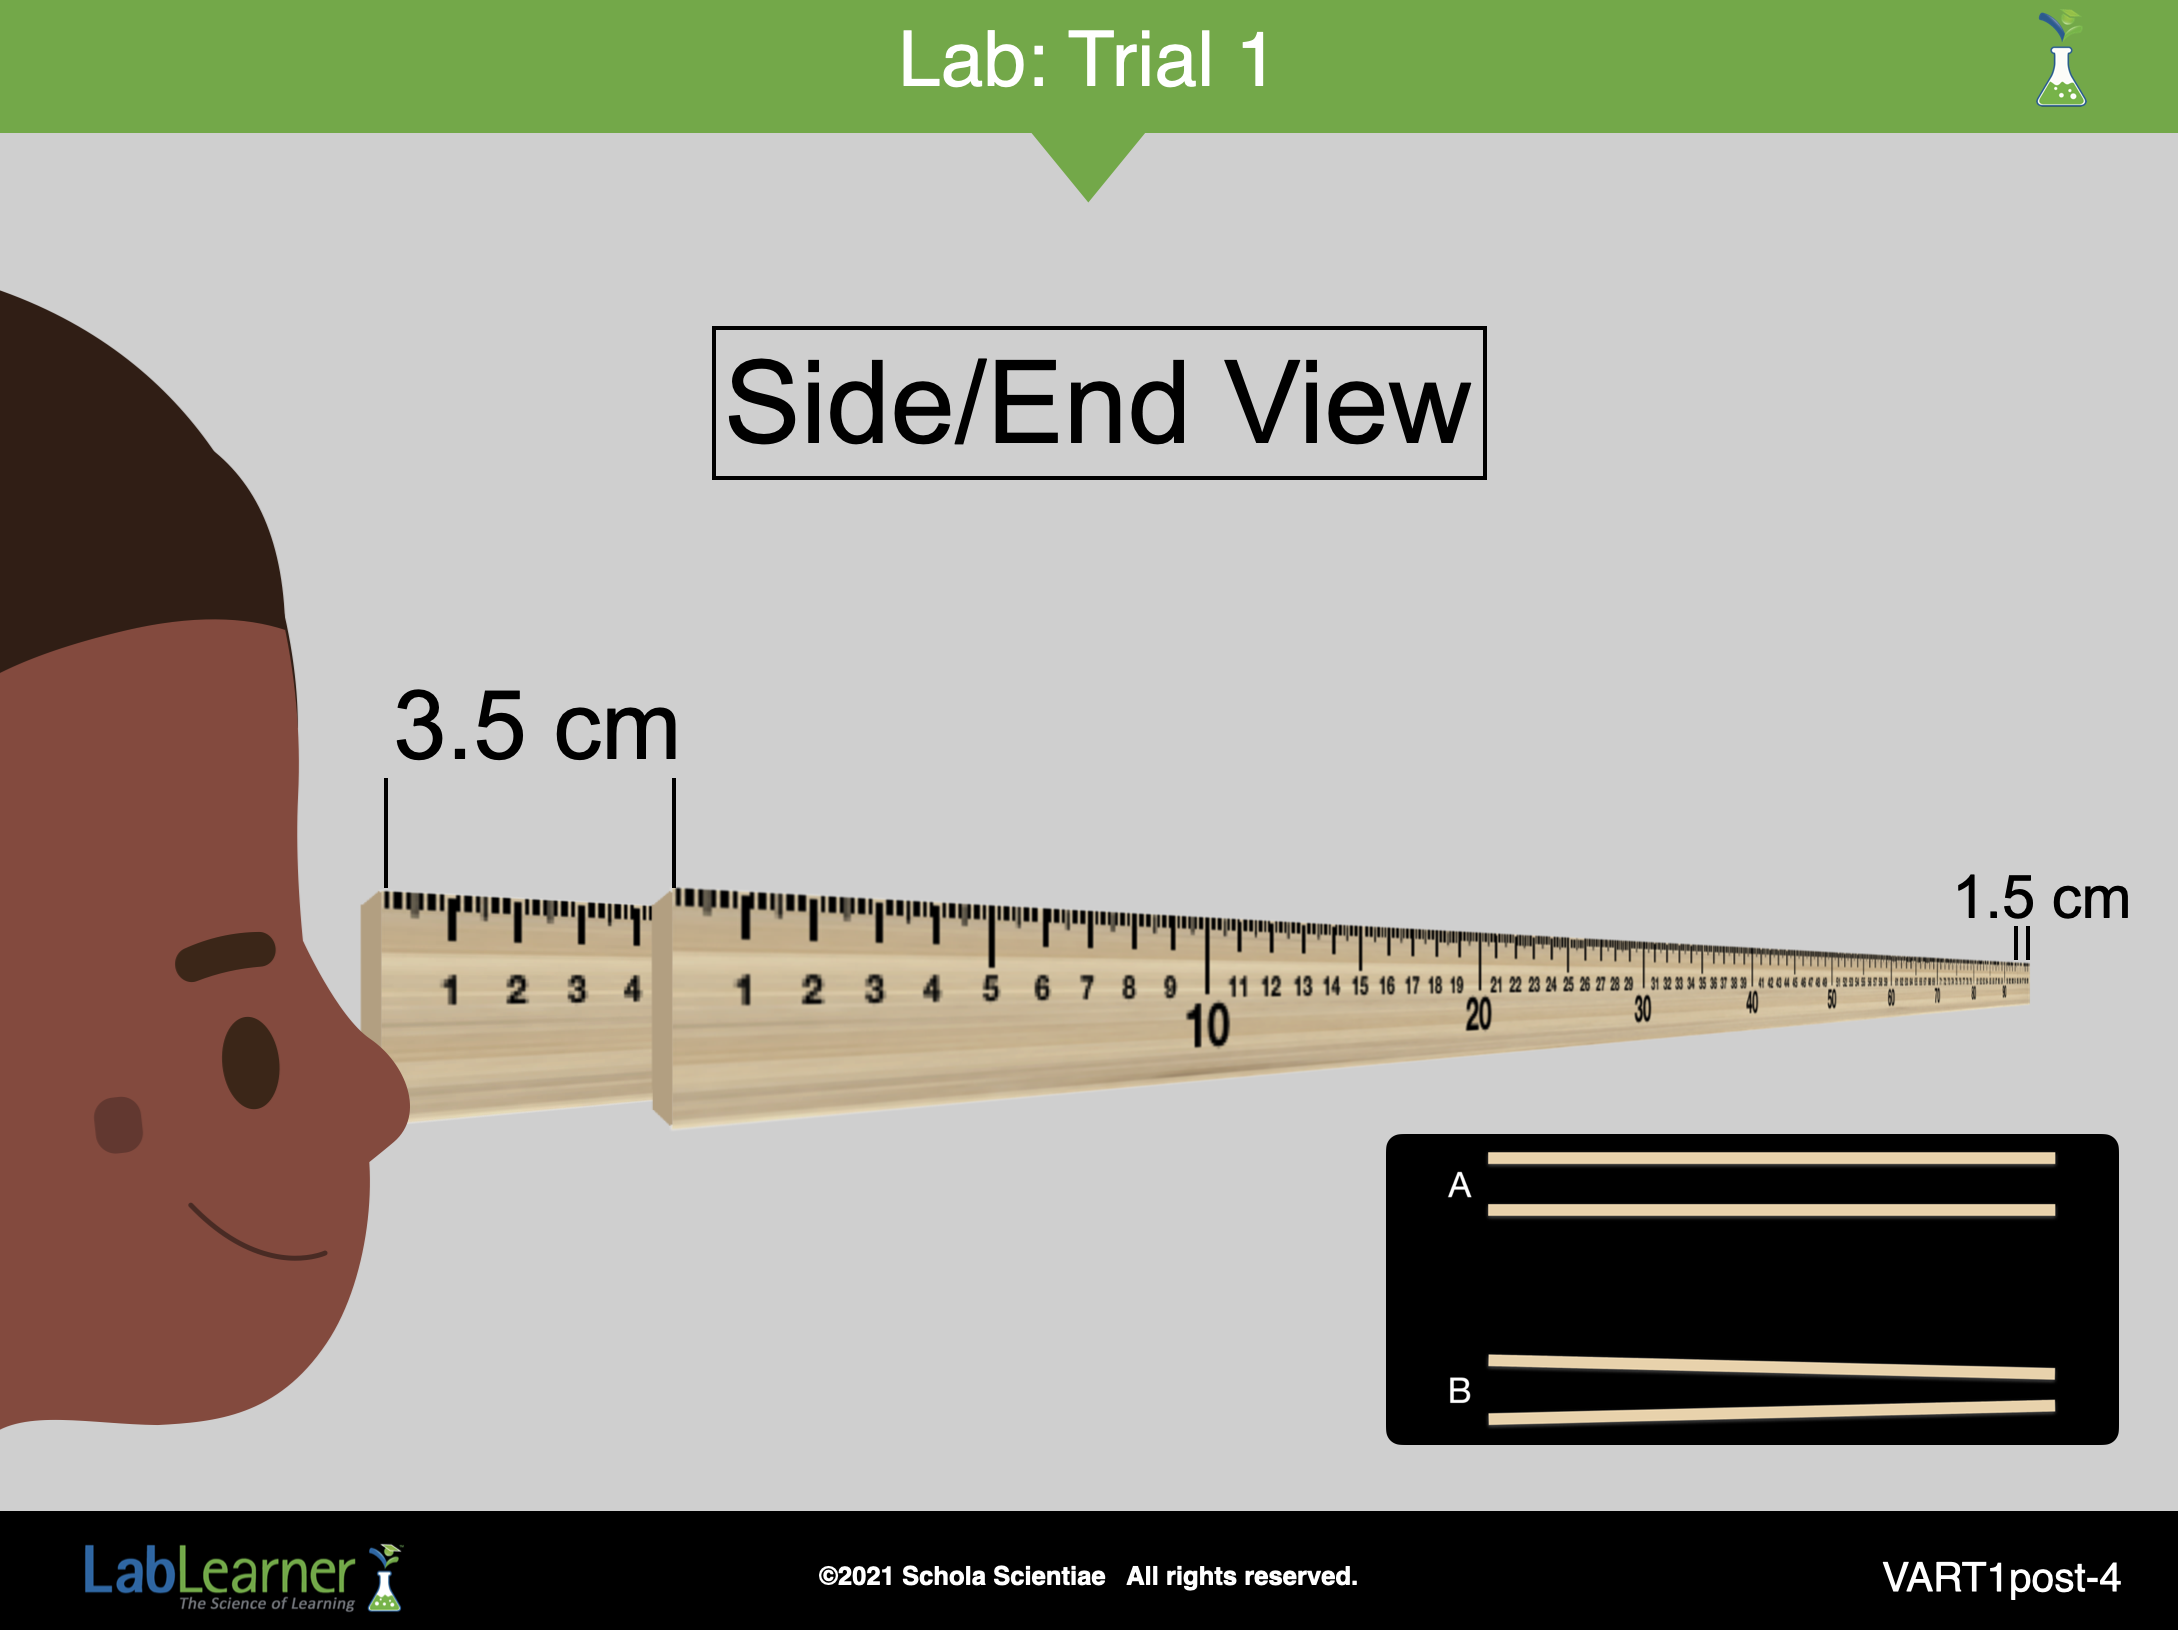
1. Ask students: You changed your point of view and looked at the meter sticks from the 0 cm end. Did the meter sticks still appear to be parallel? How did they appear? Students should indicate that the meter sticks no longer appeared parallel. Instead, they appeared to be moving closer to each other at the ends farthest from the student’ eyes (100 cm end).
2. Refer again to the diagram on the slide to illustrate the appearance of the meter sticks.
3. Ask students: You measured the distance between the meter sticks at the 0 cm end and the 100 cm end when viewing from the end of the meter sticks. What were the measurements? Were they the same at both ends? Students should indicate that the measurements were not the same at both ends when viewed from the 0 cm end. Example: The meter sticks were 3.5 cm apart at the 0 cm and 1.5 cm apart at the 100 cm end.
4. Point out the measurements on the drawing of the meter sticks to illustrate the point.
5. Ask students: Why do you think the meter sticks appeared closer at one end than the other? Did the meter sticks move? Student answers may vary. Students should recognize the fact that the meter sticks did NOT move. However, the location of their eyes did. Students may suggest that it was because they viewed the meter sticks from a different location. Other students may not be able to offer a suggestion. Allow a brief discussion indicating that students may be able to better answer this question when they analyze their data from Trials 2 and 3.
6. Point out the two drawings of the meter sticks on the lower right of this slide. Which drawing is when you viewed them from above? Which drawing is when you viewed them from the 0 cm end? Students should match the parallel lines with a view from above (50 cm mark) and the merging lines with the view from the 0 cm end.
7. Explain to students that this phenomenon: parallel lines that seem to merge in the distance is called vanishing point. Discuss the definition of vanishing point as a class:
Vanishing point: A point in a drawing, painting, or in space at which parallel lines seem to meet. A point in space at which objects seem to disappear.
______________________________________________
SLIDE VART1post-5
Begin the analysis of the experiment by encouraging students to organize their data from Trial 1.
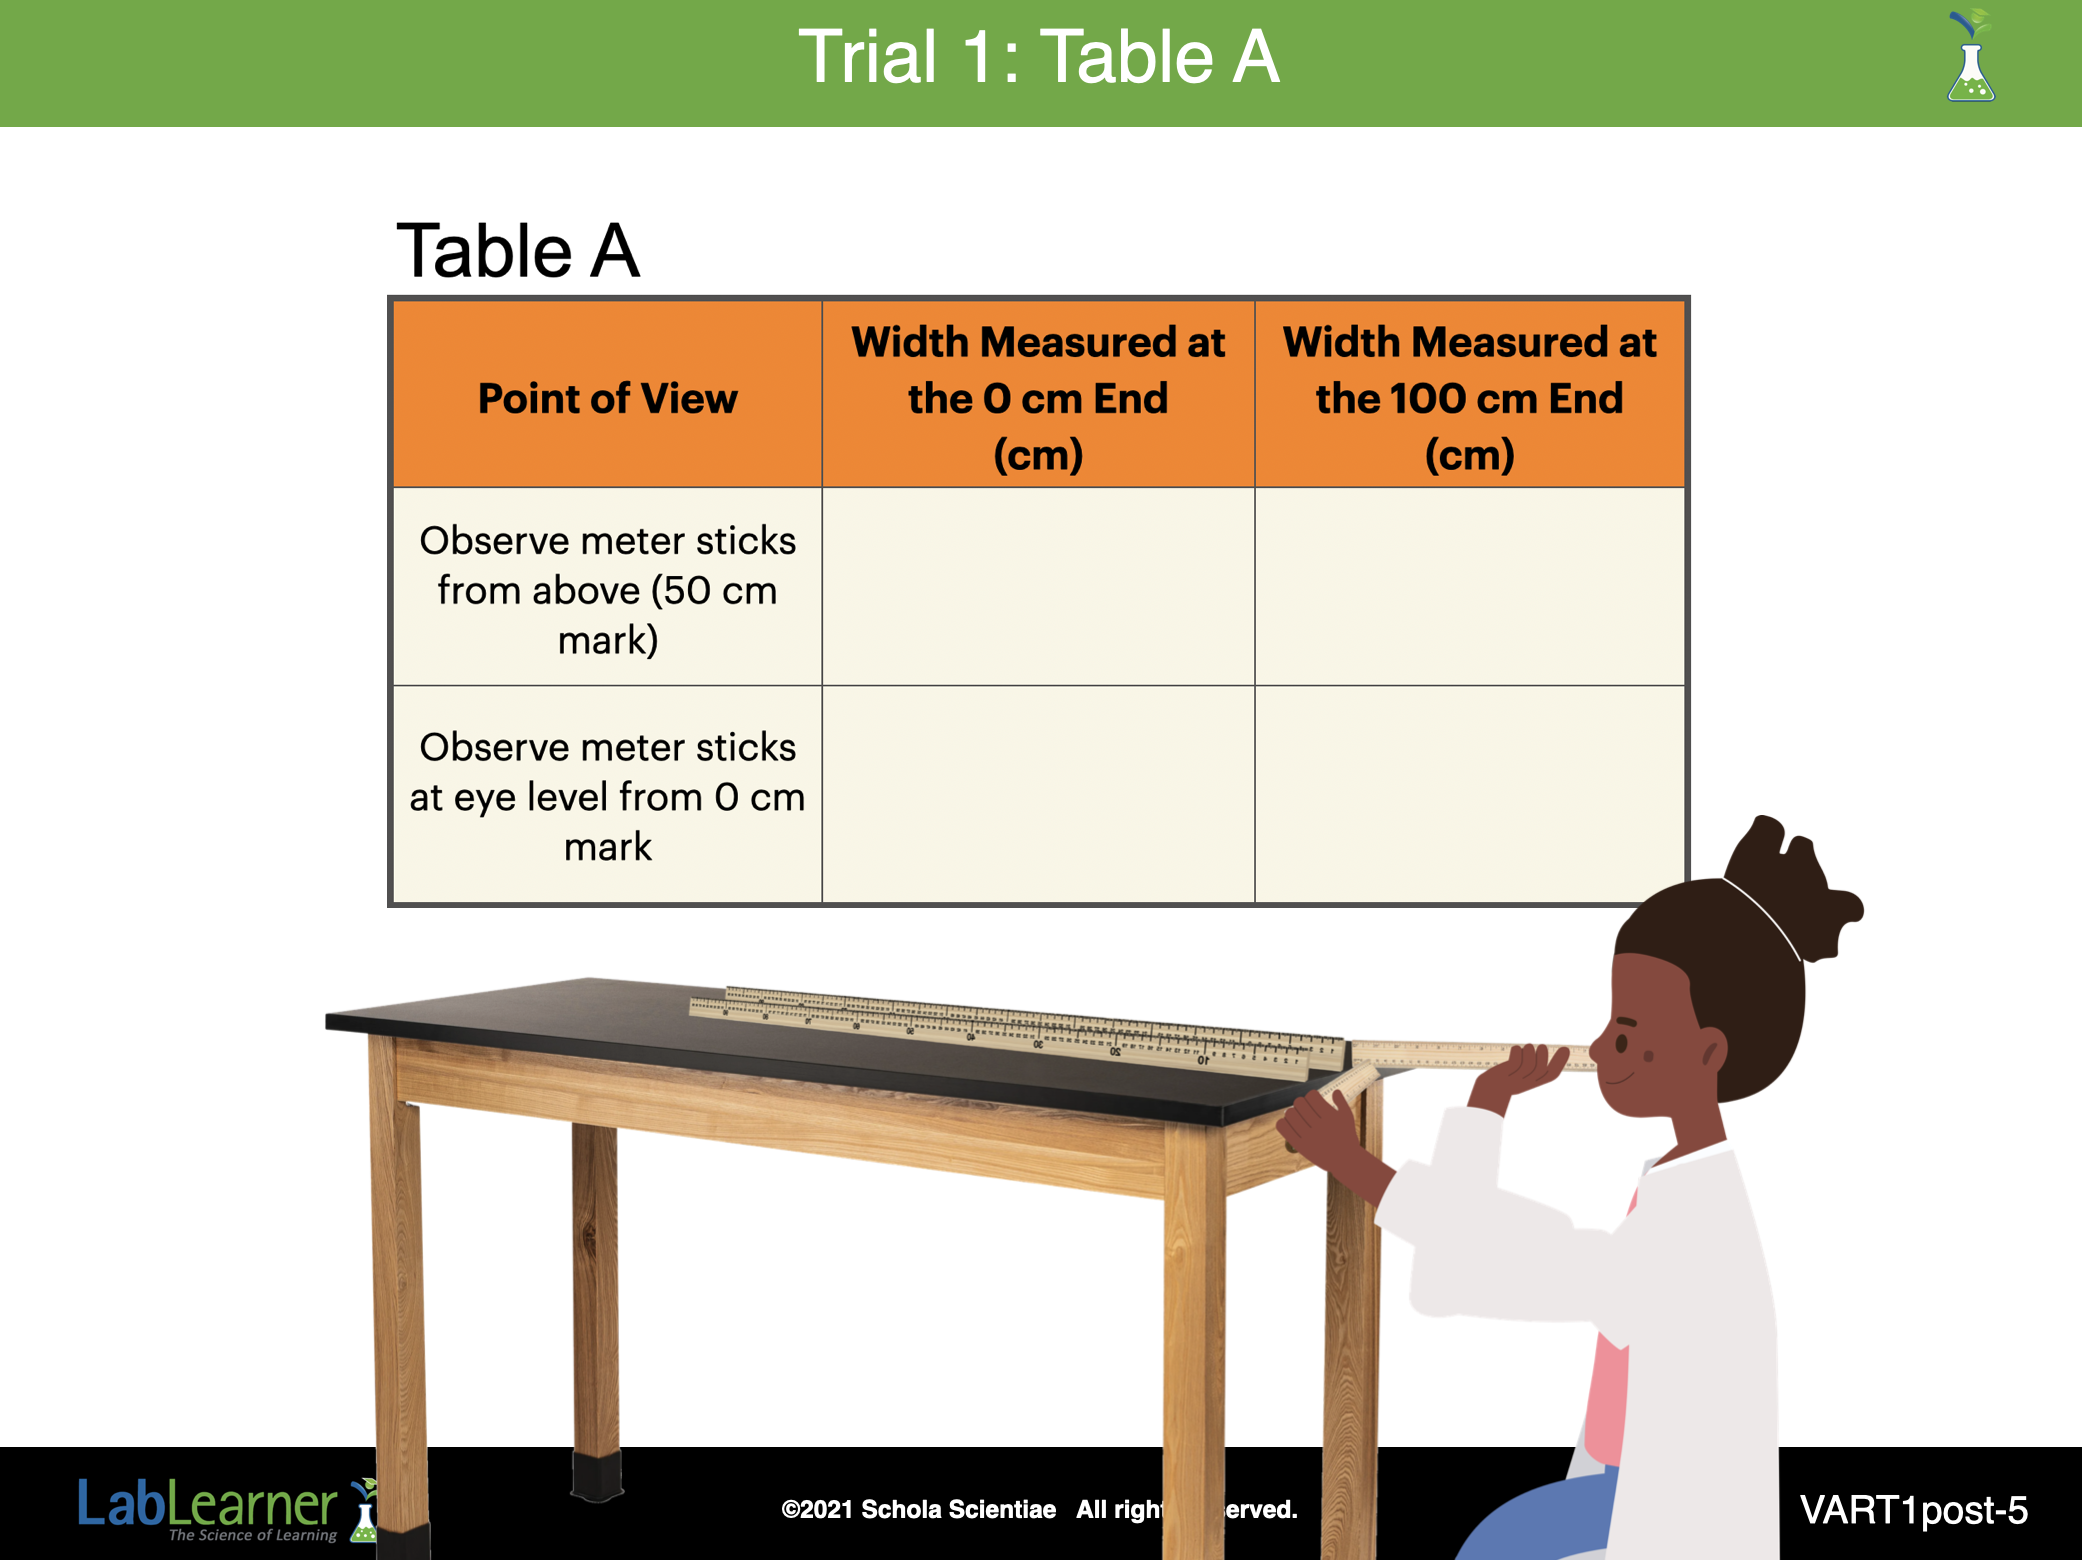
1. Tell students to look at Table A. Students should complete the data table using the measurements recorded in Trial 1.
2. Ask students: Did the distance separating the meter sticks appear to be the same when you viewed the meter sticks from the 50 cm mark? Students should indicate that the distance separating the meter sticks was the same at the 0 cm and 100 cm ends when the meter sticks were viewed from above (50cm mark).
______________________________________________
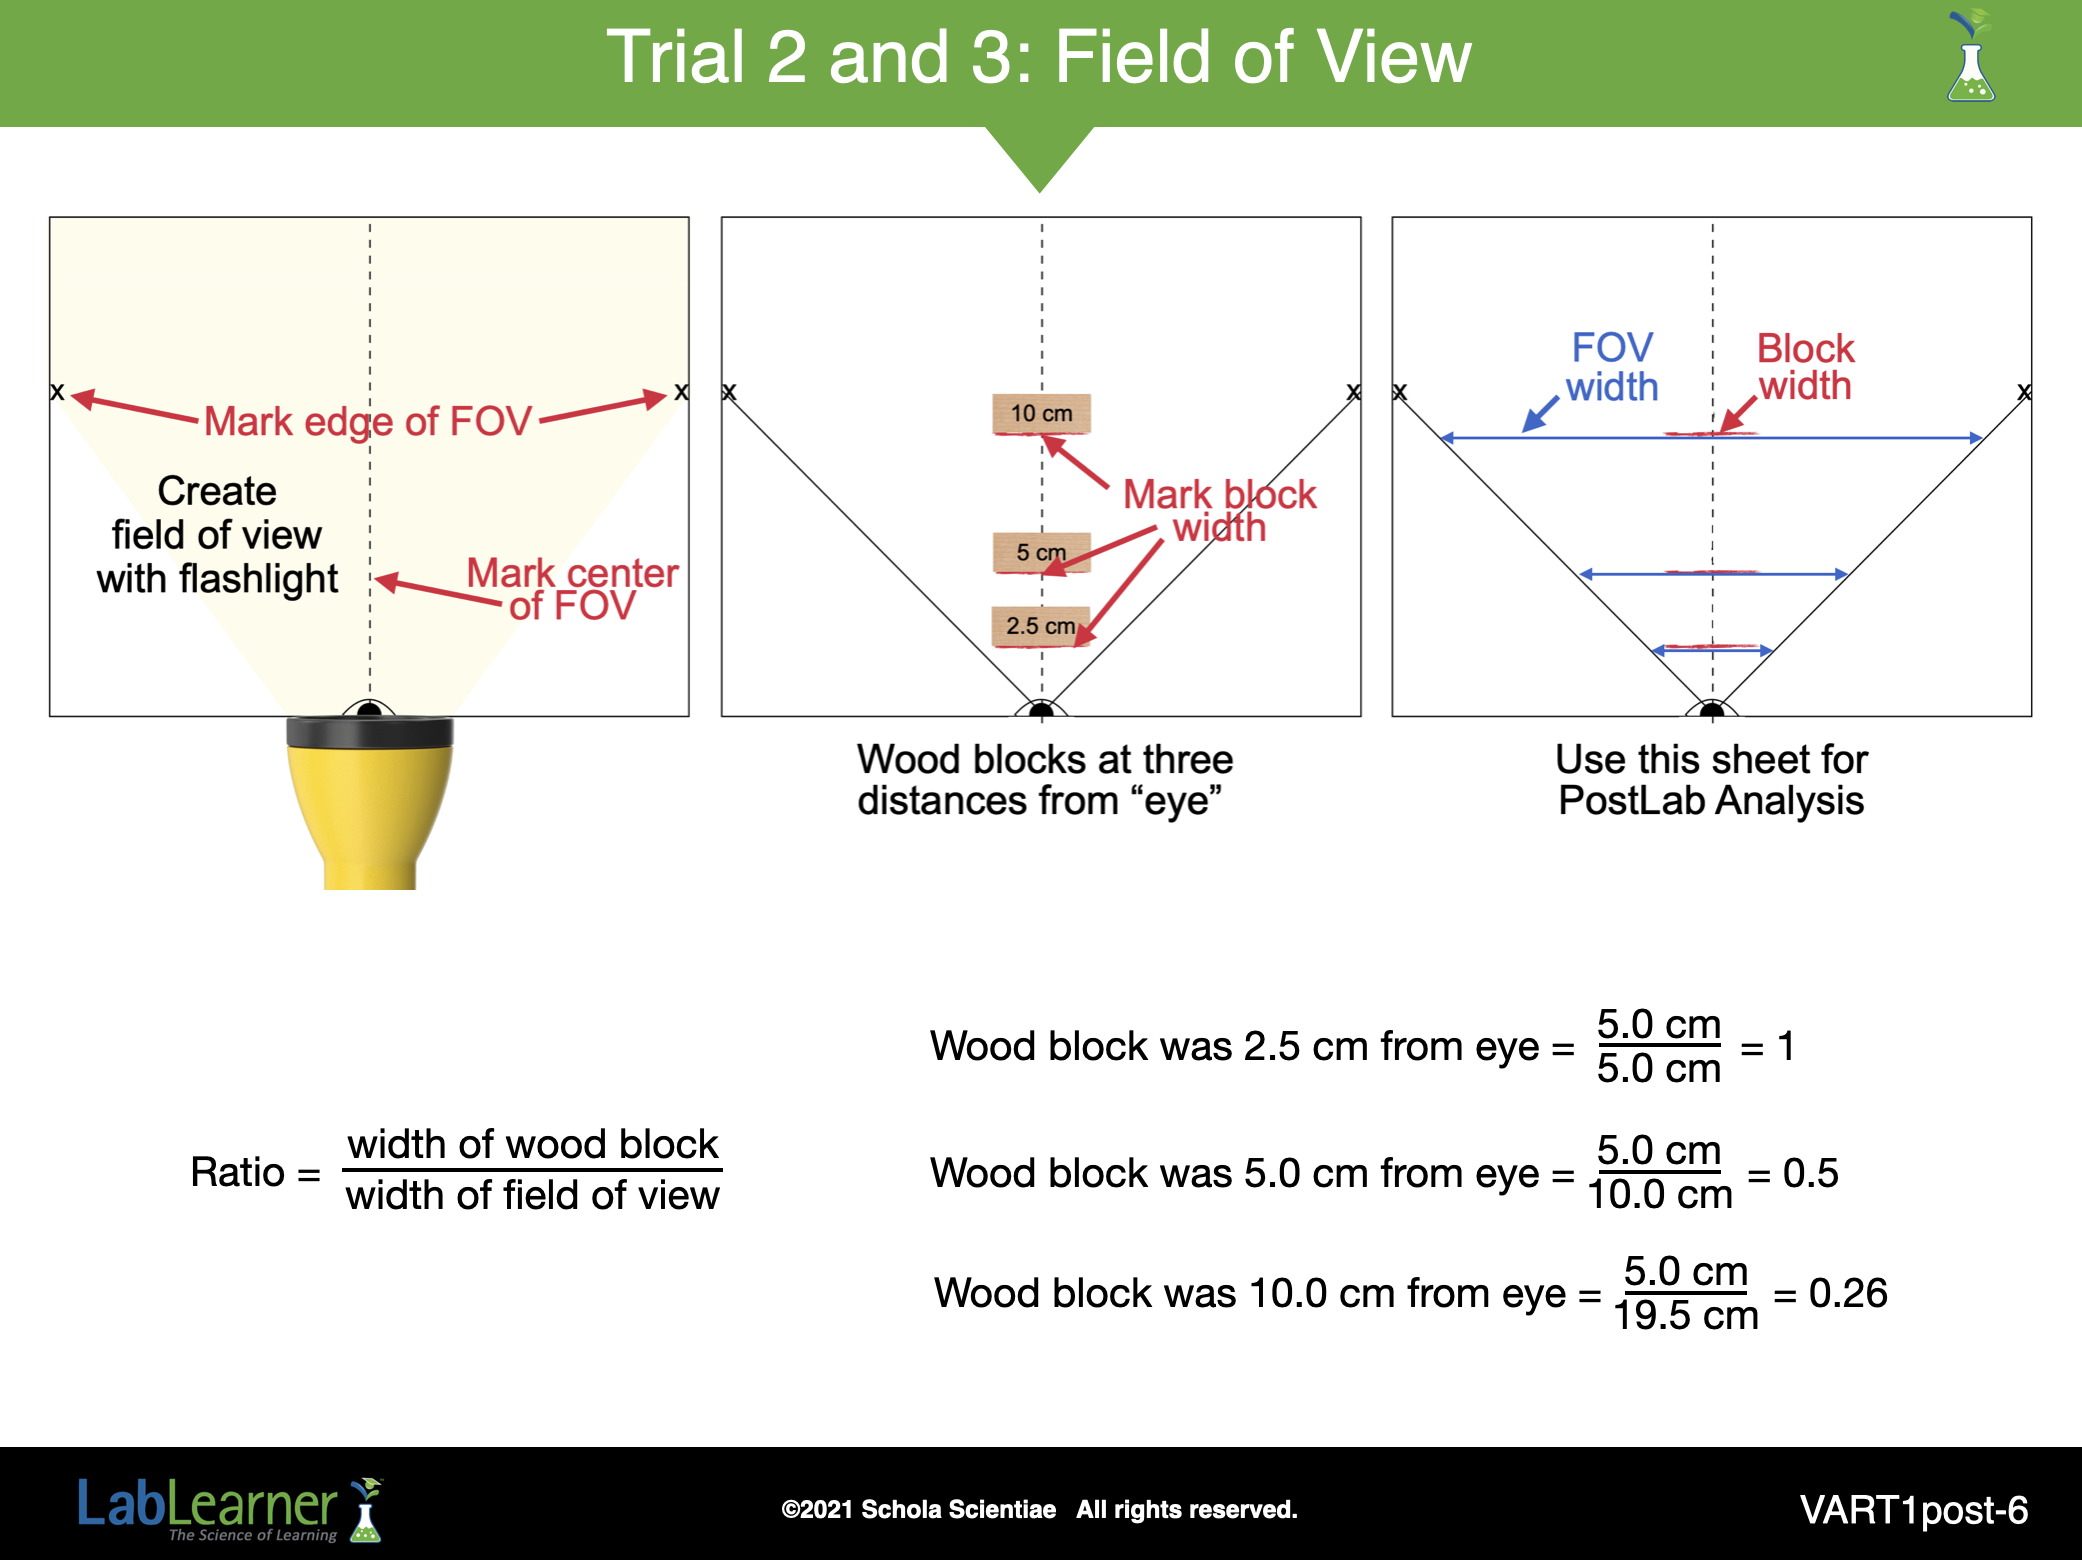
SLIDE VART1post-6
1. Ask students: Did the size of the wood block change? Students should indicate that the size of the wood block did not change. It was 4.5 cm wide when it was both 2.5 cm and 5 cm from the model eye (flashlight).
2. Ask students: Remember the light from the flashlight modeled in your field of view. Did the field of view change when the object moved from 2.5 cm to 5 cm in front of the eye? Students should indicate that the field of view did change as the distance from the eye increased. The field of view was modeled by the rays of light coming from the flashlight. The width of the field of view was wider at 5 cm from the eye (16 cm) as compared to 2.5 cm from the eye (8 cm).
3. Compare the size of the wood block to the size of the field of view when it was at different distances from the eye. Show this relationship as a ratio. Write the ratios in the Table. Students may need some assistance with this mathematical operation. If necessary, review the concept of a ratio. Discuss that this ratio compares the size of the wood block to the size of the field of view. Therefore, the ratio can be written as a fraction with the width of the wood block as the numerator and the width of the field of view as the denominator.
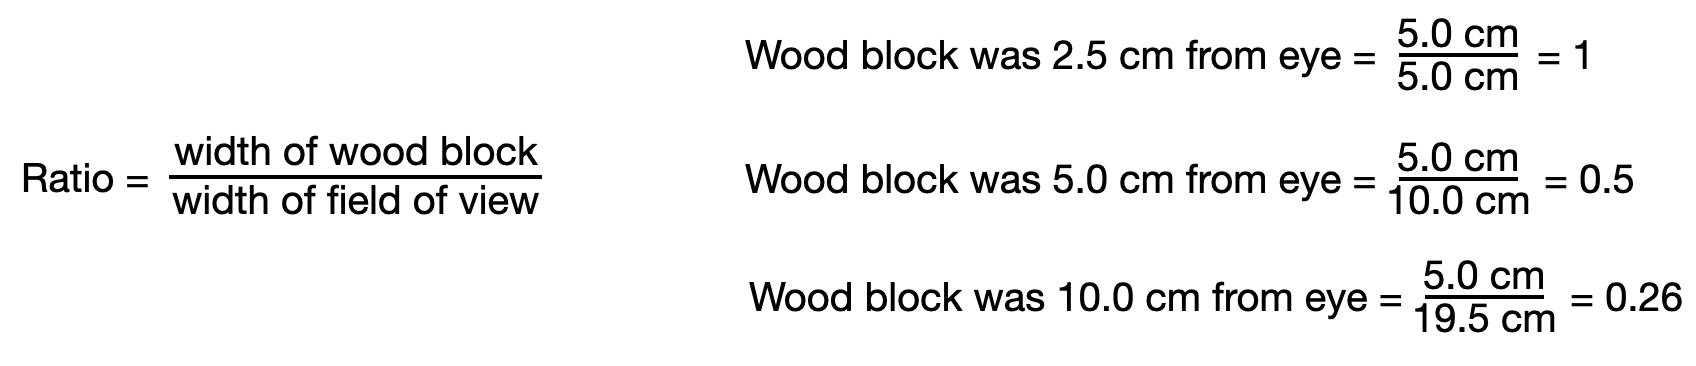
4. Ask students: Which ratio is larger? Which is smaller? Students may need assistance in comparing the ratios. Students should discover that the ratio of the wood block to the field of view is larger when the wood block was 2.5 from the eye and smaller when the wood block was 5 cm from the eye. One way to illustrate this is to divide the numerator in each fraction by the denominator in order to obtain decimals that can be compared (use your judgment if students can appreciate the decimal conversion):
5.0 cm/ 8 cm = 0.56
5.0 cm / 10 cm = 0.28
5.0 cm / 19.5 cm = 0.26
5. Ask students: Did the wood block take up a larger part of the field of view when it was 2.5 cm, 5 cm, or 10.0 cm from the eye? The wood block took up more of the field of view when it was 2.5 cm from the eye than when it was 5 cm or 10 cm from the eye. The decimal 0.26 (for 10.0 cm) and 0.5 (for 5.0 cm) are both smaller number than the decimal 1 (for 2.5 cm).
______________________________________________
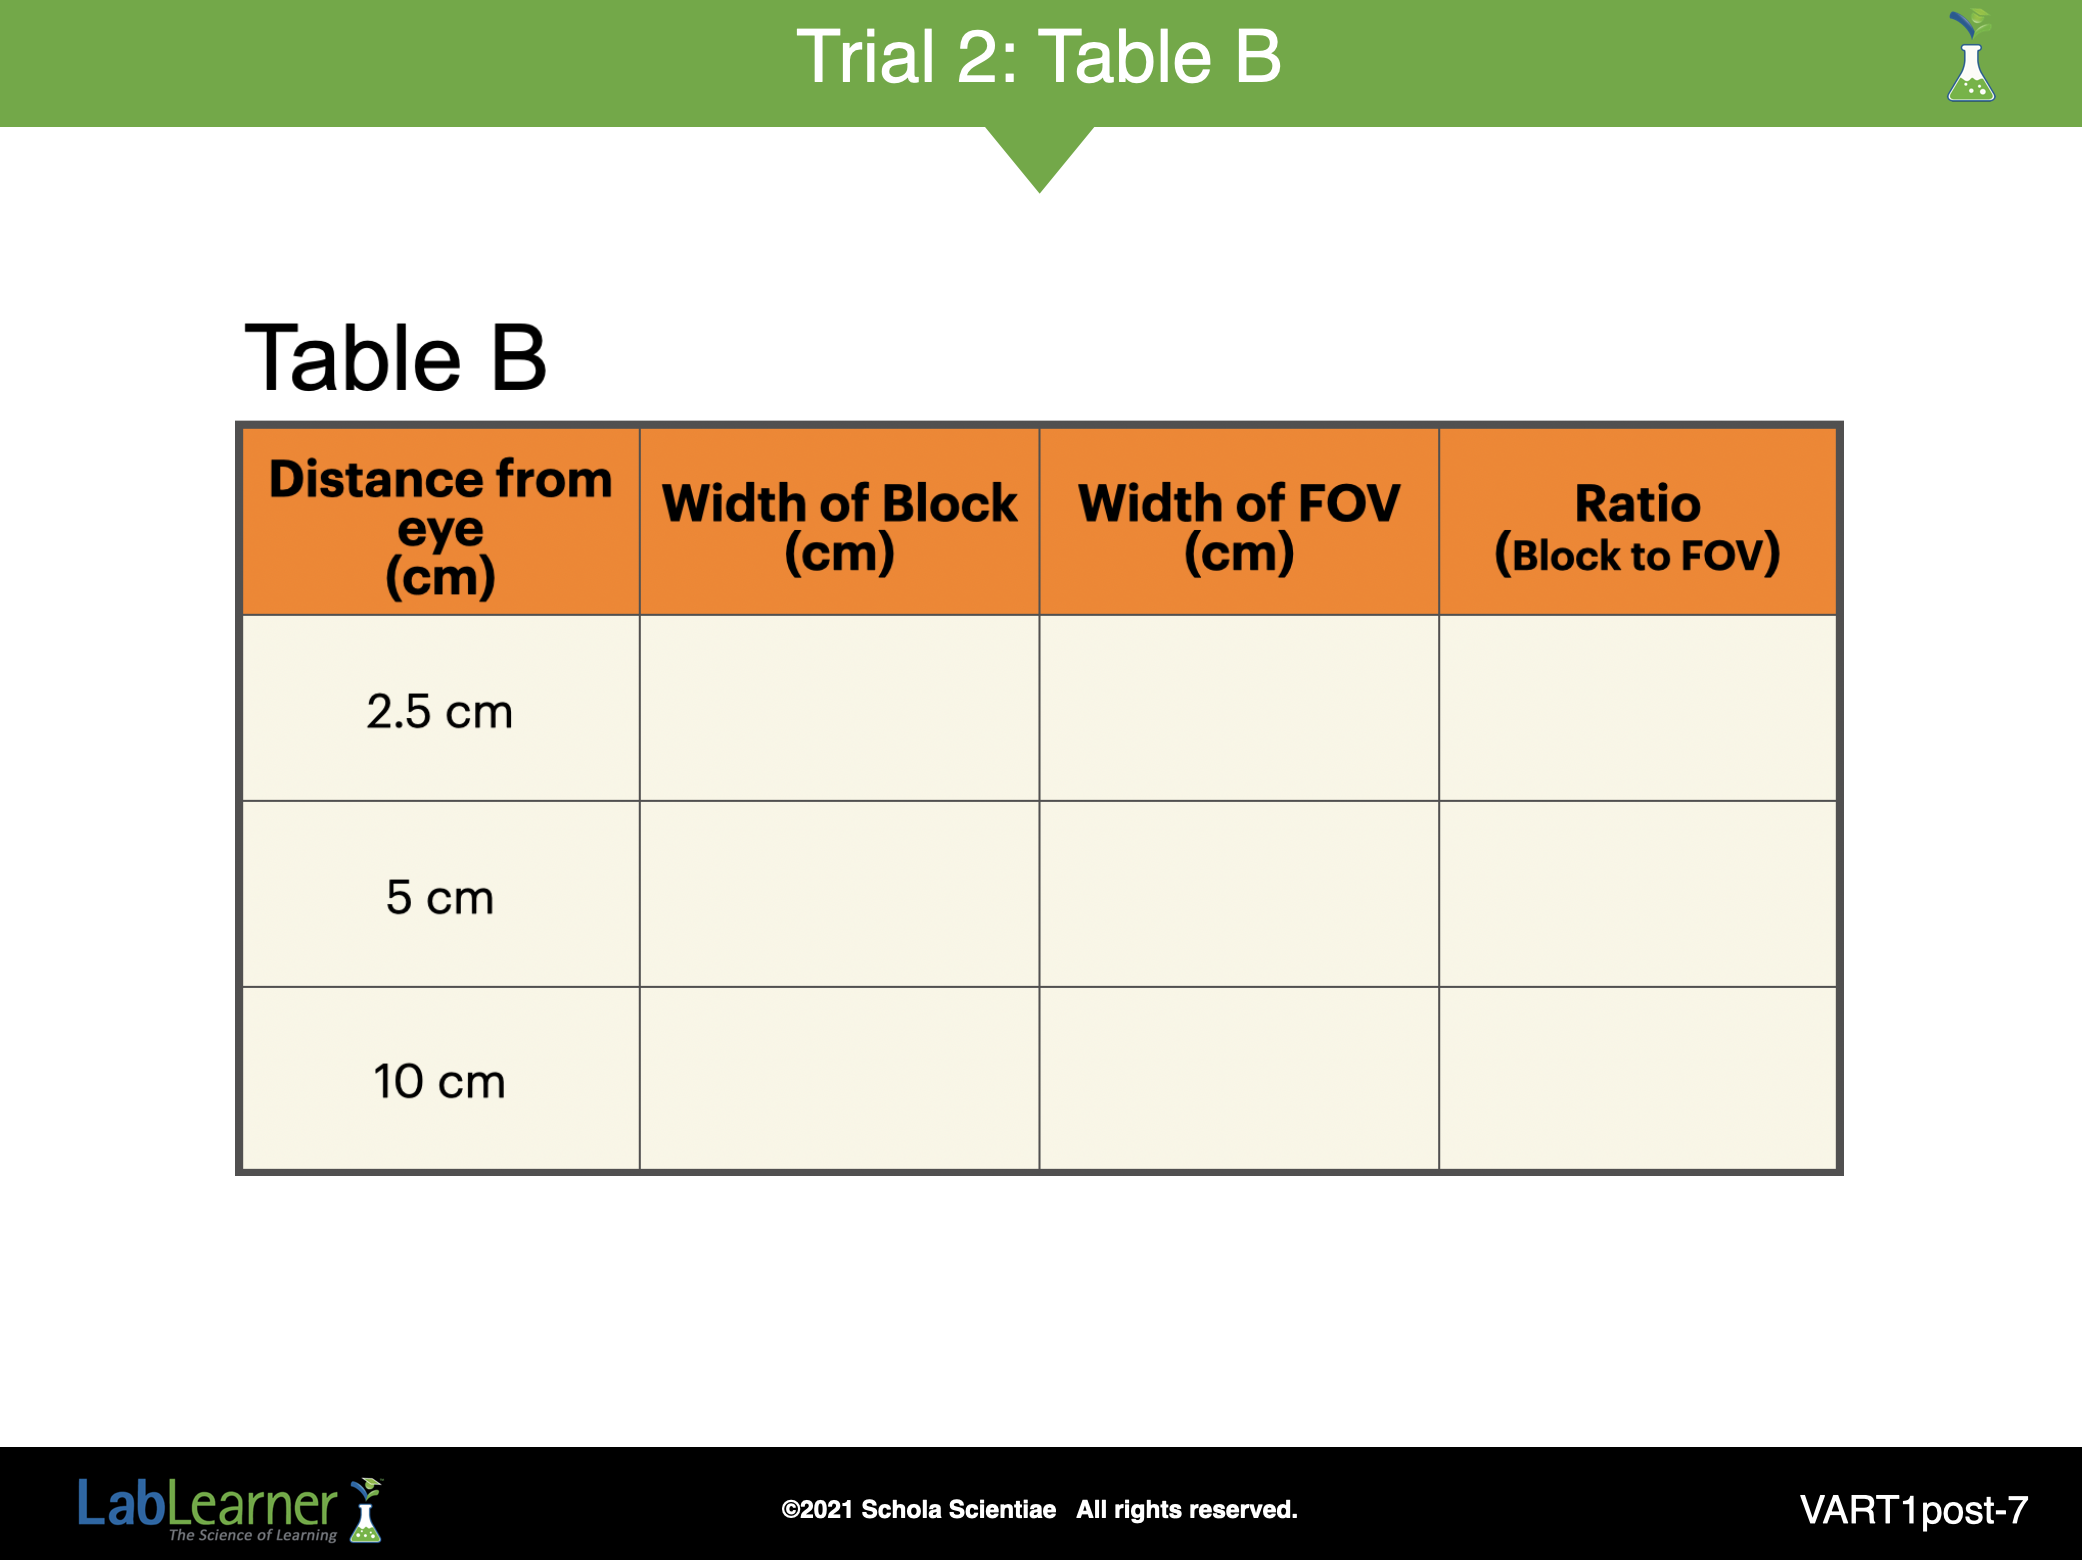
SLIDE VART1post-7
1. Continue the analysis by questioning students about why they think parallel lines appear to merge or why the distance between the lines becomes smaller as the distance from the eye increases. In other words, what causes a vanishing point?
2. Tell students that they performed two experiments in the lab that could help answer this question. These were the experiments in Trials 2 and 3.
3. Explain that it is often easier to discover the answer “why” to a question when all of the data is organized in the same place. If students have not already done so, encourage them to complete Table B using the data from Trials 2 and 3.
______________________________________________
SLIDE VART1post-8
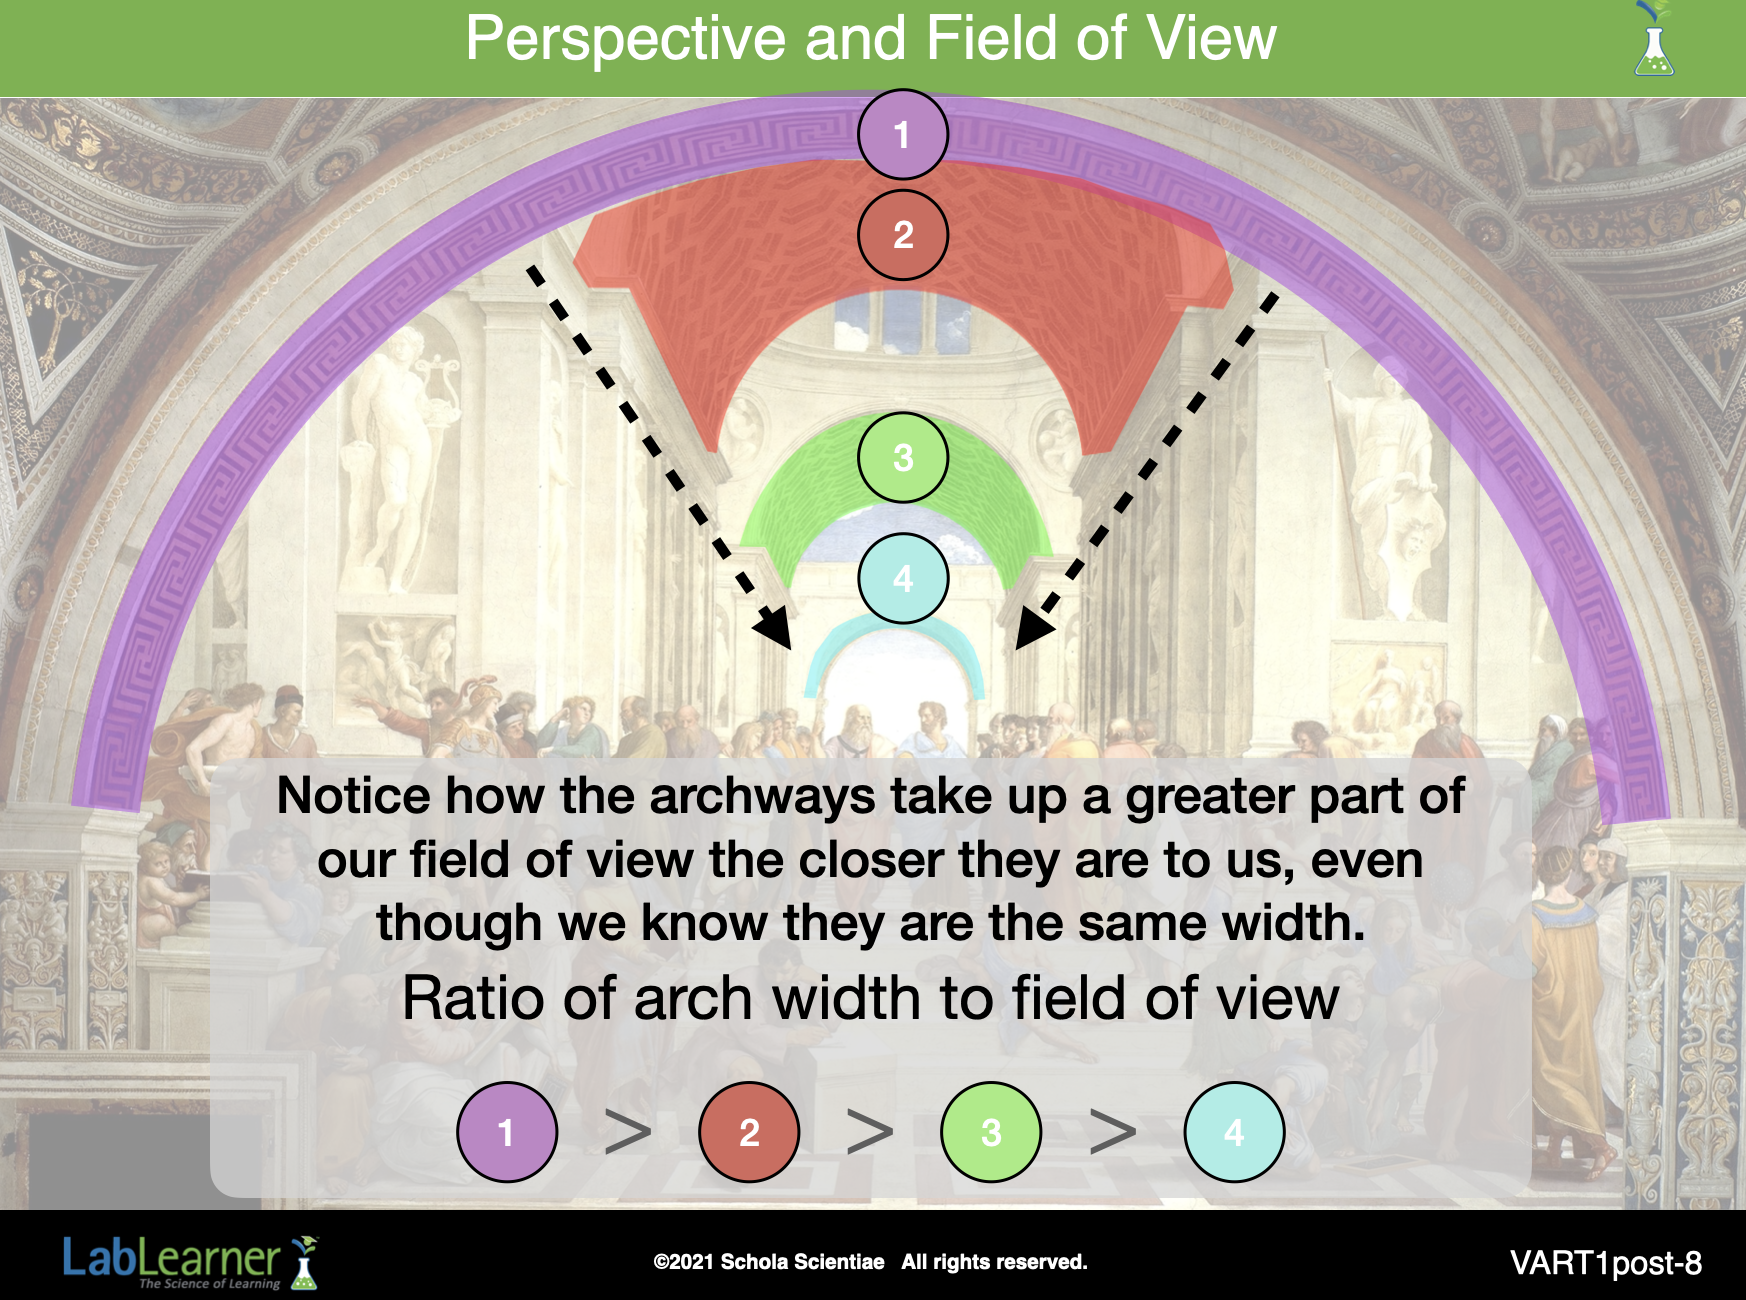
1. Tell students that the patterns that students just discovered explain the way in which we see depth. Our eyes have a field of view or field of vision. Objects in that field of vision take up a certain portion or ratio of it. The closer the object, the more of the field of view is taken up. The farther the object, the less of the field that is taken up.
2. Discuss how the vanishing point is related to this concept: in terms of our eyes, a vanishing point is a distance that is so far away that an object takes up so little of the field of vision it seems to disappear.
3. Tell students that they will learn more in Investigation Two about how the eyes see depth and how artists use vanishing points to create depth in their paintings.
4. Conclude the PostLab by encouraging students to apply what they have learned by looking at the paintings in the next several slides.
______________________________________________
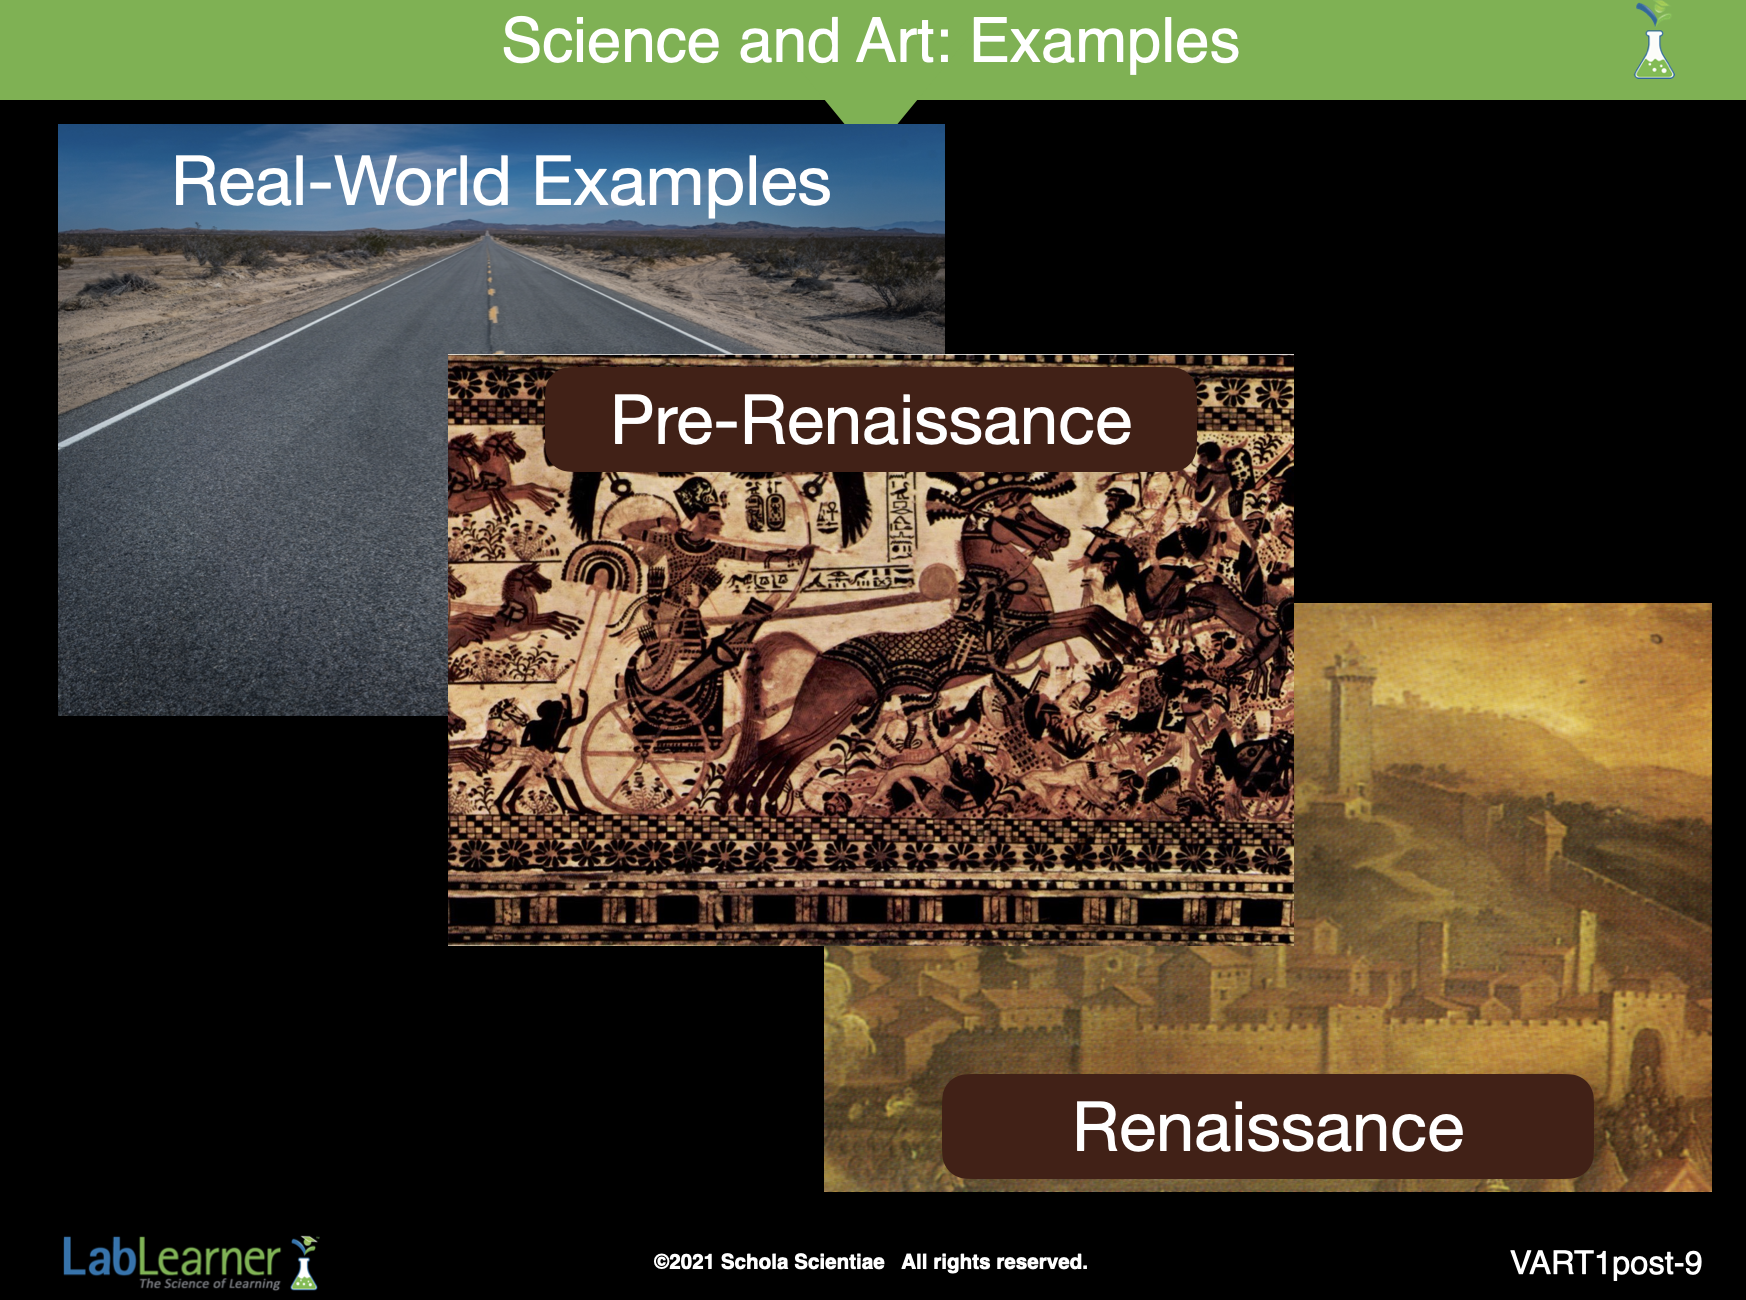
SLIDE VART1post-9
1. Use the following slides to show students several examples of vanishing points. The slides are broken up into three sets:
- The first set (slides 10-13) shows examples in which parallel lines appear to merge in the distance.
- The second set (slides 14 and 15) shows two of the Pre-Renaissance paintings that students viewed in PreLab.
- The third set (shows some of the Renaissance paintings that students viewed in PreLab.
______________________________________________

SLIDE VART1post-10
1. Ask students: Where is the vanishing point in this picture? Students should indicate that the vanishing point is where the edges of the road and the dashed yellow line converge at the horizon.
______________________________________________
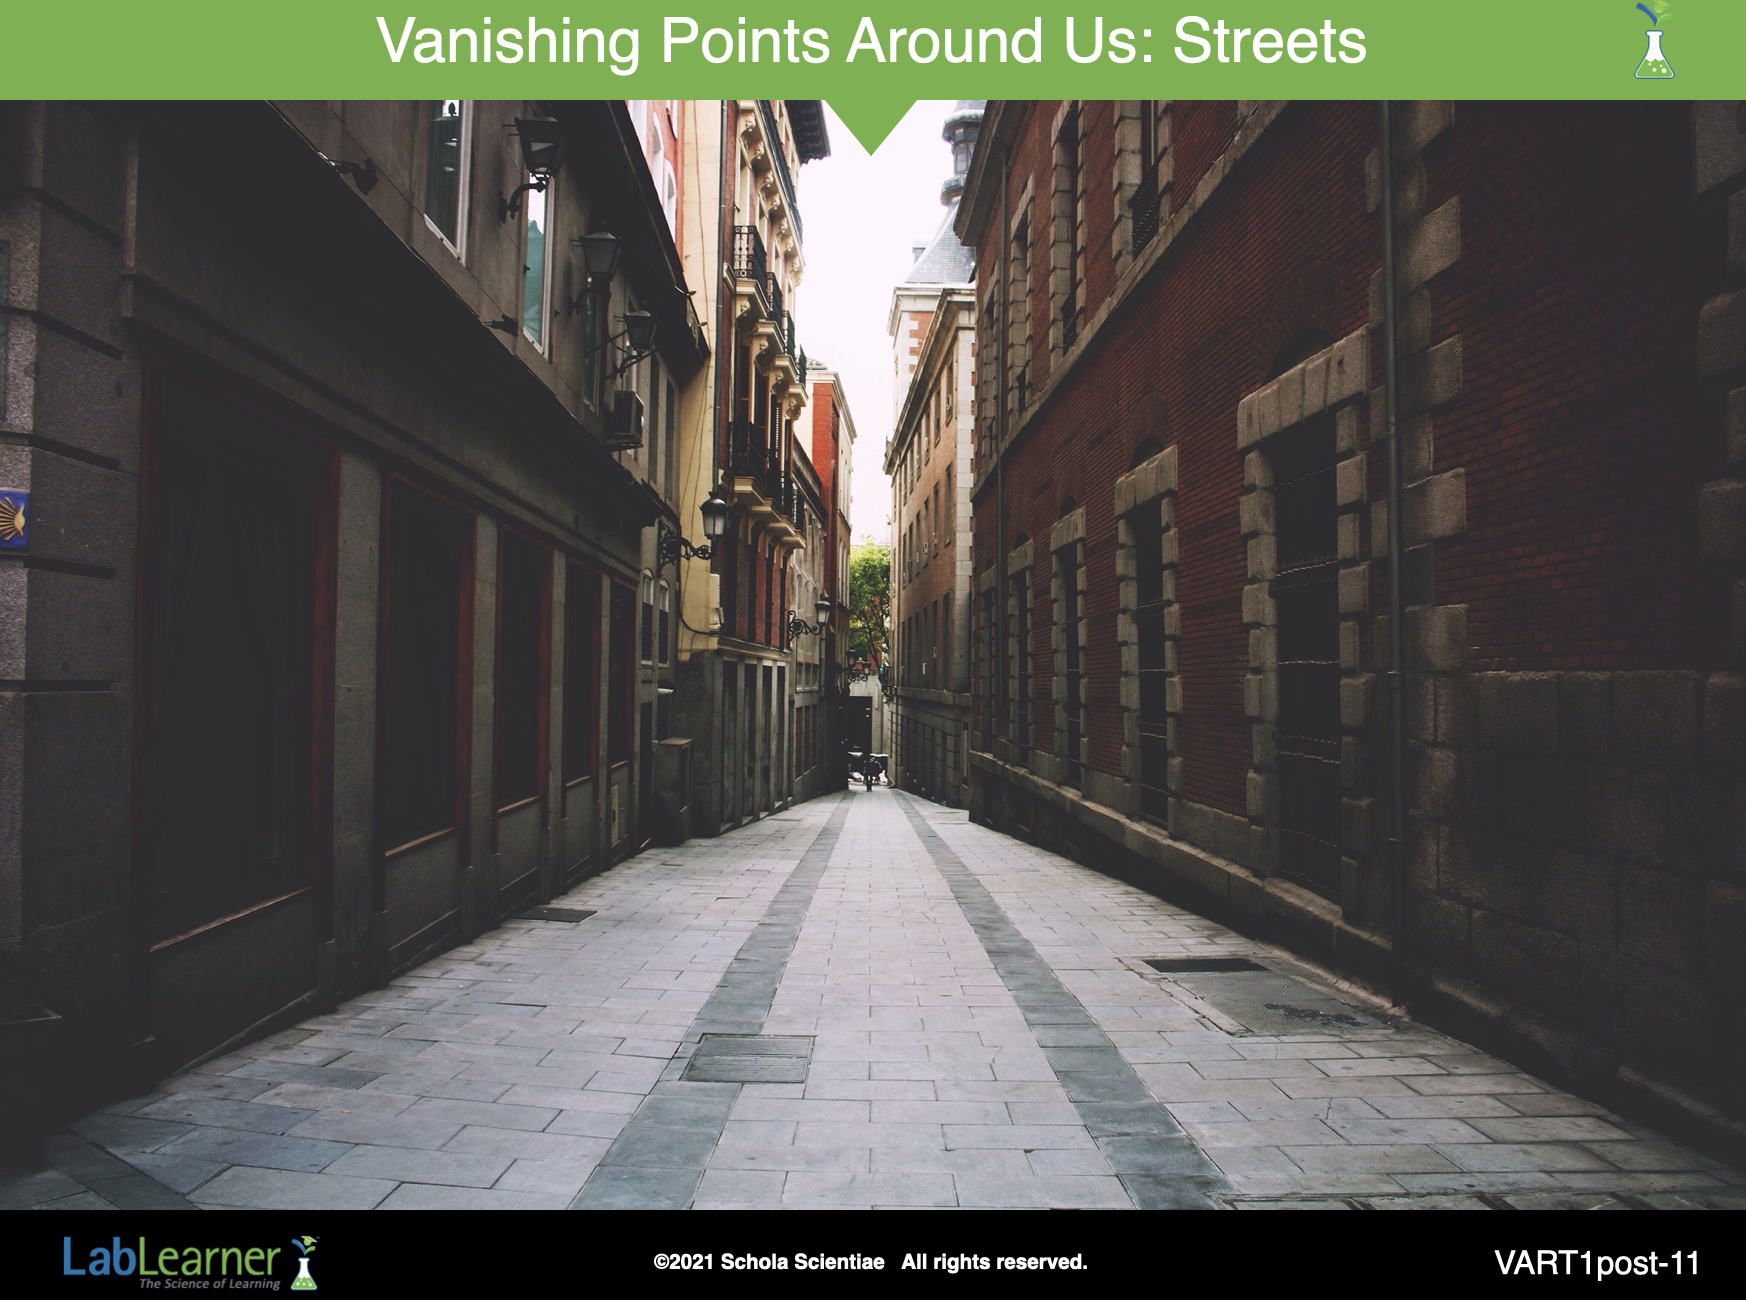
SLIDE VART1post-11
These pictures have been chosen to illustrate the concept of vanishing point to students. Each of the pictures is similar to what students observed in the lab when viewing their meter sticks: parallel lines appear to merge in the distance.
______________________________________________
SLIDE VART1post-12
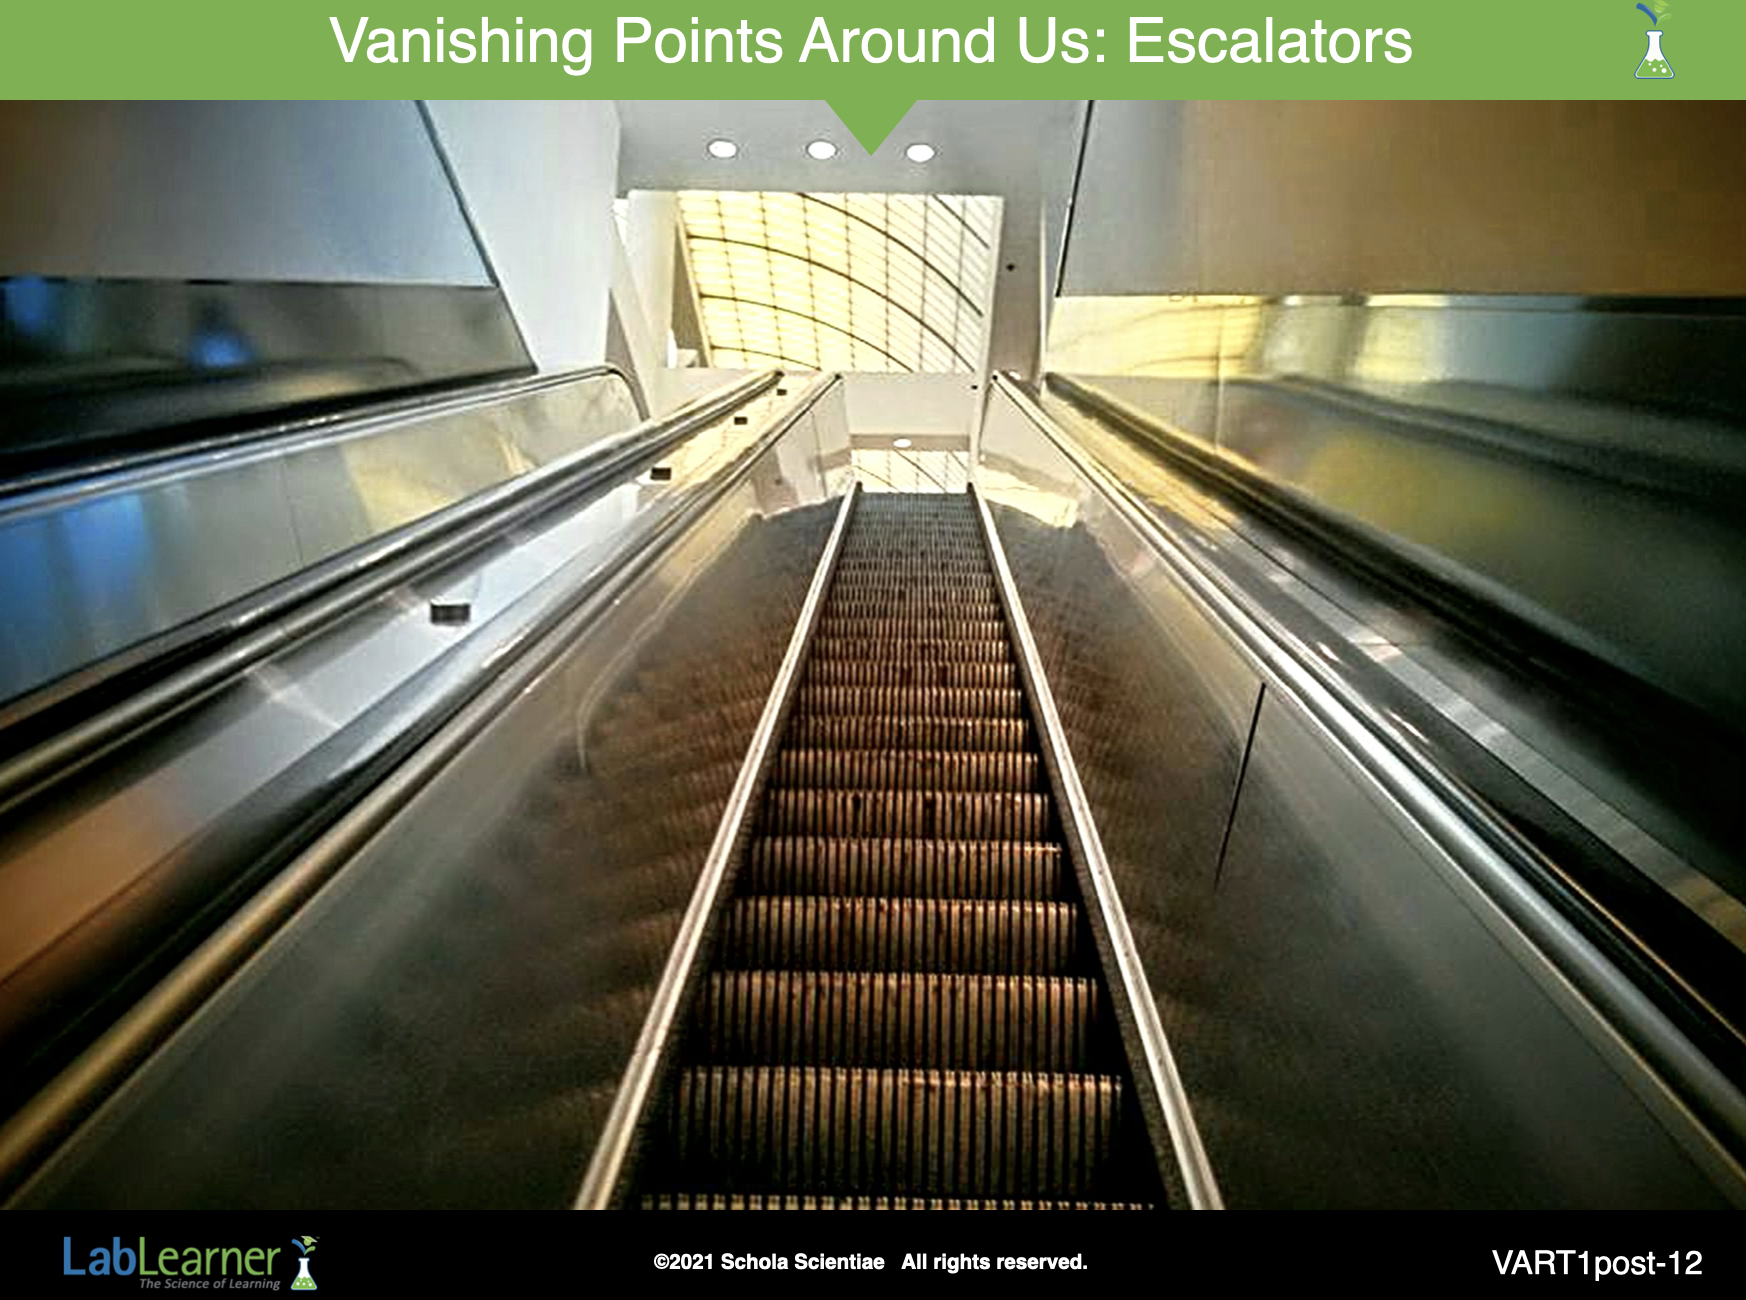
Notice that even though the escalator looks narrower at the top, we will find that it is exactly the same width all the way to the top.
1. Ask students: If we were to reach the top and turn around and loob back down the escalator, would the top or bottom of the escalator appear narrower? Students should conclude that, if standing at the top of the escalator, the bottom of the escalator would appear narrower.
______________________________________________
SLIDE VART1post-13
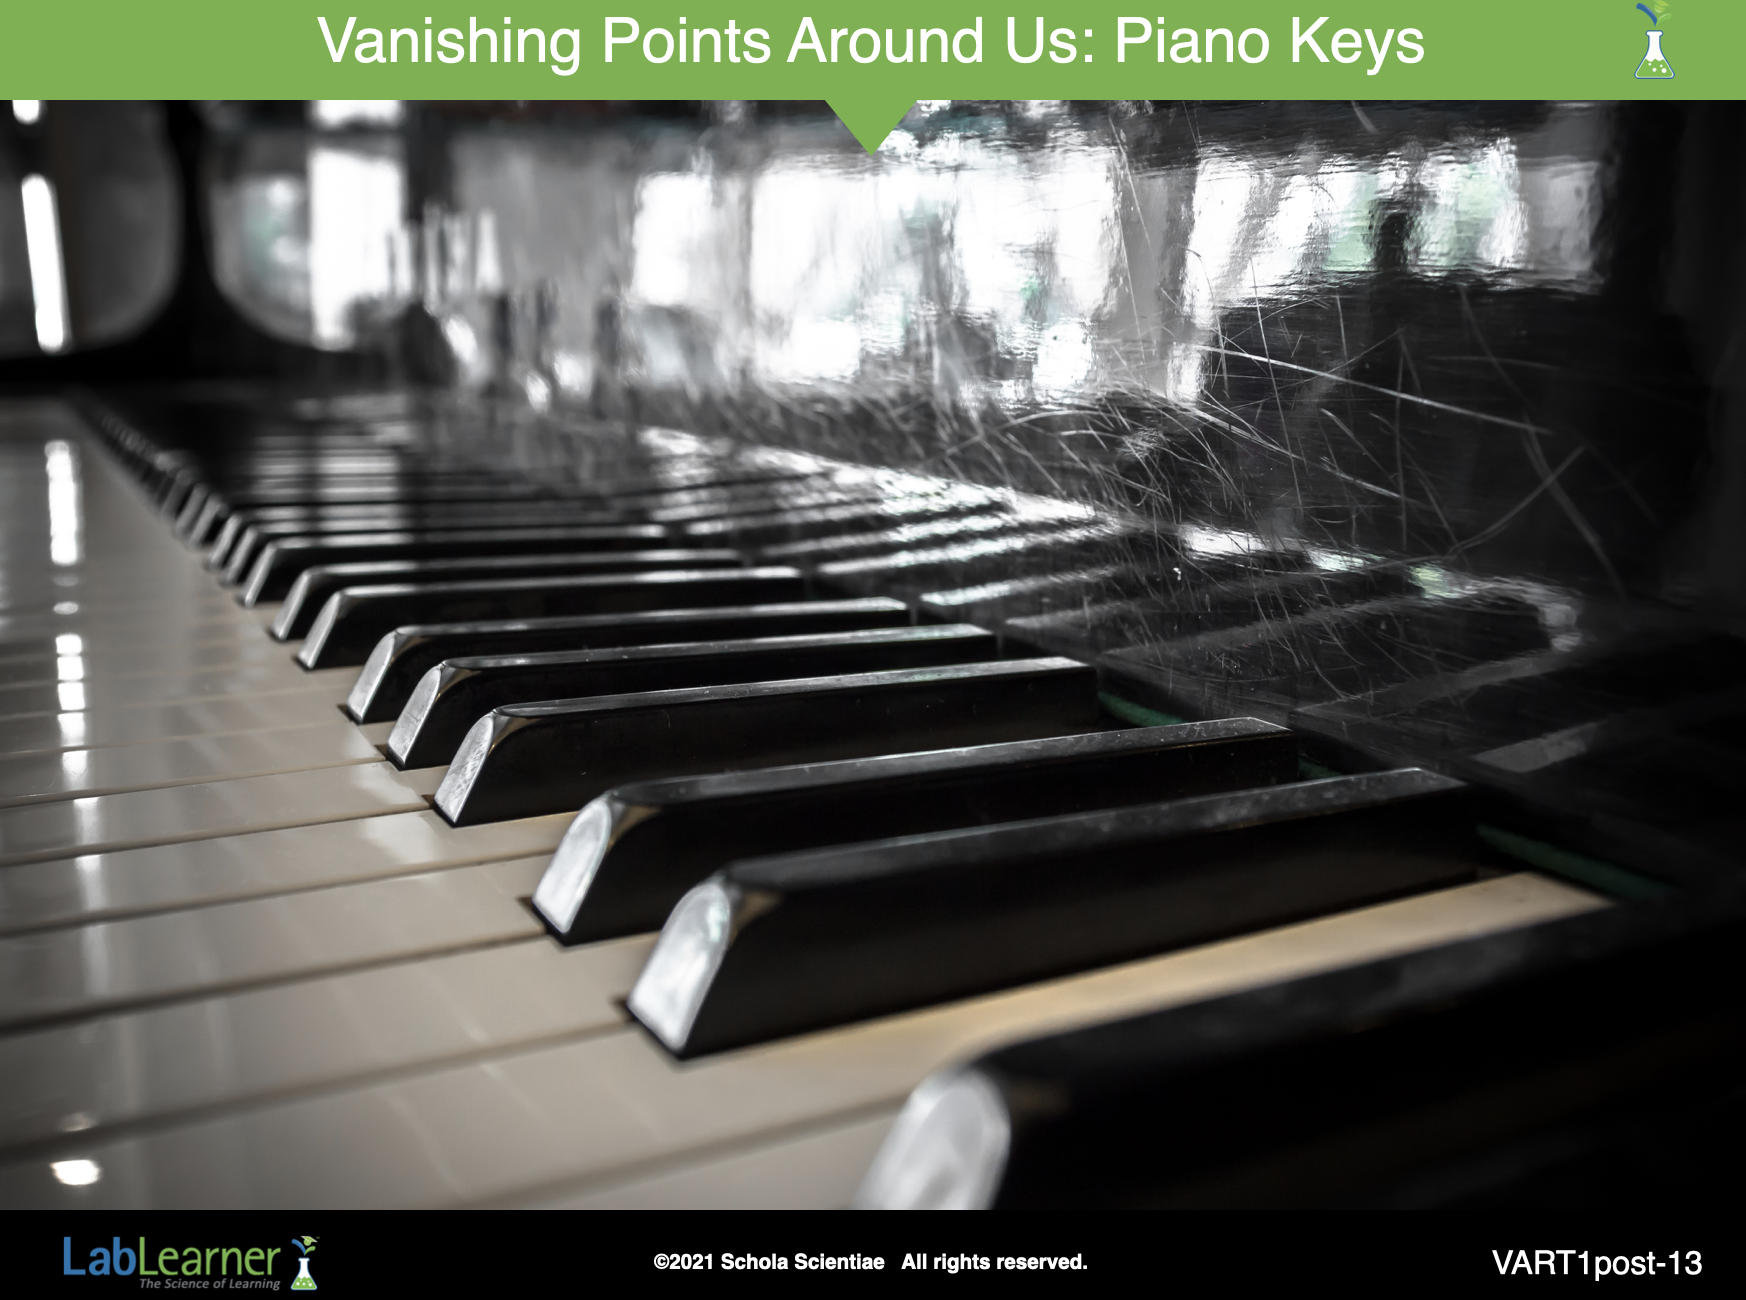
Notice that even in something as small as a piano, if we assume the right point of view, we can see a suggestion of a vanishing point.
1. Ask students: Can you think of other times you have seen vanishing points? Student answers will vary. Examples may include a playground slide, railroad track, bowling alley, sidewalk, rows of shelves in the library, rows of crops in a field, etc.
______________________________________________
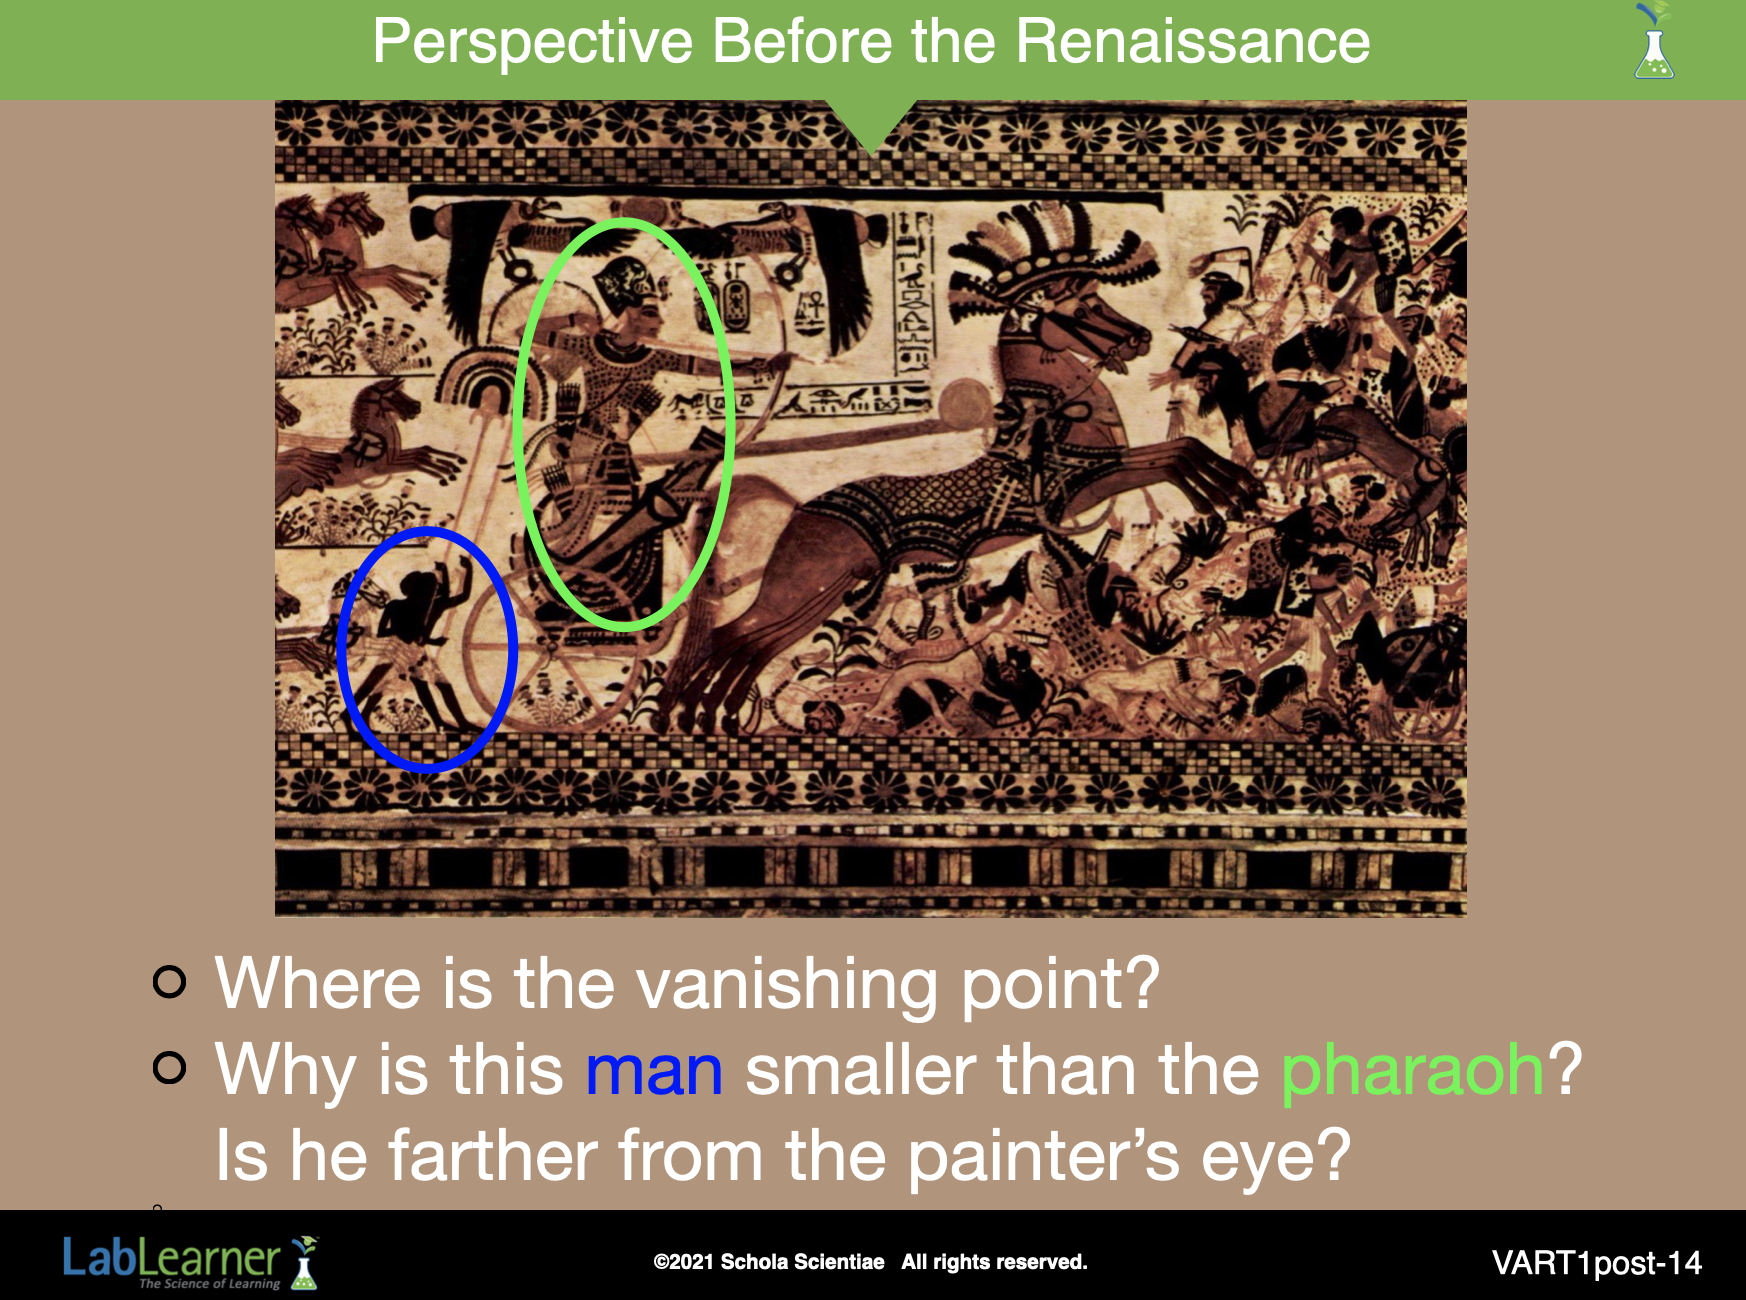
SLIDE VART1post-14
A thorough study of art history shows that artists experimented with how to show depth both before and after the Renaissance. As a result, one can find paintings that produce a feeling of depth before the Renaissance. However, it is generally widely accepted that the concept of vanishing point and the more reproducible and realistic portrayal of depth occurred during the Renaissance.
This slide contains a painting done well before the Renaissance, thousands of years before!
1. Ask students the questions on the slide. Students should indicate that they cannot find a vanishing point in the artwork. The lines along the top and bottom of the piece of art remain parallel and there does not appear to be a place in which objects become systematically smaller.
In terms of the man and pharaoh circled – the man is smaller than the pharaoh. According to the way in which we see, this should mean that the man is farther from our eye than the pharaoh. However, if you look at the context of the drawing, this is not meant to be the case. The man is directly behind the pharaoh and, therefore, should be the same size. However, in ancient times, size in art was used to illustrate the importance of rank rather than true perspective. It is likely that the larger objects in this piece of art were considered more important than the smaller objects.
Art origin: Ancient Egypt- from Tutankhamun’s tomb (1550-1070 B.C.)
______________________________________________
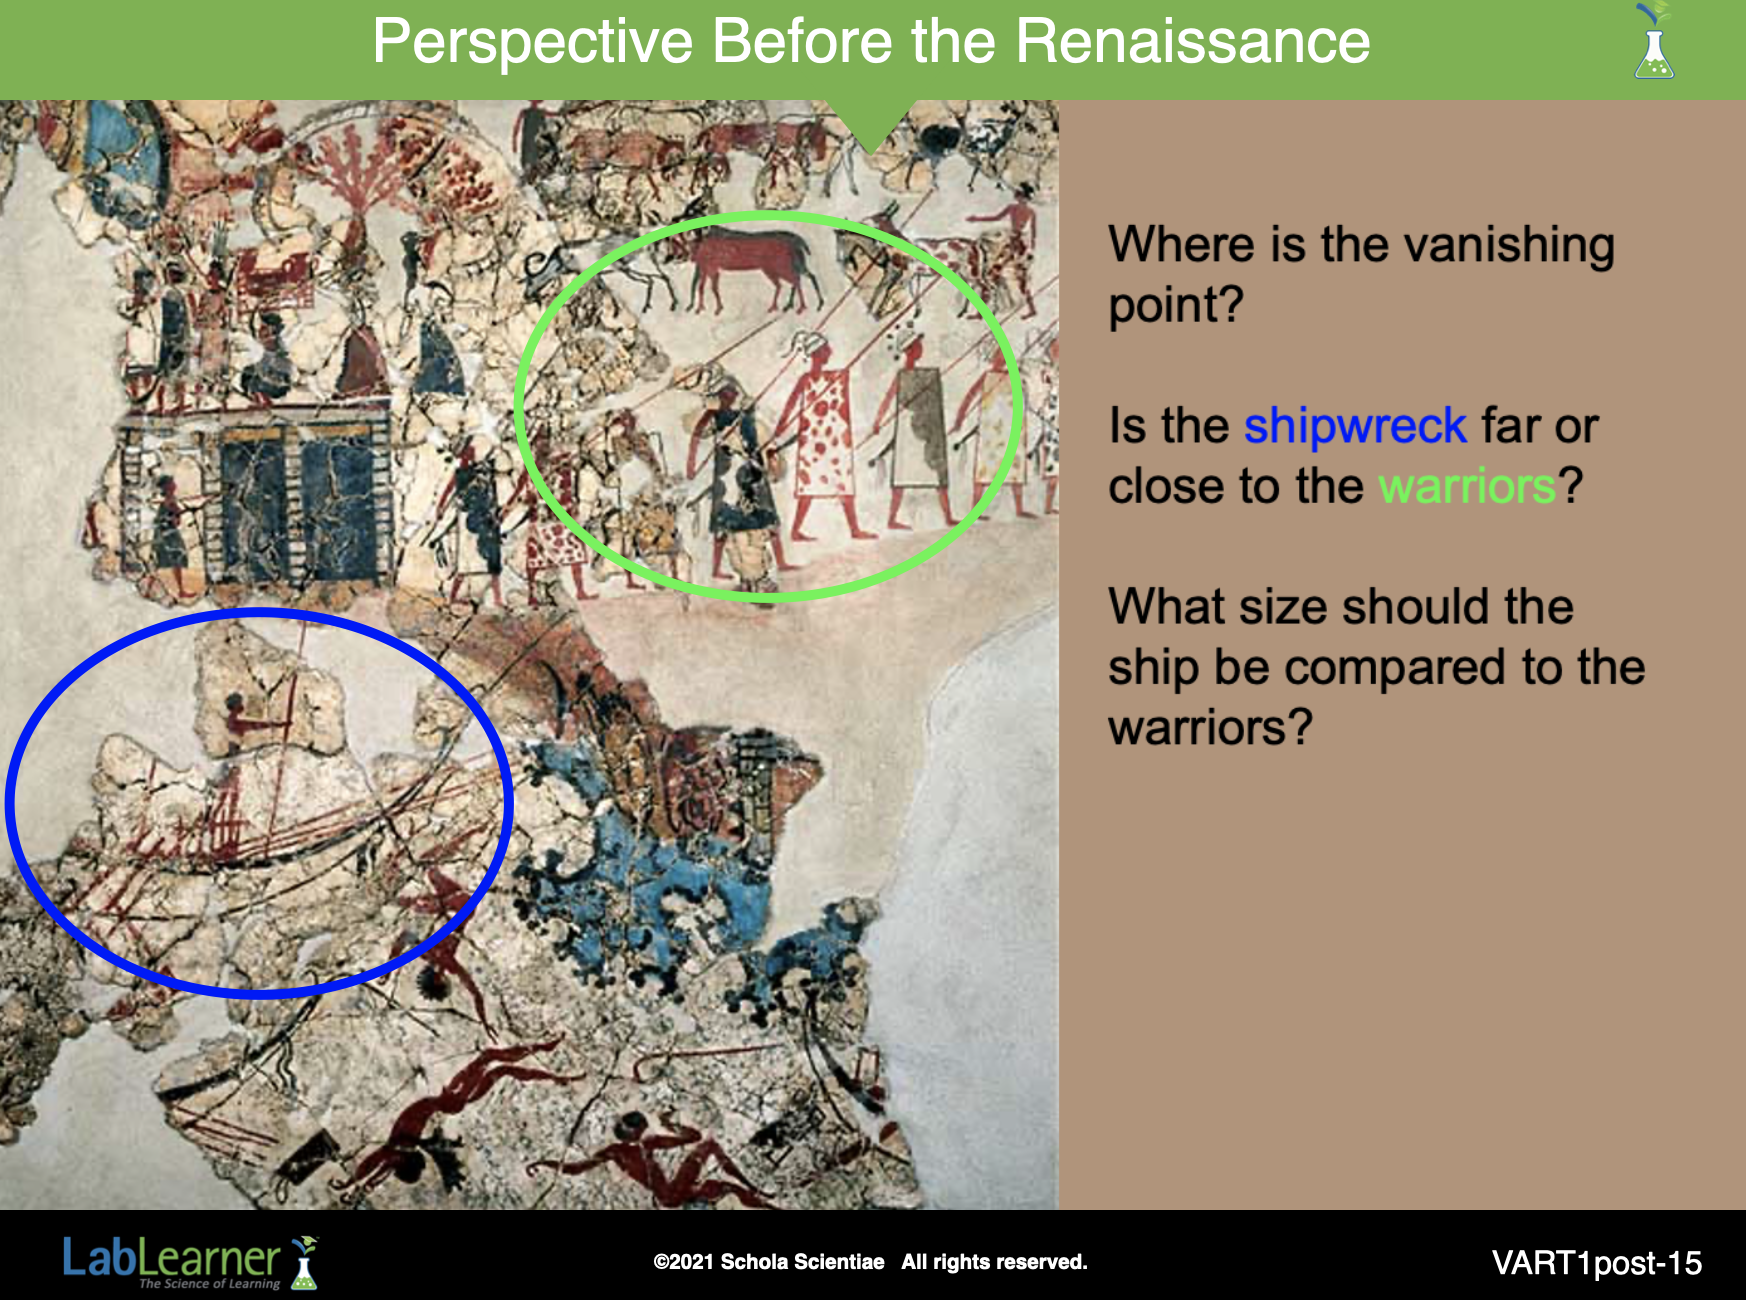
SLIDE VART1post-15
This slide shows another painting done well before the Renaissance, created between 3200 – 720 B.C.
1. Ask students the questions on the slide. Students should indicate that there is no vanishing point on the fresco. Because there is no vanishing point and objects are all drawn relatively the same size, it is more difficult to understand where the events occur in relation to each other. Here the shipwreck appears very close to the warriors on the shore. Yet, if the vanishing point had been employed and perspective maintained, then the shipwreck would be farther from the warriors. In this case, the ship should be much larger than the warriors.
______________________________________________
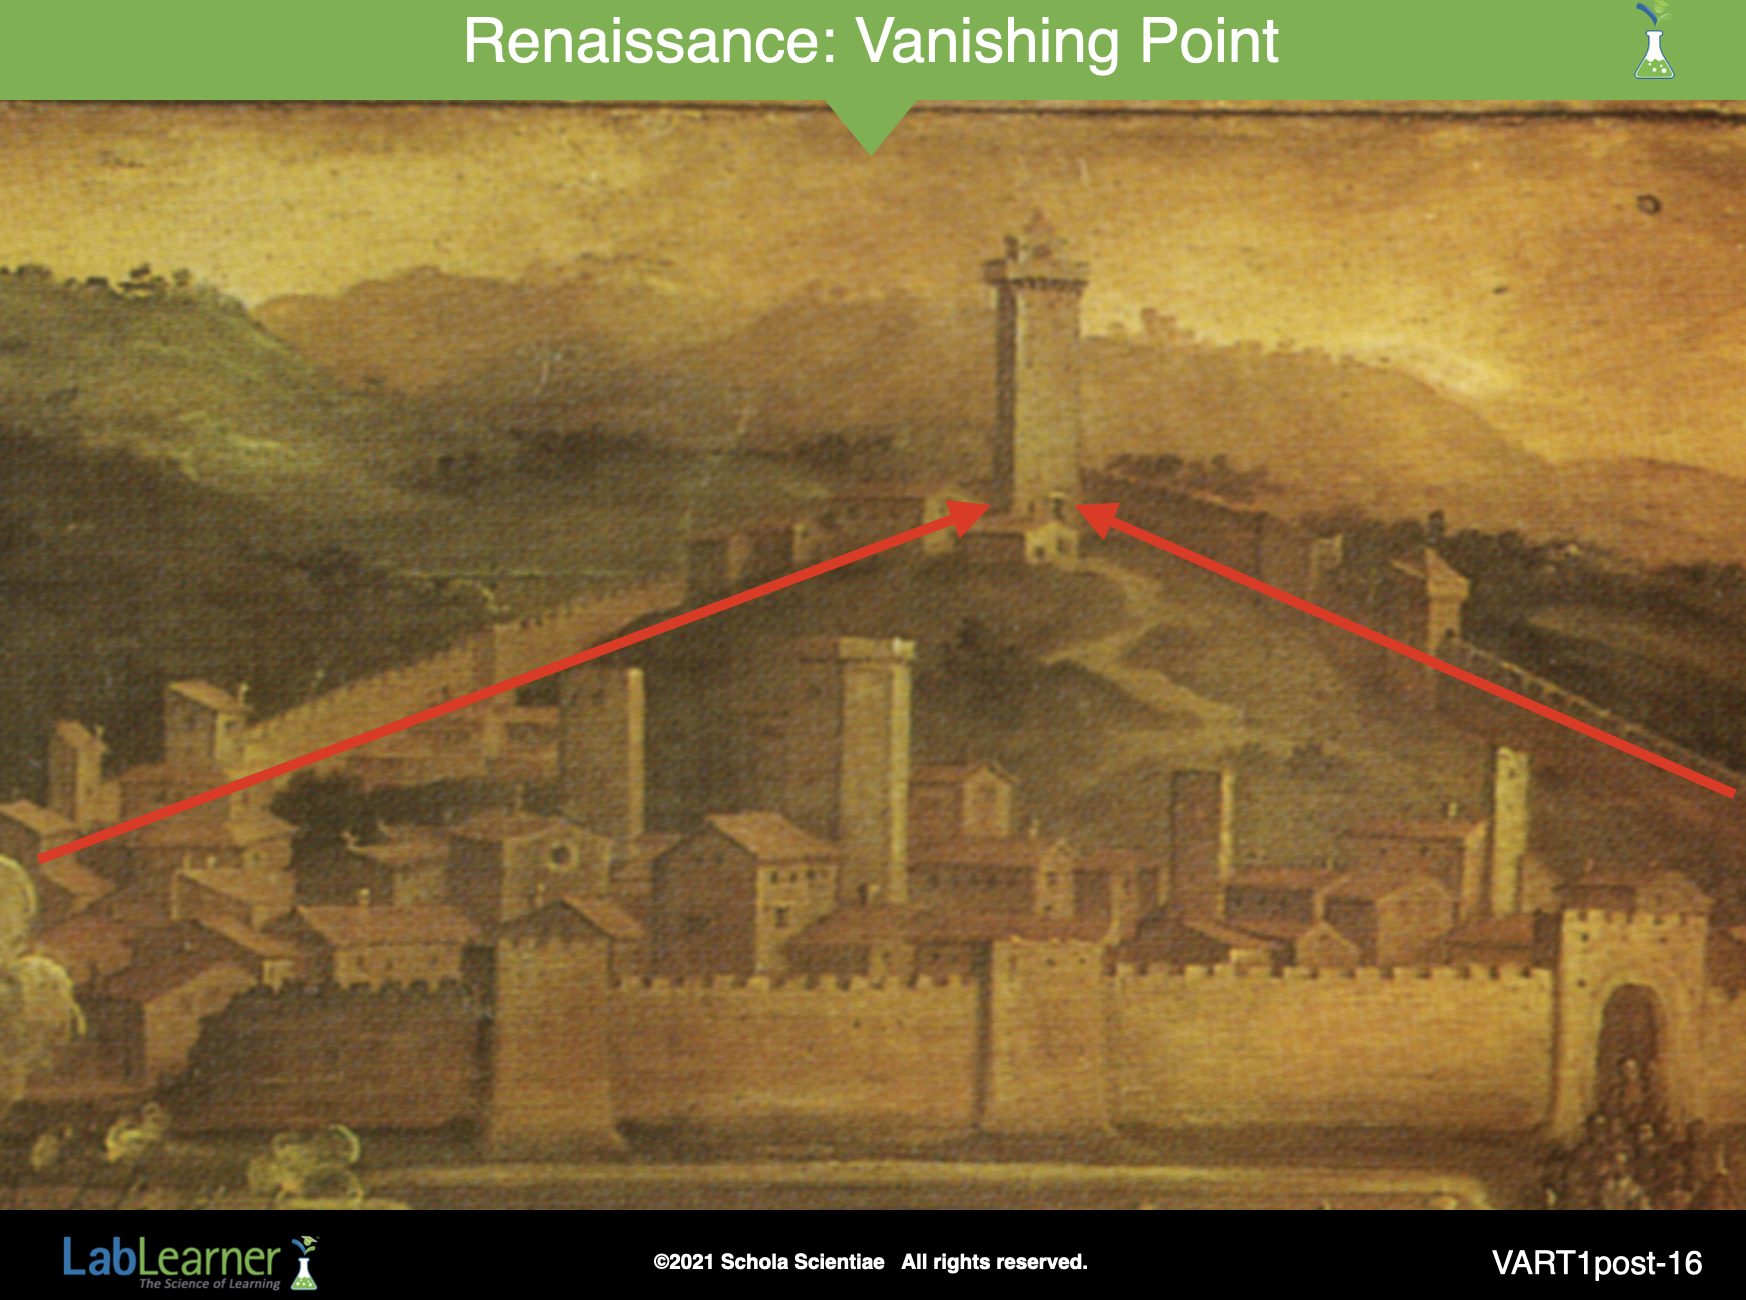
SLIDE VART1post-16
This is the first example of Renaissance art. In this painting, the artist created a vanishing point and portrayed how the objects viewed would look to the human eye; distant objects are more narrow, and closer objects are wider. In this picture, the vanishing point appears to be near the bottom of the distant tower.
Artist: Brunelleschi
______________________________________________
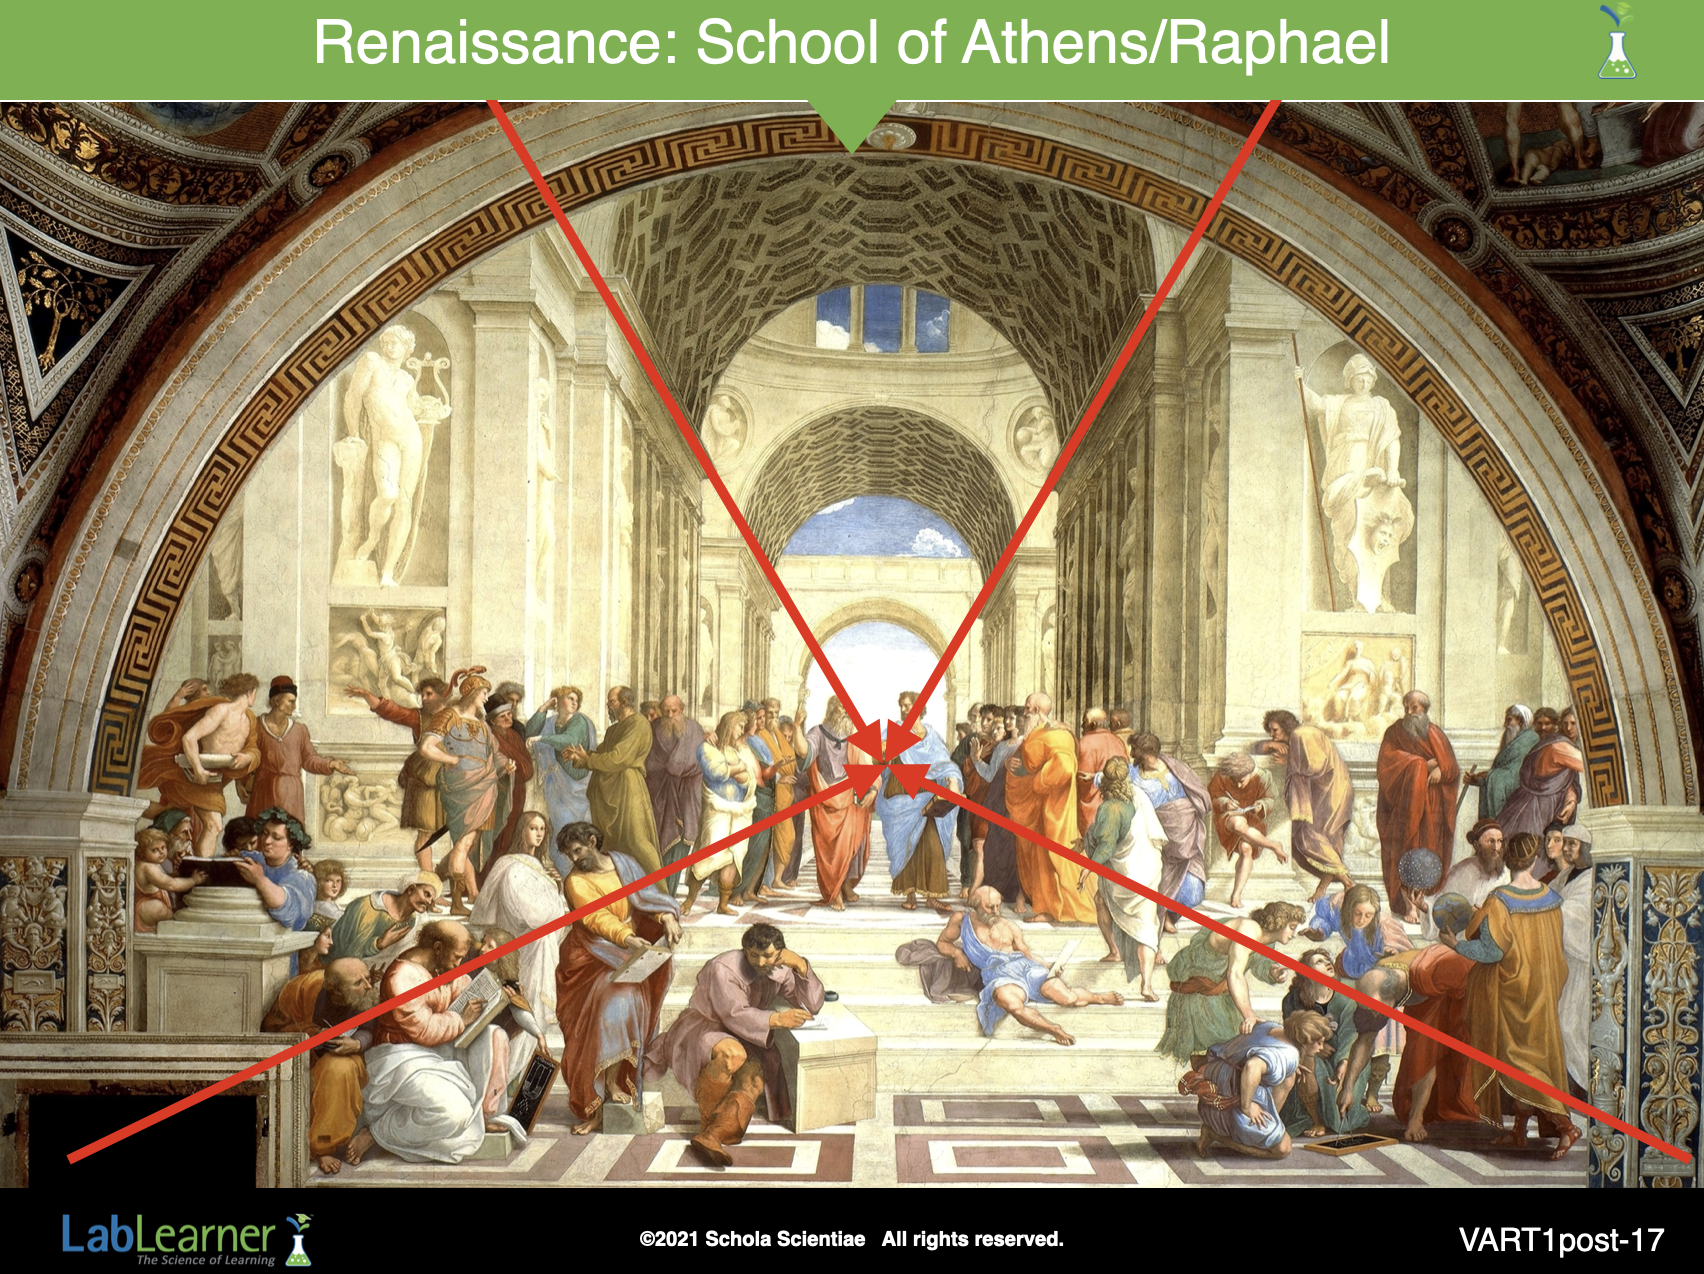
SLIDE VART1post-17
The vanishing point is clearly seen in the School of Athen fresco in the Vatican, Italy. It is important to notice that artists often place the most important subject(s) of a painting at the vanishing point. In this case, the vanishing point is on the two Greek philosophers Plato and Aristotle.
Artist: Raphael
Fresco: Approximately 5 m x 8 m (16ft x 25ft)
______________________________________________
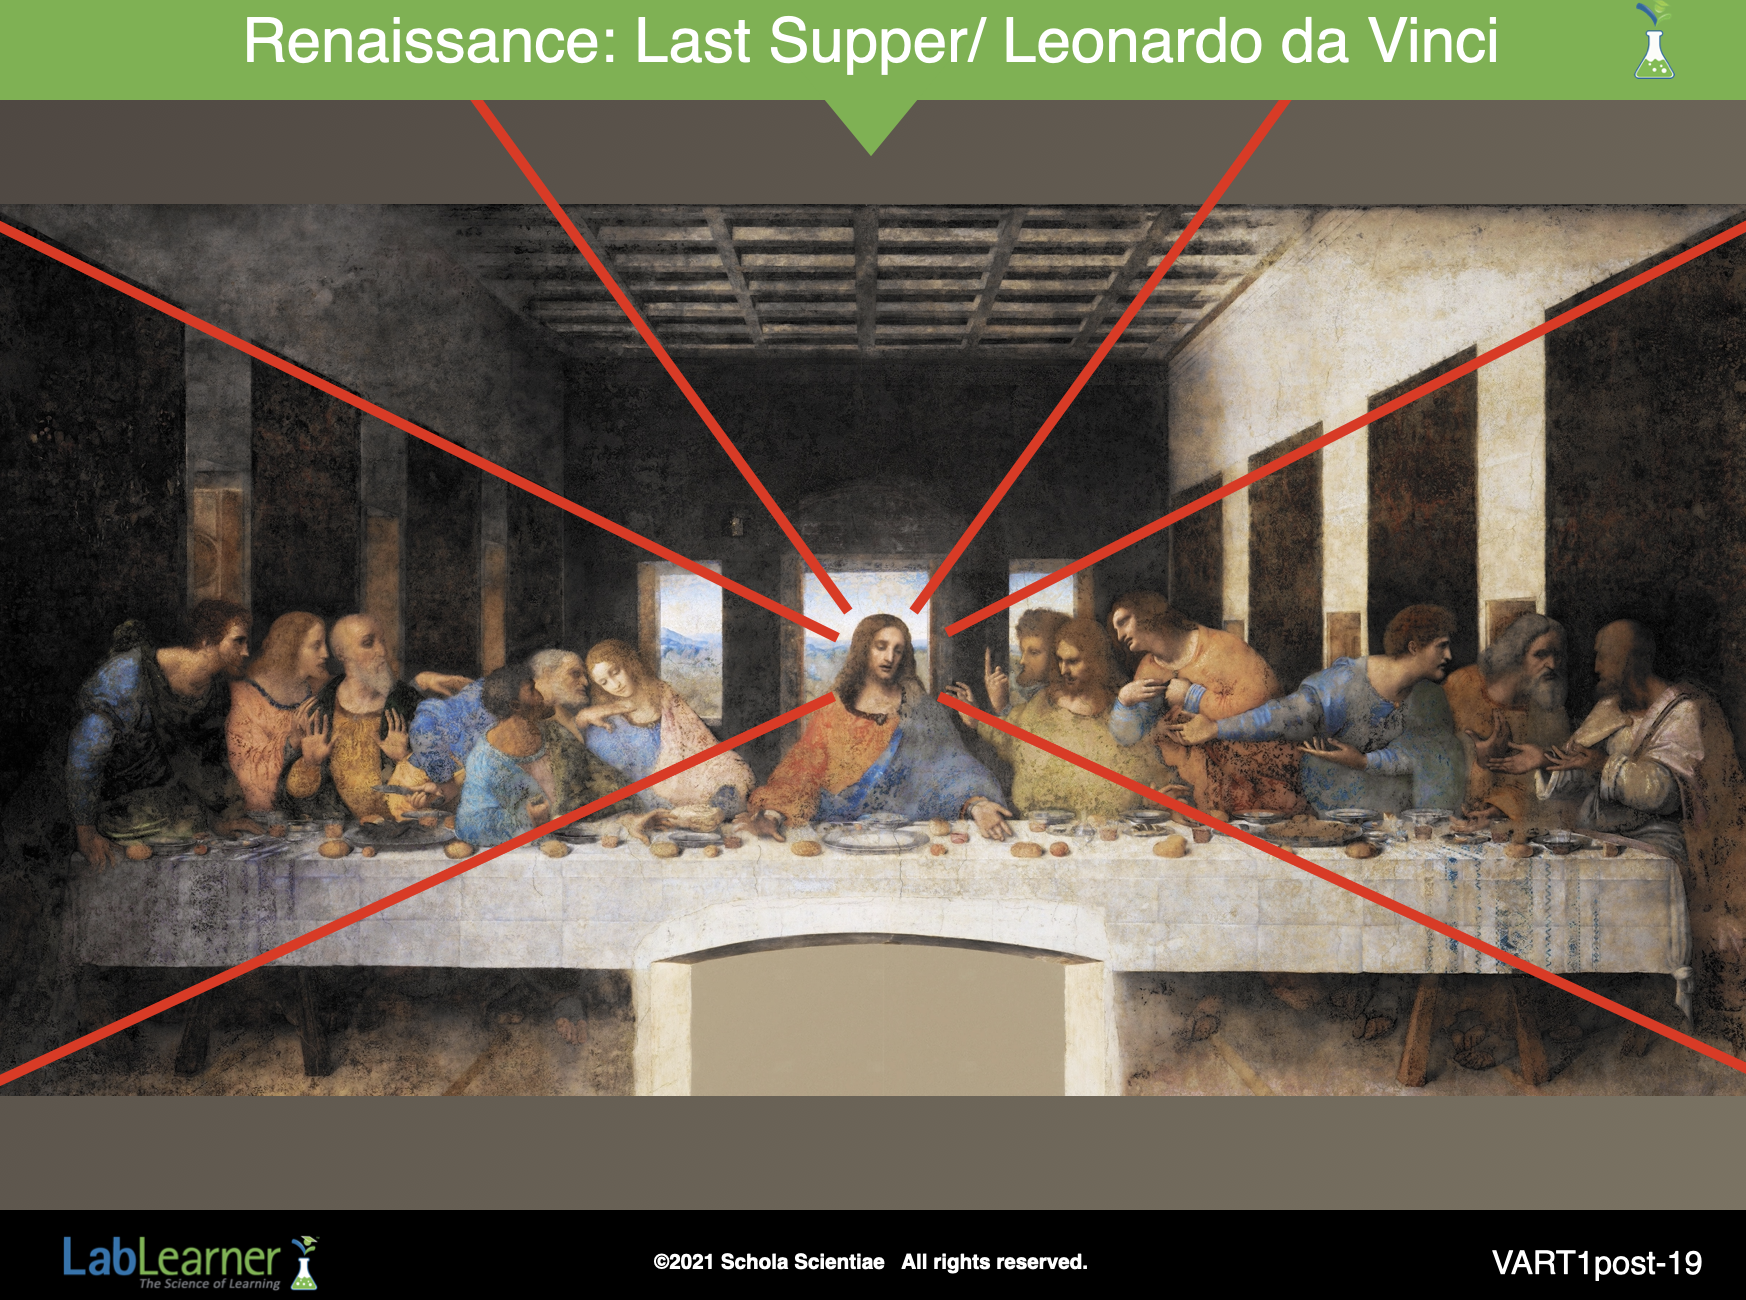
SLIDE VART1post-19
Using the vanishing point to focus attention on the most important area of a painting is obvious in Leonardo da Vinci’s Last Supper in Milan, Italy. All of the vanishing point lines meet at the depiction of Christ in this fresco.